Nanoboxとか言うPaaSが意外と便利だった件
どこで知ったか覚えていないがNanoboxと言うPaaSを知った。
今回はそのNanoboxについて軽く書こうと思う。
2019/01/31 -> 確認してみたところパッケージのリポジトリが2017年から更新されてないなど、ほぼ死んだプロジェクトと化してるので使わない方が良いかも http://packages.nanobox.io/
2019/06/20 -> なんか更新されてるっぽい http://packages.nanobox.io/
Nanoboxって?
簡単に説明するとコーディング専用のVagrantのみたいな感じ。
boxfile.ymlに環境を書いてそれを元にDockerコンテナを取ってきて実行みたいな感じ。
boxfileと同じ場所が/appにマウントされる。
また、DBなども2行で追加できるため非常に楽である。
ただ、少々曲者でnode_modulesなどのディレクトリをcache_dirsに記載しないとエラーになるなど知らないとハマることが多い。
使ってみる
今回はWindows10 + VirtualBox + Nanoboxで行きます。
インストールは適当にやってください。
たぶん最初にいろいろ設定させられると思います。
run.config:
  # elixir runtime
  engine: elixir

  # we need nodejs in development
  # ensure inotify exists for hot-code reloading
  dev_packages:
    - nodejs
    - inotify-tools
    - mysql-client

  # cache node_modules
  cache_dirs:
    - assets/node_modules

  # add node_module bins to the $PATH
  extra_path_dirs:
    - assets/node_modules/.bin

  # enable the filesystem watcher
  fs_watch: true

# add postgres as a data component
data.db:
  image: nanobox/mysql
こんな感じのboxfileを用意します。
Postgresがよければdev_packagesのmysql-clientを消してdata.dbのimageをnanobox/postgresqlにしましょう。
Windowsの人のみですがWindowsだとデフォルトのマウントタイプがnetfsになっています。このnetfsはWindowsのファイル共有機能を使っていて不具合満載なのでnanobox config set mount-type nativeでネイティブに変えておくことをおすすめします。
そしたらターミナルを開いてnanobox runと実行してみましょう。(コマンドプロンプトかPowerShellで実行してください。)
また、日本語環境ではバックスラッシュが円マークになると思いますがその場合はVSCodeで実行すればバックスラッシュになります。
こんな感じに表示されたら起動完了です。
Preparing environment :
  √ Mounting codebase

--------------------------------------------------------------------------------
+ HEADS UP:
+ This is the first build for this project and will take longer than usual.
+ Future builds will pull from the cache and will be much faster.
--------------------------------------------------------------------------------


Building runtime :
  √ Starting docker container
  √ Preparing environment for build
  √ Gathering requirements
  √ Mounting cache_dirs
  √ Installing binaries and runtimes
  √ Packaging build

phx_test (local) :
  √ Reserving IPs

Syncing data components :
  Removing old :
    √ Skipping (up-to-date)
  Launching new :
    data.db :
      √ Reserve IP
      √ Starting docker container
      √ Gathering requirements
      √ Configuring services

Building dev environment :
  √ Starting docker container
  √ Configuring


                                   **
                                ********
                             ***************
                          *********************
                            *****************
                          ::    *********    ::
                             ::    ***    ::
                           ++   :::   :::   ++
                              ++   :::   ++
                                 ++   ++
                                    +
                    _  _ ____ _  _ ____ ___  ____ _  _
                    |\ | |__| |\ | |  | |__) |  |  \/
                    | \| |  | | \| |__| |__) |__| _/\_

--------------------------------------------------------------------------------
+ You are in a Linux container
+ Your local source code has been mounted into the container
+ Changes to your code in either the container or desktop will be mirrored
+ If you run a server, access it at >> 172.21.0.20
--------------------------------------------------------------------------------

/app $
早速PhoenixFrameworkを入れていきましょう。
今回はPhoenix 1.3を使うのでNanobox上でmix archive.install https://github.com/phoenixframework/archives/raw/master/phx_new.ezと実行しましょう。
質問は全てyesでおkです。
入れられたらプロジェクトを作りましょう。
PCとコンテナ間で共有されているディレクトリは/appですので/に移動して
/ $ mix phx.new app --app phoenix_test --database mysqlと実行しましょう。
質問は全てyesで行きましょう。
このコマンドを軽く解説するとphx.newでプロジェクト作成、appはディレクトリ--appはプロジェクトの名前--databaseはDBの指定です。
--databaseに関してはpostgresを選んだ人はつけなくていいです。
次にDBの設定をしましょう。
Nanoboxでは環境変数にDBの情報が入っています。
ユーザーがDATA_DB_USERパスワードがDATA_DB_PASSホストがDATA_DB_HOSTです。
先ほど作ったプロジェクトのconfig/dev.exsを開いてください。
下にConfigure your databaseと書いてあるところがあると思います。
そこを書き換えて行きます。
config :phoenix_test, PhoenixTest.Repo,
  adapter: Ecto.Adapters.MySQL,
  username: System.get_env("DATA_DB_USER"),
  password: System.get_env("DATA_DB_PASS"),
  database: "phoenix_test_dev",
  hostname: System.get_env("DATA_DB_HOST"),
  pool_size: 10
こんな感じになっていればおkです。
mix ecto.createでデータベースが作成できることを確認しましょう。
最後にアクセスできるか確認して終わりにしましょう。
最初のAAがあったところの下にIPアドレスが書いてあります。
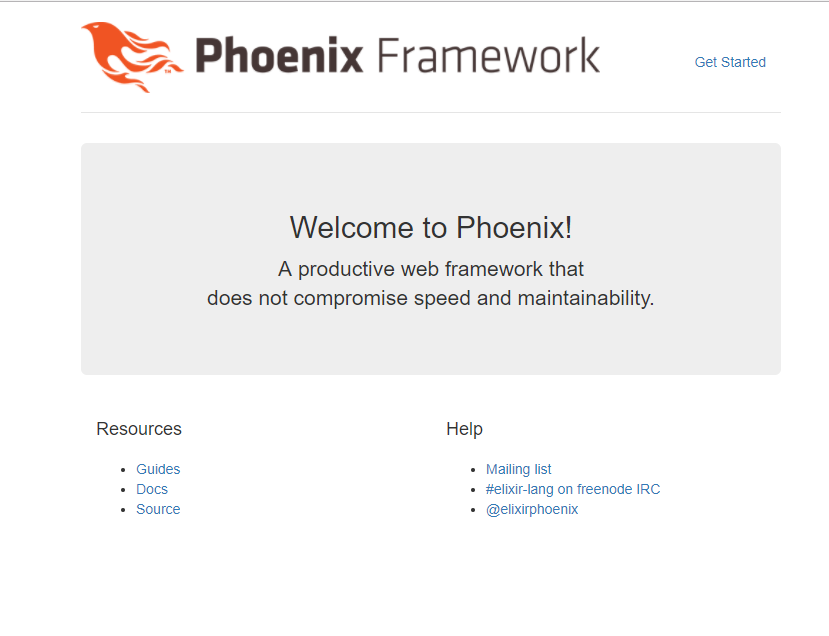
mix phx.serverを実行した状態でhttp://172.21.0.x:4000 にアクセスすると繋がると思うので繋いでみましょう。
無事表示されましたか?
たまに繋がらないみたいな時があるのでそしたらNanoboxを疑ってください。
最後にコンテナを破壊して終わりにしましょう。
exitでpowershellまで抜けてきてください。
そしたらnanobox destroyで破壊しましょう👋
さいごに
なんか見つけたので使ってるNanoboxくんですが、恐らく別の物でもいいです。
同じようなのあると思います。
使ったこと無いですがNanobox有料プラン契約すればデプロイやらなにやらやってくれるみたいです。
→ 無料になったらしいです
バグというか動かないことが多いので、使ってる時に突然死んで原因を突き止めるのが好きな人とかはぜひNanobox使ってみてください。
