本記事はMagento2 Advent Calendar 2018 18日目の記事になります。
はじめに
magento2において、文字列は、ロケールファイル(csv)を複数のファイルで継承・上書きして表示しています。
本記事では、magento2で文字列を翻訳、変更するためのロケールディクショナリの作り方を紹介します。
公式DevDocsのFrontend Developer GuideとConfiguration Guideを見ればだいたいのことが分かるかと思いますが、その中でも注意すべき点や見落としがちな点をご紹介できたらと思います。
目次
1.ロケールファイルの配置場所と優先順位
2.Translation packageの作り方
3.まとめ
ロケールファイルの配置場所と優先順位
magento2のロケールファイルの配置は以下のようになっています。(公式DevDocs参照)
- Module translations: /i18n/
- Theme translations:
- < parent_theme_dir >/i18n/ (iterated through all ancestor themes)
- < current_theme_dir >/i18n/
- Translation package: app/i18n/
- Magento database
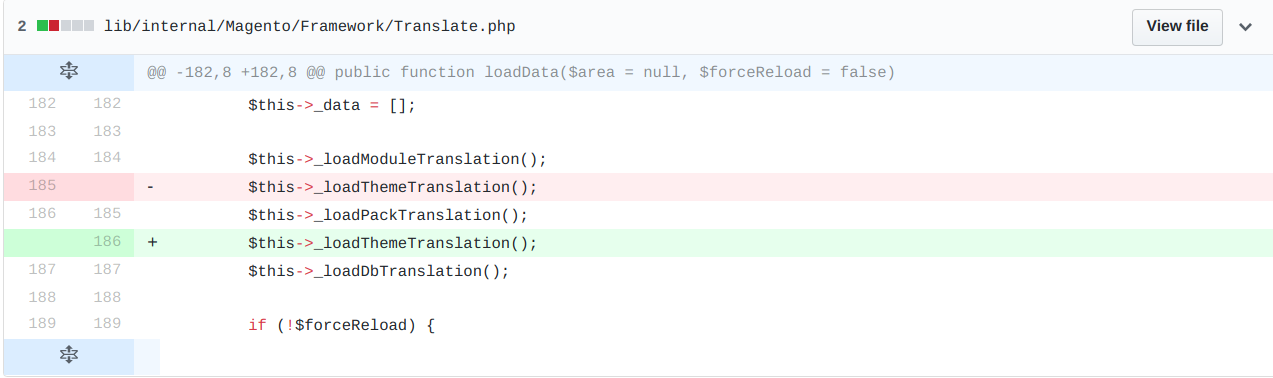
ここで注意すべき点は、バージョン2.2系から優先順位が 1 < 2 < 3 < 4 ではなく 1 < 3 < 2 < 4 に変更されたことです。
変更箇所・変更時点はgithubに公開されています。
したがってロケールファイルを作る際、プロジェクト全体を翻訳したい場合は3のpackageに、その中でもtheme単位で翻訳したい場合は2のthemeに作る形になるかと思います。
Translation packageの作り方
2のTheme translationsに関しては< current_theme_dir >/i18n/にcsvファイルを置くだけで機能します。
3のTranslation packageに関しては、app/i18n/< vendor >/< package >/の中に
- registration.php
- language.xml
- xx_YY.csv(xx_YYは国際規格であるISO 639-1(言語コード)とISO 3166(国コード)からなるコードです。例:ja_JP)
と3つのファイルを作る必要があります。
registration.php
<?php
\Magento\Framework\Component\ComponentRegistrar::register(
    \Magento\Framework\Component\ComponentRegistrar::LANGUAGE,
    'magento_xx_yy',
    __DIR__
);
language.xml
<?xml version="1.0"?>
<language xmlns:xsi="http://www.w3.org/2001/XMLSchema-instance" xsi:noNamespaceSchemaLocation="urn:magento:framework:App/Language/package.xsd">
    <code>xx_YY</code>
    <vendor>vendorName</vendor>
    <package>packageName</package>
    <use vendor="vendorName" package="packageName"/>
</language>
codeに関してはvendor/magento/framework/Locale/Config.phpを参照すると良いです。
useの部分では継承する親のロケールファイルのvendor名とpackage名を記述します。(package名は大文字小文字に気をつけてください!)
xx_YY.csv
"String to overwrite","上書き後の文字列"
左に上書きしたい文字列を記述し、カンマで区切り、右に上書き後の文字列を記述します。
ここまで来たら
php bin/magento cache:clean
php bin/magento cache:flush
で適用されます。
まとめ
本記事では、magento2で文字列を翻訳、変更するためのロケールディクショナリの作り方を紹介させていただきました。
注意すべきポイントなど、少しでも皆様の参考になりましたら幸いです。
ご覧いただきありがとうございました![]()