Greeting everyone. So this time our article is about AWS VPC. In this article I am going to talk about what is VPC? How to set up a public network (Server Zone) and private network (LAN) in AWS VPC.
Introduction
What is VPC?
- VPC stand for Virtual Private Cloud.It is a virtual network which dedicated to our AWS account.To make it simple we can say we be able to setup or configure our network on cloud.We also can modify its IP ranges, create subnet , configure route table , network gateway and security setting.
What is Server Zone?
- Server zone(Public network) is a public zone where normally it contains all the server machine.Any services that is being provide to the users on the internet should be place in this zone.
Example : Mail Server , VoIP Server, Web Server , DNS Server, FTP Server.
What is LAN?
- LAN(Private network) LAN stand for Local Area Network which is private network. This network is not response or receive directly to the internet. If there is a device want to request or access to the internet, first, it needs to sent the request to the router and router will communicate with the external network which is internet.
Getting Start
So , today we are going to build a network in AWS VPC by creating A VPC , create two subnet which one subnet is for public network and another one is for private network.
Why do we need to do that?Why do we need to separate our network?
- We do that for a security purpose. When we host a website or anything on the internet. Our server will open to all the people on the internet. It mean everyone can access or make a request to our server so it mean that server is at risk because there is a chance that somebody trying to hack into our network. If we put the whole network together ,if the hacker successfully hack into the server machine the whole network will be in danger but if we separate the network, even if we get hack, the hacker won't be able to do anything to our LAN (private network).
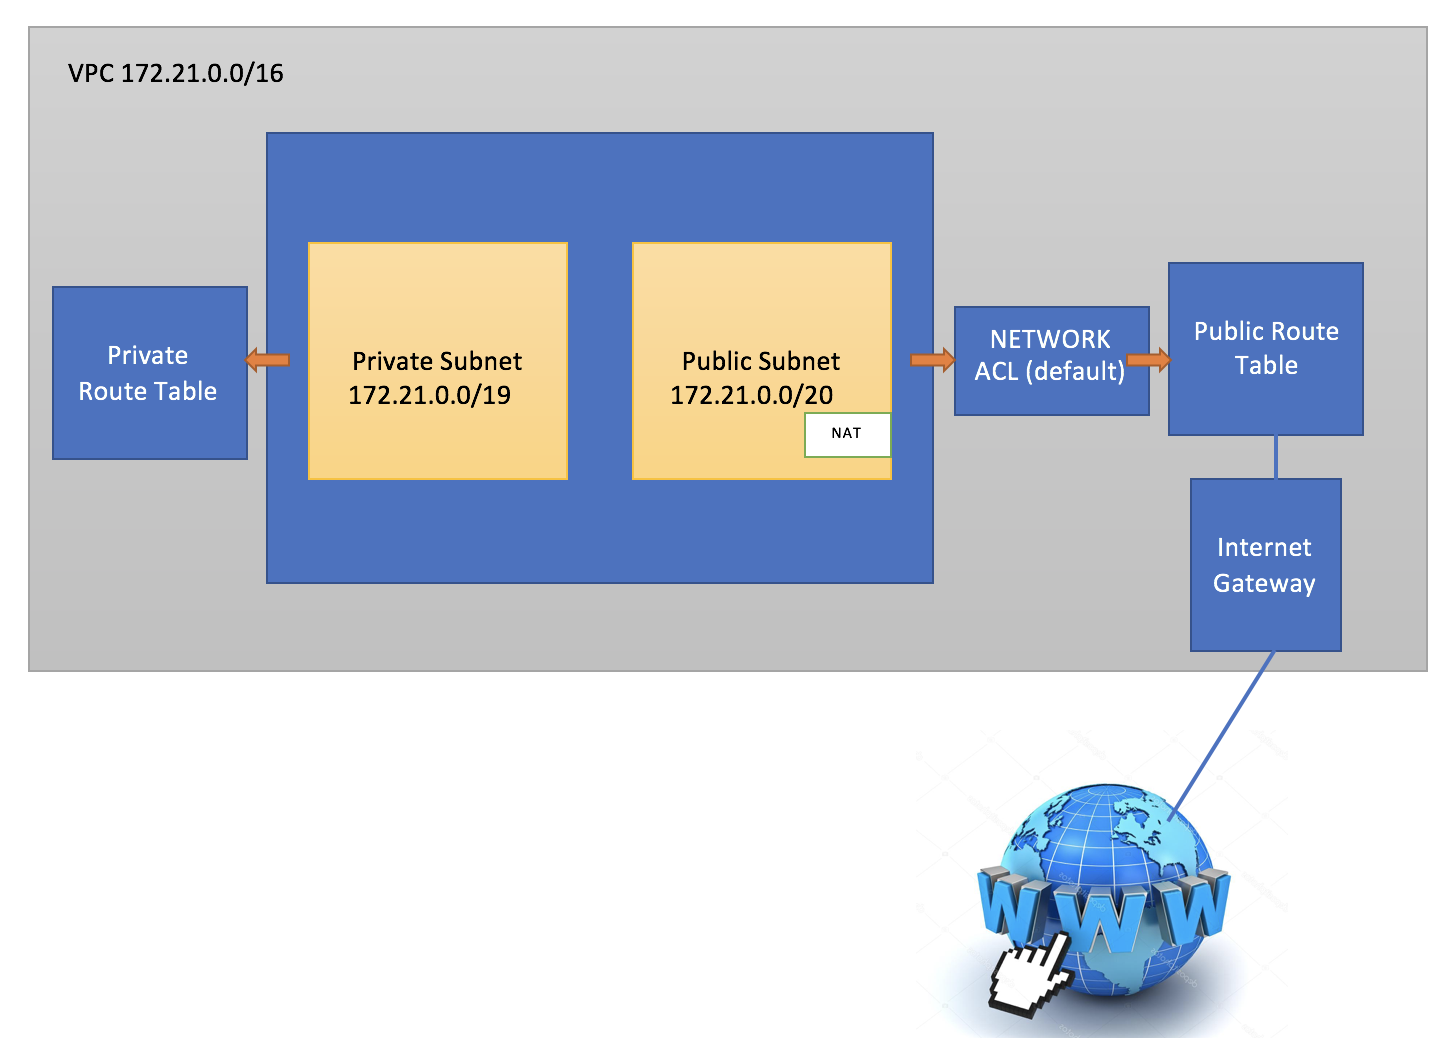
Our VPC Structure
1. Create VPC
So ,I assume that everyone has an AWS account. Right now let's go into AWS service and find VPC and create it.
Let's create a VPC and give its IP range 172.21.0.0/16. With this IP range I could get up to 65534 available IP address.To know the available IP address the easy way is to use online IP address calculator. => link http://jodies.de/ipcalc
2. Create Subnet
Ok so now, let's create subnet.First of all , let create subnet for a private network.

I name this subnet as privateZone and its IP range is 172.21.0.0/19. The reason why I use /19 it is because I only need 8000+ available IP for my private network.Ok let's create subnet for a public network.

I name this subnet as serverZone since it is going to contain only server machine and its IP range is 172.21.32.0./20. The reason why it is start from 172.21.32.0 it is because our private network has use all the IP from 172.21.0.0 until 172.21.31.255 so our next subnet must start from 172.21.32.0 and for this network I only need 4000+ IP that is why I use /20.
3. Create Internet GateWay
- So, let go to internet gateway and create it and you have to associate it with your VPC . I name this internet gateway as visal-Igateway and you have to remember that 1 VPC can have only 1 internet gateway.

4. Create Public Route Table
Before we begin to create route table I want you guys to know that What make a subnet public it depends on what route table it is associate with and whether that route table has a rule outbound through the internet gateway.
- Ok so now let create a route table.
 after we create our route we have to assign a rule for that route to out bound through the internet gateway. We can do that by click into the route and type 0.0.0.0/0 in the destination field and choose internet gateway and save it.
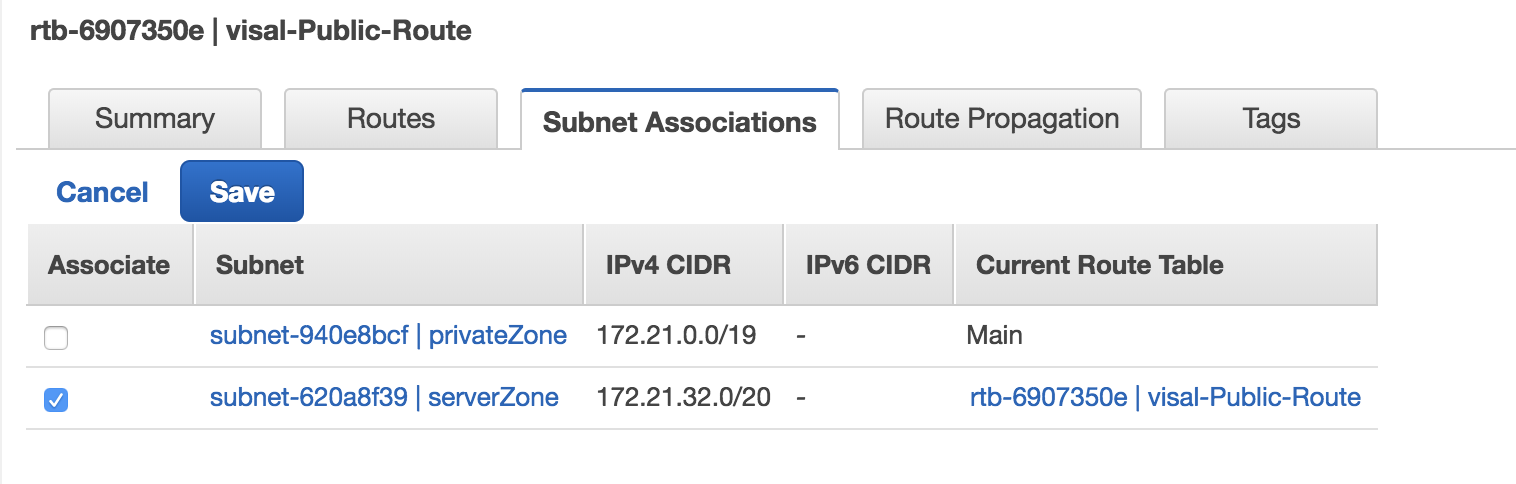
 So after we set this rule any subnet that associate with this route table it will become public subnet. So right now let associate this route table with our serverZone subnet since we want it to become public.Now let click on Subnet Associations tape - > click edit -> and select our serverZone and save.
5. Create NAT Gateway
We create NAT gateway the purpose is to translate between the private network and public network so our private network can also access to the internet but like I have mentioned since beginning , our private network won't access directly it will go to private route table and private route will communicate with public route table through NAT.
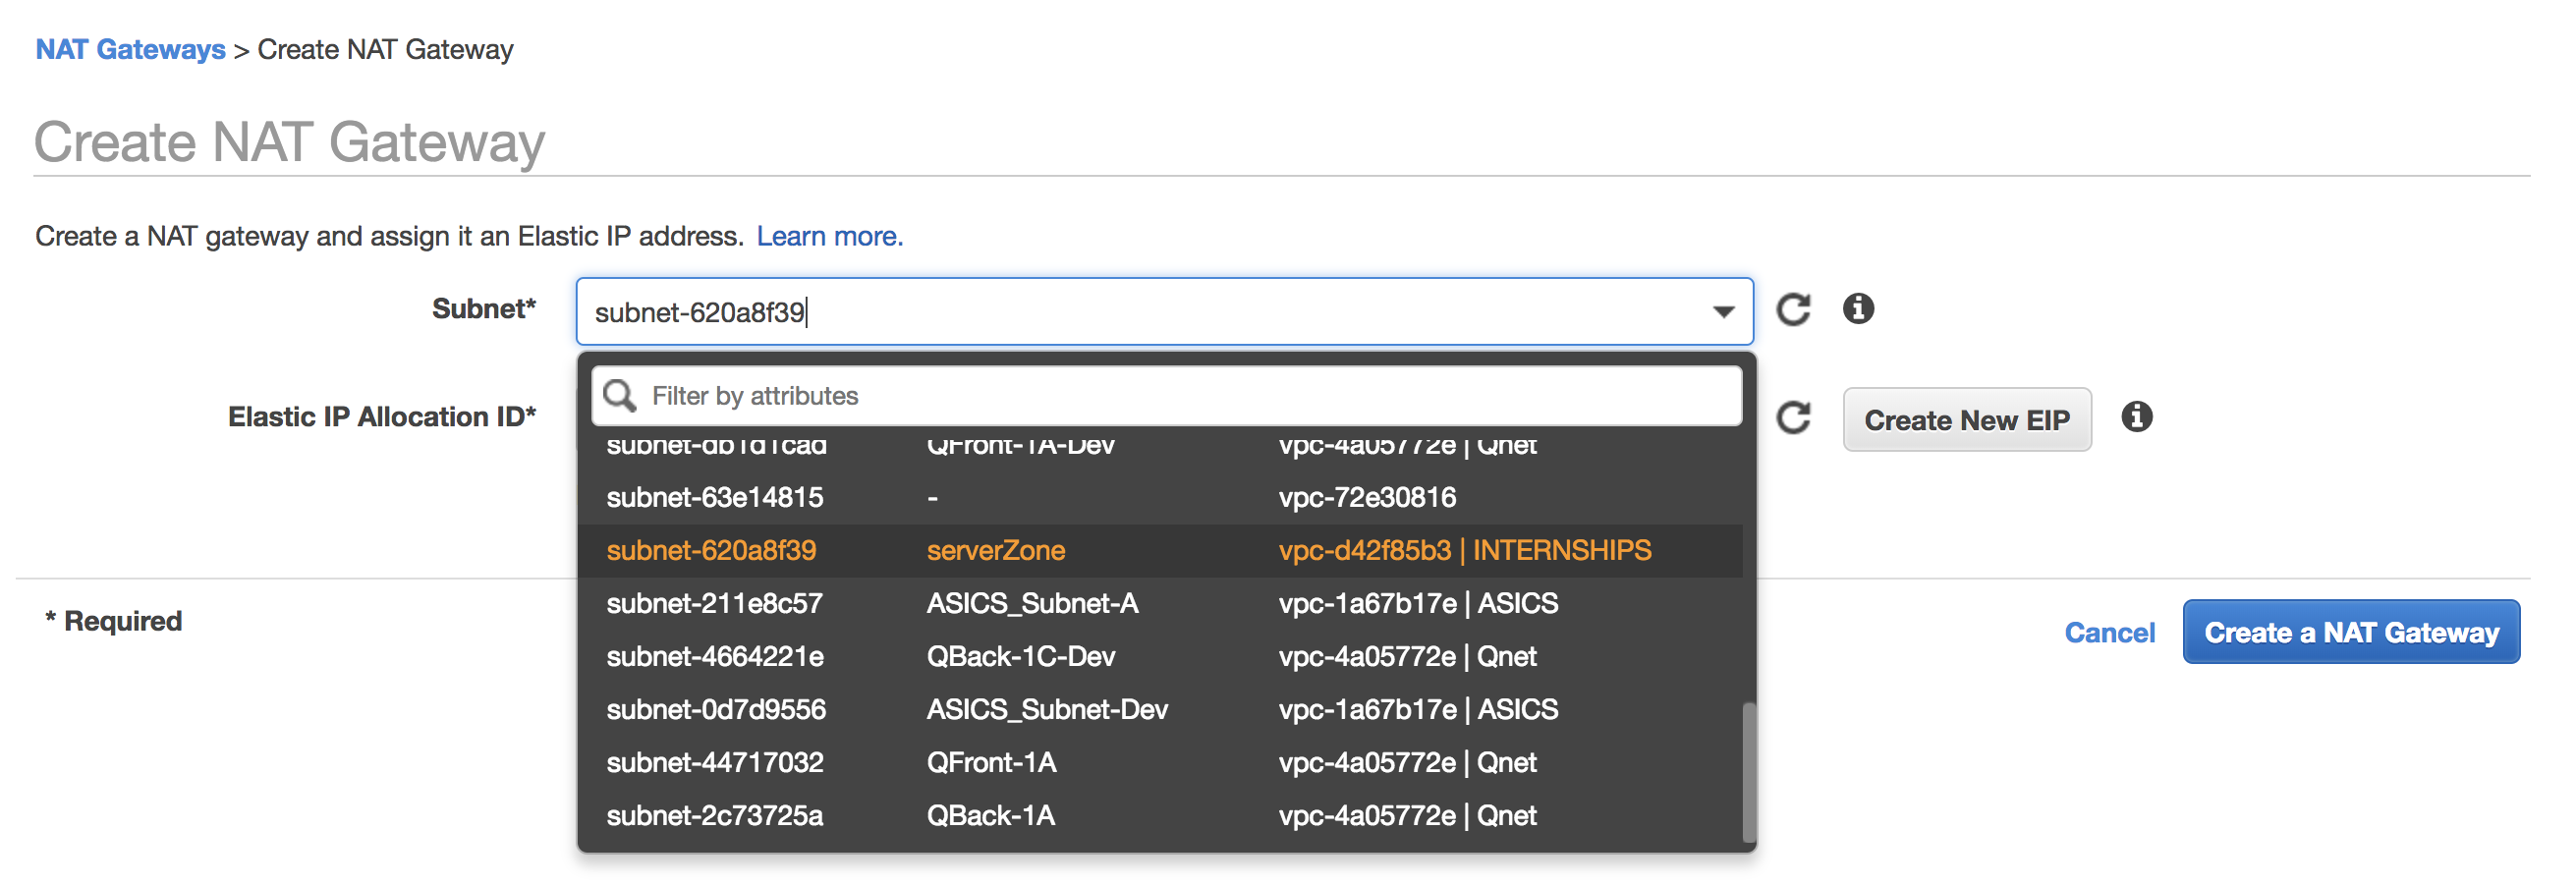
During the creation of NAT please choose public subnet(serverZone) as a subnet and click create new EIP then click create a NAT Gateway.
6. Create a Private Route Table
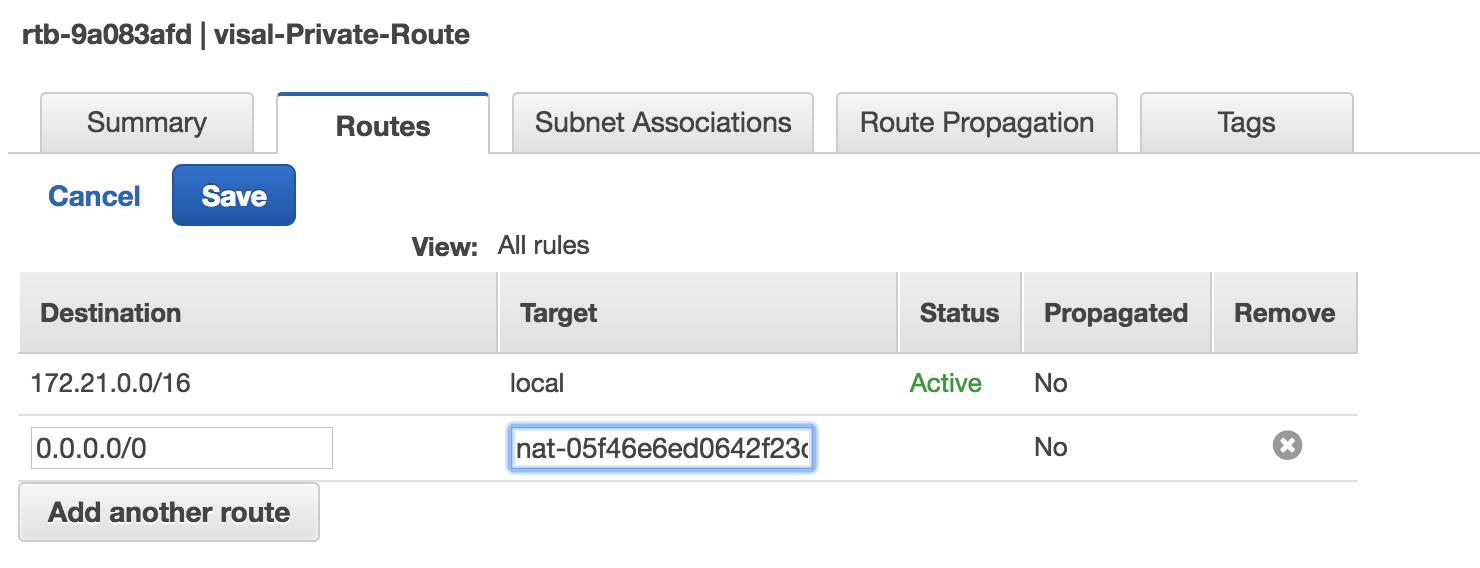
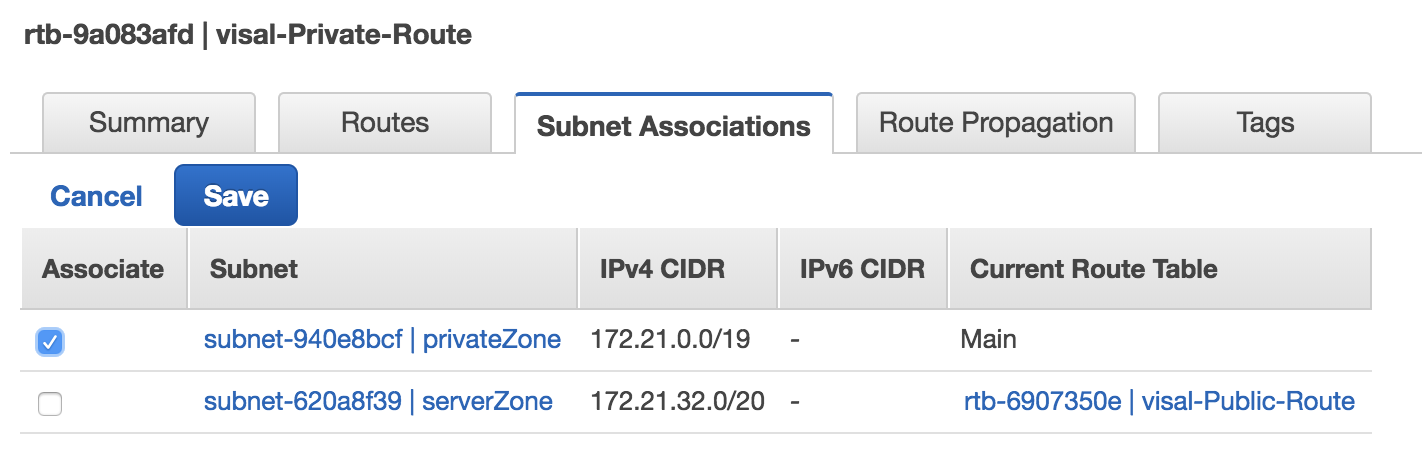
Create private route. I name it as visal-Private-Route

Then Go to Routes tape , click edit and assign the outbound rule to it and choose NAT that we create as target then save.
Go to Subnet Associations tape , click edit and select our private subnet then save.
That's it! Now we have create a VPC which contain 2 subnets. Public subnet and Private subnet.