BIツールと言えば定評のあるTableauやQlik View、Power BIなどがあり、GoogleからもData Studioというベータ版のサービスがあります。(現地では日本で利用できない)
そんな中で、先日QuickSightがプレビュー版からGAになり、またドキュメントも公開されました。
http://docs.aws.amazon.com/ja_jp/quicksight/latest/user/welcome.html
QuickSightは非常にシンプルで直感的な操作で作業することができ、また他のAWSサービスとの連携も簡単にできます。
リージョンは現在、以下の3つのみで東京は利用できません。
- US East(N. Virginia)
- US West(Oregon)
- EU(Ireland)
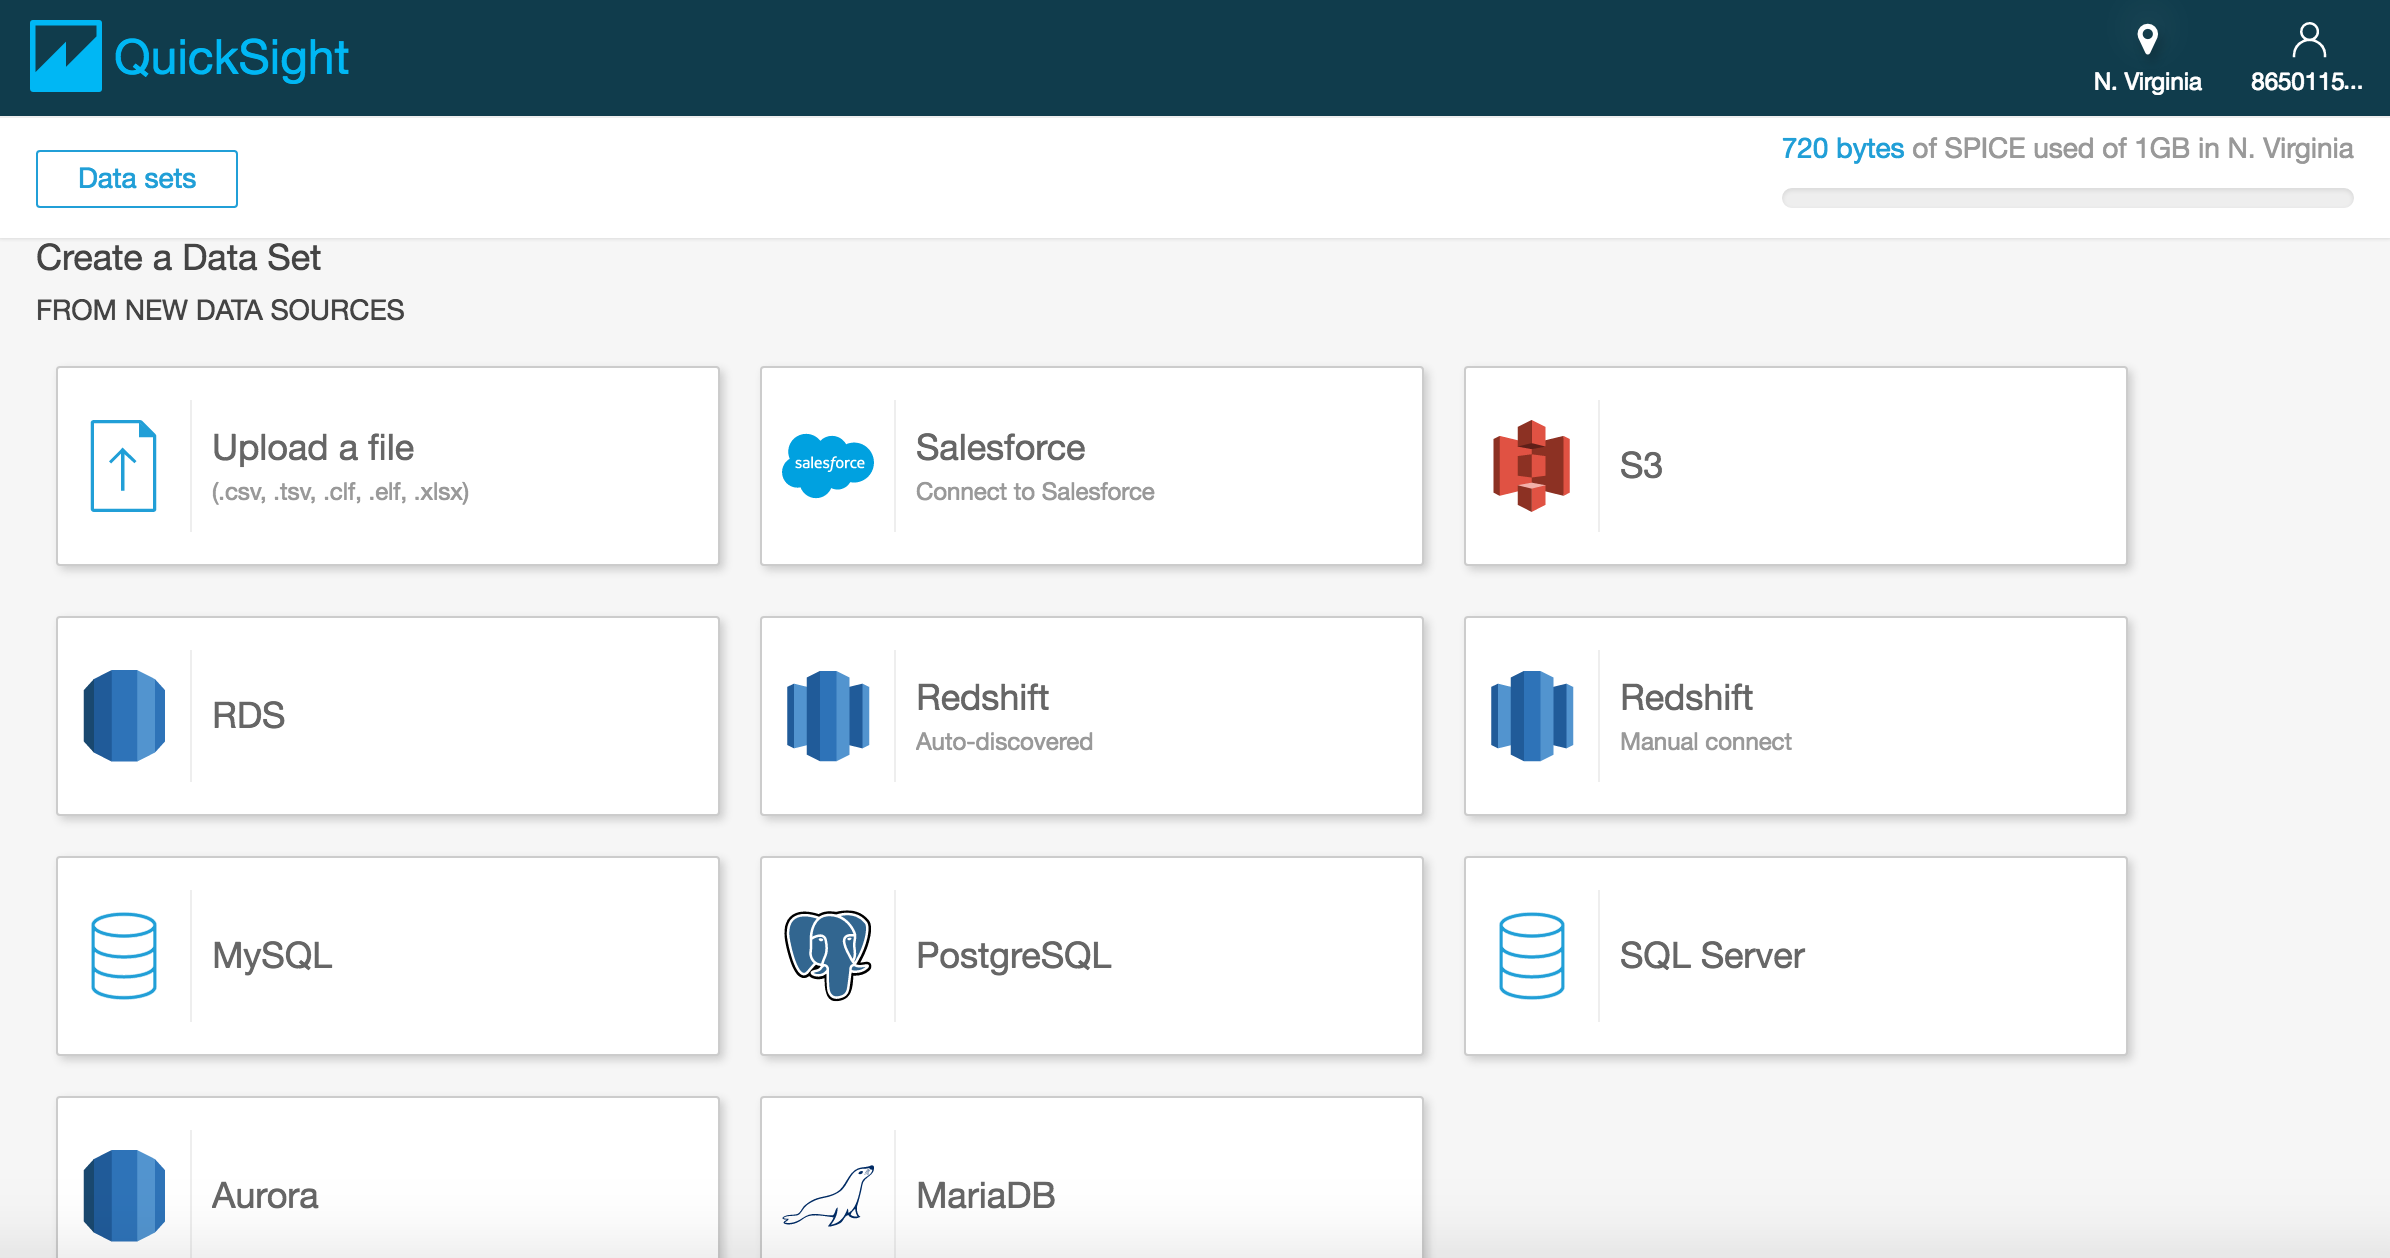
データソースとしては、以下のものが利用できる。
- アップロードファイル
- .csv
- .tsv
- .clf
- .xlsx
- Salesforce
- S3
- RDS
- Redshift
- Auto-discoverd
- Manual connect
- MySQL
- PosgreSQL
- SQL Server
- Aurora
- MariaDB
また、グラフの種類は現在以下の8種類が用意されている。
- AutoGraph
- Bar Charts
- Line Charts
- Pivot Table
- Scatter Plot
- Tree Map
- Pie Chart
- Heat Map
料金は、Tableauがライセンス料が12万円や24万円だと考えると、1000円程度から使用可能となっており、値段は安めだと言えます。
| Standard Edition | Enterprise Edition | |||
|---|---|---|---|---|
| サブスクリプション | 1年 | 1か月 | 1年 | 1か月 |
| 1ユーザーあたり1か月ごとの料金 | 9.00USD | 12.00USD | 18.00USD | 24.00USD |
| バンドル SPICE (GB)* | 10 | 10 | 10 | 10 |
| 追加のSPICEGB/月の料金 | 0.25USD | 0.25USD | 0.38USD | 0.38USD |
実際に操作する注意点としては、後ほど記述しますが、QuickSightが他のAWSリソースにアクセスする際のセキュリティグループの設定ですが、利用するリージョンによって指定する送信元のIPアドレスのレンジが異なるので注意。
QuickSightのみに興味がある場合は以下のURLより前半は飛ばしてください。
http://qiita.com/hayashier/items/61af17b4bccb274598fc#quicksightの設定
Redshiftの設定
マネジメントコンソールからの設定
マネジメントコンソールからRedshiftを選択。
[Launch Cluster]を選択。
Cluster Details
Cluster Identifier: sample-cluster
Database Name: sampledb
Database Port: 5439
Master User Name: test-user
Master User Password: Passw0rd
Confirm Password: Passw0rd
[Contunue]を選択。
Node Configuration
Node Type: dc1.large
CPU: 7 EC2 Compute Units (2 virtual cores) per node
Memory: 15 GiB per node
Storage : 160GB SSD storage per node
I/O Performance: Moderate
Cluster Type: Single Node
Number of Compute Nodes*: 1
Maximum : 1
Minimum : 1
[Continue]を選択。
Additional Configuration
Cluster Parameter Group: A default parameter group will be associated with this cluster.
Encrypt Database: None
Choose a VPC: Default VPC
Cluster Subnet Group: default
Publicly Accesible: Yes
Choose a Public IP Address: No
Enhanced VPC Routing: No
Availability Zone: No Preference
VPC Security Groups: default
Create CloudWatch Alarm: No
AvailableRoles: Choose a Role
[Continue]を選択。
請求に関しての警告が出るが、[Launch Cluster]を選択。
[Close]を選択。
作成したクラスターのCluster Statusがcreatingからavailableになるまで待つ。
セキュリティグループの設定
先ほど作成したRedshiftにアクセスする権限を付与する。
1.先ほど作成したRedshiftのClusterを選択。
2.VPC IDをメモしておく。(Ex. vpc-xxxxxxxx)
3.マネジメントコンソールからVPCを選択。
4.[セキュリティグループ]を選択。
5.[セキュリティグループの作成]を選択。
6.以下のように入力する。
ネームタグ: redshift-sg
グループ名: redshift-sg
説明: redshift-sg
VPC: vpc-xxxxxxxx(先ほどメモしたもの)
[作成]を選択。
7.作成したセキュリティグループを選択した状態で、[インバウンドルール]タブを選択し、[編集]を選択。
タイプ: カスタムTCPルール
プロトコル: TCP(6)
ポート範囲: 5439
送信元: 任意の場所
8.先ほど作成したRedshiftのClusterを選択して、[Cluster]のセレクトボックスから[Modify]を選択し、VPC Security Groupsから先ほど作成したredshift-sgを選択。
PosgreSQLの設定
EC2インスタンスを立ててログイン。
ssh -i ~/.ssh/id_rsa_aws_test.pem ec2-user@XX.XXX.XXX.XXX
PostgreSQLのインストール。
yum update -y
yum install -y postgresql
PosgreSQLへ接続。
psql -h sample-cluster.xxxxxxxxxxxx.us-east-1.redshift.amazonaws.com -U test-user -d sampledb -p 5439
sampledb=# create table sample_table (
time double precision,
score double precision
);
sampledb=# \db
     テーブルスペース一覧
    名前    | owner | location
------------+-------+----------
 pg_default | rdsdb |
 pg_global  | rdsdb |
(2 行)

sampledb=# \d
             リレーションの一覧
 schema |      名前      |   type   | owner
--------+----------------+----------+-------
 public | sample_table | テーブル | test-user
(1 行)
S3の設定
1.マネジメントコンソールからS3を選択。
2.[バケットを作成]を選択し、以下のように入力する。
ただし、リージョンには注意。後ほど作成するRedshiftと一致させる必要がある。
バケット名: sample-bucket
リージョン: US Standard
アクセス許可からバケットを編集を選択し、以下のようにアクセスポリシーを設定する。
{
    "Version": "2012-10-17",
    "Statement": [
        {
            "Sid": "GetObject",
            "Effect": "Allow",
            "Principal": "*",
            "Action": "s3:GetObject",
            "Resource": "arn:aws:s3:::sample-bucket/*"
        },
        {
            "Sid": "ListBucket",
            "Effect": "Allow",
            "Principal": "*",
            "Action": "s3:ListBucket",
            "Resource": "arn:aws:s3:::sample-bucket"
        }
    ]
}
以下のようなCSVファイルを作成し、sample.csvとする。
0.0,0.11556159877972202
0.15000000000000002,0.26651804459164957
0.35000000000000003,0.45004960788354187
0.4,0.4923782722288377
0.55,0.6100166047975116
0.8,0.7723353907234323
0.8500000000000001,0.7994047693651011
1.0,0.8692916937732581
1.1500000000000001,0.9217305049137822
1.25,0.94677401743939
1.3,0.9562876445562403
1.55,0.9735993414622379
1.6500000000000001,0.9664373548374785
1.7000000000000002,0.9598669917759179
1.9500000000000002,0.8977331296873741
2.6,0.5286810798099599
2.7,0.449411570846044
2.8000000000000003,0.36538242946650334
2.95,0.23158559205148774
3.2,-0.007130730394672186
3.5,-0.30657398913335876
3.6,-0.4062783020741787
3.9000000000000004,-0.6932281106174598
3.95,-0.7380731498775843
4.0,-0.7817440682615289
4.2,-0.9421186636318482
4.3,-1.0118541610162926
4.5,-1.1248186551055641
4.55,-1.1466810590474197
5.0,-1.1957252477107565
Data Pipelineの設定
Name: SamplePipeline
Description (optional): (空欄)
Source: Build using a template
Load data from S3 into Redshift
Redshift password : ••••••••
Redshift security group(s): default
Redshift database name: sampledb
Redshift username: test-user
Create table SQL query (optional): (空欄)
Table insert mode: TRUNCATE
Redshift table name: sample_table
Input S3 folder: s3://sample-bucket/sample.csv
Redshift JDBC connection string: jdbc:redshift://sample-cluster.xxxxxxxxxxxx.us-east-1.redshift.amazonaws.com:5439/sampledb
Copy options (optional): CSV
Primary keys (optional): (空欄)
Run: on a schedule
Run every: 15 minute(s)
Starting: on pipeline activation
Ending: never
Logging: Enabled
S3 location for logs: s3://sample-bucket/logs/
IAM roles: Default
Tags
Key: name
Value: SamplePipeline
[Activate]を選択。
※Table insert modeでTRUNCATEにすることが大事。
sampledb=# select * from sample_table;
 time |        score
------+----------------------
 0.15 |     0.26651804459165
  0.8 |    0.772335390723432
 1.25 |     0.94677401743939
  1.7 |    0.959866991775918
  2.8 |    0.365382429466503
  3.6 |   -0.406278302074179
  4.2 |   -0.942118663631848
    5 |    -1.19572524771076
 0.35 |    0.450049607883542
 0.85 |    0.799404769365101
  1.3 |     0.95628764455624
 1.95 |    0.897733129687374
 2.95 |    0.231585592051488
  3.9 |    -0.69322811061746
  4.3 |    -1.01185416101629
  0.4 |    0.492378272228838
    1 |    0.869291693773258
 1.55 |    0.973599341462238
  2.6 |     0.52868107980996
  3.2 | -0.00713073039467219
 3.95 |   -0.738073149877584
このようにデータが格納されていればOK
QuickSightの設定
QuickSightがAWSリソースにアクセスする権限の付与
QuickSightが他のリソースへアクセスするための権限の付与には注意が必要。送信元がリージョンによって異なるように指定する。
先ほど作成したRedshiftにQuickSightがアクセスする権限を付与する。
1.先ほど作成したRedshiftのClusterを選択。
2.VPC IDをメモしておく。(Ex. vpc-xxxxxxxx)
3.マネジメントコンソールからVPCを選択。
4.[セキュリティグループ]を選択。
5.[セキュリティグループの作成]を選択。
6.以下のように入力する。
ネームタグ: Amazon-QuickSight-access
グループ名: Amazon-QuickSight-access
説明: Amazon-QuickSight-access
VPC: vpc-xxxxxxxx(先ほどメモしたもの)
[作成]を選択。
7.作成したセキュリティグループを選択した状態で、[インバウンドルール]タブを選択し、[編集]を選択。
タイプ: カスタムTCPルール
プロトコル: TCP(6)
ポート範囲: 5439(Redshiftでインバウンドルールで許可したTCPポート番号)
送信元: 52.23.63.224/27(北バージニアの場合)
送信元のIPアドレスのレンジについては、QuickSightを使用するリージョンによって以下のように異なるので適切なものを選択する。
| リージョン | IPアドレスレンジ |
|---|---|
| 北バージニア(us-east-1) | 52.23.63.224/27 |
| オレゴン(us-east-2) | 54.70.204.128/27 |
| アイルランド(eu-west-1) | 52.210.255.224/27 |
8.作成したRedshiftのClusterを作成した状態に戻り、[Cluster]のセレクトボックスから[Modify]を選択。
9.VPC Security Groupsの項目で先ほど作成したAmazon-QuickSight-accessとredshift-sgをCommand(Ctrl)を押しながら両方選択し、[Modify]を選択。
QuickSightの操作
現在、QuickSightは以下のリージョンでサービスを利用できるのでいずれかを選択する。
US East(N. Virginia)
US West(Oregon)
EU(Ireland)
1.マネジメントコンソールから、QuickSightを選択。
2.[Sign up]を選択し、以下のように入力する。
Quicksight home region: US East(N. Virginia)
QuickSight account name: test-user
Notification email address: *************@******
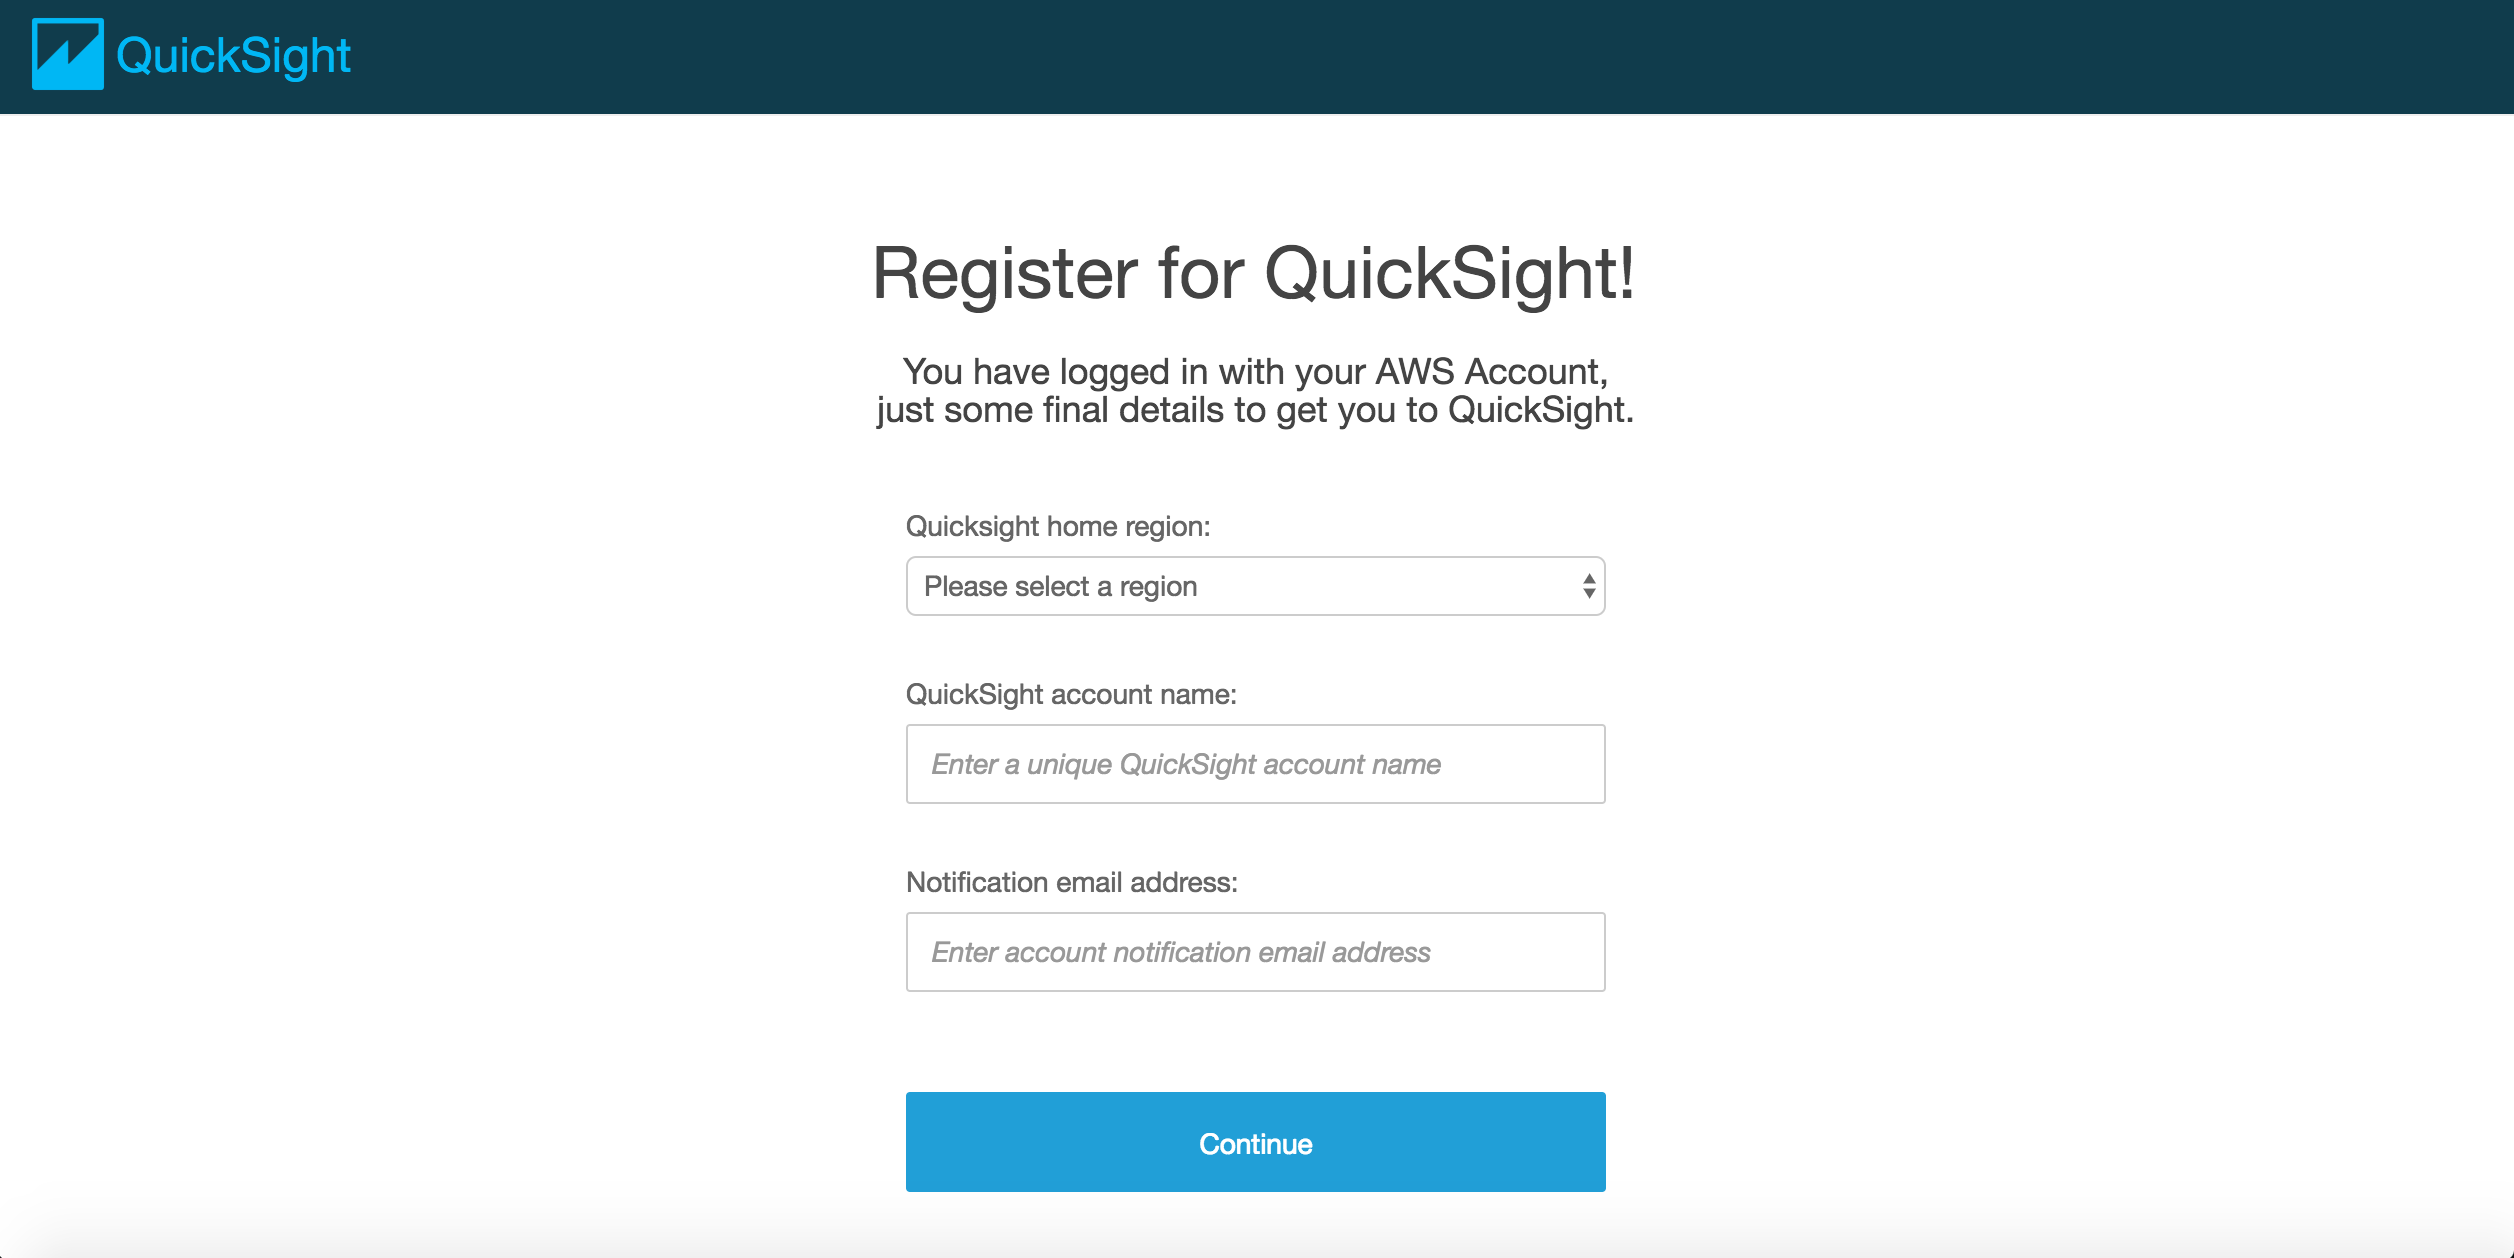
[Continue]を選択。
4.Sign upが完了し、[Next]を選択。

5.[Go To Amazon QuickSight]を選択。
6.最初にQuickSightのポップアップが出るが、全て[Next]を選択。
7.[Manage data]を選択。
8.[New data set]を選択。
9.[Redshift(Auto discovered)]を選択し、以下のように入力する。
Data source name: SampleSource
Instance ID: sample-cluster
Database name: sampledb
Username: test-user
Password: Passw0rd
[Create data source]を選択。
この時、Instance IDがからのセレクトボックスが出てくる時は、QuickSightがRedshiftへのアクセス権限が正常に付与できていないと考えられる。
SSLを有効化したい場合は[Validate connection]を選択。
Schema: public
Tables: sample_table
[Select]を選択。
以下のような確認事項が表示される。
Table: sample_table
Estimated table size: 20MBSPICE
Data source: SampleSource
Schema: public
以下の2つのどちらかを選択する。ここではSPICEに取り込む方を選択。
- Import to SPICE for quicker analytics
- Directly query your data
[Visualize]を選択。
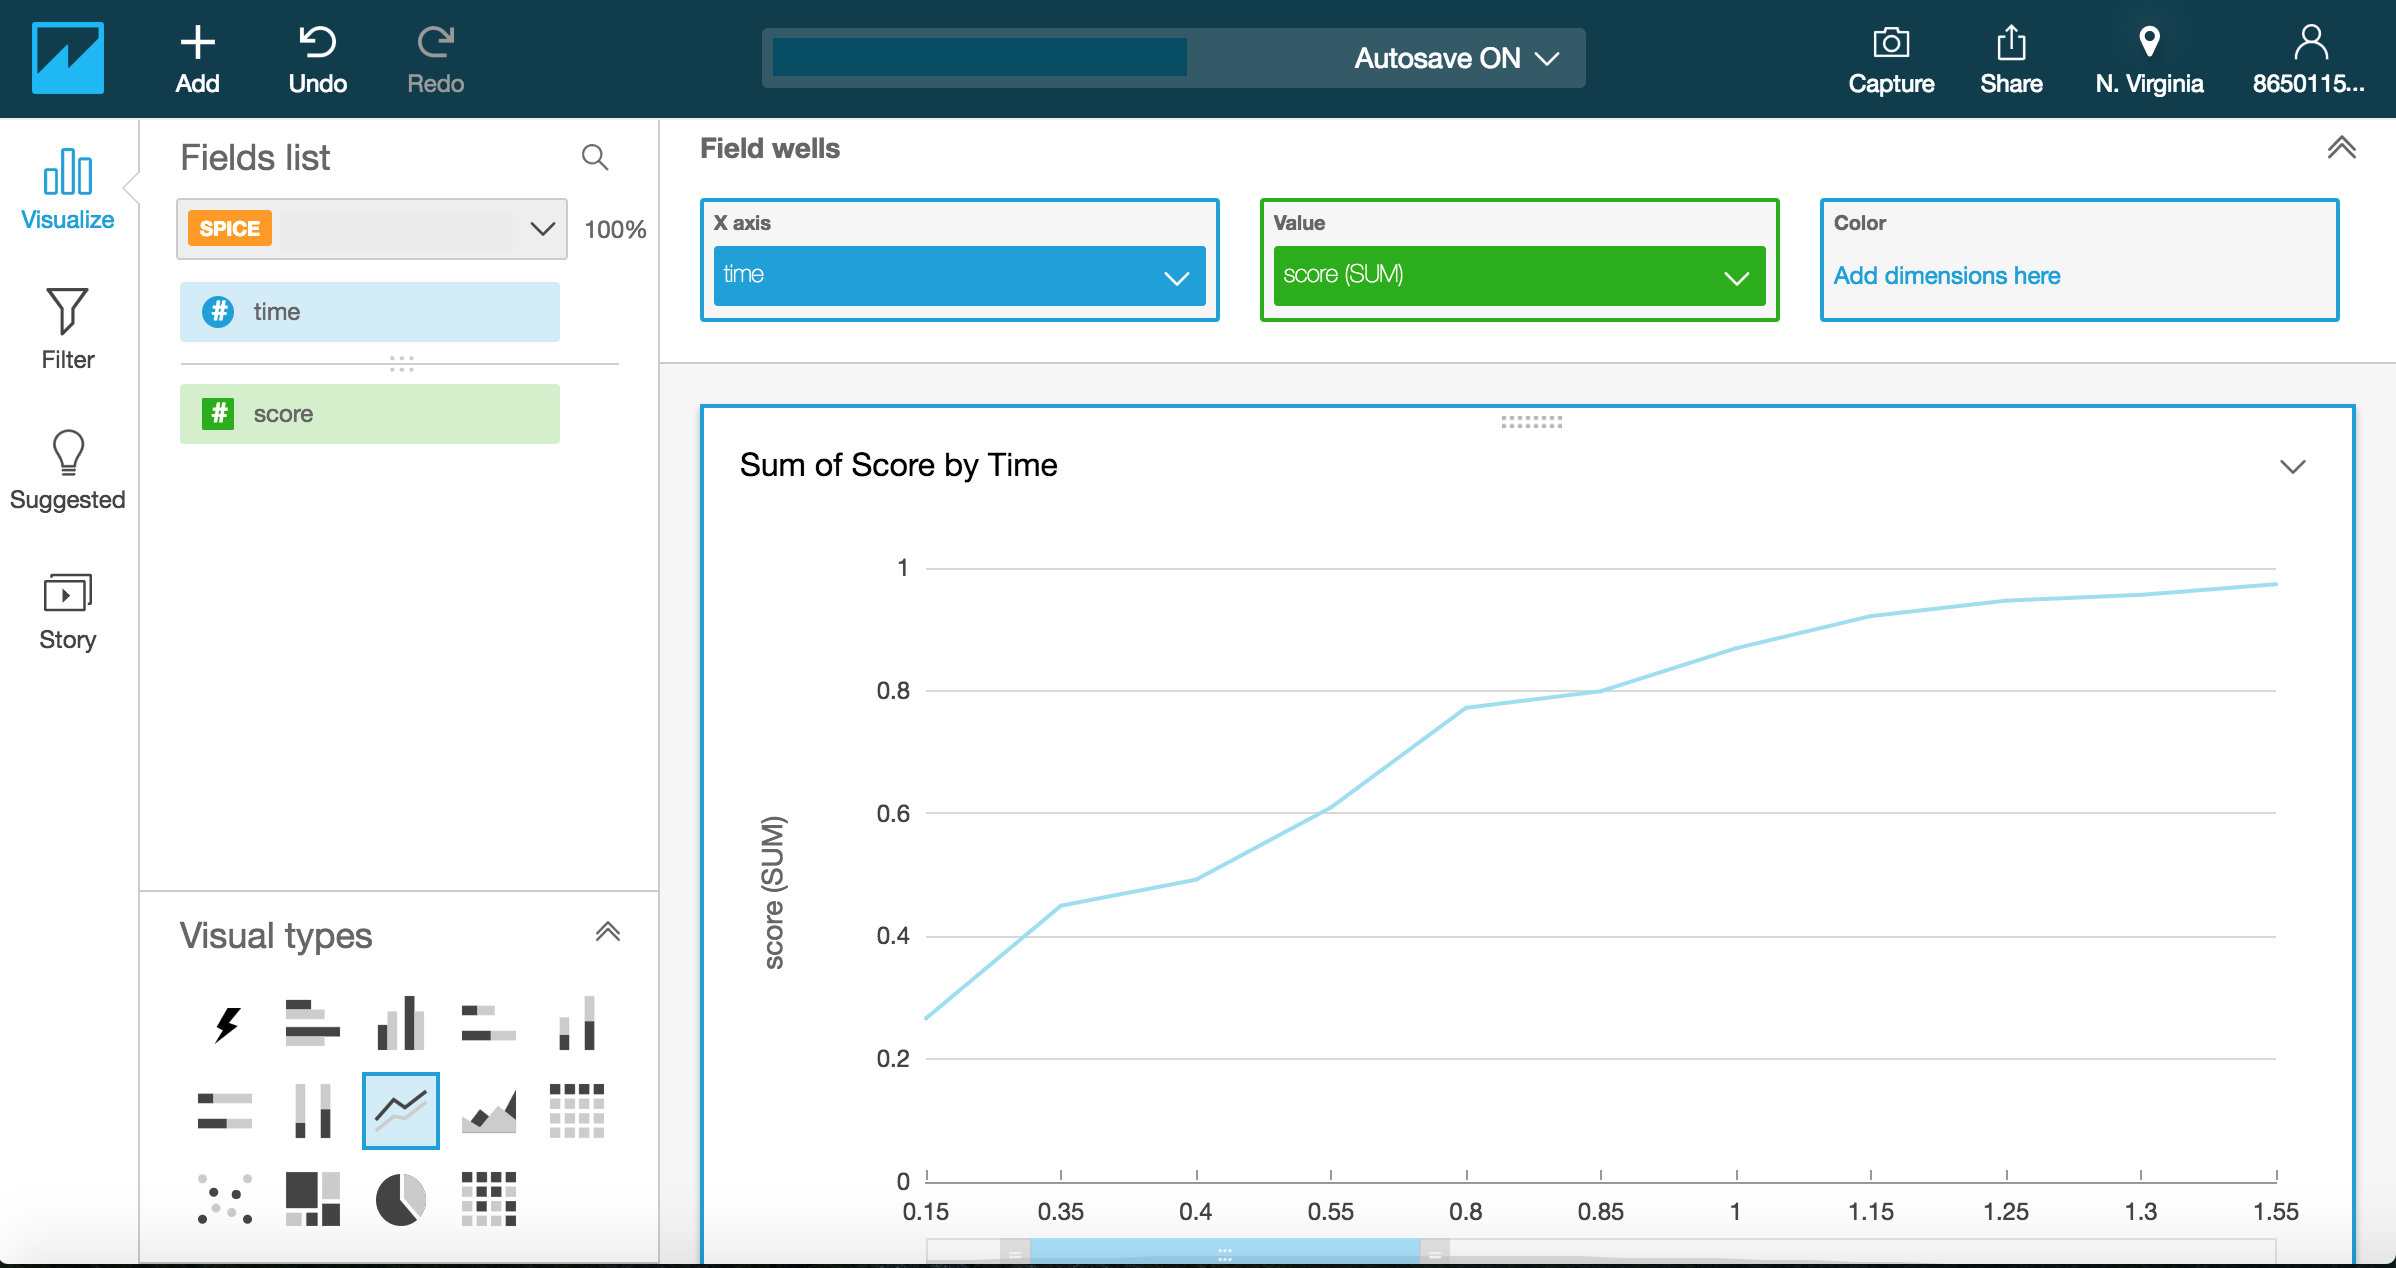
グラフの作成
現在、QuickSightには以下の8種類のグラフが用意されている。ここでは、Line Chartsを選択。
画面左のVisualizeを選択し、Fields list項目からX軸,Value(Y軸)に対応させたいRedshiftで作成したテーブルのカラムを選択。
X axis: time
Value: score
以上でグラフが表示される。
ダッシュボードで他のユーザと共有
画面上部の[Share]を選択。
[Create dashboard]を選択し、以下のように入力する。
Create new dashboard as: SampleDashboard
[Create Dashboard]を選択。
User email address or username: (Shareしたいユーザのメールアドレス、もしくはユーザ名)
[Share]を選択。
注意点
-
Redshift
- MySQLのAuto Incrementに相当するPostgreSQLのserialはRedshiftではサポートされていない。
- PostgreSQLのserialの代わりにIdentityが使える。
- Redshiftでは、カラムの追加、削除はできますが、カラムの変更はできない。
- http://docs.aws.amazon.com/ja_jp/redshift/latest/dg/r_ALTER_TABLE.html
- https://support.flydata.com/hc/ja/articles/206782883-Redshift%E3%81%AE%E3%82%AB%E3%83%A9%E3%83%A0%E5%A4%89%E6%9B%B4-%E3%82%AB%E3%83%A9%E3%83%A0%E5%90%8D-%E3%83%87%E3%83%BC%E3%82%BF%E5%9E%8B%E3%81%AA%E3%81%A9-%E3%81%AF%E3%81%A9%E3%81%AE%E3%82%88%E3%81%86%E3%81%AA%E6%89%8B%E9%A0%86%E3%81%AB%E3%81%AA%E3%82%8A%E3%81%BE%E3%81%99%E3%81%8B-
-
DataPipeline
- CSVの先頭のカラム名はいらない。
- S3とRedshiftのリージョンを一致させる(特にS3のリージョンには注意、また変更できない。)
- Redshiftへのデータの流し込みのCronの間隔を15分未満には設定できない。
- myRedshiftCopyOpts (optional)にCSVオプションをつける。
- http://docs.aws.amazon.com/ja_jp/redshift/latest/dg/c_loading_default_values.html
- myInsertMode: Truncateを指定する。
- 実行しまくると、以下のような注告が出る。
WARNING: Your pipeline is scheduled to start in the past, which could create many concurrent pipeline instances (backfilling). To avoid this, set the start date on or near the current date and time.
- QuickSight
- DatasetとしてRedshiftを選択した時に、Instance IDが空のセレクトボックスが出てくる時は、QuickSightがRedshiftへのアクセス権限が正常に付与できていないと考えられる。
(参考)Pipeline Definitionの内容
{
  "objects": [
    {
      "connectionString": "#{myRedshiftJdbcConnectStr}",
      "databaseName": "#{myRedshiftDbName}",
      "*password": "#{*myRedshiftPassword}",
      "name": "RedshiftCluster",
      "id": "RedshiftCluster",
      "type": "RedshiftDatabase",
      "username": "#{myRedshiftUsername}"
    },
    {
      "failureAndRerunMode": "CASCADE",
      "schedule": {
        "ref": "DefaultSchedule"
      },
      "resourceRole": "DataPipelineDefaultResourceRole",
      "role": "DataPipelineDefaultRole",
      "pipelineLogUri": "s3://sample-bucket/logs/",
      "scheduleType": "cron",
      "name": "Default",
      "id": "Default"
    },
    {
      "period": "15 Minutes",
      "name": "Every 1 minute",
      "id": "DefaultSchedule",
      "type": "Schedule",
      "startAt": "FIRST_ACTIVATION_DATE_TIME"
    },
    {
      "instanceType": "t1.micro",
      "name": "Ec2Instance",
      "securityGroups": "#{myRedshiftSecurityGrps}",
      "id": "Ec2Instance",
      "type": "Ec2Resource",
      "terminateAfter": "2 Hours"
    },
    {
      "output": {
        "ref": "DestRedshiftTable"
      },
      "input": {
        "ref": "S3InputDataNode"
      },
      "name": "RedshiftLoadActivity",
      "commandOptions": "#{myRedshiftCopyOpts}",
      "runsOn": {
        "ref": "Ec2Instance"
      },
      "id": "RedshiftLoadActivity",
      "type": "RedshiftCopyActivity",
      "insertMode": "#{myInsertMode}"
    },
    {
      "database": {
        "ref": "RedshiftCluster"
      },
      "createTableSql": "#{myRedshiftCreateTableSql}",
      "primaryKeys": "#{myPrimaryKeys}",
      "name": "DestRedshiftTable",
      "id": "DestRedshiftTable",
      "type": "RedshiftDataNode",
      "tableName": "#{myRedshiftTableName}"
    },
    {
      "directoryPath": "#{myInputS3Loc}",
      "name": "S3InputDataNode",
      "id": "S3InputDataNode",
      "type": "S3DataNode"
    }
  ],
  "parameters": [
    {
      "description": "Redshift password",
      "id": "*myRedshiftPassword",
      "type": "String"
    },
    {
      "description": "Redshift database name",
      "id": "myRedshiftDbName",
      "type": "String"
    },
    {
      "default": "default",
      "watermark": "security group name",
      "helpText": "The names of one or more security groups that are assigned to the Redshift cluster.",
      "description": "Redshift security group(s)",
      "isArray": "true",
      "id": "myRedshiftSecurityGrps",
      "type": "String"
    },
    {
      "description": "Redshift username",
      "id": "myRedshiftUsername",
      "type": "String"
    },
    {
      "watermark": "CREATE TABLE IF NOT EXISTS #{tableName} (id varchar(255), name varchar(255), address varchar(255), primary key(id)) distkey(id) sortkey(id);",
      "helpText": "The SQL statement to create the Redshift table if it does not already exist.",
      "description": "Create table SQL query",
      "optional": "true",
      "id": "myRedshiftCreateTableSql",
      "type": "String"
    },
    {
      "helpText": "The name of an existing table or a new table that will be created based on the create table SQL query parameter below.",
      "description": "Redshift table name",
      "id": "myRedshiftTableName",
      "type": "String"
    },
    {
      "default": "OVERWRITE_EXISTING",
      "helpLink": "https://docs.aws.amazon.com/console/datapipeline/redshiftcopyactivity",
      "helpText": "Determines how to handle pre-existing data in the target table that overlaps with rows in the data to be loaded.",
      "description": "Table insert mode",
      "id": "myInsertMode",
      "type": "String"
    },
    {
      "helpText": "The S3 folder where one or more input files are located.",
      "description": "Input S3 folder",
      "id": "myInputS3Loc",
      "type": "AWS::S3::ObjectKey"
    },
    {
      "watermark": "jdbc:postgresql://endpoint:port/database?tcpKeepAlive=true",
      "description": "Redshift JDBC connection string",
      "id": "myRedshiftJdbcConnectStr",
      "type": "String"
    },
    {
      "helpLink": "https://docs.aws.amazon.com/console/datapipeline/redshiftcopyactivity",
      "watermark": "IGNOREHEADER AS 1",
      "helpText": "COPY parameters to pass to Redshift",
      "description": "Copy options",
      "isArray": "true",
      "optional": "true",
      "id": "myRedshiftCopyOpts",
      "type": "String"
    },
    {
      "helpLink": "https://docs.aws.amazon.com/console/datapipeline/dp_object_redshiftdatanode",
      "helpText": "The names of all primary key columns in the Redshift table used to merge existing data with new data.",
      "description": "Primary keys",
      "isArray": "true",
      "optional": "true",
      "id": "myPrimaryKeys",
      "type": "String"
    }
  ],
  "values": {
    "myRedshiftUsername": "test-user",
    "myRedshiftDbName": "sampledb",
    "myRedshiftJdbcConnectStr": "jdbc:redshift://sample-cluster.xxxxxxxxxxxx.us-east-1.redshift.amazonaws.com:5439/sampledb",
    "*myRedshiftPassword": "Passw0rd",
    "myInsertMode": "TRUNCATE",
    "myRedshiftSecurityGrps": "default",
    "myRedshiftTableName": "sample_table",
    "myInputS3Loc": "s3://sample-bucket/sample-emr/output/output.csv/part-r-00000-7fb2a847-faf7-43c1-b888-ad839e2af89e.csv",
    "myRedshiftCopyOpts": "CSV"
  }
}
参考
QuickSight ドキュメント
http://docs.aws.amazon.com/ja_jp/quicksight/latest/user/welcome.html
DataPipeline ドキュメント
http://docs.aws.amazon.com/ja_jp/datapipeline/latest/DeveloperGuide/what-is-datapipeline.html
Redshift ドキュメント
http://docs.aws.amazon.com/ja_jp/redshift/latest/gsg/getting-started.html
QuickSight 料金
https://aws.amazon.com/jp/quicksight/pricing/
Tableau 料金
http://sios.jp/bigdata/tableau/price.html