はじめに
前回の記事(Vercel CLI × Next.js 実務レシピ:開発→デプロイ→テストの完全手順+コマンド早見表)では、全体の流れやフェーズごとのコマンド手順を整理しました。今回はその続編として、実際にCLIを使いながら構築からデプロイまで行った結果を記事にしました。
プリセールスエンジニアとして提案・デモを行う際、素早くデプロイできる環境を持つことは非常に重要です。Vercelはその点で非常に優れており、ほぼCLIだけで全工程を完結できます。
これまで色々用途に合わせて、Google Cloud Run、Cloudflare Workers、Twilio Functions&Assetsなど様々な環境でたくさんのデモを動かしてきました。Vercelの魅力はGithub連携やフロント系の構築の容易さなどが挙げられます。Twilioのデモでよく利用するWebsocket系やバックエンドの構築は苦手そうなのが気にはなりますが、しばらくはVercelの手軽さを楽しみたいと思っています。
それでは、実際に手順をみていきましよう。
目次
-
前提条件
-
環境構築とログイン
-
Next.js雛形の作成
-
ローカル動作確認
-
初回デプロイ
-
環境変数設定
-
Blob(Storage)の追加
-
GitHub連携
-
テストとログ確認
-
まとめ
1. 前提条件
- Mac OSXで検証
- 既に VercelのGitHub App がインストール済み/すべてのリポジトリにアクセス許可済み
- npm 導入済み
- git コマンド導入済み
- ghコマンド導入済み
2. 環境構築とログイン
コマンド
npm install -g vercel
vercel login
実行結果
Vercel CLI 33.2.0
> Success! Logged in as mitsuharu@example.com
解説
最初にVercel CLIをインストールし、ブラウザ認証でログインします。認証後、ローカル環境からVercel APIにアクセスできるようになります。
3. Next.js雛形の作成
コマンド
vercel init nextjs sample-project
実行結果
Vercel CLI 48.4.0
> Success! Initialized "nextjs" example in ~/Documents/..../sample-project.
- To deploy, `cd sample-project` and run `vercel`.

% ls
sample-project

% cd sample-project
% ls
README.md               eslint.config.mjs       package-lock.json       postcss.config.mjs      tsconfig.json
app                     next.config.ts          package.json            public
解説
vecel initはテンプレートをもとに新規プロジェクトを作成します。Next.js以外にもviteやsveltekitを選択可能です。今回は、引数に「nextjs」を指定したことによりNextJSのサンプルが設定されました。また「sample-project」と引数に指定したので、プロジェクト名がsample-projectになりました。
4. ローカル動作確認
コマンド
npm install
vercel dev
実行結果
Vercel CLI 48.4.0
? Set up and develop “~/Documents/..../sample-project”? yes
? Which scope should contain your project? xxx's projects
? Link to existing project? no
? What’s your project’s name? sample-project
? In which directory is your code located? ./
Local settings detected in vercel.json:
Auto-detected Project Settings (Next.js):
- Build Command: next build
- Development Command: next dev --port $PORT
- Install Command: `yarn install`, `pnpm install`, `npm install`, or `bun install`
- Output Directory: Next.js default
? Want to modify these settings? no
? Do you want to change additional project settings? no
🔗  Linked to xxx's-projects/sample-project (created .vercel)
> Running Dev Command “next dev --port $PORT”
> Ready! Available at http://localhost:3000
   ▲ Next.js 16.0.0 (Turbopack)
   - Local:        http://localhost:3000
   - Network:      http://192.168.1.3:3000

 ✓ Starting...
 ✓ Ready in 1385ms
管理コンソール画面
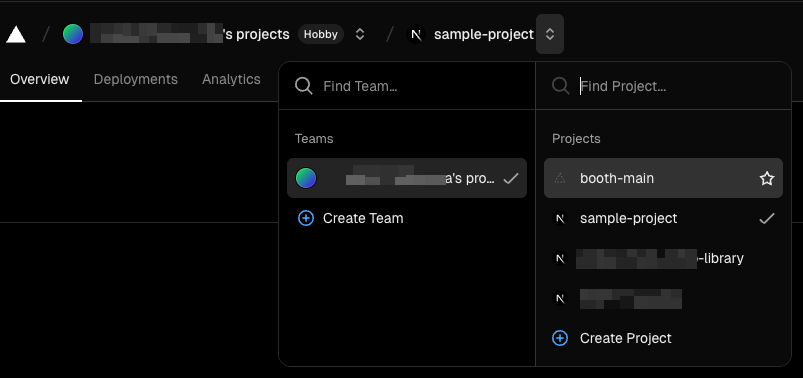
解説
vercel devを実行すると、ローカルサーバーが起動しブラウザで即座に動作確認できます。開発中の変更も自動的に反映されます。開発サーバを止めるには、Ctrl+cなどで停止できます。
また Vercelの管理画面でもこのプロジェクトが作成されて存在を確認することができるようになります。ただしこの時点ではVercelにはコードはデプロイされていません。
5. 初回デプロイ
コマンド
vercel
実行結果
Vercel CLI 48.4.0
🔍  Inspect: https://vercel.com/xxxx-projects/sample-project/HJD7jigTj7obWzjsdfwfaqPphsPtU [9s]
✅  Production: https://sample-project-nn5kkxz3t-xxxx-projects.vercel.app [9s]
📝  Deployed to production. Run `vercel --prod` to overwrite later (https://vercel.link/2F).
💡  To change the domain or build command, go to https://vercel.com/xxx-projects/sample-project/settings

Common next commands:
- `vercel inspect sample-project-nn5kkxz3t-xxx-projects.vercel.app --logs`
- `vercel redeploy sample-project-nn5kkxz3t-xxx-projects.vercel.app`
管理コンソール画面
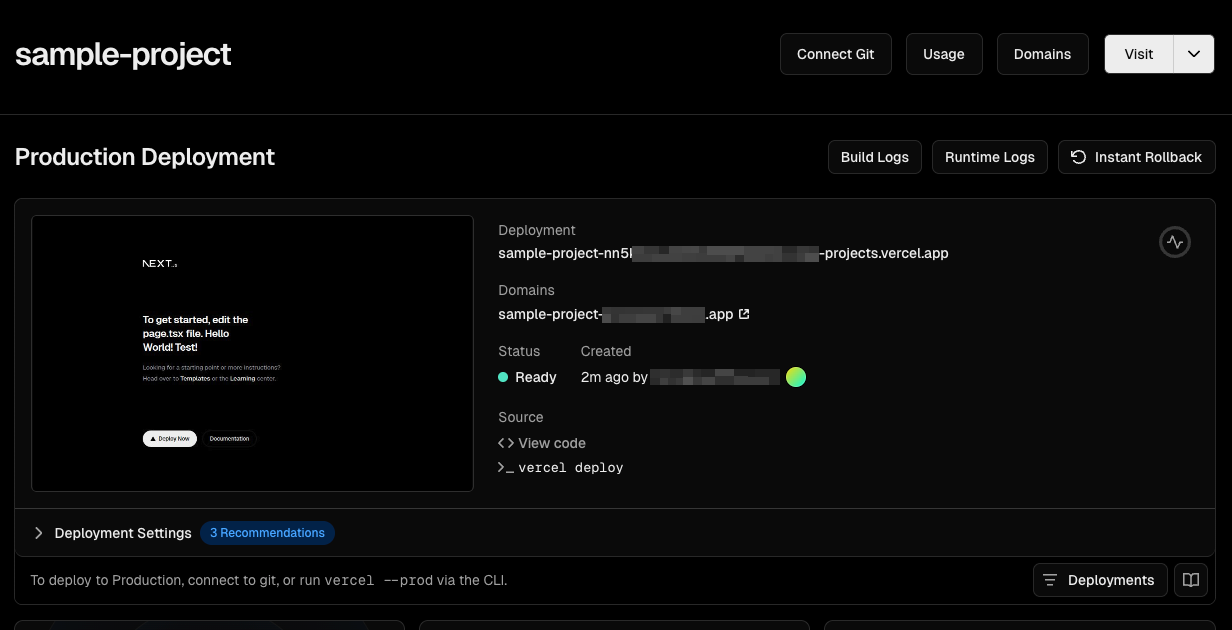
解説
最初のデプロイが完了するとURLが発行されてブラウザからアクセスできるようになります。コンソール画面でもデプロイが完了していることをかくにん出来ます。
6. 環境変数設定
コマンド
vercel env add MESSAGE_SAMPLE_1 production
実行結果
Vercel CLI 48.4.0
? What's the value of MESSAGE_SAMPLE_1? これはテストメッセージです。
✅  Added Environment Variable MESSAGE_SAMPLE_1 to Project sample-project [380ms]
Common next commands:
- `vercel env ls`
- `vercel env pull`

% vercel env ls
Vercel CLI 48.4.0
> Environment Variables found for mitsuharunakamuras-projects/sample-project [166ms]

 name                value               environments        created
 MESSAGE_SAMPLE_1    Encrypted           Production          40s ago

Common next commands:
- `vercel env add`
- `vercel env rm`
- `vercel env pull`
解説
CLIで環境変数を直接登録できます。production、preview、developmentの3環境を分けて管理可能です。登録後、vercel env lsで登録済みの環境変数を確認できます。
7. Blob(Storage)の追加
コマンド
npm i @vercel/blob
vercel blob store add my-blob-store --region kix1
実行結果
% npm i @vercel/blob

added 8 packages, and audited 369 packages in 1s

144 packages are looking for funding
  run `npm fund` for details
found 0 vulnerabilities

% vercel blob store add my-blob-store --region kix1
Vercel CLI 48.4.0
> Success! Blob store created: my-blob-store (store_OwoZXkPbqPzzzzz) in kix1
? Would you like to link this blob store to sample-project? yes
? Select environments Production, Preview, Development
> Success! Blob store my-blob-store linked to sample-project. Make sure to pull the new environment variables using `vercel env pull`
解説
Blobを利用することで、画像・音声・ドキュメントなどのファイルを簡単にアップロード・管理できます。私は動画を登録し閲覧する簡易的なサイトを作るときに利用しました。
ポイントとしてvercel blob store add my-blob-store --region kix1実行後に聞かれる「Would you like to link this blob store to sample-project? 」という問いに「Y」と答えるのが重要です。ここでプロジェクトと紐付けをしておけば、BLOB_READ_WRITE_TOKENの登録は必要ありません。もし紐付けをしなかった場合には、vercel env add BLOB_READ_WRITE_TOKEN production コマンドを使って登録する必要があります。
コードサンプル(@vercel/blob)
import { put } from '@vercel/blob';

export async function POST(req: Request) {
  const formData = await req.formData();
  const file = formData.get('file') as File;
  const { url } = await put(`uploads/${file.name}`, file, {
    access: 'public',
  });
  return new Response(JSON.stringify({ url }), {
    headers: { 'Content-Type': 'application/json' },
  });
}
このコードでは、POSTで受け取ったファイルをBlobストレージへ直接アップロードし、公開URLを返します。開発中はvercel devでローカルからもテスト可能です。
8. GitHub連携
コマンド
git init
git add .
git commit -m "Initial commit"
gh repo create my-vercel-app --public --source=. --remote=origin
git branch -M main
git push -u origin main
vercel link
vercel git connect --yes
実行結果
% git init
Initialized empty Git repository in /Users/..../sample-project/.git/
% git add .
% git commit -m "Initial commit"
[main (root-commit) d54a71e] Initial commit
 Committer: abc xyz <abc@abc-mini.local>
Your name and email address were configured automatically based
....
 17 files changed, 6934 insertions(+)
 create mode 100644 .gitignore
 create mode 100644 README.md
....
 create mode 100644 tsconfig.json

% gh repo create my-vercel-app --public --source=. --remote=origin
✓ Created repository MitsuharuNakamura/my-vercel-app on GitHub
  https://github.com/MitsuharuNakamura/my-vercel-app
✓ Added remote https://github.com/MitsuharuNakamura/my-vercel-app.git
% git branch -M main
% git push -u origin main
Enumerating objects: 21, done.
....
 * [new branch]      main -> main
branch 'main' set up to track 'origin/main'.

% vercel link
Vercel CLI 48.4.0
? Set up “~/Documents/P.../sample-project”? yes
? Which scope should contain your project? xxxx's projects
? Found project “xxxx-projects/sample-project”. Link to it? yes
✅  Linked to xxxx-projects/sample-project (created .vercel)

% vercel git connect --yes
Vercel CLI 48.4.0
> Connecting GitHub repository: https://github.com/xxxx/my-vercel-app
> Connected
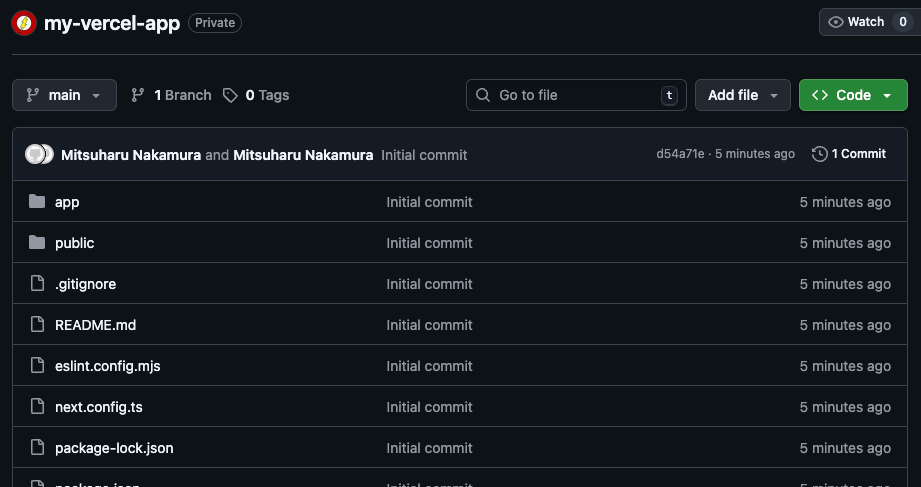
Githubの画面
github連携後のコンソール画面
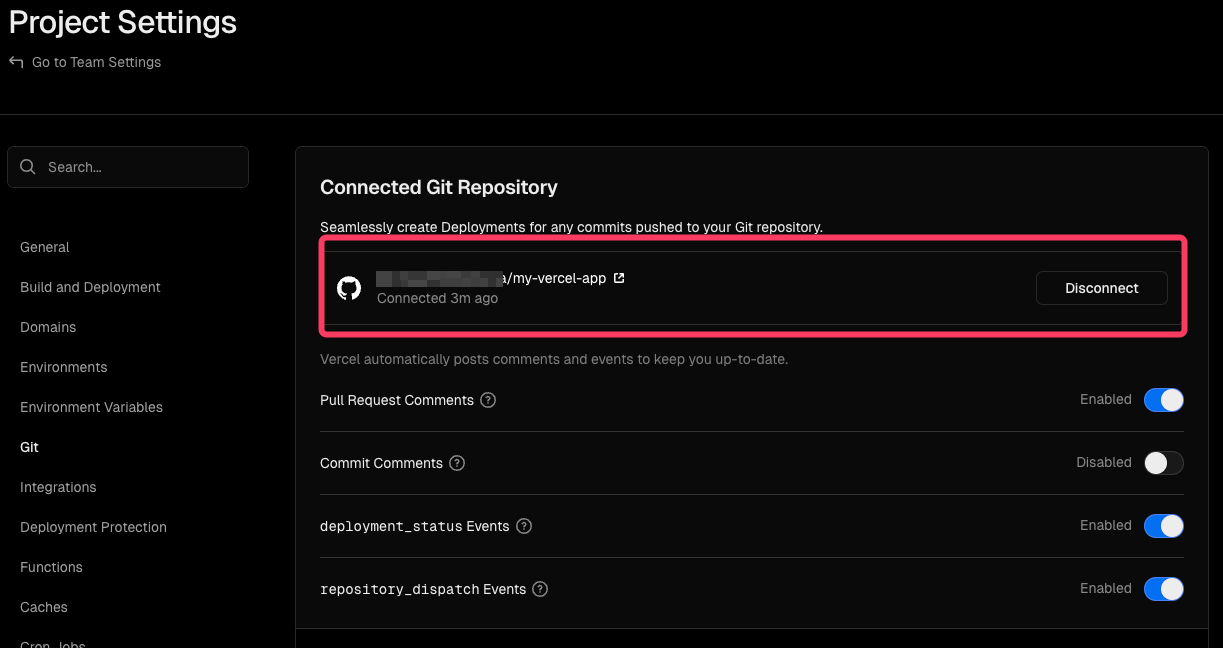
解説
GitHubと連携することで、push時に自動でPreviewデプロイが走ります。CI/CDが自然に組み込まれるのがVercelの魅力です。Githubのリポジトリ作成時にpublicを指定してください。privateだとGit Push後の自動デプロイは行えません。Git連携に失敗するときの多くは、github側でのgithub appのVercelアプリの権限設定問題が多いです。
9. テストとログ確認
リアルタイム監視実行画面(例)
コマンド
vercel logs https://my-vercel-app.vercel.app
解説
CLIから直接ログを確認可能です。
10. まとめ
この一連の流れで、Vercel CLIだけでアプリ開発〜デプロイ〜運用が完結します。UI操作を使わず、CLI中心で構築できることで、再現性が高く、チーム間のデモ共有にも最適です。またGithub連携でCI/CDも簡単い行えるのも素晴らしいです。
私のデモの多くはNode.js用に提供されたライブラリを多く使うので、Next.js Runtimeをメインで使っています。Edge Runtimeも興味はあるのですがその環境で作る良いデモがまだないのでお預けにしています。