はじめに
OpenCVで物体のBounding Boxを検出してみました。
機械学習で物体検出のモデルを作成する際には、画像にBounding Boxとラベルを付けた情報が必要となります。このアノテーション作業の効率化に役立てばと思います。
画像については、以下を前提としてしています。
- 対象とする物体は1つ(複数存在する場合、以下のコードでは最大のものを取得)
- 背景は白色もしくはそれに類する色(異なる場合、hsvで指定する値の範囲を変更する)
環境
言語はPython、環境はGoogle Colaboratoryを使用します。
コード
コード全体は以下です。
import cv2
import numpy as np

from google.colab.patches import cv2_imshow

img_path = "/path/to/image_file"

img = cv2.imread(img_path)

img2 = cv2.cvtColor(img, cv2.COLOR_BGR2HSV)
lower = np.array([0, 0, 0], dtype = "uint8")
upper = np.array([255, 50, 255], dtype = "uint8")
img2 = cv2.inRange(img2, lower, upper)
img2 = cv2.blur(img2, (2, 2))
ret, img2 = cv2.threshold(img2, 0, 255, cv2.THRESH_BINARY)
img2 = cv2.bitwise_not(img2)
contours, hierarchy = cv2.findContours(img2, cv2.RETR_TREE, cv2.CHAIN_APPROX_SIMPLE)
contours = max(contours, key=lambda x: cv2.contourArea(x))
x, y, w, h = cv2.boundingRect(contours)
img = cv2.rectangle(img, (x, y), (x+w, y+h), (0, 255, 0), 3)
cv2_imshow(img)
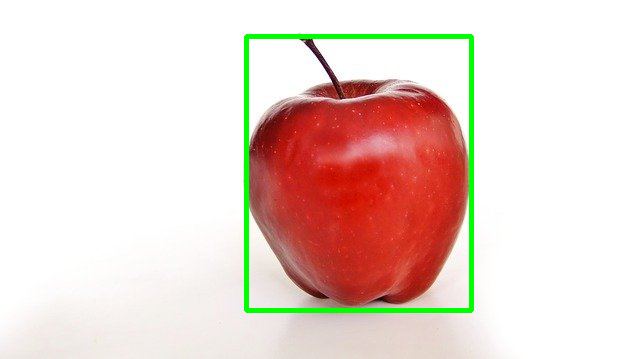
結果は以下です。

説明
以下、コードの内容を説明します。
まず、必要なライブラリをインストールします。
import cv2
import numpy as np

from google.colab.patches import cv2_imshow
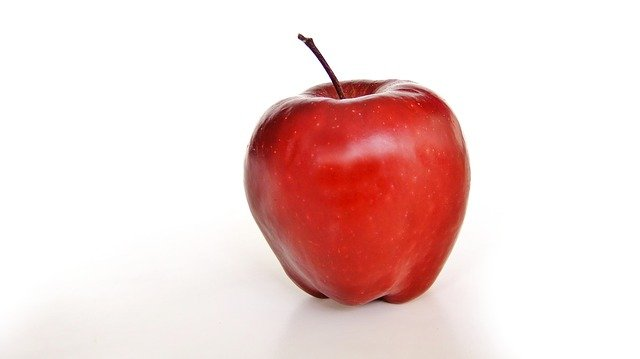
次に、画像を読み込みます。
元画像を表示すると以下になります。
img_path = "/path/to/image_file"

img = cv2.imread(img_path)
cv2_imshow(img)
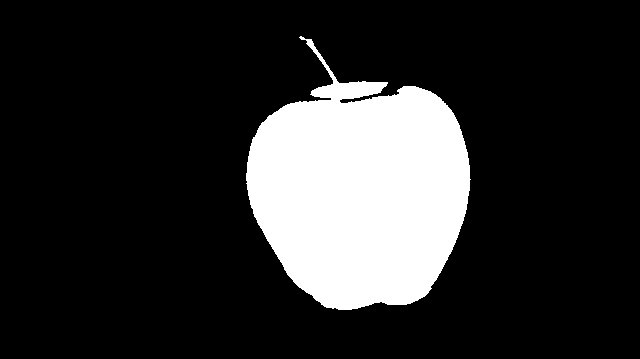
次に、以下の操作を行います。
- 画像をRGBからHSVに変換(RGBとHSVの関係についてはこちら)
- H,S,Vの値が指定した範囲内の色の部分のみ取り出す
- ノイズ除去のため、blur(ぼかし)処理を行う(「ぼかし、平滑化」についてはこちら )
- 二値化する(「二値化」についてはこちら)
- 白黒反転する
この画像を表示すると以下になります。
img2 = cv2.cvtColor(img, cv2.COLOR_BGR2HSV)
lower = np.array([0, 0, 0], dtype = "uint8")
upper = np.array([255, 50, 255], dtype = "uint8")
img2 = cv2.inRange(img2, lower, upper)
img2 = cv2.blur(img2, (2, 2))
ret, img2 = cv2.threshold(img2, 0, 255, cv2.THRESH_BINARY)

img2 = cv2.bitwise_not(img2)

cv2_imshow(img2)
最後に、以下の操作を行います。
- findContoursで輪郭を検出
- 検出した輪郭のうち、最大のものを取得
- 輪郭の外接矩形(Bounding Box)を取得
- Bounding Boxを描画
最終的に、Bounding Boxを描画した図を得ます。
contours, hierarchy = cv2.findContours(img2, cv2.RETR_TREE, cv2.CHAIN_APPROX_SIMPLE)
contours = max(contours, key=lambda x: cv2.contourArea(x))
x, y, w, h = cv2.boundingRect(contours)
img = cv2.rectangle(img, (x, y), (x+w, y+h), (0, 255, 0), 3)
cv2_imshow(img)