概要
BluemixのRaspberryPi登録レシピに登場するデバイス用のsampleプログラムは、Bluemixからのデータの受信によってシステム停止(Linuxのshutdownコマンド)のみ行える作りになっている。
Raspberry Pi 2にパーツを付け加えてBluemixからパーツを制御するには、sampleプログラムのソースコードを修正してビルドすれば良い。その方法を整理する。
※以下でやったことの反対方向(Bluemix→Raspberry Pi 2)をやってみる。
BluemixでRaspberryPi2のセンサーデータを拾う (1)仕組みの理解
BluemixでRaspberryPi2のセンサーデータを拾う (2)センサーを付けてデータを拾う 温度センサーデジタル編
BluemixでRaspberryPi2のセンサーデータを拾う (3)センサーを付けてデータを拾う 温度センサーアナログ編
BluemixでRaspberryPi2のセンサーデータを拾う (4)センサーを付けてデータを拾う 温度センサーデジタル編(リベンジ)
BluemixでRaspberryPi2のセンサーデータを拾う (5)センサーを付けてデータを拾う 温度・湿度・気圧まとめて採取編
番外編 『ムック「日経Linux ラズパイマガジン 2015年春号 」電子工作入門キット パーツセット』に入っていたもの
これから整理するにあたりきっとまた長い道のりになりそうなので、(1)Sampleプログラムの仕組みの整理と(2)どこをどのように変更すればよいのかを分けることにした。
(1) 仕組みの理解 (これ)
(2) アクチュエータを動かす 光編 RasPi2のオンボードLED
(3) アクチュエータを動かす 光編 外付けのLED
(4) アクチュエータを動かす 音編
前提
RaspberryPi2がBluemixのIoTFサービスに「レシピ」を使って接続済みであること。
構成のイメージ
IoTという構成で考えるとこんな感じ。下段ほどより具体的に。(図にしたい)
Internet → Things
クラウド → デバイス → アクチュエータ
Bluemix(IoT Foundation) → Raspberry Pi 2(sysfs) → アクチュエータ
↑ ↑
ポイント1,4 ポイント2,3
ポイント1 : MQTTプロトコルでJSONデータを受信
MQTTクライアントであるRaspberry Pi 2はMQTTプロトコルでsubscribeする。ソースコードはmqttPublisher.c
MQTTの構成要素
MQTTブローカー : BluemixのIoT Foundataionサービス
MQTTクライアント : デバイス用のsampleプログラム
MQTTの「トピック」はiotmain.cで次の通り指定している。
publish用 : iot-2/evt/status/fmt/json ※今回(Bluemix→RPi)は使わない。
subscribe用 : iot-2/cmd/reboot/fmt/json
char publishTopic[MAXBUF] = "iot-2/evt/status/fmt/json";
char subscribeTopic[MAXBUF] = "iot-2/cmd/reboot/fmt/json";
    if (isRegistered) {
        subscribe(&client, subscribeTopic);
    }
int subscribe(MQTTAsync* client, char *topic) {

    MQTTAsync_responseOptions opts = MQTTAsync_responseOptions_initializer;
    int rc = MQTTASYNC_SUCCESS;

    opts.onSuccess = onSubscription;
    opts.context = *client;

    if ((rc = MQTTAsync_subscribe(*client, topic, QOS, &opts))
            != MQTTASYNC_SUCCESS) {
#ifdef ERROR
        syslog(LOG_ERR, "Failed to subscribe, return code %d\n", rc);
#endif
        return rc;
    }

#ifdef INFO
    syslog(LOG_DEBUG, "Waiting for subscription "
            "on topic %s\n", topic);
#endif

    return rc;
}
MQTT Subscribe
init_mqtt_connection(&client, msproxyUrl, isRegistered, clientId, username, passwd);
int init_mqtt_connection(MQTTAsync* client, char *address, int isRegistered,
        char* client_id, char* username, char* passwd) {

    MQTTAsync_connectOptions conn_opts = MQTTAsync_connectOptions_initializer;

    MQTTAsync_SSLOptions sslopts = MQTTAsync_SSLOptions_initializer;

    int rc = MQTTASYNC_SUCCESS;
    MQTTAsync_create(client, address, client_id, MQTTCLIENT_PERSISTENCE_NONE,
    NULL);

    MQTTAsync_setCallbacks(*client, NULL, NULL, subscribeMessage, NULL);

#ifdef INFO
    syslog(LOG_INFO, "Connecting to %s with client Id: %s \n", address,
            client_id);
#endif
    conn_opts.keepAliveInterval = 20;
    conn_opts.cleansession = 1;
    conn_opts.onSuccess = onConnectSuccess;
    conn_opts.onFailure = onConnectFailure;
    conn_opts.context = client;
    //only when in registered mode, set the username/passwd and enable TLS
    if (isRegistered) {
        //currently only supported mech is token based. Need to change this in future.
        conn_opts.username = username;
        conn_opts.password = passwd;
        sslopts.trustStore = TRUSTSTORE;
        sslopts.enableServerCertAuth = 1;

        conn_opts.ssl = &sslopts;
    }

    if ((rc = MQTTAsync_connect(*client, &conn_opts)) != MQTTASYNC_SUCCESS) {
#ifdef ERROR
        syslog(LOG_ERR, "Failed to start connect, return code %d\n", rc);
#endif
    }
    return rc;
}
ポイント2 : JSONデータの分解
int init_mqtt_connection(MQTTAsync* client, char *address, int isRegistered,
        char* client_id, char* username, char* passwd) {
//省略
    MQTTAsync_setCallbacks(*client, NULL, NULL, subscribeMessage, NULL);
//省略
int subscribeMessage(void *context, char *topicName, int topicLen,
        MQTTAsync_message *message) {
    int i;
    char* payloadptr;
    char* command;
    int time_delay = 0;

    payloadptr = message->payload;

    time_delay = getDelay(payloadptr);
//省略
}
int getDelay(char *text) {
    cJSON *json;
    int delay = -1;

    json = cJSON_Parse(text);
    if (!json) {
        syslog(LOG_ERR, "JSON Parsing error : [%s]\n", cJSON_GetErrorPtr());
    } else {
        delay = cJSON_GetObjectItem(json, "delay")->valueint;
        cJSON_Delete(json);
    }

    return delay;
}
ポイント3 : システム(Raspberry Pi 2)の制御
    time_delay = getDelay(payloadptr);
    if(time_delay != -1) {
        sprintf(command,"sudo /sbin/shutdown -r %d", time_delay);
        syslog(LOG_INFO, "Received command to restart in %d minutes.",time_delay);
        system(command);
    } else
        syslog(LOG_ERR, "Invalid command received.");
BluemixからMQTTプロトコルを使って、トピック"iot-2/cmd/reboot/fmt/json"に以下のデータがpublishされるとshutdownコマンドが実行されるようになっている。
{"delay":1}
ポイント4 : BluemixからMQTTプロトコルでJSONデータを送信
MQTTの構成
BluemixのNode-REDアプリからMQTTプロトコルでpublishし、Raspberry Pi 2上のsampleプログラムからsubscribeする。
MQTTブローカー : BluemixのIoT Foundataionサービス
MQTTクライアント(pub) : BluemixのNode-REDアプリ ※Node-REDでなくても良い。
MQTTクライアント(sub) : デバイス用のsampleプログラム
MQTTのトピック : iot-2/cmd/reboot/fmt/json
MQTTのメッセージ : {"delay":1}
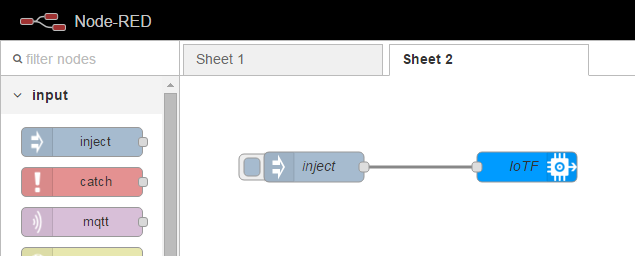
MQTTクライアント(publish)の構成
今回はNode-REDアプリとする。
「inject」ノードと「ibmiot out」ノードを使う。
injectノードの中身
着火するだけなので空っぽでよい。

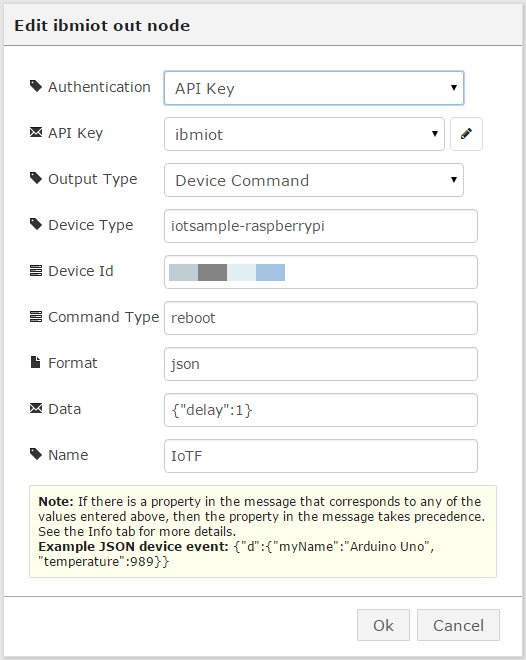
ibmiot outノードの中身
| 項目名 | 設定値 | 備考 |
|---|---|---|
| Output Type | Device Command | |
| Device Type | iotsample-raspberrypi | IoT Foundationで登録した通りに。 IoTFダッシュボードで確認可能 |
| Device Id | xxxxxxxxxxxx | RasPi上で以下のコマンドの出力する値# service iot getdeviceidIoTFダッシュボードで確認可能 |
| Command Type | reboot | トピックの一部になるため固定 |
| Format | json | トピックの一部になるため固定 |
| Data | {"delay":1} | 数字は何分後にシャットダウンするかで可変 |
| Name | IoTF | Node-RED上の表示名なだけなので何でもよい |
上記2つのノードを線でつないだら、右上の「Deploy」ボタンを押してデプロイする。
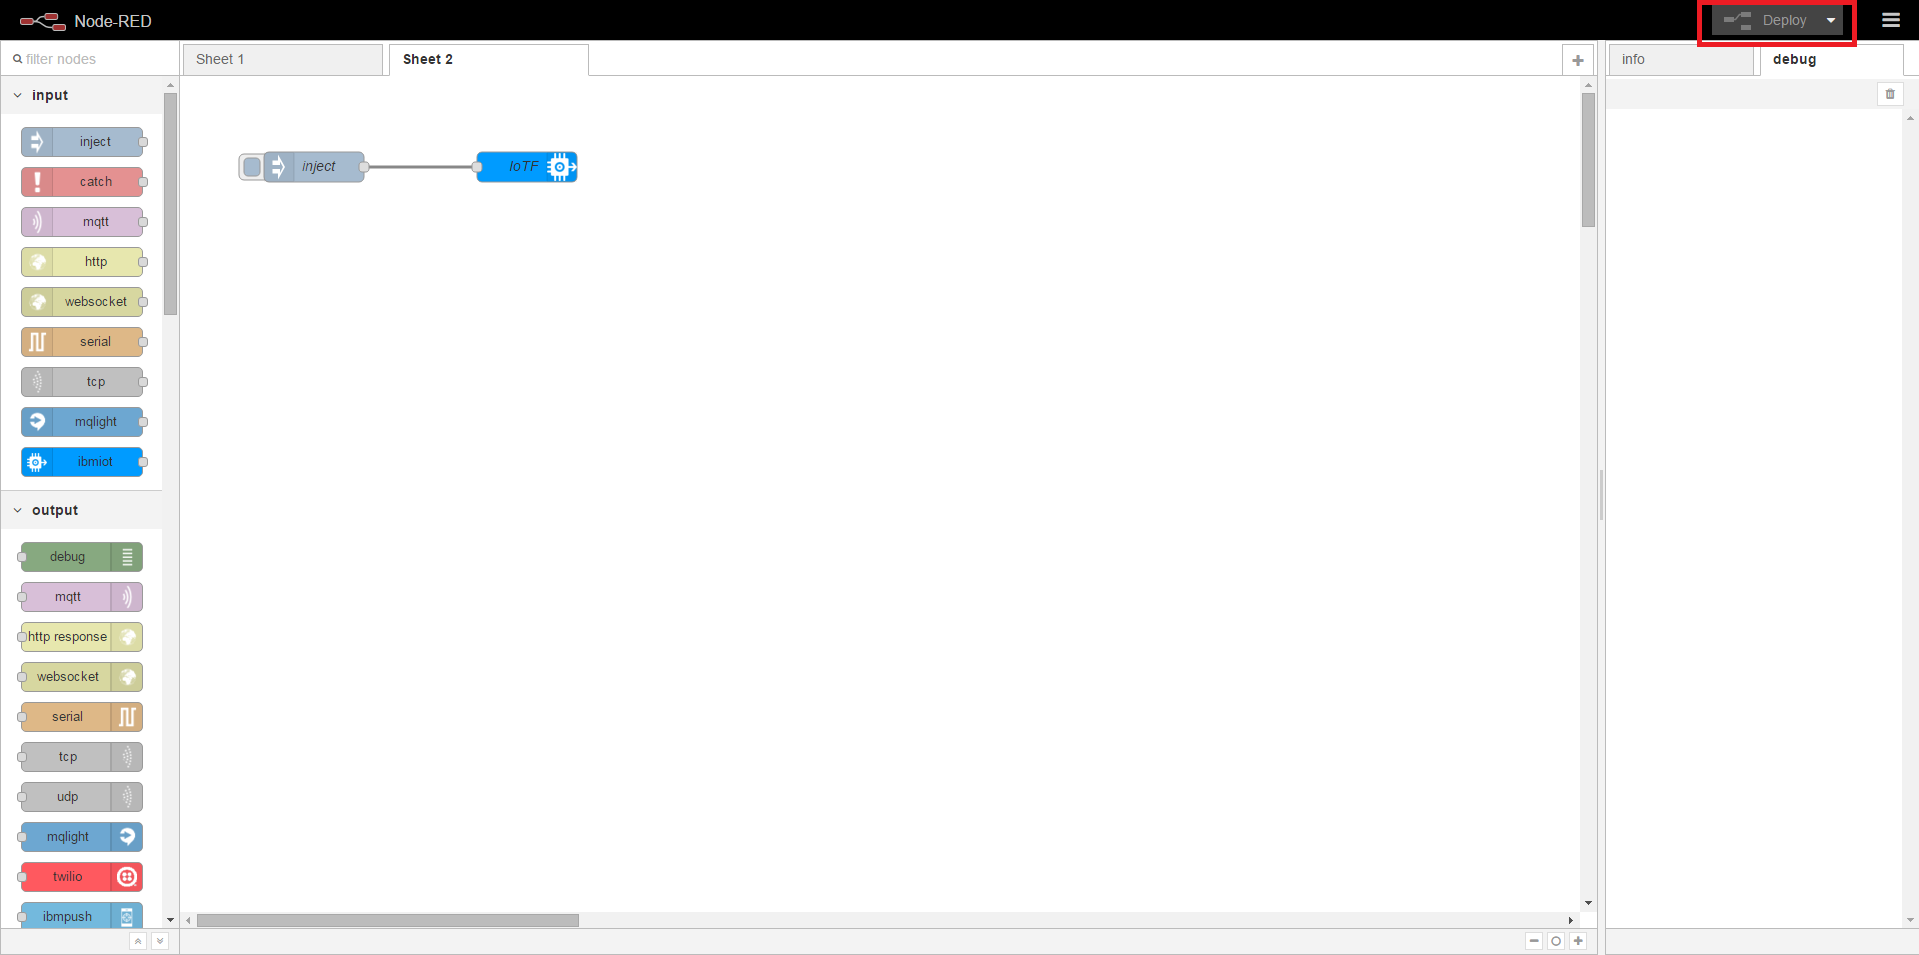
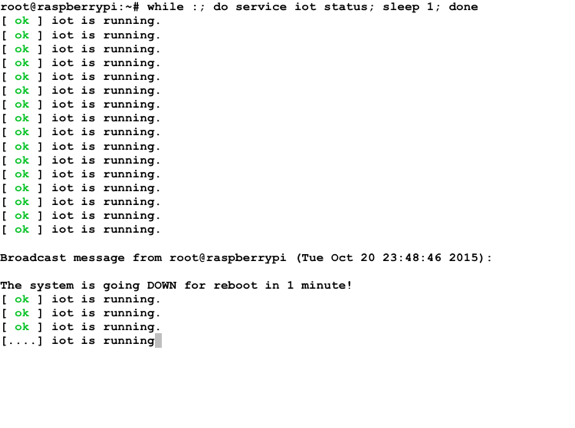
injectノードをポチッとすると、RasPi上でshutdownコマンドが実行される。
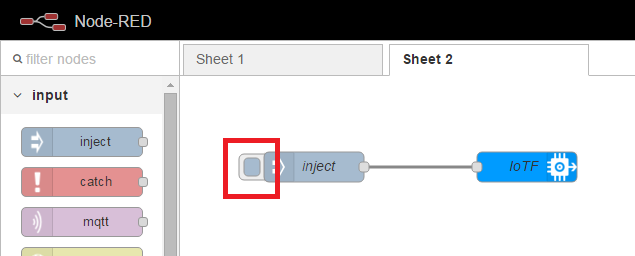
この例の場合は1分後にRasPi上でshutdown実施。
環境
Raspberry Pi 2 Model B
Raspbian
Bluemix IoT Foundation
Node-RED
参考
BluemixのRaspberryPi登録レシピ
https://developer.ibm.com/recipes/tutorials/raspberry-pi-4/
BluemixのRaspberryPi登録レシピに登場するデバイス用のsampleプログラム
(Linux用のdaemonになっている)
https://github.com/ibm-messaging/iot-raspberrypi/blob/master/samples/c/