はじめに
今回、Railsで使用できるGem byebugを使用したデバック方法があまり使用してなく、理解出来てなかったのでその使用方法などについて説明します。
導入方法
Gemfileに以下の記述があれば導入不要です。
Gemfile
group :development, :test do
  # Call 'byebug' anywhere in the code to stop execution and get a debugger console
  gem 'byebug', platforms: [:mri, :mingw, :x64_mingw]
end
導入されてない場合はbyebugをbundle installして下さい。
使用方法
確認したい所にbyebugの記述をします。
videos_controller.rb
class VideosController < ApplicationController

  before_action :move_to_index, except: [:index, :show]

  def index
    byebug ←アクション内に記述
    @videos = Video.order("created_at DESC").page(params[:page]).per(5)
  end
次にRails sでサーバーを立ち上げ該当のページへ移動します。するとbyebugが立ち上がり、コマンドを入力出来るようになります。
ターミナル
[2, 11] in /Users/samplename/projects/simonapp/app/controllers/videos_controller.rb
    2:
    3:   before_action :move_to_index, except: [:index, :show]
    4:
    5:   def index
    6:     byebug
=>  7:     @videos = Video.order("created_at DESC").page(params[:page]).per(5)
    8:   end
    9:
   10:   def new
   11:     @video = Video.new
(byebug)
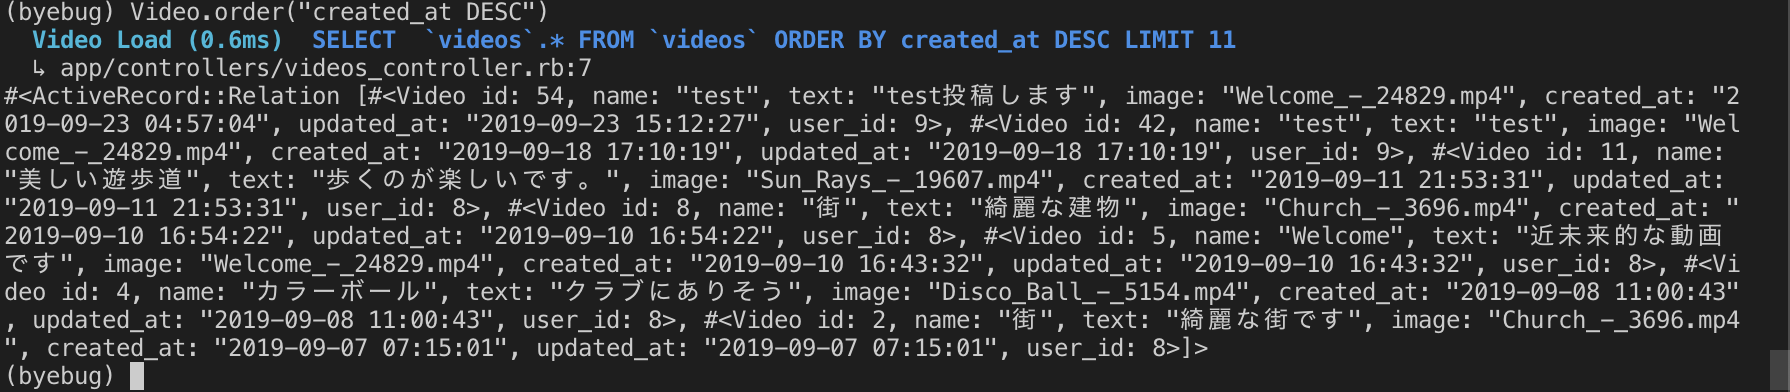
後はちゃんとデータが取れているか、入力して確認します。
今回はVideo.order("created_at DESC")でちゃんと中身が取得出来ているか確認しています。
成功した場合
失敗した場合

少し見難いですが、このようにbyebugを使用する事で値が取得出来てるか、など確認する事が出来ます。
コマンドのヘルプ表示はh終了はq!で出来ます。
最後に
デバッグツールを使用してのアプリ作成はあまり慣れてなかったので、今後さらに理解を深めて使いこなせるようになりたいと思います。
簡単な説明しかしてませんので、以下の記事も参考にして下さい。
参考資料
https://qiita.com/jnchito/items/5aaf323ab4f24b526a61#byebug%E3%82%92%E4%BD%BF%E3%81%A3%E3%81%9F%E3%83%87%E3%83%90%E3%83%83%E3%82%B0%E3%81%AE%E3%83%87%E3%83%A2
https://qiita.com/nishina555/items/e5886339d381db61b412