APIの作成についてはググるとSEO上位はExpressを使った方法でした。
今回はあえてライブラリを使わないNode.jsでやってみました。
APIとは
ネットワーク越しに利用できる関数。URLが関数名で引数を渡す事で結果が変化する。
参考サイト:WebAPIについての説明
こちらの記事がとても分かり易かったです。要するに普通の関数!
1. Webサーバーの実装
const http = require('http')
//Webサーバー実行
const svr = http.createServer(handler)
//ポート番号8000で受け付ける
svr.listen(8000)

function handler (req, res) {
  //HTTPヘッダーを出力
  res.writeHead(200, {'Content-Type': 'text/html'})
  res.end('<h1>Hello World</h1>')
}
handler()関数
http.createServerで呼び出しているhandler()関数は第1引数reqにリクエスト情報、第2引数resにレスポンス情報をもつオブジェクトを持っています。
ページにアクセスするとhandler()関数が実行され、今回はレスポンスとして「Hello World」が返ってきます。
ポート番号
ポート番号は自由に設定できますが、0~1023番はインターネット標準として予約されている為避けましょう。
指定したポート番号が別のアプリケーションで使われている場合動かないので要注意。
実行
ターミナルを使って実行します。
$ node main.js
実行したら下記URLでサーバーにアクセス出来ます。
http://localhost:8000
今回の実行結果では「Hallo Wrold」が表示されるのみです。
2.APIの実行
今回使うAPIはAikatsUP!(beta)です。IDを送ると該当するキャプ画の情報を持つオブジェクトが帰ってきます。
こちらを使って実装する内容は2つ。
・画像の取得
・画像の保存
まずは実装に必要なnpmモジュールを2つを追加します
axios
HTTP通信を行うために「axios」をインストール。
$ npm install --save axios
request
取得した画像を保存するために「request」をインストール。
$ npm install --save request
ディレクトリ構成は以下の通りです。
root/
 ├img/
 └main.js
以下ソース全文です。
const http = require('http')
const fs = require('fs')
const request = require('request')
const axios = require('axios');
const ctype = {'Content-Type': 'text/html;charset=utf-8'}

//APIの実行
async function getData() {
  const url = 'http://aikatsup.com/api/v1/search'
  return await axios.get(url, {
    params: {
      id: 3144
    }
  })
}

//画像の保存
function outPutImg(data) {
  request(data.image.url).pipe(fs.createWriteStream('img/' +data.id+ '_' +data.words+ '.jpg'))
}

function handler (req, res) {
  res.writeHead(200, ctype)

  getData().then((data) => {
    data = data.data.item
    outPutImg(data)
    resData = '<h1>' +data.id+ '_' + data.words + '</h1><img src=\"' +data.image.url+ '\" width=\"960\">'
    res.end(resData)
  }).catch(() => {
    resData = 'api通信失敗'
    res.end(resData)
  })
}

const svr = http.createServer(handler)
console.log('http://localhost:8000')
svr.listen(8000)
APIからデータを受け取る前にres.end()してしまうと何も表示されないので注意です。
ここではpromiseオブジェクトを受け取ってからres.end()しています。
ターミナルを使って実行します。
$ node main.js
 画像が取得できました。
/imgフォルダにもちゃんと保存されています。
画像が取得できました。
/imgフォルダにもちゃんと保存されています。
3.APIの作成
最後に先ほどの処理をAPI化します。
(APIを呼び出して画像を取得する処理をAPI化してます)
条件は「/getData」にGetメソッドでアクセスした時。
idを渡すと画像の取得保存をしてくれる「localhost:8000/getData」という名前の関数ですね!
ディレクトリ構成は以下の通りです。
root/
 ├img/
 ├index.html
 └main.js
クライアント側のソースです。
<!DOCTYPE html>
<html lang="ja">
<head>
  <meta charset="utf-8">
  <title>テスト</title>
</head>

<body>
  <p>ID入力</p>
  <form method="GET" action="/getData">
    <input type="text" name="id">
    <input type="submit" value="送信">
  </form>
</body>
</html>
次にサーバー側のソースです。
const http = require('http')
const fs = require('fs')
const querystring = require('querystring')
const url = require('url')
const request = require('request')
const axios = require('axios')
const ctype = {'Content-Type': 'text/html;charset=utf-8'}

async function getData(id) {
  const api = 'http://aikatsup.com/api/v1/search'
  return await axios.get(api, {
    params: {
      id: id
    }
  })
}

function outPutImg(data) {
  request(data.image.url).pipe(fs.createWriteStream('img/' +data.id+ '_' +data.words+ '.jpg'))
}

function handler (req, res) {
  if (req.url === '/' && req.method === 'GET') {
    fs.readFile(__dirname + '/index.html', {
      encoding: 'utf8'
    },
    function(err, html) {
      if (err) {
        res.statusCode = 500
        res.end('Error!')
      } else {
        res.writeHead(200, ctype)
        res.end(html)
      }
    });
  } else if (req.url.indexOf('/getData?') == 0 && req.method === 'GET') {
    res.writeHead(200, ctype)
    const id = url.parse(req.url, true).query.id;

    getData(id).then((data) => {
      data = data.data.item
      outPutImg(data)
      resData = '<h1>'+ data.words +'</h1><img src=\"'+ data.image.url +'\" width=\"960\">'
      res.end(resData);
    }).catch(() => {
      resData = 'api通信失敗'
      res.end(resData)
    })

  } else {
    res.statusCode = 404;
    res.end('NotFound')
  }
}

const svr = http.createServer(handler)
console.log('http://localhost:8000')
svr.listen(8000)
参考サイト:node.jsでGet/Postリクエストにレスポンスするサーバーを起動してみた
リクエストの内容を見てレスポンスを出し分ける処理がhandler()に書いています。
・ルートかつGetメソッドの場合はindex.htmlを表示。
・「/getData」にGetメソッドの場合はapiの実行です。
__dirname
fs.readFile(__dirname + '/index.html', {
カレントパスを取得できます。
index.Of()
} else if (req.url.indexOf('/getData?') == 0 && req.method === 'GET') {
index.Ofは指定した値が最初に現れたインデックスを返します。存在しない場合-1を返します。
クエリパラメーターが何もついていない場合はレスポンスコード404を返しています。
url.parse()
const id = url.parse(req.url, true).query.id;
ここでリクエストの内容からクエリパラメータの値のみを抜き出しています。
第1引数にURL、第2引数にクエリパラメーターをパースするか真偽値で選択できます。
trueにした場合返り値のオブジェクトのqueryパラメーターに値が格納されます。
参考サイト:Node.jsでURLをパースする
ターミナルから実行します。
$ node main.js
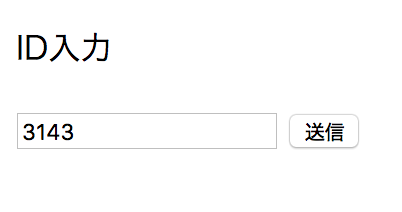
フォームにidを入力して送信します。

無事取得できました。img/にちゃんと保存もされています。