何度かWordpressをやっていて、サムネイルの扱いにコツがあったので共有します。
不満な点
- 自動的に複数サイズにカットされる機能がついているが、使わないサイズも出力されるので、サーバーの容量を圧迫されやすい。
- 指定サイズ以下の画像がアップロードされると、拡大したりカットしたりしてくれない。
- (管理画面)サムネイルから記事を見つけにくい
- ダミー画像を設定してくれない
まず、これを記入
functions.php
add_theme_support( 'post-thumbnails' );
サムネイル機能をオンにする。
余計な画像を排出しないようにする
管理画面 > 設定 > メディア で表示される
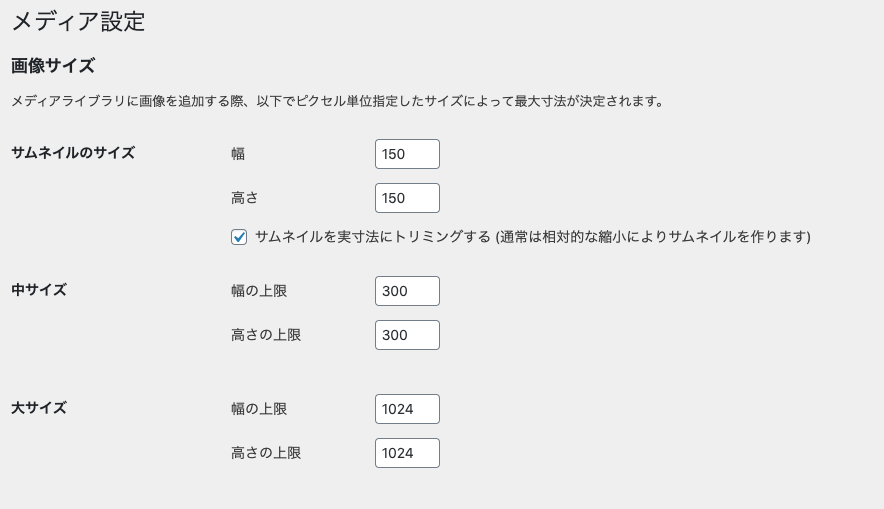
ここのサイズを全て0にすると、余分な画像サイズの画像が出力されない。
"アイキャッチ"を"サムネイル"に名前変更する
functions.php
function custom_post_labels( $labels ) {
    $labels->featured_image = 'サムネイル画像(推奨: **px : **px)'; // アイキャッチ画像
    $labels->set_featured_image = 'サムネイル画像を設定'; // アイキャッチ画像を設定
    $labels->remove_featured_image = 'サムネイル画像を削除'; // アイキャッチ画像を削除
    $labels->use_featured_image = 'サムネイル画像として使用'; // アイキャッチ画像として使用
    return $labels;
}
add_filter( 'post_type_labels_post', 'custom_post_labels' );
ちなみに、_postのpostをpageにすると固定ページに適用され、カスタム投稿名にするとカスタム投稿でも適用される。
メニューにサムネイルを挿入する
functions.php
    /**
     *  サムネイル画像表示
     */
    function customize_manage_posts_custom_column($column_name, $post_id) {
        if ( 'thumbnail' == $column_name) {
            $thum = get_the_post_thumbnail($post_id, 'small', array( 'style'=>'width:100px;height:auto;' ));
        } if ( isset($thum) && $thum ) {
            echo $thum;
        } else {
            echo __('None');
        }
    }
    add_action( 'manage_posts_custom_column', 'customize_manage_posts_custom_column', 10, 2 );
サムネイルがあるのと無いのとでは、該当記事を探すスピードが段違いだと思う。
参考サイトはこちら
大(1200px),中(600),小(300)設定する
functions.php
    add_image_size('large',1200,900);
    add_image_size('medium',600,450);
指定のサイズより大きくなった場合、縮小された画像を出力してくれる。
デザインにより、適宜変更。
1:1だと大きすぎるので、とりあえず4:3のにしておけば、不都合を感じることはないと思う。
近年のRetinaサイズやレスポンシブで画像サイズの変更も考慮すると、一回り大きいサイズの方が綺麗に出力される。
ダミー画像を作る
画像がない場合のダミー画像を準備する。大体グレー背景にロゴの画像を中央に置いている。
サムネイルサイズが複数ある場合、複数サイズ分を用意する。
ここで作る名前でおすすめなのが、dmy_post.jpgとdmy_カスタム投稿名.jpgで作ること。
画像の有無でURLを変更する関数を作る
functions.php
function post_thumbnail_set($size = 'medium', $dmy_slug = false)
{
    global $site_info;
    if (has_post_thumbnail()) {
        $url_setting = get_the_post_thumbnail_url(get_the_ID(),$size);
        return '<figure style="background-image:url('.$url_setting.');" class="imgBg"></figure>';
    } else {
        if ($dmy_id):
            return '<figure style="background-image:url('. get_stylesheet_directory_uri().'/' .'img/dmy_'.$dmy_slug.'.jpg)" class="imgBg"></figure>';
        else:
            return '<figure style="background-image:url('. get_stylesheet_directory_uri().'/' .'img/dmy_slug.jpg)" class="imgBg"></figure>';
        endif;
    }
}
記事ページで<?= post_thumbnail_set() ?>と記述すると、画像のURLを出力される。
変数を設定できて、例えば<?= post_thumbnail_set('large','event') ?>と記述すると、1200x900以内に収まった画像、もしくは、dmy_event.jpgが出力される。
サムネ用のCSSを設定する
style.css
figure.imgBg{
    background-repeat: no-repeat;
    background-size: cover;
    background-position: center center;
    width: 100%;
    height: 100%;
}
figureの周りを囲うdivに横幅と高さを設定すれば、サムネがちょうどいいサイズで表示される。