この記事はAngular #2 Advent Calendar 2019の 22 日目の記事です。
素晴らしいカレンダーに参加できて大変光栄です。企画の @lacolaco さんと Angular コミュニティの方々に感謝します。
Prologue
Angular 使いは皆ヒーローの背中を見て育ったと云います。
人材派遣会社がヒーローたちを管理するためのアプリケーションをモチーフにした、 Angular の公式チュートリアル Tour of Heroes。
モックデータのヒーローを自分が知っているヒーローに置き換える作業に熱中して、一体どれだけの時間が吸われていったでしょうか。

この記事では、Tour of Heroes をもう少しだけ Plus Ultra します。
文字通りチュートリアルに毛が生えたものですが、私のような Angular 初心者がさらに Angular 沼にはまっていくための足がかりになればと思います。
早速、ヒーローたちとの旅の続きを始めましょう。
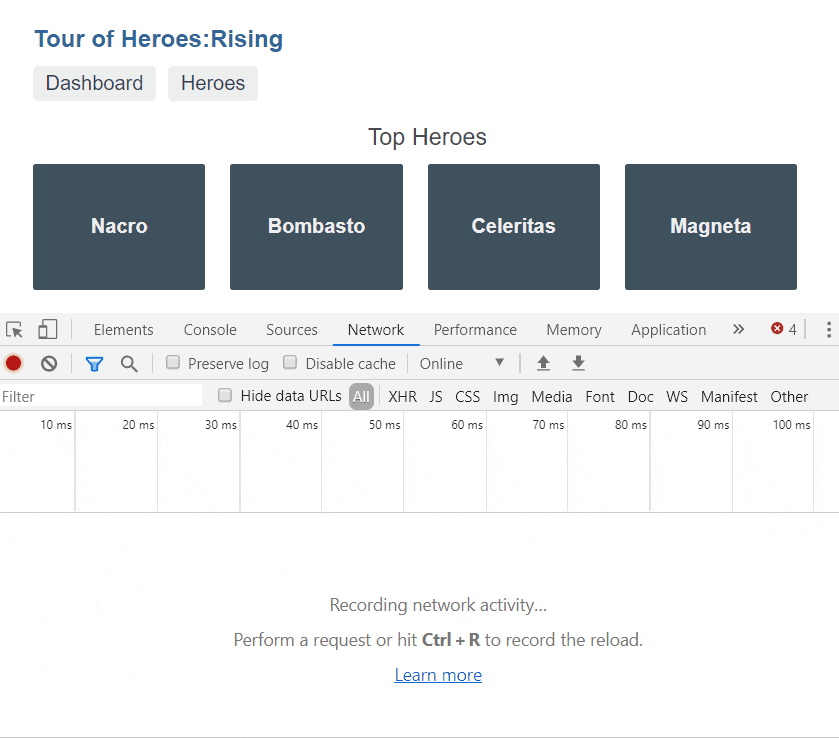
Hero is Lazy Loading:ヒーローは遅れてやってくる
Single Page Application では、初期ロード時にアプリケーション全体のソースをダウンロードします。
つまり、Villain が出てくる前からすべてのヒーローが揃って待ち構えているようなものです。
街の治安はめちゃくちゃ良くなりそうですが、ややドラマチックではありません。ただちに改善しましょう。
Angular の Router 機構を使って HeroDetailComponent を遅延ロードするように改造します。
遅延ロードを利用するにはモジュールを分割する必要があるため、HeroDetailComponent のみを持つモジュールを作成します。
import { NgModule } from '@angular/core';
import { CommonModule } from '@angular/common';
import { FormsModule } from '@angular/forms';
import { HeroDetailRoutingModule } from './hero-detail-routing.module';
import { HeroDetailComponent } from './hero-detail.component';

@NgModule({
  imports: [CommonModule, FormsModule, HeroDetailRoutingModule],
  declarations: [HeroDetailComponent]
})
export class HeroDetailModule {}
import { NgModule } from '@angular/core';
import { Routes, RouterModule } from '@angular/router';
import { HeroDetailComponent } from './hero-detail.component';

const routes: Routes = [{ path: ':id', component: HeroDetailComponent }];

@NgModule({
  imports: [RouterModule.forChild(routes)],
  exports: [RouterModule]
})
export class HeroDetailRoutingModule {}
AppModule(ルートモジュール)では HeroDetailComponent を import しているので消しておきましょう。
これからは HeroDetailModule が import してくれます。
続いて、AppRoutingModule の Route 定義を変更します。
const routes: Routes = [
  { path: '', pathMatch: 'full', redirectTo: '/dashboard' },
  { path: 'dashboard', component: DashboardComponent },
  { path: 'heroes', component: HeroesComponent },
  {
    path: 'detail',
    loadChildren: () =>
      import('./hero-detail/hero-detail.module').then(
        mdl => mdl.HeroDetailModule
      )
  }
];
これで、アプリケーション上でリクエストがあれば HeroDetailModule をダウンロードして HeroDetailComponent を表示させることができます。
助けを求める声を聞きつけてヒーローが登場するのです。
Virtual Heroes Crossover:ヒーローには仲間がいる
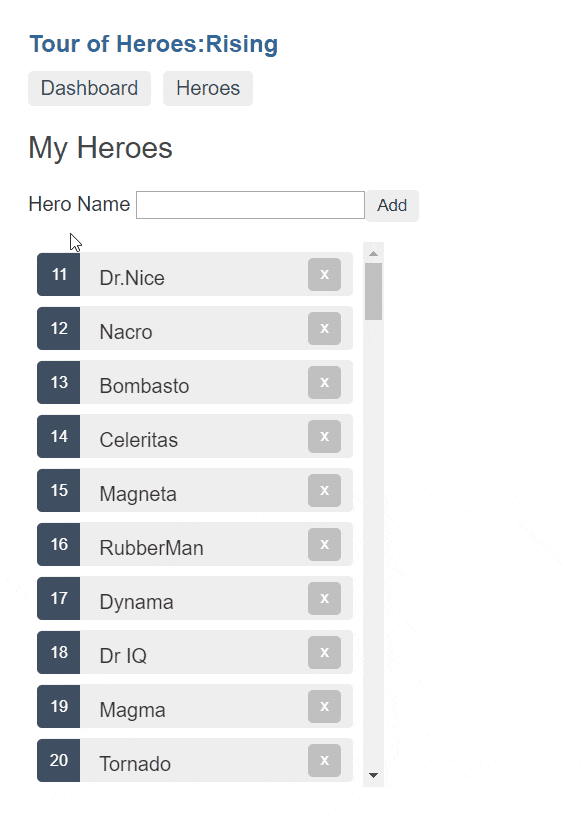
Tour of Heroes ではモックデータとして 10 人のヒーローを登録しました。
ですが、10 人では全地球上をカバーできません。Villain が常にニューヨークを襲うとは限らないのです。
さらにヒーローたちを増やして戦力を拡大しておきたいところですが、一気に大量のデータを表示してしまうとアプリケーションの身体が持ちません。
そんなときは、Angular CDK(Component Dev Kit)の Scrolling パッケージを使用して仮想スクロールを実装します。
仮想スクロールで表示する DOM の量を抑えることで、より多くのヒーローの仲間たちを増やしましょう。
Angular CDK を利用するには、別途パッケージをダウンロードしておく必要があります。
ng add @angular/cdk
Angular CDK をダウンロードし、Scrolling モジュールを import することで、仮想スクロールのための directive を使用できるようになります。
HeroesComponent に仮想スクロールを組み込み、より多くのヒーローの一覧できるようにします。
<ul class="heroes">
  <cdk-virtual-scroll-viewport itemSize="43" class="scroll-viewport">
    <li *cdkVirtualFor="let hero of heroes">
      <a routerLink="/detail/{{ hero.id }}">
        <span class="badge">{{ hero.id }}</span> {{ hero.name }}
      </a>
      <button class="delete" title="delete hero" (click)="delete(hero)">
        x
      </button>
    </li>
  </cdk-virtual-scroll-viewport>
</ul>
.scroll-viewport {
  width: 285px;
  height: 436px;
}
ヒーローのリストをcdk-virtual-scroll-viewportでラップし、*cdkVirtualForでヒーローを出力します。
itemSizeプロパティはヒーローの Height です。スクロールを正しく表示するために適切な数値を入れておきましょう。
これで、大量のヒーローを表示できる(ように見せる)ことができます。
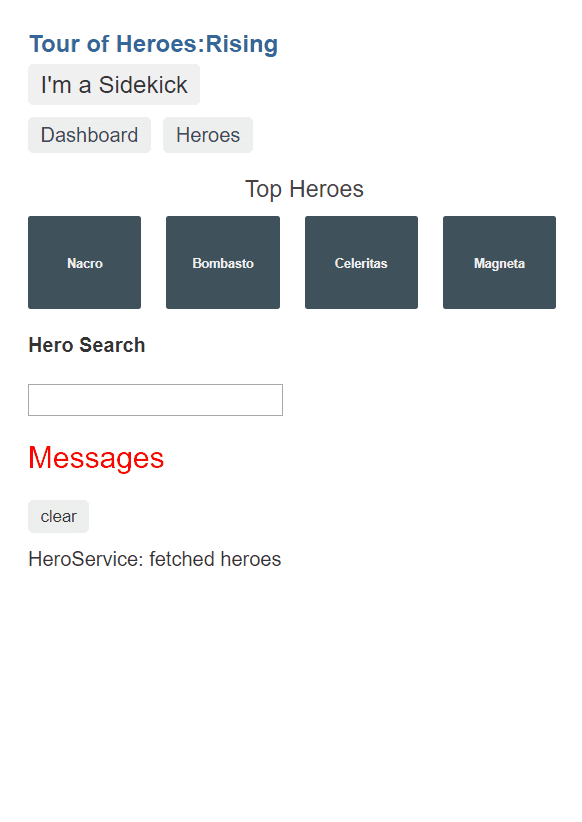
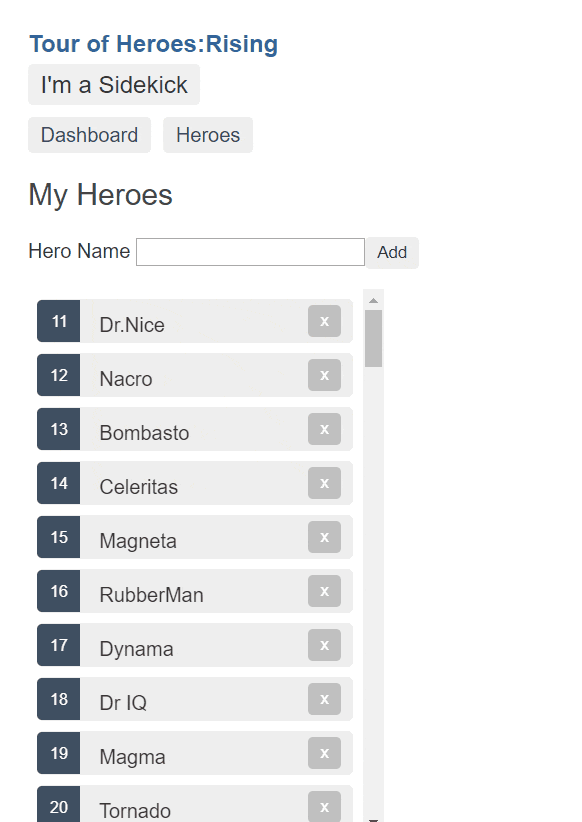
True Self Guard:ヒーローは素顔を隠すもの
Tour of Heroes アプリケーションでは、ユーザの誰もがヒーローの追加や削除、名前の変更ができてしまいます。
ヒーローのアイデンティティは誰でも気軽に触れてよいものではありません。
ここではヒーローの良き理解者であるサイドキックのみがヒーローのデータを更新できるようにしましょう。
まずはサイドキックかどうかを認証するサービスが必要です。
認証方法は(めんどくさいので)サイドキックにしか見ることのできない不思議なボタンを押すことにしておきます。
import { Injectable } from '@angular/core';

@Injectable({
  providedIn: 'root'
})
export class AuthService {
  private authorization: boolean = false;

  get isSidekick(): boolean {
    return this.authorization;
  }

  authorize(): void {
    this.authorization = !this.authorization;
  }
}
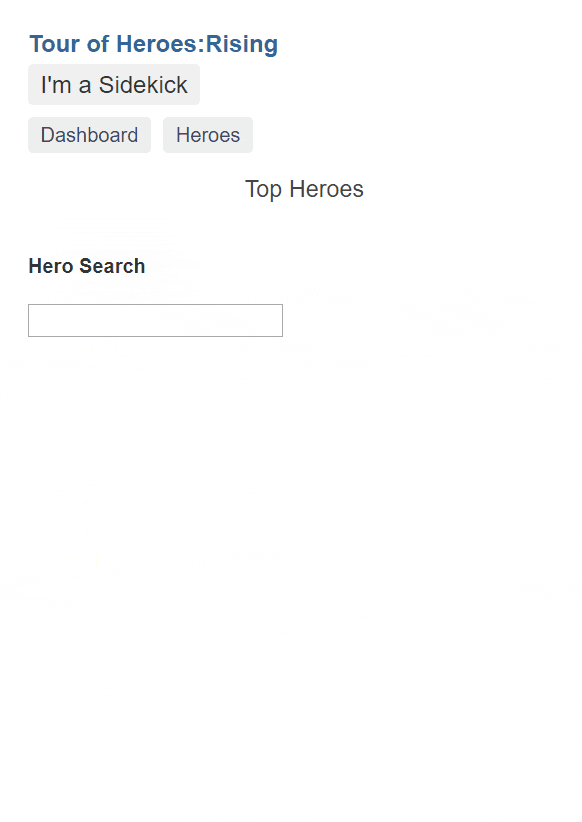
<h1>{{ title }}</h1>
<button
  (click)="authService.authorize()"
  [class.authorized]="authService.isSidekick"
>
  I'm a Sidekick
</button>
<nav>
  <a routerLink="/dashboard">Dashboard</a>
  <a routerLink="/heroes">Heroes</a>
</nav>
<router-outlet></router-outlet>
<app-messages></app-messages>
button {
  border: none;
  cursor: pointer;
  margin-top: 5px;
  padding: 5px 10px;
  border-radius: 4px;
  font-family: Arial;
  font-size: 1.2em;
  &.authorized {
    background: red;
    color: white;
    font-family: Impact;
  }
}
この認証サービスを使って、HeroesComponent の delete ボタンを制御します。
これで誰かの手が滑ってヒーローが消滅することはなくなりました。
<button
  class="delete"
  title="delete hero"
  (click)="delete(hero)"
  [disabled]="!authService.isSidekick"
>
  x
</button>
ですが、まだこれで十分ではありません。
ヒーローをクリックすると HeroDetailComponent になり、名前を変更することができてしまいます。
Guard を使用してルーティングを制御しておきましょう。
import { Injectable } from '@angular/core';
import {
  CanActivate,
  ActivatedRouteSnapshot,
  RouterStateSnapshot,
  CanLoad,
  Route,
  UrlSegment
} from '@angular/router';
import { AuthService } from './auth.service';

@Injectable({
  providedIn: 'root'
})
export class AuthGuard implements CanActivate, CanLoad {
  constructor(private authService: AuthService) {}

  canActivate(
    next: ActivatedRouteSnapshot,
    state: RouterStateSnapshot
  ): boolean {
    return this.authService.isSidekick;
  }

  canLoad(route: Route, segments: UrlSegment[]): boolean {
    return this.authService.isSidekick;
  }
}
HeroDetailComponent はすでに遅延ロードモジュールになっているので、canActivate(遷移可能かどうか)とcanLoad(ダウンロード可能か)の 2 つの判定関数を実装しておきます。
この Guard クラスをルーティングモジュールに読み込ませておけば、関数の戻り値が false だった場合にルーティング処理がキャンセルされます。
{
  path: 'detail',
  canActivate: [AuthGuard],
  canLoad: [AuthGuard],
  loadChildren: () =>
    import('./hero-detail/hero-detail.module').then(
      mdl => mdl.HeroDetailModule
    )
}
これでヒーローのアイデンティティは守られました。
ヒーローのごく身近なサイドキックだけがヒーローデータを更新することができます。
Heroes in Action:ヒーローは躍動する
ヒーローには常人をはるかに超えたエネルギーと行動力があり、それにより世界を救ってくれます。
ただ静かに管理されるだけのヒーローなんておそらく存在しないでしょう。
Angular Animation を使って、ヒーローたちの躍動を画面上で表現してみましょう。
Angular Animation では、CSS アニメーションをベースとしてアニメーションを記述することができます。
アニメーションの記述に必要なのは以下の 2 種類の要素です。
- 状態(state)
あるべき状態に名前(open、close など)を付け、CSS スタイル(open の場合は background-color: red、close の場合は background-color: blue など)を決定する - 遷移(transition)
状態が変化したときの遷移の方法(何秒かけてアニメーションするかなど)を指定する
これらの要素をまとめてtriggerを作り、trigger を HTML 要素にバインドしてアニメーションさせます。
これらの機能を使用するには、BrowserAnimationsModule を import しておくことが必要です。
import したら、まずは HeroesComponent のヒーローリストにスライドインのアニメーションを追加してみましょう。
全員が同じタイミングで出てきても野暮ったいだけなので、少しずつタイミングを変えて現れるようにします。
import { trigger, transition, animate, style, stagger, query } from '@angular/animations';

@Component({
  selector: 'app-heroes',
  templateUrl: './heroes.component.html',
  styleUrls: ['./heroes.component.scss'],
  animations: [
    trigger('slideIn', [
      transition('* => *',
        query(':enter', [
            style({ transform: 'translateX(-30px)', opacity: 0 }),
            stagger(100, animate(300))
          ],
          { optional: true }
        )
      )
    ])
  ]
})
@Component デコレーターのanimationsに記述したものが、「slideIn」と名前を付けた trigger です。
この slideIn トリガーを HTML 要素に紐づけます。トリガーを記述する際は「@」の接頭辞を付けます。
@slideIn に対してプロパティバインディングすると、「状態」を指定することになります。
ここでは適当にheroes.lengthを渡してデータの GET 時に trigger が稼働するようにしておきましょう。
<ul class="heroes">
  <cdk-virtual-scroll-viewport
    itemSize="43"
    class="scroll-viewport"
    [@slideIn]="heroes.length"
  >
    <li *cdkVirtualFor="let hero of heroes">
      <a routerLink="/detail/{{ hero.id }}">
        <span class="badge">{{ hero.id }}</span> {{ hero.name }}
      </a>
      <button
        class="delete"
        title="delete hero"
        (click)="delete(hero)"
        [disabled]="!authService.isSidekick"
      >
        x
      </button>
    </li>
  </cdk-virtual-scroll-viewport>
</ul>
これでヒーローリストのヒーローたちが左から右へ颯爽と登場するようになりました。
次は、同様の手順でダッシュボードのヒーローたちが回転するようにします。
import { trigger, transition, animate, style, stagger, query } from '@angular/animations';

@Component({
  selector: 'app-dashboard',
  templateUrl: './dashboard.component.html',
  styleUrls: ['./dashboard.component.scss'],
  animations: [
    trigger('rotate', [
      transition('* => *',
        query(':enter', [
            style({ transform: 'rotateY(180deg)', opacity: 0 }),
            stagger(100, animate(800))
          ],
          { optional: true }
        )
      )
    ])
  ]
})
<div class="grid grid-pad" [@rotate]="heroes.length">
  <a
    *ngFor="let hero of heroes"
    class="col-1-4"
    routerLink="/detail/{{ hero.id }}"
  >
    <div class="module hero">
      <h4>{{ hero.name }}</h4>
    </div>
  </a>
</div>
これでダッシュボードのヒーローたちが華麗に舞いながら登場するようになりました。
心なしか、より頼もしく見えてきたような気がするのではないでしょうか。
Epilogue
ヒーローたちの活躍により世界に平和が訪れました。
Tour of Heroes:Rising もここで一区切りとなりますが、Angular Way は果てしなく続いていきます。
あなたが Angular を使い続ける限り、ヒーローはあなたの良き支えとなってくれることでしょう。
願わくば、あなたが Angular ソースコードの平和を守るヒーローでありますように。
明日のAngular #2 Advent Calendar 2019 23 日目の担当は @Jialipassion さんです。お楽しみに!