はじめに
この記事はPyLadies Japan Advent Calendar 2019の14日目の記事です。
Alibaba Cloud Image Searchのハンズオンのコンテンツを作成するにあたり、インタラクティブに、そしてハンズオン参加者はコピペをすればImage Searchを動かせるアプリにしたいと考えました。
Image Searchは機械学習レスな類似画像検索エンジンであり、PaaSとして利用できるのですが、検索結果をjson形式で返してくれるだけなので、人間が解読するためにはCSV形式に整形したり、jsonを元に画像を表示させる必要がありました。
そこで白羽の矢が立ったのがJupyter Notebookでした。
今回初めてJupyter Notebookを使い、IPythonやipywidgetsとも出会い、そのGUIベースでインタラクティブにPythonを実行できる機能に驚き、そして時に苦戦しながら、ハンズオンを作ってきました。
今回は、そのコンテンツの中で特に工夫したり、自信が楽しめた話をまとめます。
試したこと
画像をJupyter Notebookにアップロードする
Image Searchで画像検索をする際、画像をリクエストボディとして渡す必要があります。そのため、ローカルPCから任意の画像をJupyter Notebookにアップロードできるフォームを作りました。
画像をリサイズする
Image Searchで画像検索をする際の画像には、幅・高さが200px ~ 1024px以内である条件があります。そのため、アップロードされた任意の画像をリサイズする機能を作りました。
画像をトリミングする
背景に不要が物体が写っている場合、Image Searchの精度を上げるために、画像をトリミングしたいこともあります。そのため、アップロードされてリサイズされた画像をトリミングするフォームを作りました。
プルダウンを作る
Image Searchには登録済みの数値属性や文字列属性を元に、検索条件を付与して検索ができます。そのため、検索条件を選択できるプルダウンのフォームを作りました。
HTMLベースで画像を表示する
Image Searchは検索結果として画像ファイル名を返します。また、Alibaba Cloud OSSというストレージサービスに画像を格納しています。そのため、画像ファイル名を元にOSSに格納してある画像に対して、有効期限付き署名付きURLを発行し、そのURLをHTMLで描画する機能を作りました。
具体的なコード内容
画像をJupyter Notebookにアップロードしてリサイズする
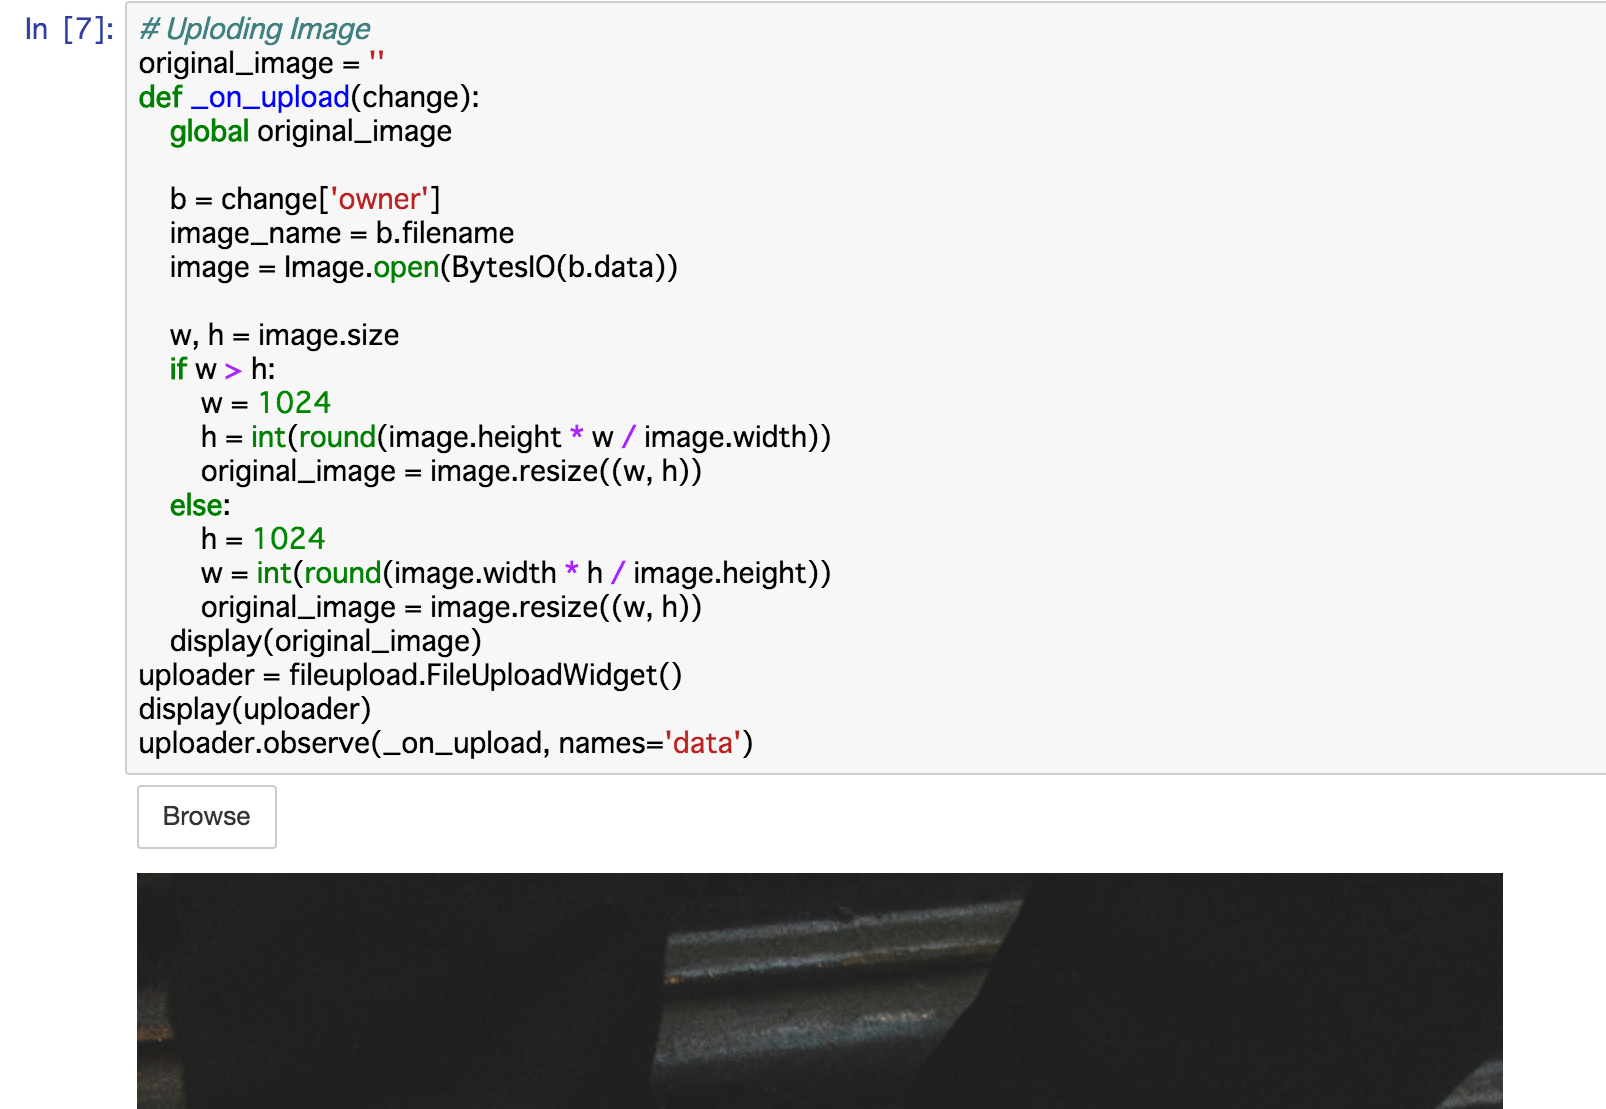
fileuploadというライブラリを使いました。実行するとボタンが表示され、画像を1枚アップロードできます。
Pillowというライブラリを使用し、画像をリサイズしました。
from IPython.display import display
from PIL import Image
import ipywidgets as widgets
import fileupload

# Uploding Image
def _on_upload(change):
    b = change['owner']
    image_name = b.filename
    image = Image.open(BytesIO(b.data))

    w, h = image.size
    if w > h:
        w = 512
        h = int(round(image.height * w / image.width))
        original_image = image.resize((w, h))
    else:
        h = 512
        w = int(round(image.width * h / image.height))
        original_image = image.resize((w, h))
    display(original_image)
uploader = fileupload.FileUploadWidget()
display(uploader)
uploader.observe(_on_upload, names='data')
実行結果
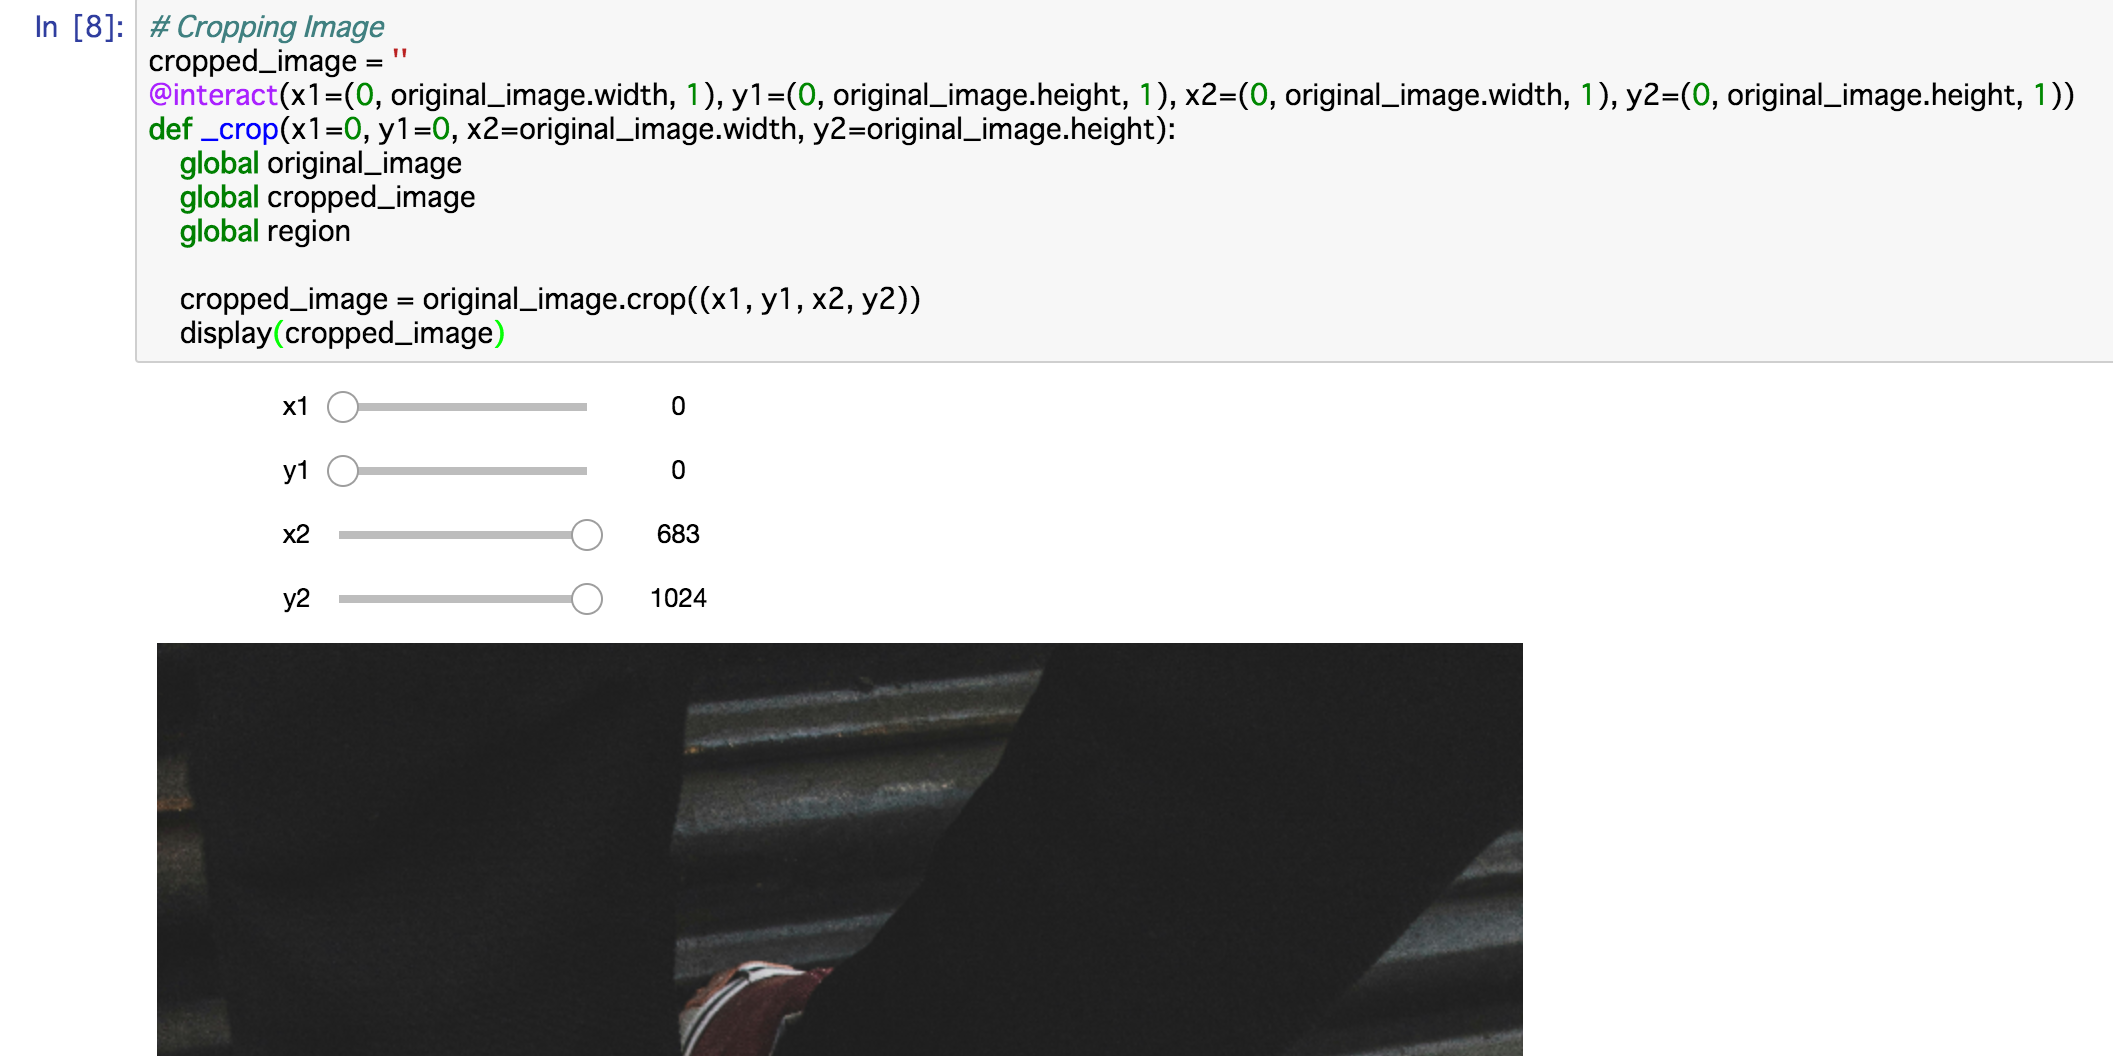
画像をトリミングする
ipywidgetsというライブラリを使い、数値つまみを4個作成しました。それぞれのつまみで指定された数値を元に、先程のPillowで画像をトリミングしました。
from IPython.display import display
from ipywidgets import interact

# Cropping Image
@interact(x1=(0, original_image.width, 1), y1=(0, original_image.height, 1), x2=(0, original_image.width, 1), y2=(0, original_image.height, 1))
def _crop(x1=0, y1=0, x2=original_image.width, y2=original_image.height):
    global original_image

    cropped_image = original_image.crop((x1, y1, x2, y2))
    display(cropped_image)
実行結果
プルダウンを作る
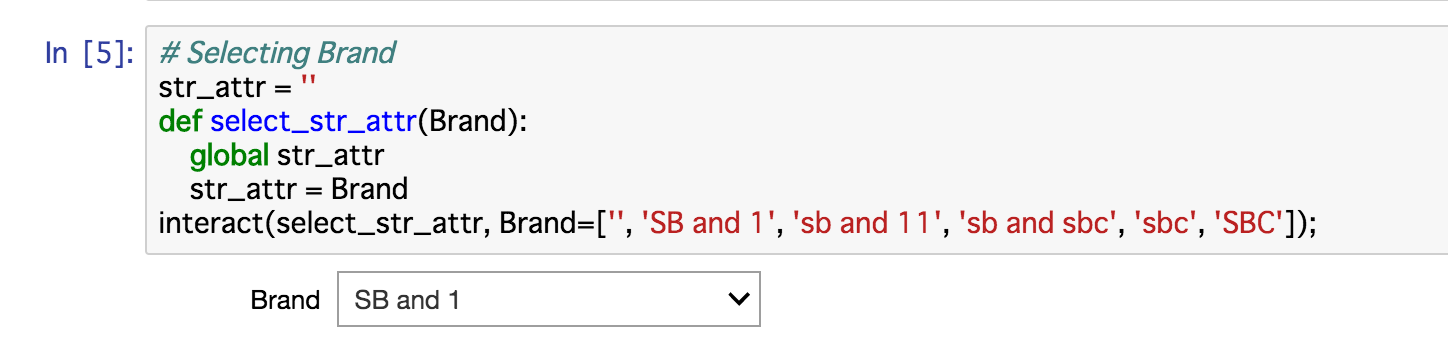
文字列プルダウン
ipywidgetsのInteractというライブラリを使い、文字列を選択できるプルダウンを作成しました。
from ipywidgets import interact

# Selecting Brand
def select_str_attr(Brand):
    str_attr = Brand
interact(select_str_attr, Brand=['', 'SB and 1', 'sb and 11', 'sb and sbc', 'sbc', 'SBC']);
実行結果
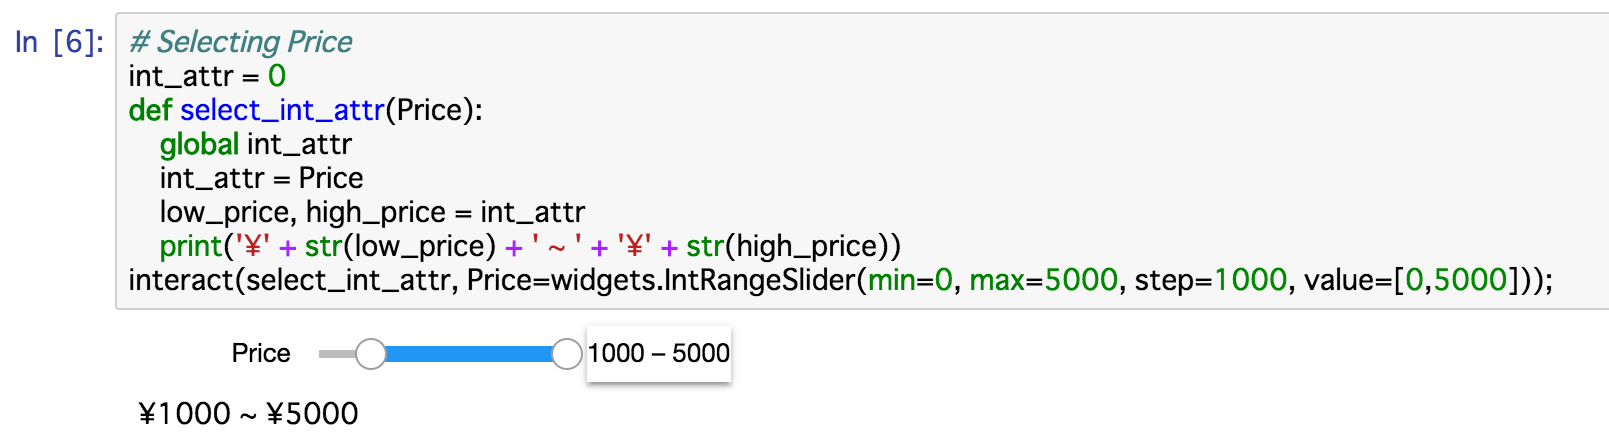
数値つまみ
ipywidgetsのIntRangeSliderという関数で2方向で調節できるつまみを作成しました。
from ipywidgets import interact
import ipywidgets as widgets

# Selecting Price
def select_int_attr(Price):
    int_attr = Price
    low_price, high_price = int_attr
    print('¥' + str(low_price) + ' ~ ' + '¥' + str(high_price))
interact(select_int_attr, Price=widgets.IntRangeSlider(min=0, max=5000, step=1000, value=[0,5000]));
実行結果
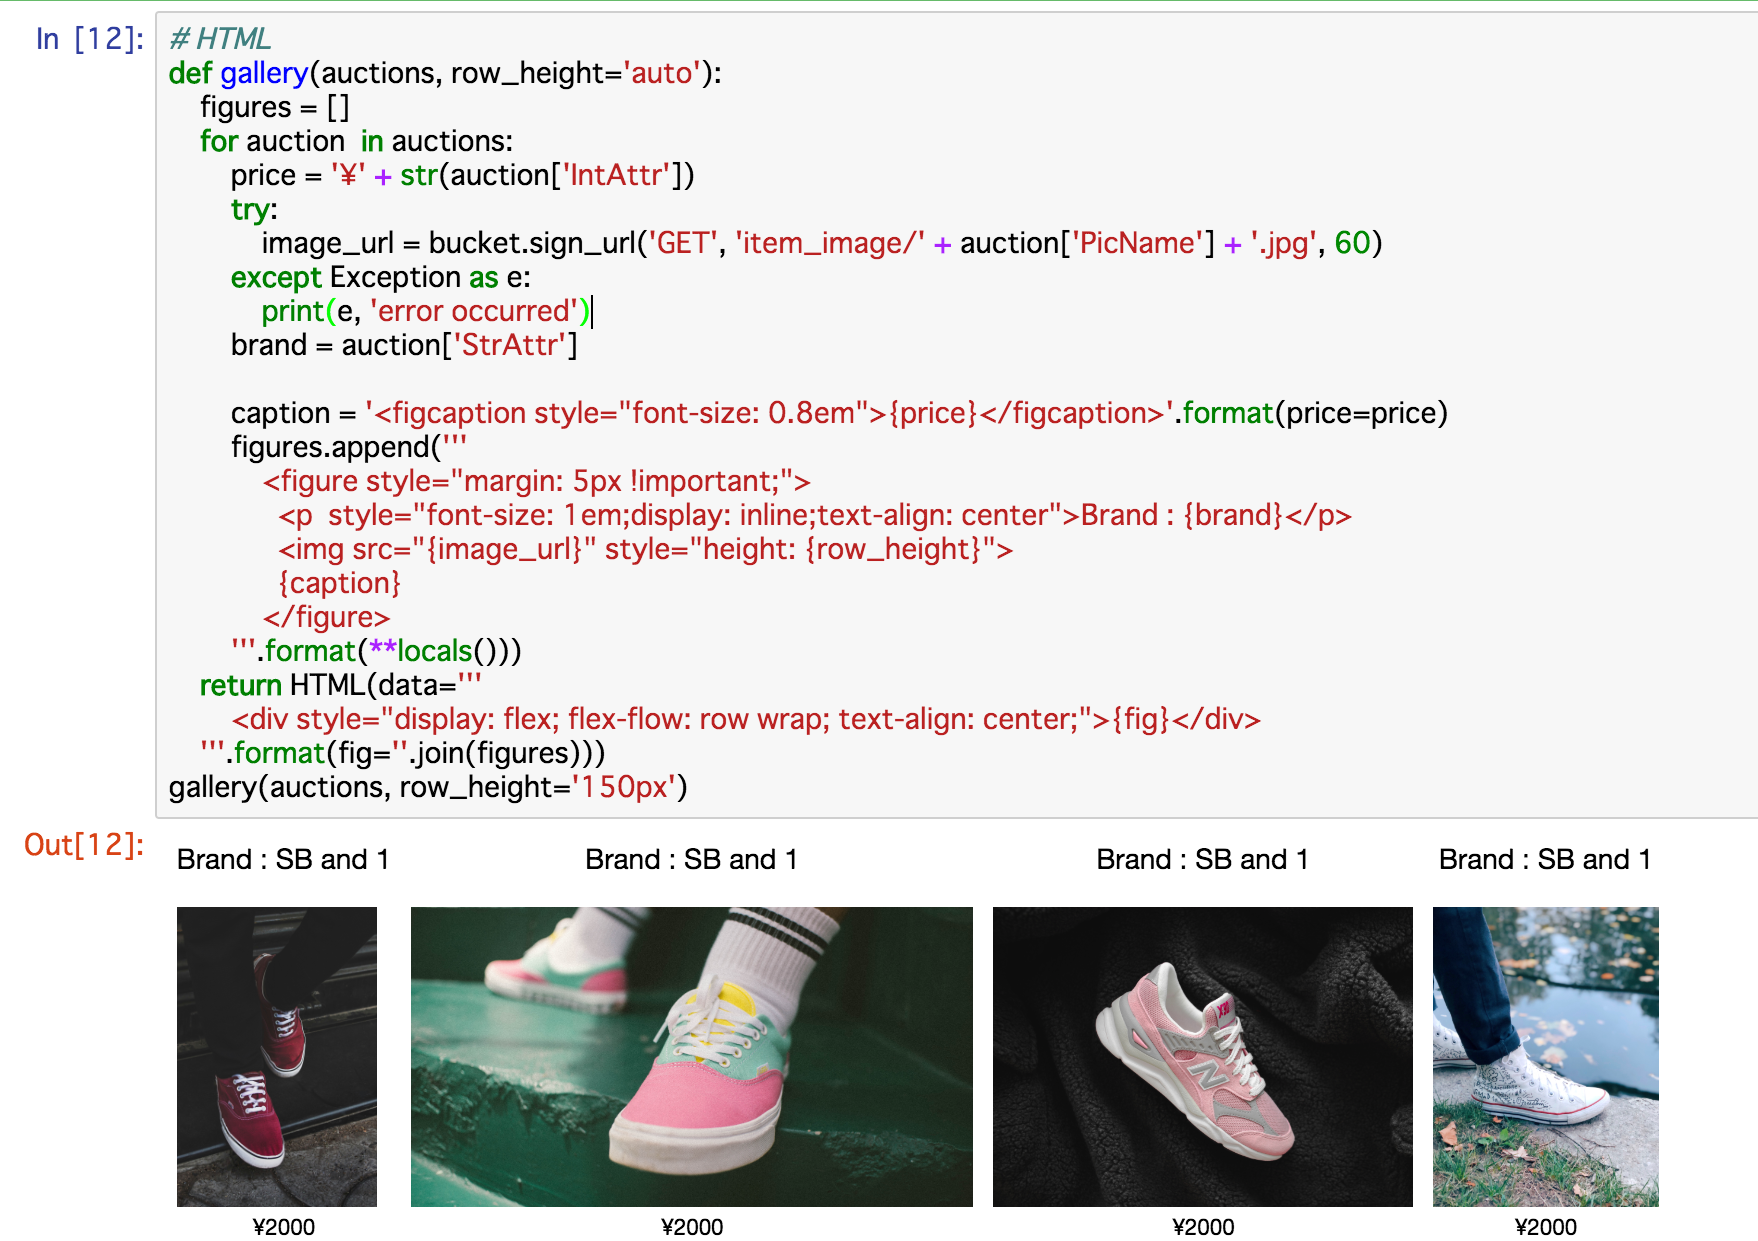
HTMLベースで画像を表示する
IPythonのdisplayというライブラリを使い、HTMLを描画しました。
# HTML
from IPython.display import HTML

def gallery(auctions, row_height='auto'):
    figures = []
    for auction  in auctions:
        price = '¥' + str(auction['IntAttr'])
        try:
            image_url = bucket.sign_url('GET', 'item_image/' + auction['PicName'] + '.jpg', 60)
        except Exception as e:
            print(e, 'error occurred')
        brand = auction['StrAttr']

        caption = '<figcaption style="font-size: 0.8em">{price}</figcaption>'.format(price=price)
        figures.append('''
            <figure style="margin: 5px !important;">
              <p  style="font-size: 1em;display: inline;text-align: center">Brand : {brand}</p>
              <img src="{image_url}" style="height: {row_height}">
              {caption}
            </figure>
        '''.format(**locals()))
    return HTML(data='''
        <div style="display: flex; flex-flow: row wrap; text-align: center;">{fig}</div>
    '''.format(fig=''.join(figures)))
gallery(auctions, row_height='150px')
実行結果
まとめ
Image Searchは機械学習レスなサービスではありますが、Jupyter Notebook上で機械学習に使用されるライブラリ各種を使用することにより、機械学習のような研究要素のある使い方ができました。実際にImage Searchを使ったアプリを開発する際は、Image Searchのレスポンスを見ながら、どのような画像を登録・検索すれば意図した検索結果が出てくるのかを検証する過程が出てきます。その際は、GUIベースでコマンドの逐次実行ができるJupyter Notebookの使用をお勧めします。