はじめに
今回はユーザーが入力した値を基に、線グラフを表示するという機能を実装してみましたので、その方法についてまとめておきます。
線グラフの描画方法につきましては、以下の記事を参考にさせていただきました。とても参考になりました。
この記事の実装で出来ること
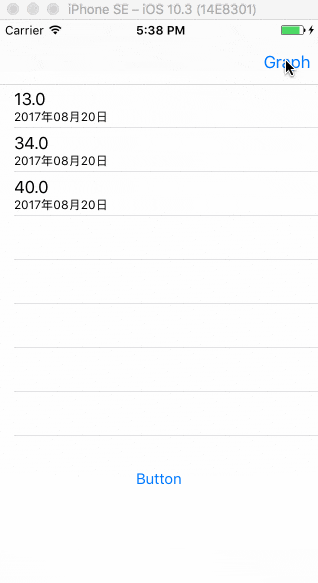
ユーザーが入力したデータを基に、以下のGIFのようにグラフを描画することができます。
実装
●AppDelegate.swift
AppDelegate.swift
import UIKit

@UIApplicationMain
class AppDelegate: UIResponder, UIApplicationDelegate {

    var window: UIWindow?

    var graphPointArray:[String] = []
    var labelDateArray:[String] = []
    var graphDataArray:[CGFloat] = []

    func application(_ application: UIApplication, didFinishLaunchingWithOptions launchOptions: [UIApplicationLaunchOptionsKey: Any]?) -> Bool {
    // Override point for customization after application launch.

        return true
    }
// ----- 以下略 ----
●GraphDataVC.swift - データを入力、管理する画面 -
GraphDataVC.swift
import UIKit

class GraphDataVC:UIViewController, UIPickerViewDelegate, UIPickerViewDataSource {

    // - 変数宣言
    // Array: PickerViewに表示するデータ
    var percent = ["0","1","2","3","4","5","6","7","8","9"
        ,"10","11","12","13","14","15","16","17","18","19",
         "20","21","22","23","24","25","26","27","28","29",
         "30","31","32","33","34","35","36","37","38","39",
         "40","41","42","43","44","45","46","47","48","49",
         "50","51","52","53","54","55","56","57","58","59",
         "60","61","62","63","64","65","66","67","68","69",
         "70","71","72","73","74","75","76","77","78","79",
         "80","81","82","83","84","85","86","87","88","89",
         "90","91","92","93","94","95","96","97","98","99",
         "100"]

    // TextField:データ入力時に使用する
    var textField: UITextField!

    // textFieldのtext
    var textFieldText = ""

    // alertControllerでOKを押した時のアクション
    var otherAction: UIAlertAction!

    // Button: データの入力を開始する為のボタン
    @IBOutlet weak var dataTableView: UITableView!

    // PickerView: ドラムロールでの入力に使用する
    var pickerView: UIPickerView!

    override func viewDidLoad(){
        super.viewDidLoad()

        // PickerViewを生成
        pickerView = UIPickerView()
        pickerView.selectRow(0, inComponent: 0, animated: true) // 初期値
        pickerView.frame = CGRect(x: 0, y: 50, width: view.bounds.width * 0.85, height: 150) // 配置、サイズ
        pickerView.dataSource = self
        pickerView.delegate = self


    }

    override func viewWillAppear(_ animated: Bool) {
        super.viewWillAppear(true)

    }

    override func didReceiveMemoryWarning(){
        super.didReceiveMemoryWarning()
    }

    // MARK: TableView
    func tableView(_ tableView: UITableView, numberOfRowsInSection section: Int)->Int {
        let appDelegate = UIApplication.shared.delegate as! AppDelegate
        return appDelegate.graphPointArray.count
    }

    func tableView(_ tableView: UITableView, cellForRowAtIndexPath indexPath: IndexPath)->UITableViewCell {


        let cell: UITableViewCell = UITableViewCell(style: UITableViewCellStyle.subtitle, reuseIdentifier: "Cell")
        let appDelegate = UIApplication.shared.delegate as! AppDelegate

        cell.textLabel?.text = "\(appDelegate.graphDataArray[indexPath.row])"
        cell.detailTextLabel?.text = appDelegate.graphPointArray[indexPath.row]

        return cell
    }

    // MARK: Button
    @IBAction func addDataButtonTapped(_ sender: AnyObject) {
        self.navigationController?.setNavigationBarHidden(true, animated: true)

        let appDelegate = UIApplication.shared.delegate as! AppDelegate


        let alertController = UIAlertController(title: "新しくデータを追加", message: "数値を入力して下さい。", preferredStyle: .alert)

        let cancelAction = UIAlertAction(title: "Cancel", style: .default){
            action in print("Cancelが押された!")
            self.navigationController?.setNavigationBarHidden(false, animated: true)
        }

        otherAction = UIAlertAction(title: "Done", style: .default){
            action in print("Doneが押された!")

            let textToNum = NumberFormatter().number(from: self.textField.text!)

            //入力されたデータをgraphDatasに追加
            appDelegate.graphDataArray.append(textToNum as! CGFloat)

            //現在の日付をgraphPointsに追加
            let now = Date()
            let dateFormatter = DateFormatter()
            dateFormatter.locale = Locale(identifier: "ja_JP")
            dateFormatter.dateFormat = "yyyy年MM月dd日"
            let dateString = dateFormatter.string(from: now)

            appDelegate.graphPointArray.append(dateString)

            //label用の配列にStringデータを
            let dateFormatter2 = DateFormatter()
            dateFormatter2.locale = Locale(identifier: "ja_JP")
            dateFormatter2.dateFormat = "MM/dd"
            let dateString2 = dateFormatter2.string(from: now)

            appDelegate.labelDateArray.append(dateString2)

            print("graphDatasの内容:\(appDelegate.graphDataArray)")
            print("graphPointsの内容:\(appDelegate.graphPointArray)")


            self.dataTableView.reloadData()

            self.navigationController?.setNavigationBarHidden(false, animated: true)

        }

        otherAction.isEnabled = false
        // alertControllerのCancelボタンのactionを追加
        alertController.addAction(cancelAction)
        // alertControllerの
        alertController.addAction(otherAction)

        //textFieldの追加
        alertController.addTextField(configurationHandler: {(textField: UITextField!) -> Void in

            textField.tag = 1
            textField.placeholder = "達成率を入力"
            textField.inputView = self.pickerView

            self.textField = textField

            //self.textField!.addTarget(self, action: #selector(GraphDataVC.textFieldEditing(_:)), for: UIControlEvents.editingDidBegin)
            let toolbar = UIToolbar(frame: CGRect(x: 0, y: 0, width: 0, height: 35))
            let doneItem = UIBarButtonItem(barButtonSystemItem: .done, target: self, action: #selector(GraphDataVC.pickerdone))
            //let cancelItem = UIBarButtonItem(barButtonSystemItem: .cancel, target: self, action: #selector(GraphDataVC.pickercancel))
            toolbar.setItems([doneItem], animated: true)
            textField.inputAccessoryView = toolbar
        })
        present(alertController, animated: true, completion: nil)
    }

    func searchBySearchBarText(_ textF: UITextField) {
        switch textF.tag {
            case 1: textFieldText = textF.text!
            default: break
        }
        otherAction.isEnabled =  textFieldText.characters.count > 0 ? true : false
    }

    func textField(_ textField: UITextField, shouldChangeCharactersIn range: NSRange, replacementString string: String) -> Bool {
        let delayTime = DispatchTime.now() + Double(Int64(100 * Double(NSEC_PER_MSEC))) / Double(NSEC_PER_SEC)
        DispatchQueue.main.asyncAfter(deadline: delayTime) {
            self.searchBySearchBarText(textField)
        }
        return true
    }

    // MARK: PickerView
    //表示列
    func numberOfComponents(in pickerView: UIPickerView) -> Int {
        return 1
    }

    //表示個数
    func pickerView(_ pickerView: UIPickerView, numberOfRowsInComponent component: Int) -> Int {
        return percent.count
    }

    //表示内容
    func pickerView(_ pickerView: UIPickerView, titleForRow row: Int, forComponent component: Int) -> String? {
        return percent[row] as String
    }

    //選択時
    func pickerView(_ pickerView: UIPickerView, didSelectRow row: Int, inComponent component: Int) {
        print("列: \(row)")
        print("値: \(percent[row])")
        textField.text = percent[row]
        textFieldText = percent[row]
        searchBySearchBarText(UITextField())
    }

    func pickercancel() {
        textField.text = ""
        textField.endEditing(true)
    }

    func pickerdone() {
        textField.endEditing(true)
    }
}
●GraphViewController.swift
GraphViewController.swift
import UIKit

var viewWidth:CGFloat!
var viewHeight:CGFloat!

let screenWidth:CGFloat = UIScreen.main.bounds.size.width
let screenHeight:CGFloat = UIScreen.main.bounds.size.height

class GraphViewController: UIViewController {

    override func viewDidLoad() {
        super.viewDidLoad()

        let appDelegate = UIApplication.shared.delegate as! AppDelegate

        viewWidth = self.view.frame.width
        viewHeight = self.view.frame.height

        let graphview = GraphView() //グラフを表示するクラス
        graphview.drawLineGraph() //グラフ描画開始

        _ = appDelegate.graphDataArray
        _ = appDelegate.labelDateArray

        self.view.addSubview(graphview)

        //labelの描画
        let label0 = UILabel(frame: CGRect(x: 20, y: viewHeight-50, width: 35, height: 20));
        label0.text = "0%"
        label0.font = UIFont.systemFont(ofSize: 11);//文字サイズ
        self.view.addSubview(label0)

        let label25 = UILabel(frame: CGRect(x: 15, y: viewHeight-40-(viewHeight-120)/4-10, width: 35, height: 20));
        label25.text = "25%"
        label25.font = UIFont.systemFont(ofSize: 11);//文字サイズ
        self.view.addSubview(label25)

        let label50 = UILabel(frame: CGRect(x: 15, y: viewHeight-40-((viewHeight-120)/4)*2-10, width: 35, height: 20));
        label50.text = "50%"
        label50.font = UIFont.systemFont(ofSize: 11);//文字サイズ
        self.view.addSubview(label50)

        let label75 = UILabel(frame: CGRect(x: 15, y: viewHeight-40-((viewHeight-120)/4)*3-10, width: 35, height: 20));
        label75.text = "75%"
        label75.font = UIFont.systemFont(ofSize: 11);//文字サイズ
        self.view.addSubview(label75)

        let label100 = UILabel(frame: CGRect(x: 10, y: viewHeight-40-((viewHeight-120)/4)*4-10, width: 35, height: 20));
        label100.text = "100%"
        label100.font = UIFont.systemFont(ofSize: 11);//文字サイズ
        self.view.addSubview(label100)

    }

    override func viewWillAppear(_ animated: Bool) {
        super.viewWillAppear(true)
        let graphview = GraphView()
        let appDelegate = UIApplication.shared.delegate as! AppDelegate

        _ = appDelegate.graphDataArray
        _ = appDelegate.labelDateArray
        graphview.setNeedsDisplay()
        graphview.MemoriGraphDraw()
    }

    override func didReceiveMemoryWarning(){
        super.didReceiveMemoryWarning()
    }

}
●GraphView.swift
GraphView.swift
import UIKit


// GraphViewControllerのviewDidLoadとviewWillAppearで呼び出される.
// -- viewDidLoad -- 最初の画面生成を実施する時にグラフを描画する為に使用する
// -- viewWillAppear -- backボタンが謳歌された時にグラフの状態を更新する為に使用する。

// あとはこのデータをDBを使ってやりくりすれば、グラフをうまく使用することが可能


class GraphView: UIView {

    var lineWidth:CGFloat = 3.0 //グラフ線の太さ
    var lineColor:UIColor = UIColor(red:0/256,  green:239/256,  blue:155/256, alpha:1) //グラフ線の色
    var circleWidth:CGFloat = 4.0 //円の半径
    var circleColor:UIColor = UIColor(red:0/256,  green:239/256,  blue:155/256, alpha:1) //円の色


    var memoriMargin: CGFloat! //横目盛の感覚
    var graphHeight: CGFloat = screenHeight-120 //グラフの高さ
    var numOfGD: CGFloat!


    func drawLineGraph(){
        GraphFrame()
        MemoriGraphDraw()
    }

    //グラフを描画するviewの大きさ
    func GraphFrame(){
        self.backgroundColor = UIColor(red:0.7,  green:0.7,  blue:0.7, alpha:0.5)
        self.frame = CGRect(x: 40 , y: 80, width: viewWidth - 60, height: viewHeight - 120)
    }


    //===================================
    //横目盛・グラフを描画する
    //===================================


    func MemoriGraphDraw() {

        let appDelegate = UIApplication.shared.delegate as! AppDelegate

        numOfGD = CGFloat(appDelegate.graphDataArray.count)
        memoriMargin = (viewWidth-40)/numOfGD

        var count:CGFloat = 0
        for _ in appDelegate.graphPointArray {

            let label = UILabel()
            label.text = appDelegate.labelDateArray[0]
            label.font = UIFont.systemFont(ofSize: 9)
            //ラベルのサイズを取得
            let frame = CGSize(width: 250, height: CGFloat.greatestFiniteMagnitude)
            let rect = label.sizeThatFits(frame)

            //ラベルの位置
            var labelX = viewWidth-20
            //(count * memoriMargin)-rect.width/2
            //最後のラベル
            if Int(count+1) == appDelegate.graphPointArray.count{
                labelX = viewWidth-20
            }

            label.frame = CGRect(x: labelX , y: graphHeight, width: rect.width, height: rect.height)
            self.addSubview(label)

            count += 1

            self.addSubview(label)
        }
    }


    //=========================================
    //グラフのデータストロークの線を描画
    //=========================================


    override func draw(_ rect: CGRect) {

        let appDelegate = UIApplication.shared.delegate as! AppDelegate

        var count:CGFloat = 0
        let linePath = UIBezierPath()
        var myCircle = UIBezierPath()

        numOfGD = CGFloat(appDelegate.graphDataArray.count)
        memoriMargin = (viewWidth-60)/numOfGD

        print("numOfGD:\(numOfGD)")
        print("memoriMargin:\(memoriMargin)")

        linePath.lineWidth = lineWidth
        lineColor.setStroke()

        for datapoint in appDelegate.graphDataArray {
            // もともとは"count+1"
            if Int(count) < appDelegate.graphDataArray.count {
                //datapoint[10]/100*(viewHeight-circleWidth)
                var nowY: CGFloat = datapoint/yAxisMax
                //* (graphHeight - circleWidth)

                nowY = graphHeight - nowY

                if(appDelegate.graphDataArray.min()!<0){
                    nowY = (datapoint - appDelegate.graphDataArray.min()!)/yAxisMax * (graphHeight - circleWidth)
                    nowY = graphHeight - nowY
                }

                //次のポイントを計算
                var nextY: CGFloat = 0
                nextY = appDelegate.graphDataArray[Int(count)]/yAxisMax * (graphHeight - circleWidth)
                print("nextY1:\(nextY)")
                nextY = graphHeight - nextY
                print("nextY2:\(nextY)")

                if(appDelegate.graphDataArray.min()!<0){
                    nextY = (appDelegate.graphDataArray[Int(count+1)] - appDelegate.graphDataArray.min()!)/yAxisMax * (graphHeight - circleWidth)
                    nextY = graphHeight - nextY - circleWidth
                }

                //最初の開始地点を指定
                var circlePoint:CGPoint = CGPoint()
                if Int(count) == 0 {
                    linePath.move(to: CGPoint(x: count * memoriMargin + circleWidth, y: nowY))
                    circlePoint = CGPoint(x: count * memoriMargin + circleWidth, y: nowY)
                    myCircle = UIBezierPath(arcCenter: circlePoint,radius: circleWidth,startAngle: 0.0,endAngle: CGFloat(M_PI*2),clockwise: false)
                    circleColor.setFill()
                    myCircle.fill()
                    myCircle.stroke()
                }

                //描画ポイントを指定
                linePath.addLine(to: CGPoint(x: (count+1) * memoriMargin, y: nextY))

                //円をつくる
                circlePoint = CGPoint(x: (count+1) * memoriMargin, y: nextY)
                myCircle = UIBezierPath(arcCenter: circlePoint,
                                        // 半径
                    radius: circleWidth,
                    // 初角度
                    startAngle: 0.0,
                    // 最終角度
                    endAngle: CGFloat(M_PI*2),
                    // 反時計回り
                    clockwise: false)
                circleColor.setFill()
                myCircle.fill()
                myCircle.stroke()

                print("drawRect\(count)回目")
            }

            count += 1

        }

        linePath.stroke()

        drawTopLine()
        drawBottomLine()
        drawLeadingLine()
        drawTrailingLine()
        drawHorizontalLines()

    }

    func drawLine(_ from: CGPoint, to: CGPoint){
        let linePath = UIBezierPath()

        linePath.move(to: from)
        linePath.addLine(to: to)

        linePath.lineWidth = 0.5

        let color = UIColor.black
        color.setStroke()
        linePath.stroke()
        linePath.close()
    }

    func drawTopLine(){
        drawLine(CGPoint(x: 0, y: 0), to: CGPoint(x: viewWidth-20, y: 0))
    }

    func drawBottomLine(){
        drawLine(CGPoint(x: 0, y: viewHeight-120), to: CGPoint(x: viewWidth-20, y: viewHeight-120))
    }

    func drawLeadingLine(){
        drawLine(CGPoint(x: 0, y: 0), to: CGPoint(x: 0, y: viewHeight))
    }

    func drawTrailingLine(){
        drawLine(CGPoint(x: viewWidth-60, y: 0), to: CGPoint(x: viewWidth-60, y: viewHeight-120))
    }

    func drawHorizontalLines(){
        for i in 1..<4{
            let y = (viewHeight-120)/4 * CGFloat(i)
            drawLine(CGPoint(x: 0, y: y), to: CGPoint(x: viewWidth-20, y: y))
        }
    }


    // 保持しているDataの中で最大値と最低値の差を求める
    var yAxisMax: CGFloat {
        return 100
            //graphDatas.maxElement()! - graphDatas.minElement()!
    }

    //グラフ横幅を算出
    func checkWidth() -> CGFloat{
        let appDelegate = UIApplication.shared.delegate as! AppDelegate

        return CGFloat(appDelegate.graphPointArray.count-1) * memoriMargin + (circleWidth * 2)
    }

    //グラフ縦幅を算出
    func checkHeight() -> CGFloat{
        return viewHeight-120
    }


}
課題
・今回の実装では、DBやUserDefaultを用いたデータの保存などは実装していませんので、データの永続保存をするためには追加の実装をする必要がある。
・GraphViewの大きさを固定で表示しているため、データが多くなった時に、点と点の間隔が狭くなっていってしまうため、その点は改善する必要がある。
・GraphViewの大きさが固定となっているので、AutoLayoutなどを用いたり、UIパーツのサイズを可変にする必要がある。
おわりに
上述した通り、まだまだ課題はありますが、ひとまず、ユーザーの入力を反映してグラフを描画するという機能を実装することができました。
ベストプラクティスではない可能性が高いかと思いますが、より良い方法がありましたら、ご教示頂ければ幸いです。
最後までお読みいただきまして、ありがとうございました。