XOプラットフォームからサードパーテイのAPIを使用してメール送信ができます。
以下SendGrid APIを使用してメール送信を紹介します。
Step1:SendGridの無償アカウントを作成します
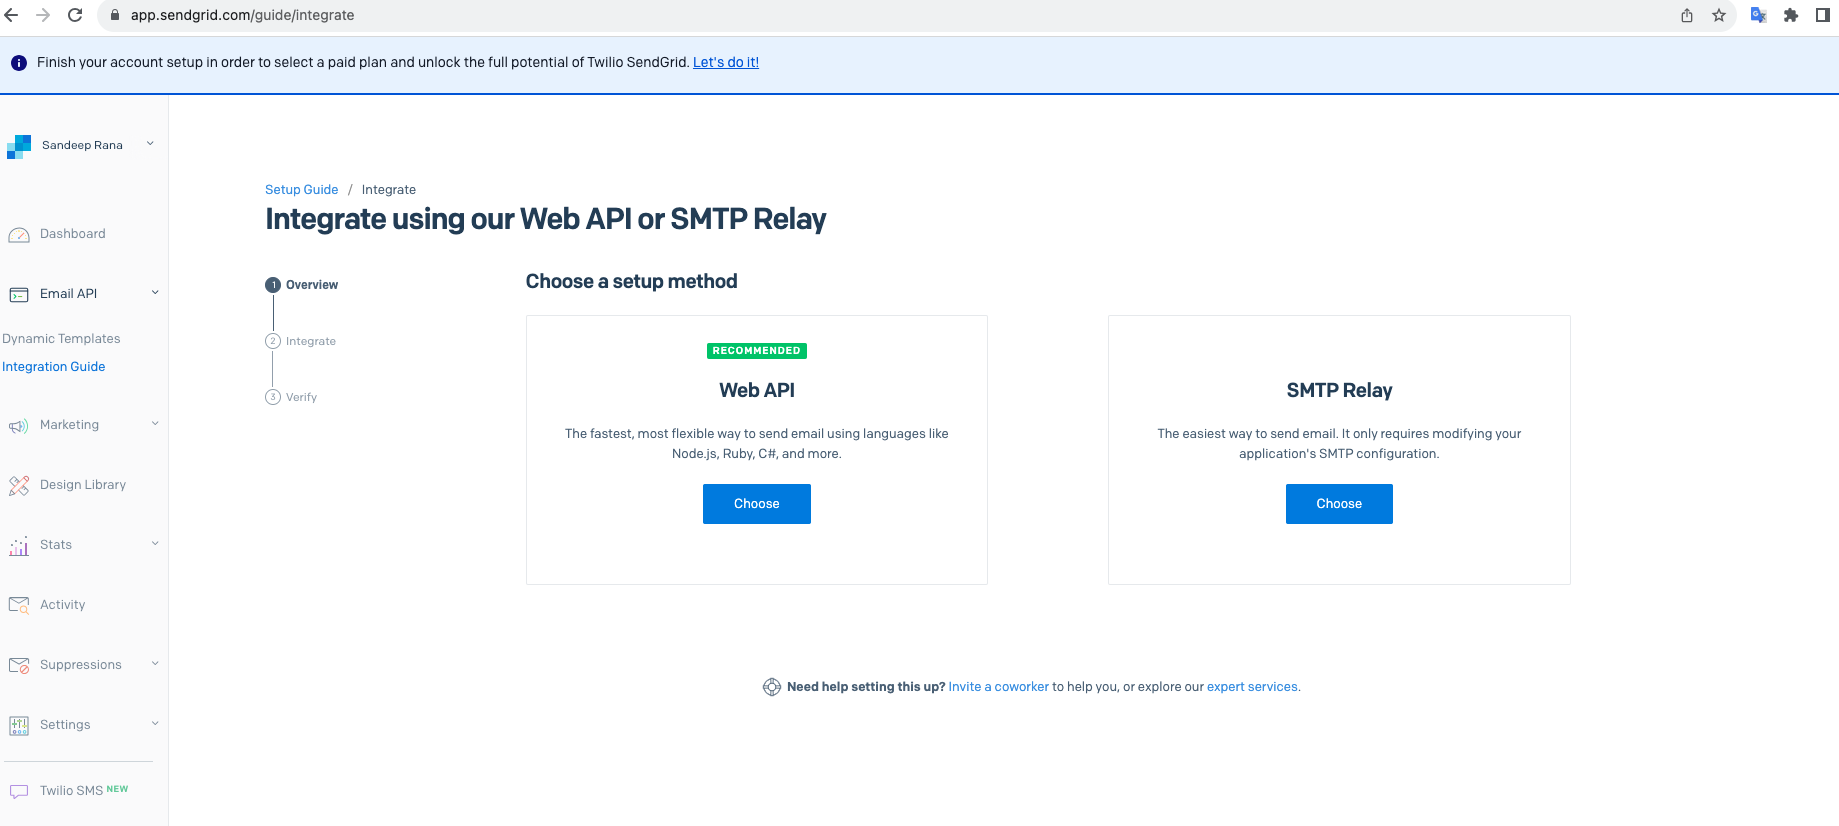
Step2:SendGridのWeb API選択
以下のURLをアクセスしてWeb APIを選択します。
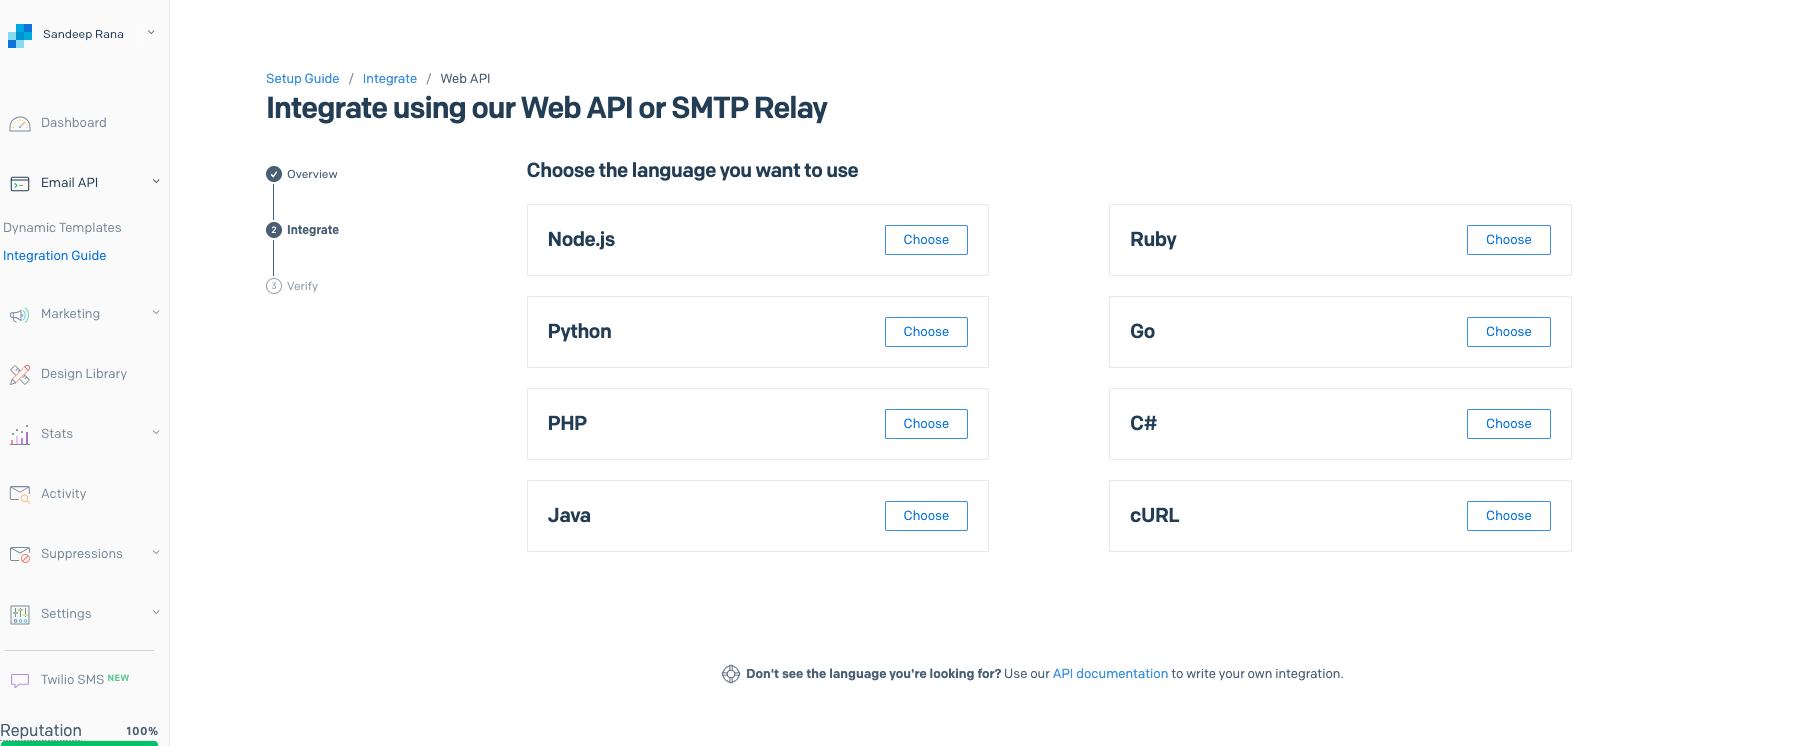
Step3: cURLを選択
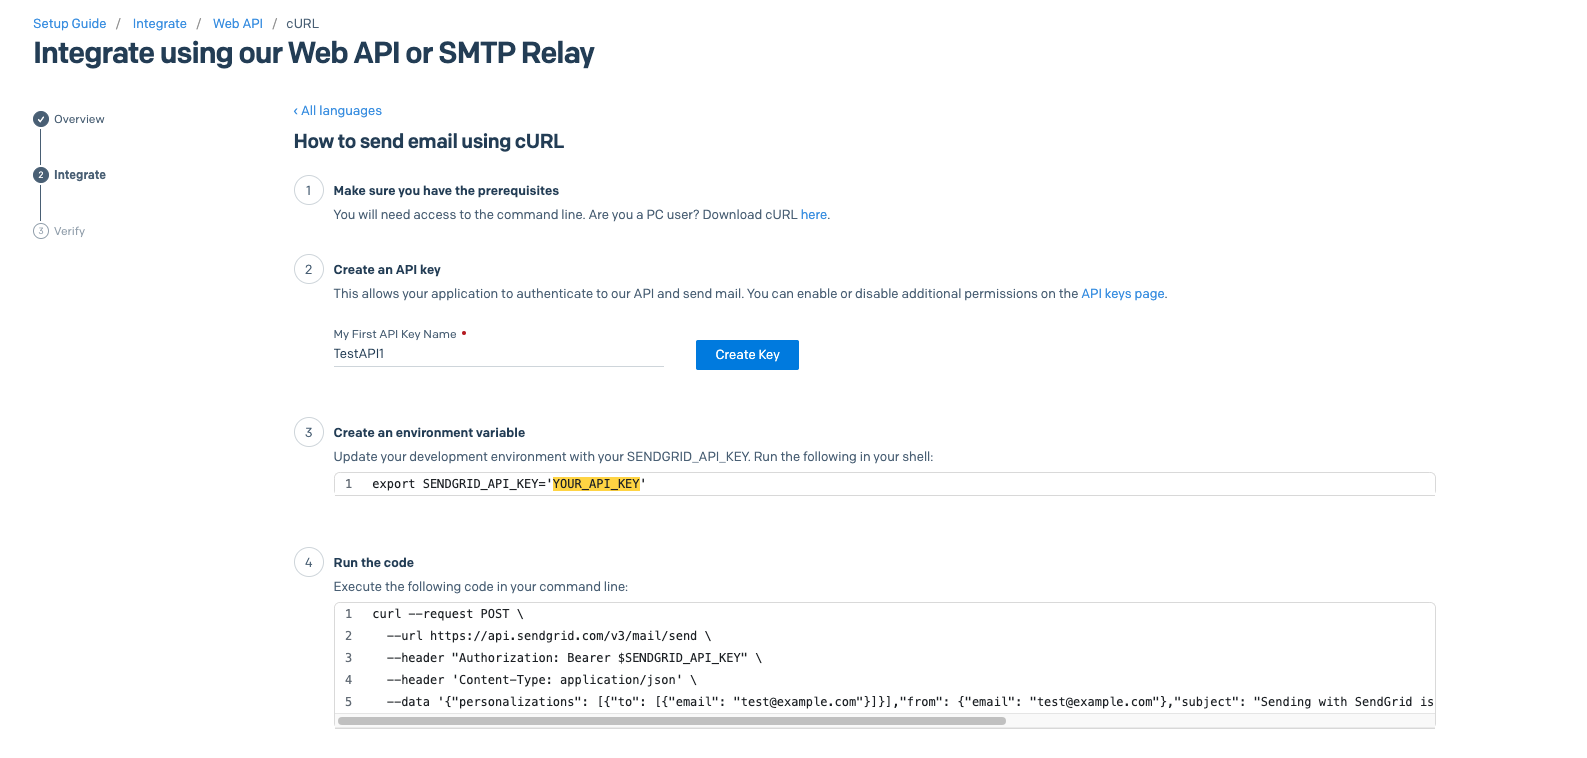
Step4:画面上でMy First API Key Nameの項目にAPIキーの名前を設定します

例えば TestAPI1を入力してCreate Keyボタンを押します
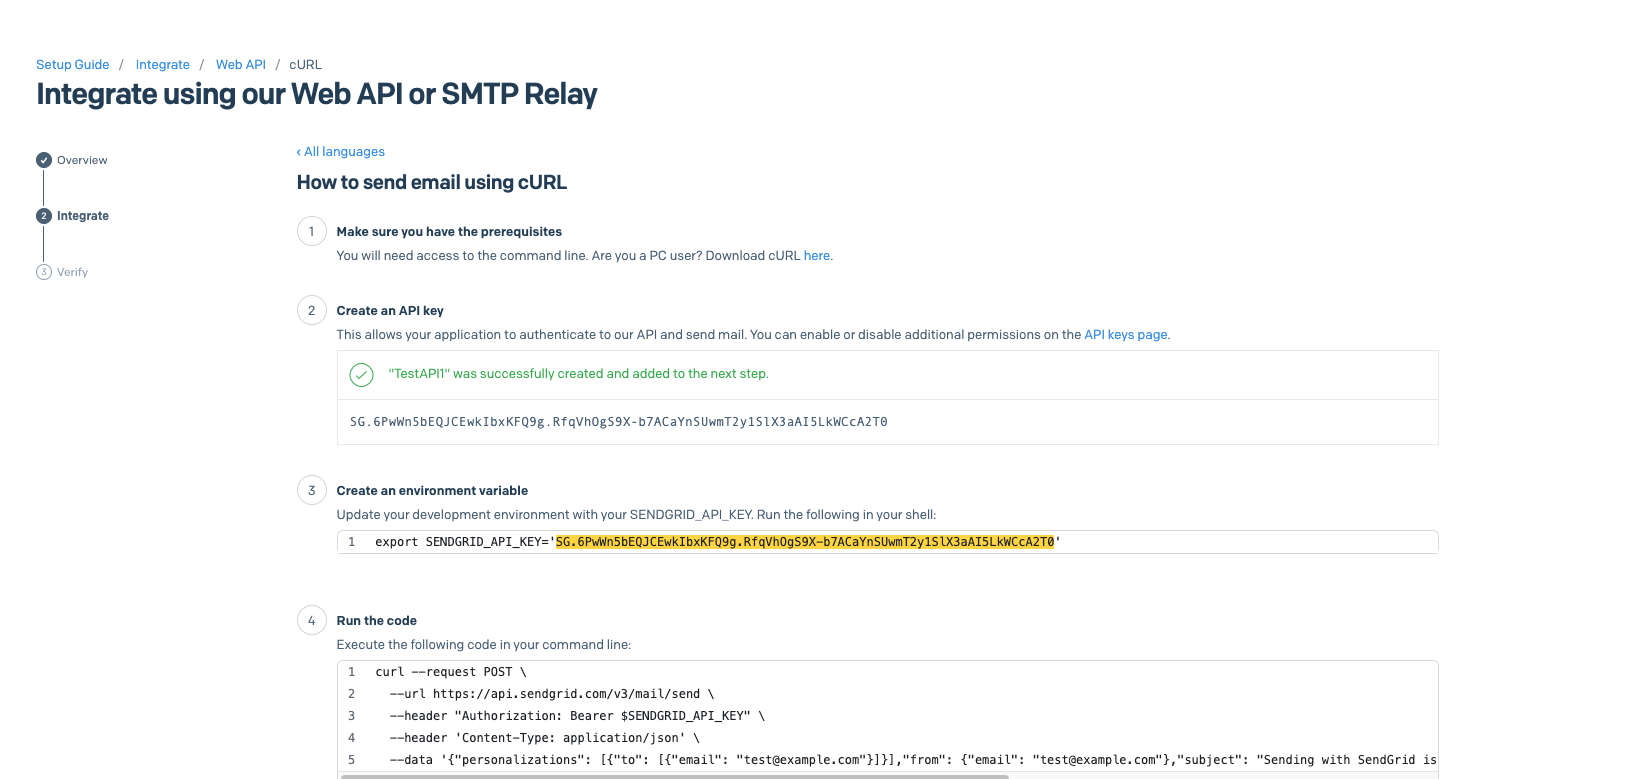
ボタン押してから以下画面上でAPIキーが作成されます
次 I have executed the codeのチェックボックスを選択して Verified Integrationボタン押します

XOプラットフォームにログインして、SendEmail名前のタスクボットを作成します。
ボットアクション「sendEm」を追加します。
sendEm ボットアクション内にスクリプトノードを追加します。
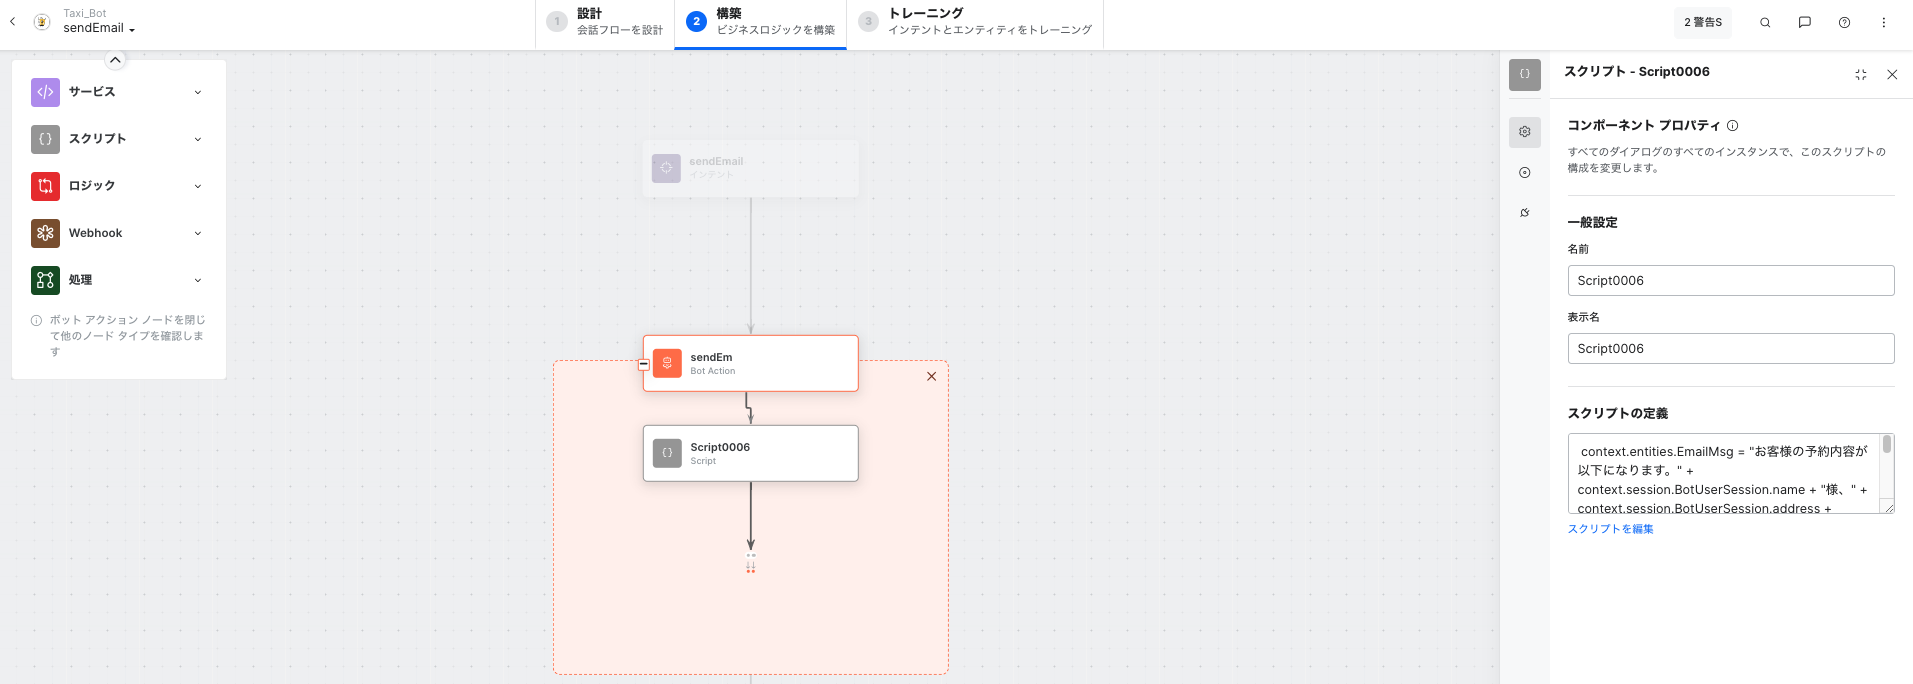
スクリプトノードを以下のように設定します
Script.rb
context.entities.EmailMsg = "お客様の予約内容が以下になります。" + context.session.BotUserSession.name + "様、" + context.session.BotUserSession.address + "、"+context.session.BotUserSession.address+ "、" + "、" + "。";
puts 'code block.'
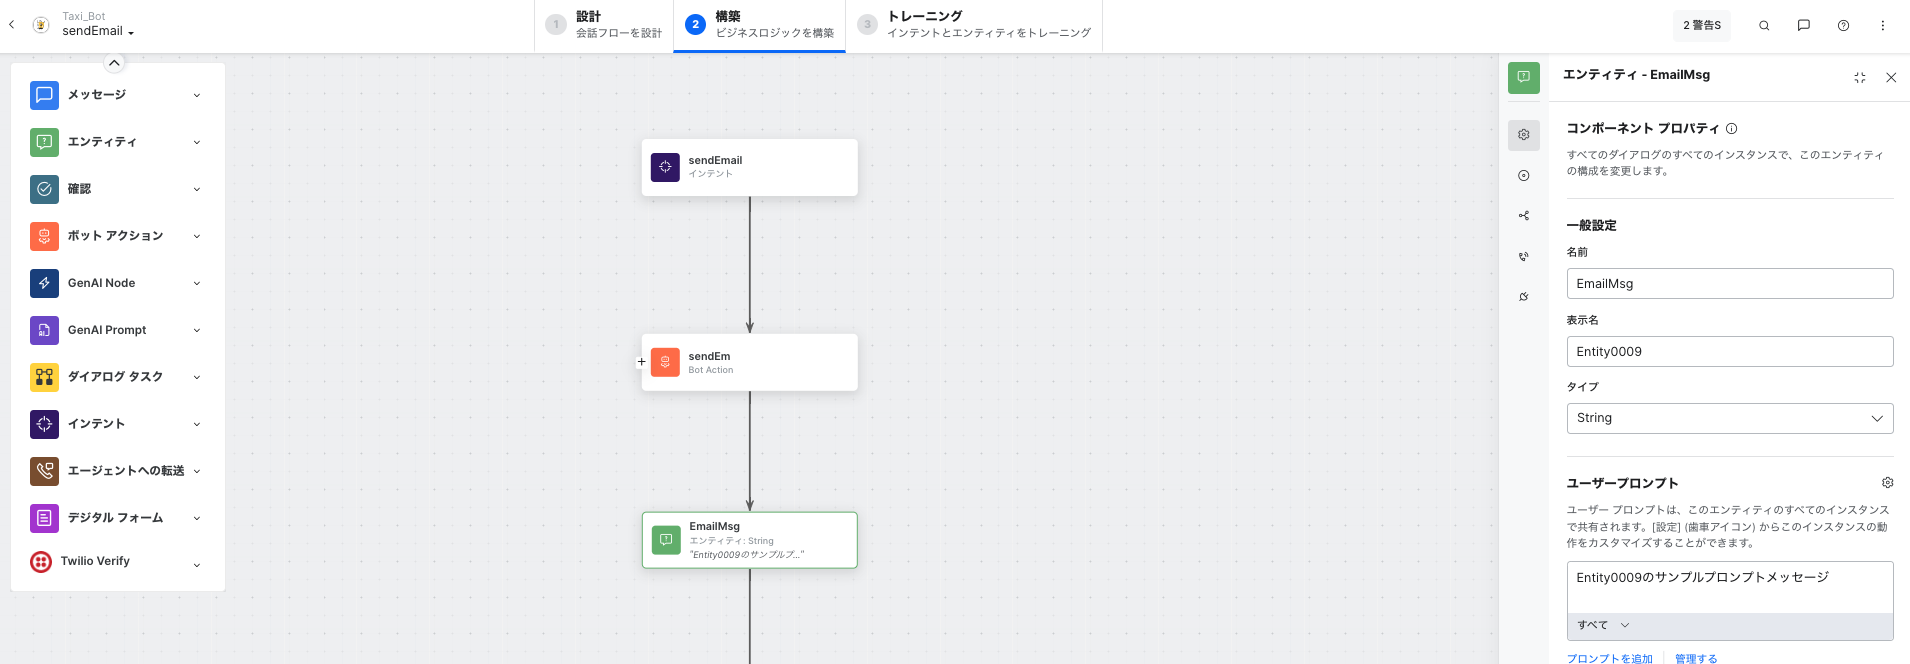
EmailMsg Entityノード追加します。
最後に新しいボットアクションノードを追加して、Serviceノード設定します。
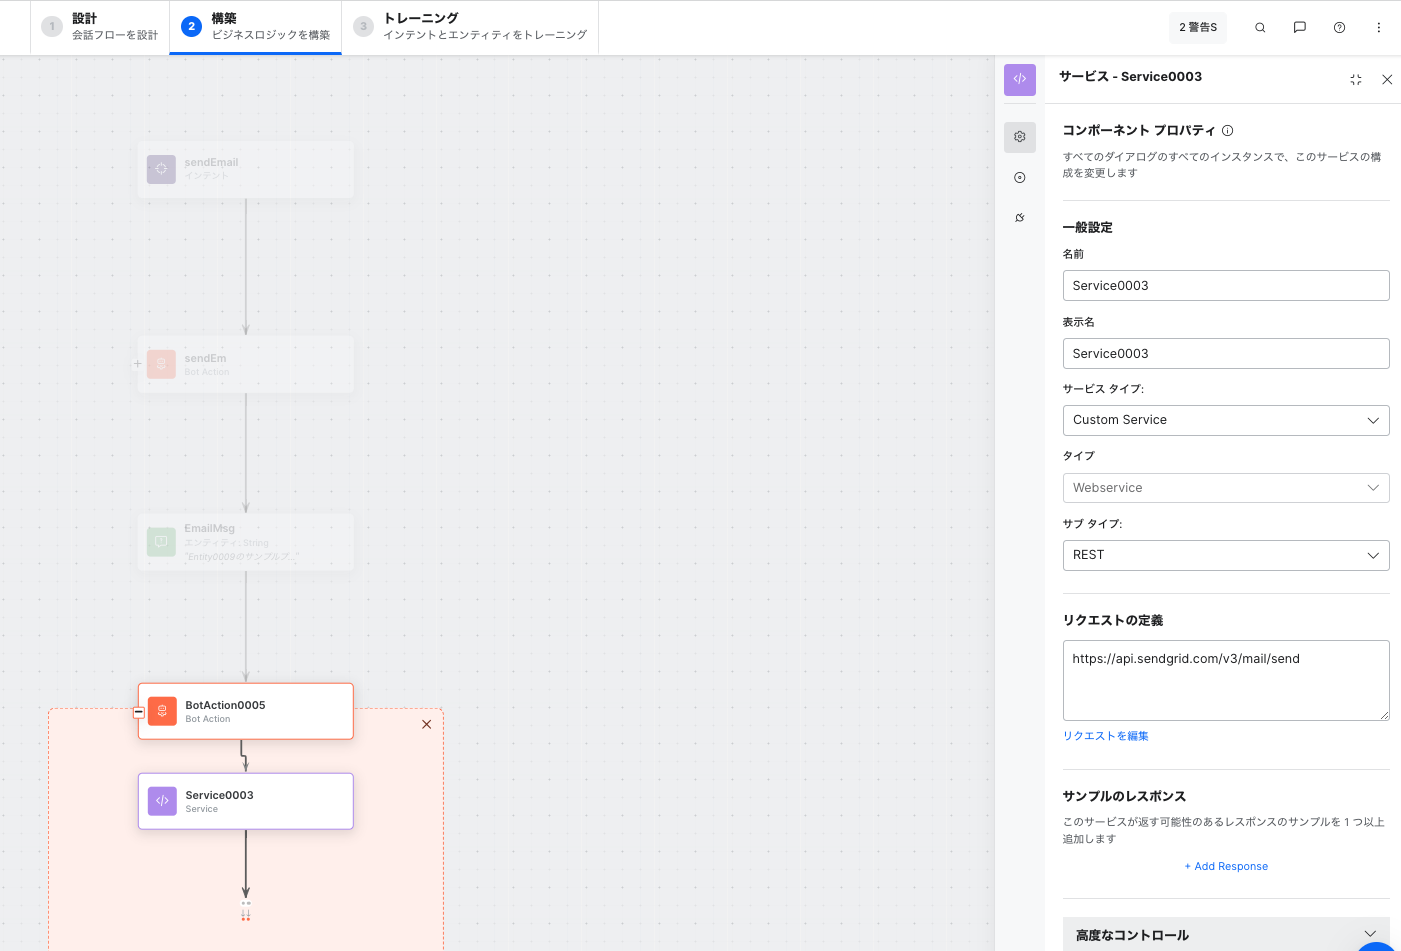
ヘッダーは以下のように設定します

ボデイの場合は、application/jsonを選択し、以下のコードを設定して保存します。

title.rb
{
  "personalizations": [
    {
      "to": [
        {
          "email": "sandeep.s@z.com"
        }
      ]
    }
  ],
  "from": {
    "email": "sand.s@p.com"
  },
  "subject": "予約メール",
  "content": [
    {
      "type": "text/plain",
      "value": "{{context.entities.EmailMsg}}"
    }
  ]
}
puts 'code block.'

以上