Play 2.5に入門、今回はインストールと初回起動を行う。Playの初回起動はかなり遅いので、作業待ち時間に、初使用となるPlay Java界隈の情報を調べることとする。
環境構築
インストール
Play 2.2以降のインストールには必要なものは以下の2つ
- Java 8
- Scala製のビルドツールsbtの改訂版(?)であるTypesafe Activator
Scalaのsbt使いの人の中には、sbtでPlay環境を使っている方もいるようだが、入門時は素直に公式サイトからActuvator入りのPlayをダウンロードした方が良い:
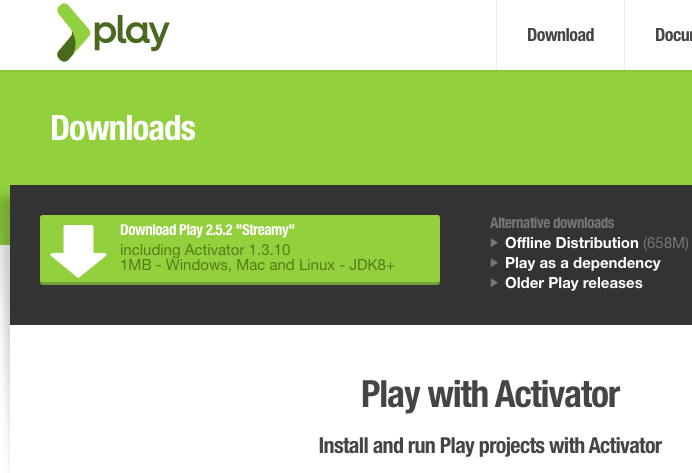
ダウンロード画面のバージョン2.5.2の横に"Steamy"なる単語が並んでいるが、これはPlayframeworkバージョン2.5につけられたニックネームらしい(Playframework2.4のニックネームは、"Damiya")。...Androidのお菓子シリーズに影響を受けたのだろうか。
Windowsな人のインストールについては、Typesafe ActivatorでPlay framework 2実行環境を整えるに従えば良いはず。
(今回)Macでhomebrew経由でTypesafe Activatorをインストール
Macでhomgbrewを使う場合は、以下のようにコマンドのみで良い(activatorの)。
brew install typesafe-activator
activator -help
※activator -helpすることで、activatorの動作に必要なjarがダウンロードされる。
※今回の導入時点での環境は、以下。
- Mac OS(10.11.4)
- Java 8 update 91
- Homebrew 0.9.9 (git revision 1451; last commit 2016-04-23)
※旧バージョンのhomebrewが壊れていた際には、こちらの対処方法で(..お世話になった)。
アプリの雛形生成
Play2.3日本語版のインストール解説通りに行える。
すなわち、"activator new your-first-app play-java"コマンドで、Play Javaアプリの雛形が出来上がる。
cd /your/play/folder
activator new your-first-app play-java
この時点でのフォルダ構成は以下のとおり:
$ tree
.
├── LICENSE
├── README
├── app
│   ├── Filters.java
│   ├── Module.java
│   ├── controllers
│   │   ├── AsyncController.java
│   │   ├── CountController.java
│   │   └── HomeController.java
│   ├── filters
│   │   └── ExampleFilter.java
│   ├── services
│   │   ├── ApplicationTimer.java
│   │   ├── AtomicCounter.java
│   │   └── Counter.java
│   └── views
│       ├── index.scala.html
│       └── main.scala.html
├── bin
│   └── activator
├── build.sbt
├── conf
│   ├── application.conf
│   ├── logback.xml
│   └── routes
├── libexec
│   └── activator-launch-1.3.9.jar
├── project
│   ├── build.properties
│   └── plugins.sbt
├── public
│   ├── images
│   │   └── favicon.png
│   ├── javascripts
│   │   └── hello.js
│   └── stylesheets
│       └── main.css
└── test
    ├── ApplicationTest.java
    └── IntegrationTest.java
プロジェクトフォルダに移動しての二回目のactivatorコマンド実行により、Play Javaアプリの立ち上げに必要な依存性解決がなされる(ここで結構な"待ち"が入る)。
cd your-first-app
activator
Play Javaつまみ食い
待ち時間を利用して、Play Javaで気になることを調べておく。
①GAE(Google App Engine)対応は下火
Play 1.xの頃は、Google App EngineでPlayを動かす、的な話が多かった気がする(未体験)。公式サイトでも1.0の頃のGAE対応についてのドキュメントが残っている。
が、そんな記事は2012年くらいまでな気がした。JavaでGAEという取り組み自体が下火なのだろうか...
②ORMのebeanとLombokは組み合わせ可
Play JavaとPlay Scalaと比較した際に、RDBアクセスについては、Javaのebean ORMに好感を持った。なんというか普通に便利な感じがよさ気(ScalaのRDBアクセス事情については必要に応じ調べる)。
で、少し気になったのが、ebeanと脱ボイラープレートなLombokとの関係。
以下によると、どうやら共存可能な模様なようで一安心(ユニットテストが楽になるとのこと):
EBeanでもユニットテストの導入はスマートです。そう、Lombokならね。
@Entity @Table(name="items") // ebean ORM
@Data                        // Lombok
public class Item extends Model implements IItem {
    @Id @NotNull
    public Integer id;
    @NotNull
    public String name;
}
上ブログで書かれているユニットテストの導入時の話は、Play Framework でエンティティを使う際の注意点で書かれている、PlayFrameworkエンハンスによる、"app"配下にあるソースコードのエンティティに対してのgetter/setter自動挿入の話と関わるものと思っている。このことが、app配下外のソースコード並びに、scalaコードからのEbeanの@Entityが付されたモデルの呼び出し時に、フィールドが存在しない場合のNullPointerException発生につながるとのこと。注意点の記事では、それゆえ、"エンティティへの直アクセスを禁止しsetter/getterは明示的に宣言せよ"と書いているが、実際には、Lombokの@Dataアノテーションで対策済となるのでは思っている。
あるいは、
@Entity @Table(name="items") // ebean ORM
@Data                        // Lombok
public class Item extends Model implements IItem {
    @Id @NotNull
    private Integer id;
    @NotNull
    private String name;
}
とフィールドをprivateとしておけば良いのか。このあたり、scalaコードのJavaコードの混在にとって大事なところなので、後で検証したい。
③Play2.4以降のDependency Injection (DI)には、Google Guiceが選択可
Play2.4以降の特徴の1つである、DIの全面採用。
Play Framework 2.4 + コンパイル時DIで Play Module を利用する方法に延べられているとおり、Playで利用できるDIには二種類ある。
- Runtime Dependency Injection(実行時の動的なDI)
- Compile Time Dependency Injection(コンパイル時の静的なDI)
※上のリンクはPlay2.4系のドキュメント。...Play2.5系のドキュメントはまだ未整備...
このうち、Runtime DIでGoogle Guiceが利用されている。Java使いにとっては、古くからあるGuiceは親しみやすいところだろう。逆にScala使いは、Guiceを(Javaっぽくて)微妙と思う人が多いらしく、上記事の人のようにCompile Time DIを採用したり、試行錯誤している模様。
使ってみないと分からないが、Java使いの方がPlayのDIには馴染みやすいのかもしれない。
Play Java実行
...と調べものをしているうちに、activatorがjarをかき集め終わったので、Play Javaを実行する
ローカルホスト(9000番ポート)での実行は以下のとおり。
activator run
しばし待つとコンパイルとデプロイが終わり、localhost:9000にアクセスできる:

Play Javakの簡単な解説とAPIブラウザへのリンクが表示されている。
自動生成されるコードのDI周りを眺める。
まずはcomv/routesを眺める。
# An example controller showing a sample home page
GET     /                           controllers.HomeController.index
# An example controller showing how to use dependency injection
GET     /count                      controllers.CountController.count
# An example controller showing how to write asynchronous code
GET     /message                    controllers.AsyncController.message

# Map static resources from the /public folder to the /assets URL path
GET     /assets/*file               controllers.Assets.versioned(path="/public", file: Asset)
ホーム以外に、以下のアプリもあるとのこと。
- http://localhost:9000/count => アクセスカウンターのデモ
- http://localhost:9000/message => ただの挨拶(hello world相当)
CountController.javaを見ておこう:
package controllers;

import javax.inject.*;
import play.*;
import play.mvc.*;

import services.Counter;

/**
 * This controller demonstrates how to use dependency injection to
 * bind a component into a controller class. The class contains an
 * action that shows an incrementing count to users. The {@link Counter}
 * object is injected by the Guice dependency injection system.
 */
@Singleton
public class CountController extends Controller {

    private final Counter counter;

    @Inject
    public CountController(Counter counter) {
       this.counter = counter;
    }

    /**
     * An action that responds with the {@link Counter}'s current
     * count. The result is plain text. This action is mapped to
     * <code>GET</code> requests with a path of <code>/count</code>
     * requests by an entry in the <code>routes</code> config file.
     */
    public Result count() {
        return ok(Integer.toString(counter.nextCount()));
    }

}
@InjectのところでDIが使われている。このコントローラーは、counterがいかなるカウンターであるかは知らず、また、counter.nextCount()がどのように実行されるかも型情報以外は知らないというわけだ。
実際にInject(注入)されているAtomicCounter.java:
package services;

import java.util.concurrent.atomic.AtomicInteger;
import javax.inject.*;

/**
 * This class is a concrete implementation of the {@link Counter} trait.
 * It is configured for Guice dependency injection in the {@link Module}
 * class.
 *
 * This class has a {@link Singleton} annotation because we need to make
 * sure we only use one counter per application. Without this
 * annotation we would get a new instance every time a {@link Counter} is
 * injected.
 */
@Singleton
public class AtomicCounter implements Counter {

    private final AtomicInteger atomicCounter = new AtomicInteger();

    @Override
    public int nextCount() {
       return atomicCounter.getAndIncrement();
    }

}
その他、Counterインターフェースを持つ、任意のCounterが作れる。このあたり、後でためすべきだろう。
環境構築時点の感想
環境構築については、以前の(2.0/2.1頃)のPlayとあまり変わりない印象。とりあえず実行するところまでは、はまりどころが少ない。初回の実行までにはこれまた従来同様、時間がかかる。その間、いろいろググッて、Play2.2以降の皆さんのはまりっぷりを各所で眺めることとなった。Play2.5にはどんなはまり道が待っているのだろうか^^;