youtubeでpythonについて話していますのでチャンネル登録して頂けると嬉しいです。
https://www.youtube.com/channel/UCjLz0Ot73w9v60ST1w9ugLg
今回開発したPC環境
win10
python3.7.2
heroku
今回のゴールと記載にあたり
heroku関連情報は既に溢れているのですがweb公開できる事に気付きました。そこで今回はローカルでdjangoを開発するだけではなく、__サーバに実際にデプロイしweb公開(herokuを利用しdjangoをデプロイ)します。
始める前に
web上でも非常に丁寧に教えて下さった技術者の方々が沢山います。その方々の知識・知恵がなければ私はこんなに短期間に習得する事はできなかったため、有益な記事を書かれている全ての技術者・また丁寧に教えて頂いた技術者の方へ満腔の敬意を表します。ではいきましょう。
herokuとは
Heroku はPaasです。Paasはアプリケーションの開発から実行や運用までをクラウドで完結できるサービスです。一言で言うとサーバの設定、例えばOS、dbなどプラットフォーム部分についてGUIを利用しながら簡単に設定する事ができます。Paasはアプリの構築、提供、監視、スケールができる為インフラストラクチャの管理問題から大部分解放され便利なサービスです。
これよりも詳細な説明を希望・求められる方は以下をご覧ください。
https://jp.heroku.com/what
なおherokuのプランや値段は以下に記載しているので検討されてください。
https://jp.heroku.com/pricing
web公開工程としてまずはherokuユーザ登録します。
1 herokuユーザ登録
まずhrokuのユーザ登録をしましょう。
heroku CLI Heroku Dev Center
続いてCLI(コマンドラインインターフェース)をwindowsにインストールしていきます。
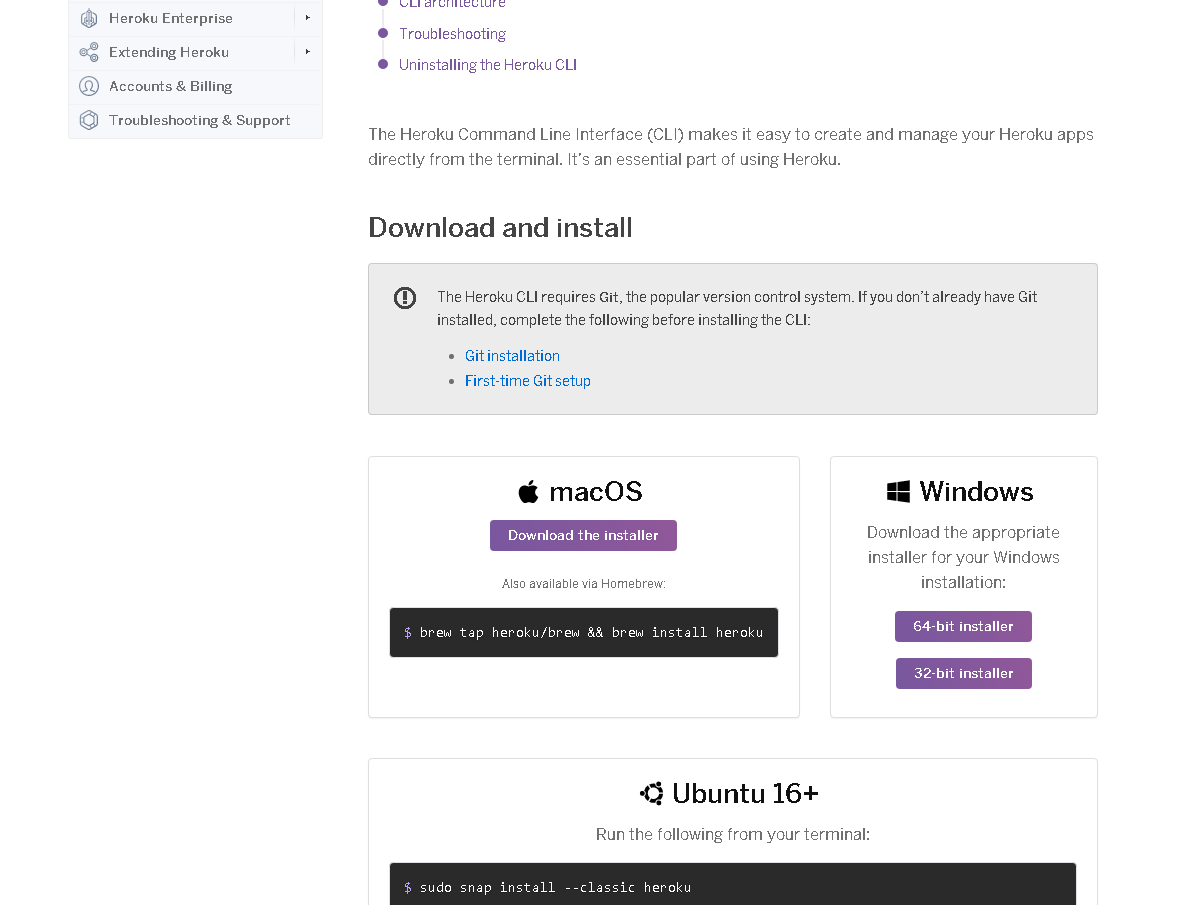
【Winodwsの場合】
インストーラを起動させたら『Next >』をクリック任意のインストール先(デフォルトで良い)を設定して『Install』します。
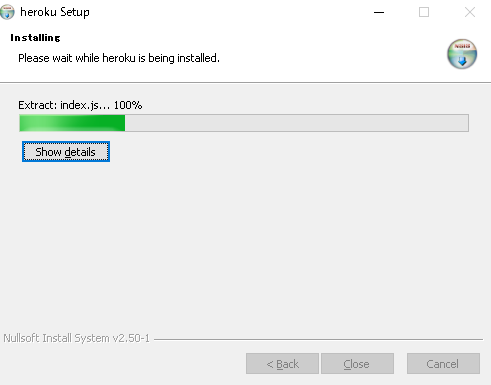
正常終了したらPowerShellかコマンドプロンプトでバージョン確認します。これでwindowsからコマンドをスムーズに入力することができます。
heroku --version
heroku/7.22.9 win32-x64 node-v11.10.1
heroku --version と打ちherokuのバージョンが表示していればOKです。
Herokuにログイン
heroku loginコマンドを叩くとブラウザ起動してログインを求められるのでEnterを押してください。
> heroku login
heroku: Press any key to open up the browser to login or q to exit:
Opening browser to https://cli-auth.heroku.com/auth/browser/xxxxxxxxxxxxxxxxxxxxx
Logging in... done
Logged in as xxxxxxxxxxxx@xxxxx.com
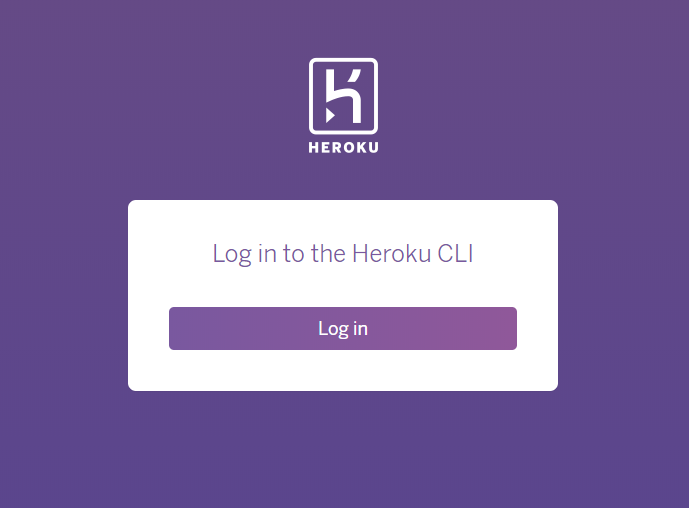
Loginを押すと自動的にloggedinされます。
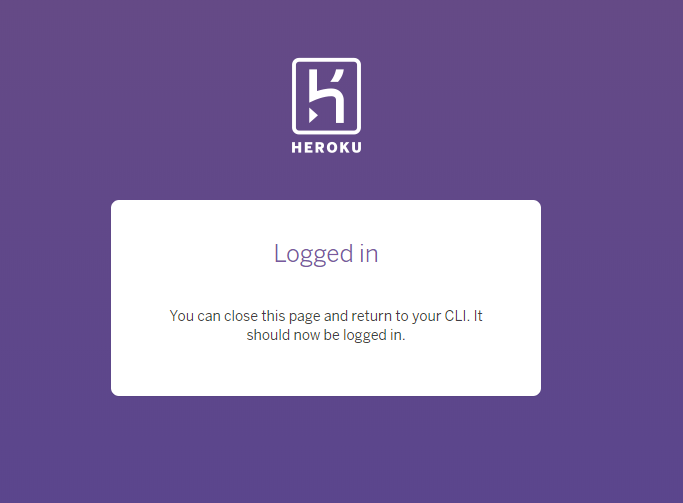
Logged in が表示されていれば正常にログインできています。お疲れ様でした。続いてPythonのライブラリをインストールしましょう。
2 各ライブラリインストール
ローカル環境上(win10)で必要となるライブラリをインストールします。以下をインストールしてくだしい。
インストールするモジュールは以下です。
django
dj-database-url
django-heroku
gunicorn
whitenoise
具体的なコマンドは以下です。
pip install django dj-database-url gunicorn whitenoise django-heroku
djangoでプロジェクトとアプリを作成する
djangoをインストールしたらプロジェクトとアプリを作成し各種設定をしましょう。djangoにはプロジェクトとアプリという概念があります。ここでは説明は割愛しますがdjangoを開発する上で必要ですので必ず理解してください。
以下の記事を書かれた方がわかりやすくdjango上のプロジェクトとアプリの相違について説明されています。もしも気になる方は参考にしてください。
http://farewell-work.hatenablog.com/entry/2017/05/07/160359
プロジェクト名:first
アプリ名:myapp
プロジェクトを生成
djangoのプロジェクトとアプリケーションの概念を理解したら早速プロジェクトをコマンドで作成しましょう。コマンドプロンプトでもgitでもbashでもOKです。以下コマンドを叩いてください。
$ django-admin startproject first
firstというプロジェクトが作成されました。firstフォルダは違う階層に2つできややこしいですが正常稼働です。djangoのフォルダ構成は最初にチェックすると重複していたりみずらいと思える構成があるかもしれません。後々にわかると思いますが技術的見地からはむしろわかりやすい側面が多々あります。そのためdjangoのフレームワークの癖にはここで慣れてしまいましょう。
first/
 first/
     manage.py
     mysite/
         __init__.py
         settings.py
         urls.py
         wsgi.py
settings.pyと新しく作るlocal_settings.pyの作成方法は後述します。
urls.py
"""first URL Configuration

The `urlpatterns` list routes URLs to views. For more information please see:
    https://docs.djangoproject.com/en/2.0/topics/http/urls/
Examples:
Function views
    1. Add an import:  from my_app import views
    2. Add a URL to urlpatterns:  path('', views.home, name='home')
Class-based views
    1. Add an import:  from other_app.views import Home
    2. Add a URL to urlpatterns:  path('', Home.as_view(), name='home')
Including another URLconf
    1. Import the include() function: from django.urls import include, path
    2. Add a URL to urlpatterns:  path('blog/', include('blog.urls'))
"""
from django.contrib import admin
from django.urls import path, include

urlpatterns = [
    path('admin/', admin.site.urls),
    path('myapp/', include('myapp.urls'))
]
アプリを生成
続いてアプリケーションも作成しましょう。
$ python manage.py startapp myapp
myappというアプリが作成されました。
myapp/
    __init__.py
    admin.py
    apps.py
    migrations/
        __init__.py
    models.py
    tests.py
    views.py
アプリの中の各ファイルを修正・追加していきます。
views.pyは以下のように修正しています。
from django.shortcuts import render

def index(request):
    """/ トップページ"""
    context = {
        'name': 'hogehoge',
    }
    return render(request, 'myapp/index.html', context)


def about(request):
    """/about アバウトページ"""
    return render(request, 'myapp/about.html')


def info(request):
    """/info インフォページ"""
    return render(request, 'myapp/info.html')
apps.py
from django.apps import AppConfig


class MyappConfig(AppConfig):
    name = 'myapp'
urls.pyは新規にファイルを作成します。
from django.urls import path
from . import views

app_name = 'myapp'

urlpatterns = [
    path('', views.index, name='index'),
    path('about/', views.about, name='about'),
    path('info/', views.info, name='info'),
]
起動を確認する
必ずmanage.pyがある場所(ディレクトリ)まで移動してからサーバーを起動しましょう。
サーバーを起動するコマンドは以下です。
$ python manage.py runserver
http://127.0.0.1:8000/
でローカル環境で正常にwebが表示されれば正常にサーバーが起動しています。ローカルとサーバーと少しややこしい表現がありわかりずらいかもしれません。今回はローカル環境での話です。簡単に言えばあなたのPC環境(ローカル環境)でdjango環境を立ち上げたというイメージで間違いありません。
3 herokuを利用する為herokuで利用する各設定ファイルを追加する
新しく3つのファイルを作成する必要があります。
| ファイル名 | 役割 | 一言TIPS |
|---|---|---|
| runtime.txt | Pythonのバージョン指定 | ローカルでtxt作成すればOKです |
| Procfile | Herokuプロセスの起動コマンド | 拡張子はないので注意してください |
| requirements.txt | 依存パッケージのリスト | ローカルtxt作成すればokです |
プロジェクト名:first
アプリ名:app
※今後はみなさんの環境で上記を読み替えてください。
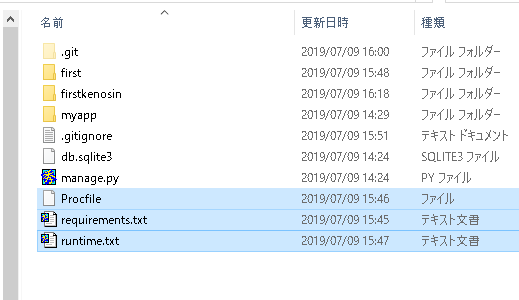
3つのファイルがどこに格納するべきかを以下のディレクトリ構造をチェックし再度確認してください。
first
│  db.sqlite3
│  manage.py
│  Procfile👈👈👈👈👈
│  requirements.txt👈👈👈👈👈
│  runtime.txt👈👈👈👈👈
│  __init__.py
│
├─first
│      settings.py
│      urls.py
│      wsgi.py
│      __init__.py
│
└─app
    │  admin.py
    │  apps.py
    │  models.py
    │  tests.py
    │  urls.py
    │  views.py
    │  __init__.py
    │
    ├─migrations
    │
    ├─static
    │  └─app
    │          style.css
    │
    └─templates
        └─app
                detail.html
                index.html
                results.html
runtime.txt
Pythonのバージョンはpython --versionとコマンドを打ち、お使いのPythonのバージョンに変更してください。
python-3.7.2
Procfile
firstと書いてある部分はあなたのプロジェクト名に変更して下さい。少しだけハマりポイントです。注意してくださいね。さりげなくwsgiファイル名称が異なるのでご自身のファイル名称を記載するよう注意してくださいね。
web: gunicorn first.wsgi --log-file -
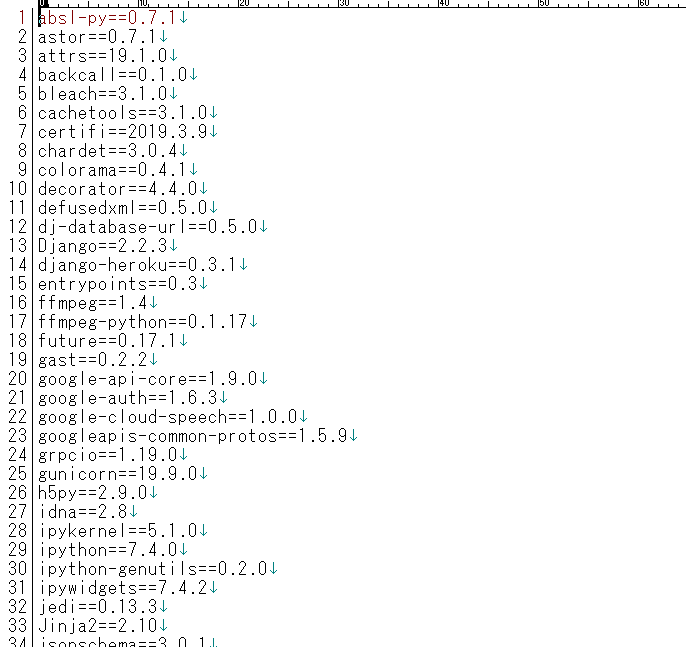
requirements.txt
必ずディレクトリをfirstフォルダ(上の階層の方)にcdで移動してから以下コマンドを入力します。
pip freeze > requirements.txt
ちゃんとrequirements.txtの中身が入っているかを確認してください。
4 django側 ファイル編集
それではdjango側は2ファイルを作成・修正します。local_settings.pyは新規にファイルを作ります。
settings.pyは既存にある設定ファイルを編集します。
| ファイル名 | 役割 |
|---|---|
| first/local_settings.py | 新規作成です。開発環境用設定ファイル |
| first/settings.py | 本番環境用設定ファイル |
first
│  db.sqlite3
│  manage.py
│  Procfile
│  requirements.txt
│  runtime.txt
│  __init__.py
│
├─first
│      settings.py👈👈👈👈👈
│      local_settings.py👈👈👈👈👈
│      urls.py
│      wsgi.py
│      __init__.py
│
└─app
    │  admin.py
    │  apps.py
    │  models.py
    │  tests.py
    │  urls.py
    │  views.py
    │  __init__.py
    │
    ├─migrations
    │
    ├─static
    │  └─app
    │          style.css
    │
    └─templates
        └─app
                detail.html
                index.html
                results.html
first/local_settings.py
ローカル環境でアプリを動かすための設定です。プロジェクトの下の「first」フォルダの下に、「local_settings.py」を作成して以下のように編集します。
import os
BASE_DIR = os.path.dirname(os.path.dirname(__file__))

DATABASES = {
    'default': {
        'ENGINE': 'django.db.backends.sqlite3',
        'NAME': os.path.join(BASE_DIR, 'db.sqlite3'),
    }
}

DEBUG = True
first/settings.py
Herokuで動くための設定を追加します。settings.pyの最後に以下を追加します。なお以下ファイルをまるまるコピーするではありませんので気を付けてくださいね。あくまで以下コードは最後に追加してください。
# 今回heroku用に以下を追加します
DEBUG = False

try:
    from .local_settings import *
except ImportError:
    pass

if not DEBUG:
    import django_heroku
    django_heroku.settings(locals())
.gitignore ファイル作成
.gitignoreというファイルを作成します。しかし.gitignoreの最初は[.]です。windowsでは通常のファイルの作成方法だと名前の一番最初に[.]が付くファイルは以下のようにエラーがでます。linuxなら楽に作成できるのですがwindowsなので以下方法で作成しましょう。
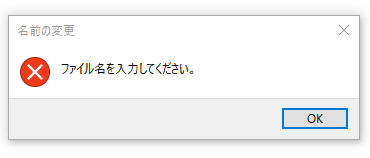
そこで以下方法で.gitignoreファイルを作成します。
1gitignore.txtを作る。(gitignore.txtは.gitignoreファイルを保存したいフォルダに保存しておく。)
2gitignore.txtに.gitignoreに書きたい内容を書く。
3gitignore.txtを保存したフォルダ上を、SHIFTを押しながら右クリックして、"コマンドウインドウをここで開く"を選択。
コマンドプロンプト(黒い画面)を開いたら以下コマンドを入力してEnterを押してください。
ren gitignore.txt .gitignore
ファイルの格納場所は以下になります。
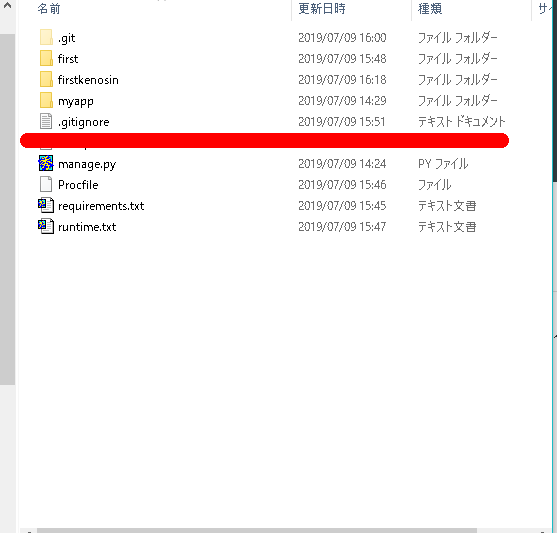
実際の.gitignoreファイルの中身は以下を入力しましょう
### Django ###
__pycache__
staticfiles
local_settings.py
db.sqlite3
*.py[co]
5 Gitでリモートリポジトリにプッシュ
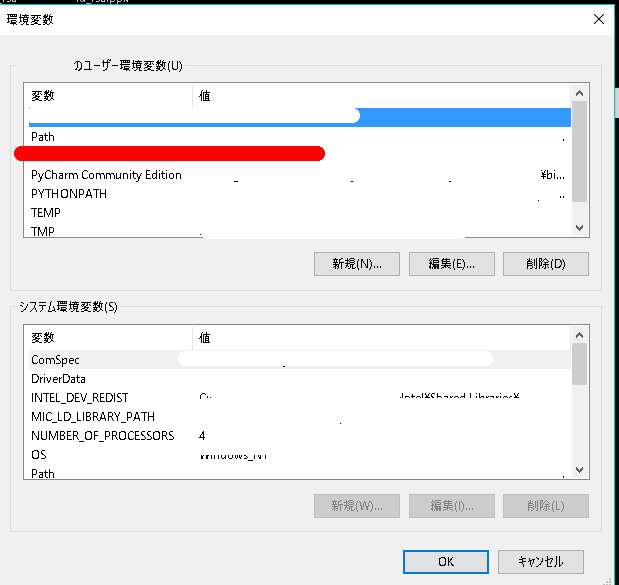
※heroku, gitコマンドはあらかじめwindows環境変数のpathを追加しておきます。以下のパスを環境変数に追加してください。
C:\Program Files\Git\bin
C:\Program Files\heroku\bin
windowsで環境変数を開き上記パスをpath欄に追加してください。
ファイルを格納する場所は以下を参照してください。
first
│  .gitignore👈👈👈👈👈👈👈今回ファイルを新規作成します。
│  db.sqlite3
│  manage.py
│  Procfile
│  requirements.txt
│  runtime.txt
│  __init__.py
│
├─first
│      local_settings.py👈👈👈👈👈👈👈👈👈今回ファイルを新規作成します。
│      settings.py👈👈👈👈👈👈👈👈既存にあるファイルを修正します。
│      urls.py
│      wsgi.py
│      __init__.py
│
└─app
    │  admin.py
    │  apps.py
    │  models.py
    │  tests.py
    │  urls.py
    │  views.py
    │  __init__.py
    │
    ├─migrations
    │
    ├─static
    │  └─app
    │          style.css
    │
    └─templates
        └─app
                detail.html
                index.html
                results.html
herokuにログインします。
heroku login
結果
heroku: Press any key to open up the browser to login or q to exit:
Opening browser to https://cli-auth.heroku.com/auth/browser/asdfasoifhasdnfa
Logging in... done
Logged in as xxx@xxx.com
ログインしたら、まず作成したプロジェクトの直下にディレクトリをcdで移動します。
cd first 作ったプロジェクトの直下に移動します。(manag.pyと並列の階層です)
git init
Initialized empty Git repository in C:/Users/xxx/first/.git/
ご自身の名前で登録します。例えばgit config user.name "hoge"
git config user.name "Your Name"
メールアドレスを入力します。例えばgit config user.email xxx@xxx.com
git config user.email xxxxx@mail.com
git add -A .

結果改行コードによる以下ワーニングが出るかもしれません。
warning: LF will be replaced by CRLF in first/settings.py.
The file will have its original line endings in your working directory
warning: LF will be replaced by CRLF in first/urls.py.
The file will have its original line endings in your working directory
warning: LF will be replaced by CRLF in first/wsgi.py.
The file will have its original line endings in your working directory
warning: LF will be replaced by CRLF in manage.py.
The file will have its original line endings in your working directory
warning: LF will be replaced by CRLF in myapp/admin.py.
The file will have its original line endings in your working directory
warning: LF will be replaced by CRLF in myapp/apps.py.
The file will have its original line endings in your working directory
warning: LF will be replaced by CRLF in myapp/models.py.
The file will have its original line endings in your working directory
warning: LF will be replaced by CRLF in myapp/templates/myapp/about.html.
The file will have its original line endings in your working directory
warning: LF will be replaced by CRLF in myapp/templates/myapp/base.html.
The file will have its original line endings in your working directory
warning: LF will be replaced by CRLF in myapp/templates/myapp/index.html.
The file will have its original line endings in your working directory
warning: LF will be replaced by CRLF in myapp/templates/myapp/info.html.
The file will have its original line endings in your working directory
warning: LF will be replaced by CRLF in myapp/tests.py.
The file will have its original line endings in your working directory
warning: LF will be replaced by CRLF in myapp/urls.py.
The file will have its original line endings in your working directory
warning: LF will be replaced by CRLF in myapp/views.py.
The file will have its original line endings in your working directory
コミット用のコメントを入力します。
git commit -m "first commit"

結果
[master (root-commit) 76d9fbd] first commit
 21 files changed, 364 insertions(+)
 create mode 100644 .gitignore
 create mode 100644 Procfile
 create mode 100644 first/__init__.py
 create mode 100644 first/settings.py
 create mode 100644 first/urls.py
 create mode 100644 first/wsgi.py
 create mode 100644 manage.py
 create mode 100644 myapp/__init__.py
 create mode 100644 myapp/admin.py
 create mode 100644 myapp/apps.py
 create mode 100644 myapp/migrations/__init__.py
 create mode 100644 myapp/models.py
 create mode 100644 myapp/templates/myapp/about.html
 create mode 100644 myapp/templates/myapp/base.html
 create mode 100644 myapp/templates/myapp/index.html
 create mode 100644 myapp/templates/myapp/info.html
 create mode 100644 myapp/tests.py
 create mode 100644 myapp/urls.py
 create mode 100644 myapp/views.py
 create mode 100644 requirements.txt
 create mode 100644 runtime.txt
Herokuへデプロイします
重複しないURLを入力してください。ここでURLが決まります。
heroku create firstdeploy

結果
Creating ⬢ firstdeploy... done
https://firstdeploy.herokuapp.com/ | https://git.heroku.com/firstdeploy.git
herokuのアプリにローカルリポジトリからpushします。
git push heroku master

結果
Enumerating objects: 26, done.
Counting objects: 100% (26/26), done.
Delta compression using up to 4 threads
Compressing objects: 100% (21/21), done.
Writing objects: 100% (26/26), 5.71 KiB | 307.00 KiB/s, done.
Total 26 (delta 1), reused 0 (delta 0)
remote: Compressing source files... done.
remote: Building source:
remote:
remote: -----> Python app detected
remote:  !     Python has released a security update! Please consider upgrading to python-3.7.3
remote:        Learn More: https://devcenter.heroku.com/articles/python-runtimes
remote: ----->
Installing python-3.7.2
remote: -----> Installing pip
remote: -----> Installing SQLite3
remote: -----> Installing requirements with pip

省略

remote: -----> Compressing...
remote:        Done: 207.4M
remote: -----> Launching...
remote:        Released v5
remote:        https://firstdeploy.herokuapp.com/ deployed to Heroku
remote:
remote: Verifying deploy... done.
To ssh://heroku.com/firstdeploy.git
 * [new branch]      master -> master
続いて以下コマンドを打ちます。push した後はアプリケーションのプロセスを動かす必要がありますので以下のコマンドで起動します。
heroku ps:scale web=1

結果
Scaling dynos... done, now running web at 1:Free
データベースが空の状態なので、ローカルにデータベースをセットアップした時のように、再度migrate コマンドを実行します。
heroku run python manage.py migrate

結果
Running python manage.py migrate on ⬢ firstdeploy... up, run.2676 (Free)
Operations to perform:
  Apply all migrations: admin, auth, contenttypes, sessions
Running migrations:
  Applying contenttypes.0001_initial... OK
  Applying auth.0001_initial... OK
  Applying admin.0001_initial... OK
  Applying admin.0002_logentry_remove_auto_add... OK
  Applying admin.0003_logentry_add_action_flag_choices... OK
  Applying contenttypes.0002_remove_content_type_name... OK
  Applying auth.0002_alter_permission_name_max_length... OK
  Applying auth.0003_alter_user_email_max_length... OK
  Applying auth.0004_alter_user_username_opts... OK
  Applying auth.0005_alter_user_last_login_null... OK
  Applying auth.0006_require_contenttypes_0002... OK
  Applying auth.0007_alter_validators_add_error_messages... OK
  Applying auth.0008_alter_user_username_max_length... OK
  Applying auth.0009_alter_user_last_name_max_length... OK
  Applying auth.0010_alter_group_name_max_length... OK
  Applying auth.0011_update_proxy_permissions... OK
  Applying sessions.0001_initial... OK
任意でsuperuserを作成し管理画面にログインできるように設定してください。
heroku run python manage.py createsuperuser

結果
Running python manage.py createsuperuser on ⬢ hogehoge... up, run.8935 (Free)
ユーザー名 (leave blank to use 'hogehoge'): xxxxxx
メールアドレス: xxx@xxx.com
Password:
Password (again):
Superuser created successfully.
最後に下記を入力すると、ブラウザが立ち上がり、自分で作ったアプリが表示されます。
heroku open
6 herokuのURLをムームードメイン独自ドメインと紐づける
djangoのweb公開ができたら次は独自ドメインを設定しましょう。
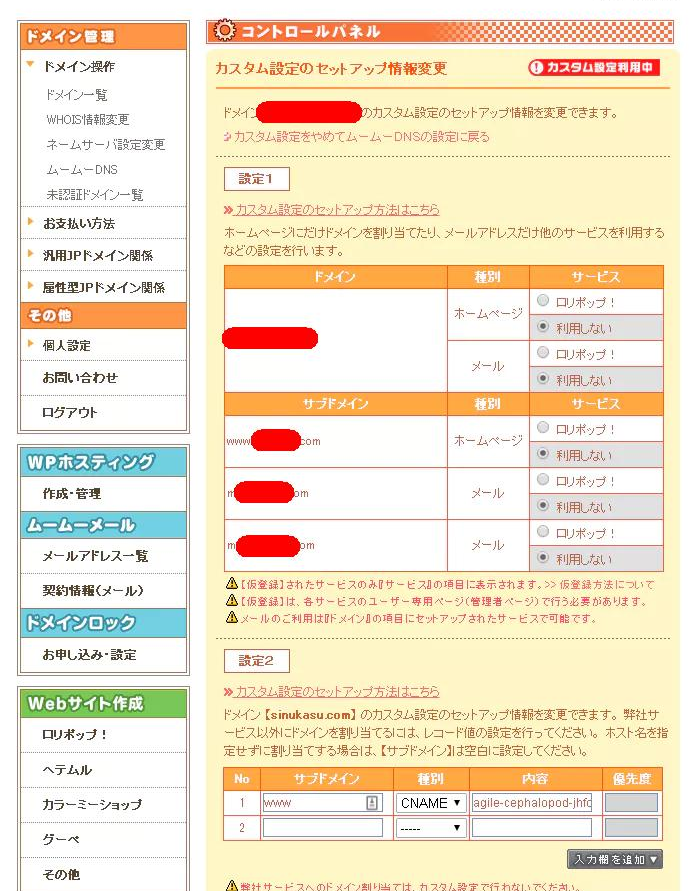
ムームードメイン側:
1.「ドメイン管理」→「ムームーDNS」→設定したい独自ドメインの「変更」を選択します。
2.「カスタム設定のセットアップ方法はこちら」というボタンを押してください。
3.設定2が現れるのでサブドメインを「www」、種別を[CNAME]、内容を[www.アプリの名前.herokudns.com]にします
サブドメイン:www
種別:CNAME
内容:agile-cephalopod-adここはそれぞれ違いますfakjnefhoo60.herokudns.com
※内容はherokuのDNS Targetをそのまま入れて下さい。
4.「セットアップ情報変更」を押し完了です。
5.24~48時間ほどで適用されます。
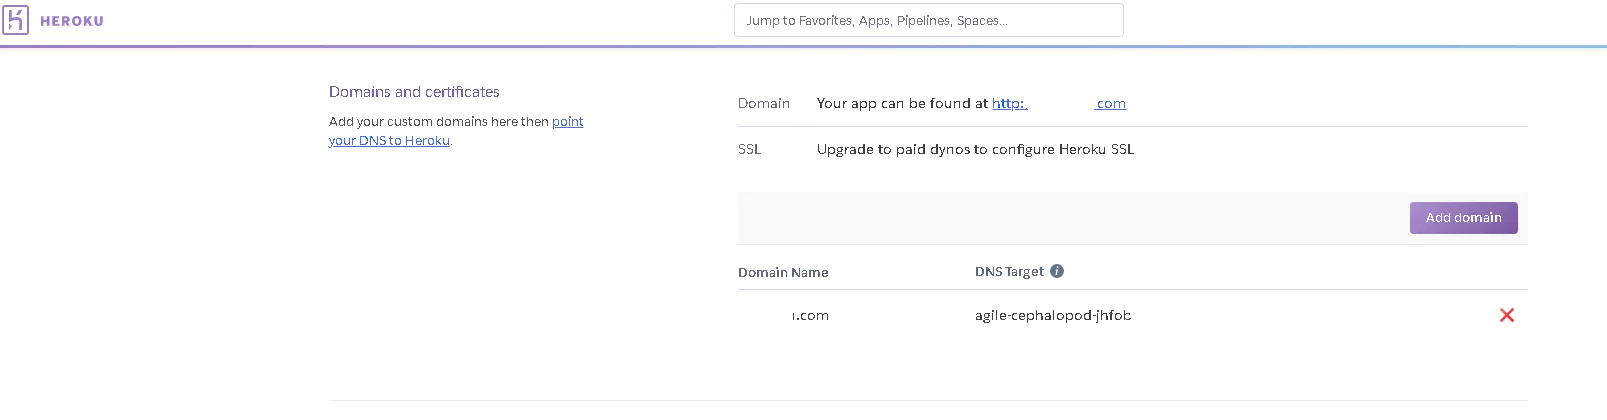
heroku側:
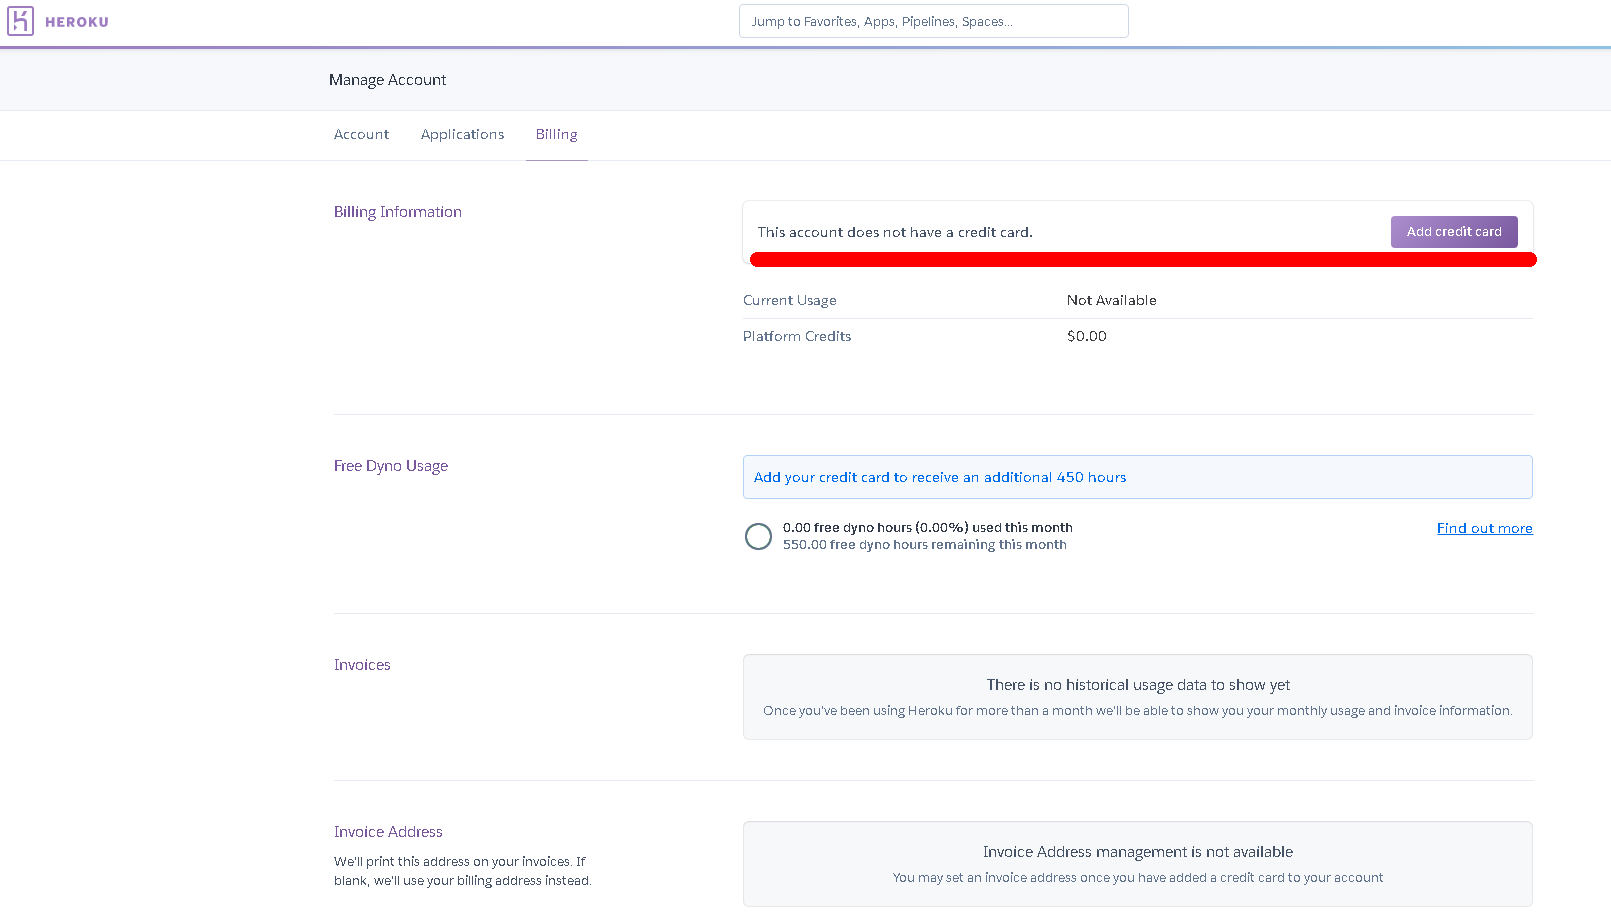
続いてheroku側の設定をGUI上で実施します。まずはDomains and certificatesページでドメインを登録してください。登録しようとした時にもしも以下のようなエラーが出たらheroku側にクレジットカード登録が済んでいない可能性があります。請求ページに行きクレジットカードを登録してください。
https://dashboard.heroku.com/account/billing
Domain "xxx.com" could not be created:
Please verify your account in order to add domain
s (please enter a credit card) For more information, see
ここからクレジットカードを登録します。
アプリのドメインが設定されているかをコマンドプロンプトで確認しましょう。
C:\Users\hogehoge>heroku domains -a firsthogehoge
=== firsthogehoge Heroku Domain
firsthogehoge.herokuapp.com

=== firsthogehoge Custom Domains
Domain Name   DNS Record Type  DNS Target
────────────  ───────────────  ─────────────────────────────────────────────────────
hogehoge.com  ALIAS or ANAME   agile-cephalopod-joghoehgoehgoehgoehgoe.herokudns.com
しばらく待ってから独自ドメインでweb公開されているか確認しましょう。
7 New Relicの設定
NewRelicについて説明します。Herokuでは無料で月に1000時間の稼働稼働枠が確保されますが30分アプリ(URL)にアクセスがないとアプリがSleepになります。つまりURLに30分誰からもアクセスがないとスリープに入る為次の閲覧ユーザはURLがすぐに閲覧できません。サーバーがスリープしてしまうと復帰させるために5~10秒ほど待たなければならないのです。ユーザは5秒から10秒画面が真っ白になります。ユーザのほどんとは画面が白い事を好まないと思いますのでサーバのスリープを阻止しましょう。そこでNew Relicというアドオンがあります。このアドオンでは定期的にリクエストを送信することができる為、アプリがSleep状態になることを防ぐ事ができます。
New Relic
New Relicはアプリケーションの運用監視を行うクラウドサービスでサーバーの状況をリアルタイムでモニタリングできます。New Relicは定期的にサーバーへpingしてモニタリングを行なっています。pingはサーバーへのアクセスになります。つまりpingを30分以内の間隔で行えばサーバーはスリープさせずに運用できる仕組みです。定期的にpingをしてくれるわけですね。
Herokuのダッシュボードから運用しているアプリケーションを選択し「Resources」ページに遷移しAdd-onsメニューから「New Relic」を検索します。プランは「Wayne – Free」を選択します。Wayneは無料プランになります。
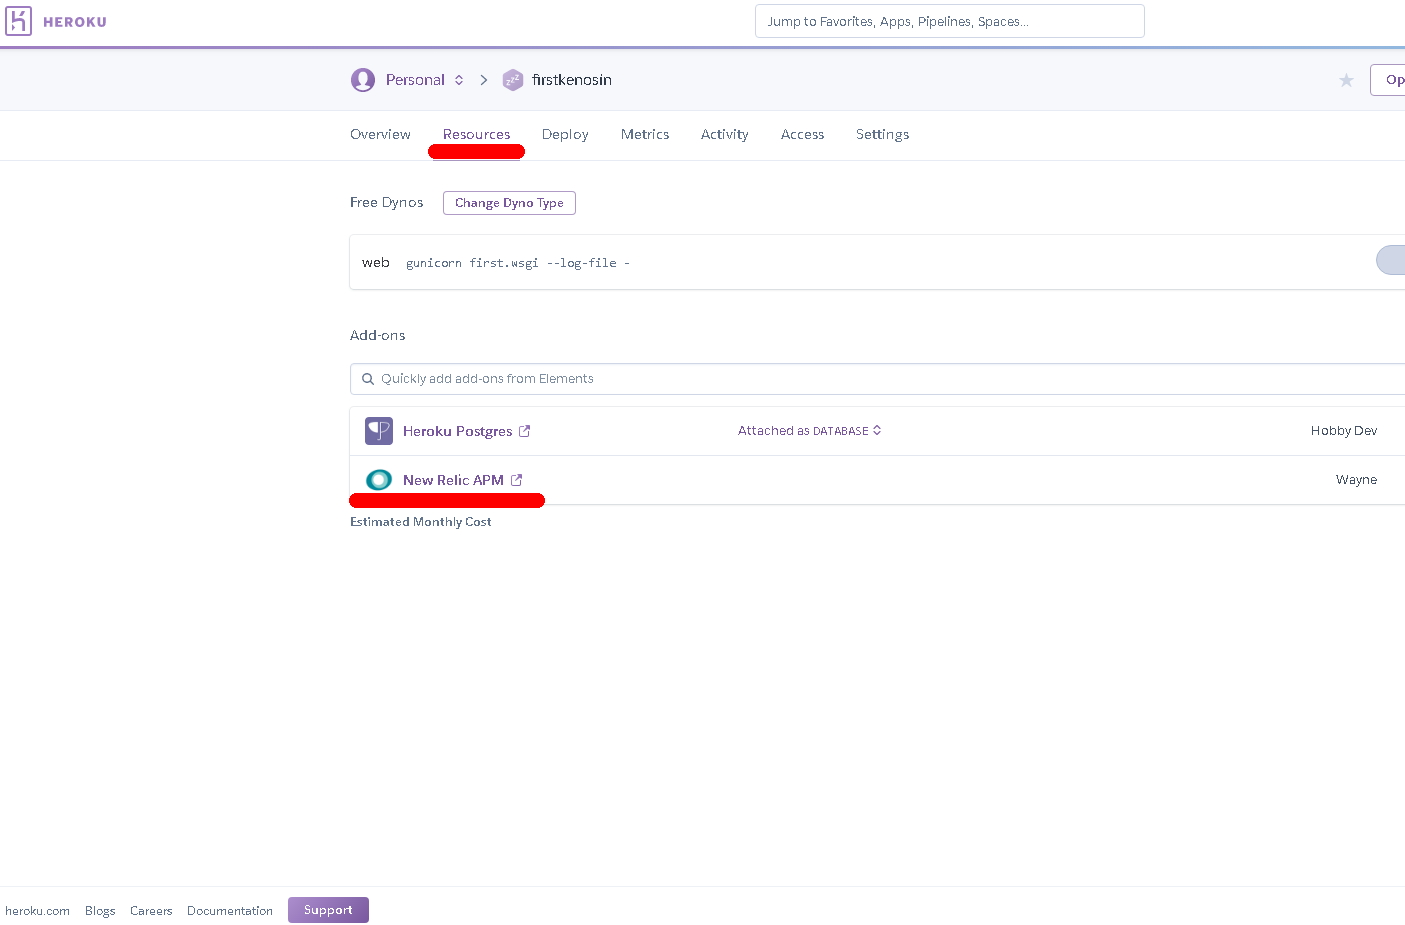
追加されたアドオンをクリックすると、New Relicのページに遷移します。NewRelicの画面に入ってアプリケーションの各運用メニューが表示されている為「SYNTHETICS」を選択します。

- Choose your monitor type には ping を選択しましょう。
- Enter the details 1つ目の項目欄はアプリケーションの名前を入力(任意の名前でOK) 2つ目の項目欄には監視するアプリケーションのURL https://firsthogehoge.herokuapp.com/myapp/ 3つ目の項目欄は空欄
- Select monitoring locations には Tokyo,JP」を選択しましょう。
- Set the schedule 15M を選択
- Get notified メアドを入力してください。 「Create my monitor」をクリックするとアプリケーション監視の設定が完了します。
※ちょいハマりポイント
Herokuは月1000時間まで無料稼働枠がありこの時間は全アプリの稼働時間の合計です。つまりアプリを3つ運用する場合、3つのアプリ稼働時間を合わせた合計時間が1000時間未満であれば無料で利用できます。今回のNewRelicの方法だと3つアプリを構成する場合は1000時間を超過してしまいますので注意して下さい。
番外編
gitにメール、ユーザを登録していないと、commit時にエラーになります。
*** Please tell me who you are.
Run
  git config --global user.email "you@example.com"
  git config --global user.name "Your Name"
to set your account's default identity.
Omit --global to set the identity only in this repository.
fatal: unable to auto-detect email address (got 'xxxxx@DESKTOP-xxxxx.(none)')
その場合はgitに登録してください。登録するコマンドは以下になります。
git config --global user.email "hogehoge@gmail.com"
git config --global user.name "taro yamada"
settings.py
わかりやすいようにsettings.pyも掲載しておきます。本来は大事なファイルですから他人に見せるような事がないよう配慮してください。
"""
Django settings for first project.

Generated by 'django-admin startproject' using Django 2.0.

For more information on this file, see
https://docs.djangoproject.com/en/2.0/topics/settings/

For the full list of settings and their values, see
https://docs.djangoproject.com/en/2.0/ref/settings/
"""

import os

# Build paths inside the project like this: os.path.join(BASE_DIR, ...)
BASE_DIR = os.path.dirname(os.path.dirname(os.path.abspath(__file__)))


# Quick-start development settings - unsuitable for production
# See https://docs.djangoproject.com/en/2.0/howto/deployment/checklist/

# SECURITY WARNING: keep the secret key used in production secret!
SECRET_KEY = 'urfaj;foanjdfnaehongehongeefhnawoenfawefaj'👈👈👈👈👈#ここは毎回違うので注意してください。

# SECURITY WARNING: don't run with debug turned on in production!
DEBUG = True👈👈👈👈👈

ALLOWED_HOSTS = []👈👈👈👈👈


# Application definition

INSTALLED_APPS = [
    'myapp.apps.MyappConfig',👈👈👈👈👈
    'django.contrib.admin',
    'django.contrib.auth',
    'django.contrib.contenttypes',
    'django.contrib.sessions',
    'django.contrib.messages',
    'django.contrib.staticfiles',
]

MIDDLEWARE = [
    'django.middleware.security.SecurityMiddleware',
    'django.contrib.sessions.middleware.SessionMiddleware',
    'django.middleware.common.CommonMiddleware',
    'django.middleware.csrf.CsrfViewMiddleware',
    'django.contrib.auth.middleware.AuthenticationMiddleware',
    'django.contrib.messages.middleware.MessageMiddleware',
    'django.middleware.clickjacking.XFrameOptionsMiddleware',
]

ROOT_URLCONF = 'first.urls'

TEMPLATES = [
    {
        'BACKEND': 'django.template.backends.django.DjangoTemplates',
        'DIRS': [],
        'APP_DIRS': True,
        'OPTIONS': {
            'context_processors': [
                'django.template.context_processors.debug',
                'django.template.context_processors.request',
                'django.contrib.auth.context_processors.auth',
                'django.contrib.messages.context_processors.messages',
            ],
        },
    },
]

WSGI_APPLICATION = 'first.wsgi.application'👈👈👈👈👈


# Database
# https://docs.djangoproject.com/en/2.0/ref/settings/#databases

DATABASES = {
    'default': {
        'ENGINE': 'django.db.backends.sqlite3',
        'NAME': os.path.join(BASE_DIR, 'db.sqlite3'),
    }
}


# Password validation
# https://docs.djangoproject.com/en/2.0/ref/settings/#auth-password-validators

AUTH_PASSWORD_VALIDATORS = [
    {
        'NAME': 'django.contrib.auth.password_validation.UserAttributeSimilarityValidator',
    },
    {
        'NAME': 'django.contrib.auth.password_validation.MinimumLengthValidator',
    },
    {
        'NAME': 'django.contrib.auth.password_validation.CommonPasswordValidator',
    },
    {
        'NAME': 'django.contrib.auth.password_validation.NumericPasswordValidator',
    },
]


# Internationalization
# https://docs.djangoproject.com/en/2.0/topics/i18n/

LANGUAGE_CODE = 'ja' 👈👈👈👈👈#変更対象です。

TIME_ZONE = 'Asia/Tokyo' 👈👈👈👈👈#変更対象です。

USE_I18N = True

USE_L10N = True

USE_TZ = True


# Static files (CSS, JavaScript, Images)
# https://docs.djangoproject.com/en/2.0/howto/static-files/

STATIC_URL = '/static/'

# 今回heroku用に以下を追加します👈👈👈👈👈
DEBUG = False

try:
    from .local_settings import *
except ImportError:
    pass

if not DEBUG:
    import django_heroku
    django_heroku.settings(locals())
以上、お疲れ様でした。youtubeでpythonについて話していますのでチャンネル登録して頂けると嬉しいです。
https://www.youtube.com/channel/UCjLz0Ot73w9v60ST1w9ugLg
今回はherokuとdjangoのデプロイを中心に独自ドメインの設定までを記載してみました。御忙しい所最後までご覧いただきありがとうございました。