BitbucketはGitHubと異なり、非公開を前提としたリポジトリ管理が無料できます。そのため、個人で作ったプログラムや、知人から請け負っている仕事のプログラムなどを管理するのはこちらを使っています。
今回は基本編としてBitbucket上のリモートリポジトリにpushするところまで記載します。
なおBitbucketはAtlassianが提供していて、JIRAなどのプロジェクト管理サービスも提供しています。
前提
-
ローカルリポジトリサーバ:CentOS 6.5
-
Bitbucketユーザ:test
-
リモートリポジトリ:testrepo
-
ローカルリポジトリパス:/opt/app/testrepo
-
接続プロトコル:SSH
-
gitはインストール済
※gitのインストール方法はこちらが参考になります
SSH鍵の登録
Bitbucketとの接続にはSSHプロトコルを用いますが、公開鍵をBitbucketのユーザと紐づける必要があります。
公開鍵の作成
$ cd ~/.ssh
## Bitbucket用のディレクトリ作成(test@hoge.comは自身のメールアドレスに読み替え)
$ mkdir bitbucket
$ cd bitbucket
$ ssh-keygen -t rsa -C test@hoge.com
Generating public/private rsa key pair.
Enter file in which to save the key (/home/ユーザ名/.ssh/id_rsa): /home/ユーザ名/.ssh/bitbucket/id_rsa #[先ほど作成したディレクトリパスに変更]
Enter passphrase (empty for no passphrase): #[enterを押す]
Enter same passphrase again: #[enterを押す]
・
・
・
BitbucketのHPにも作成方法の記載があります。
公開鍵をBitbucketに登録
先ほど作成した公開鍵をBitbucketに登録します。
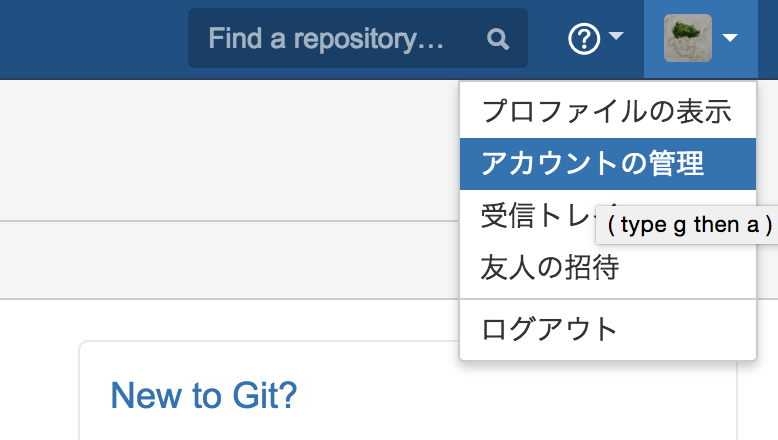
まずはログイン後、画面右上のアイコンにマウスオーバーし、アカウントの管理を選択。
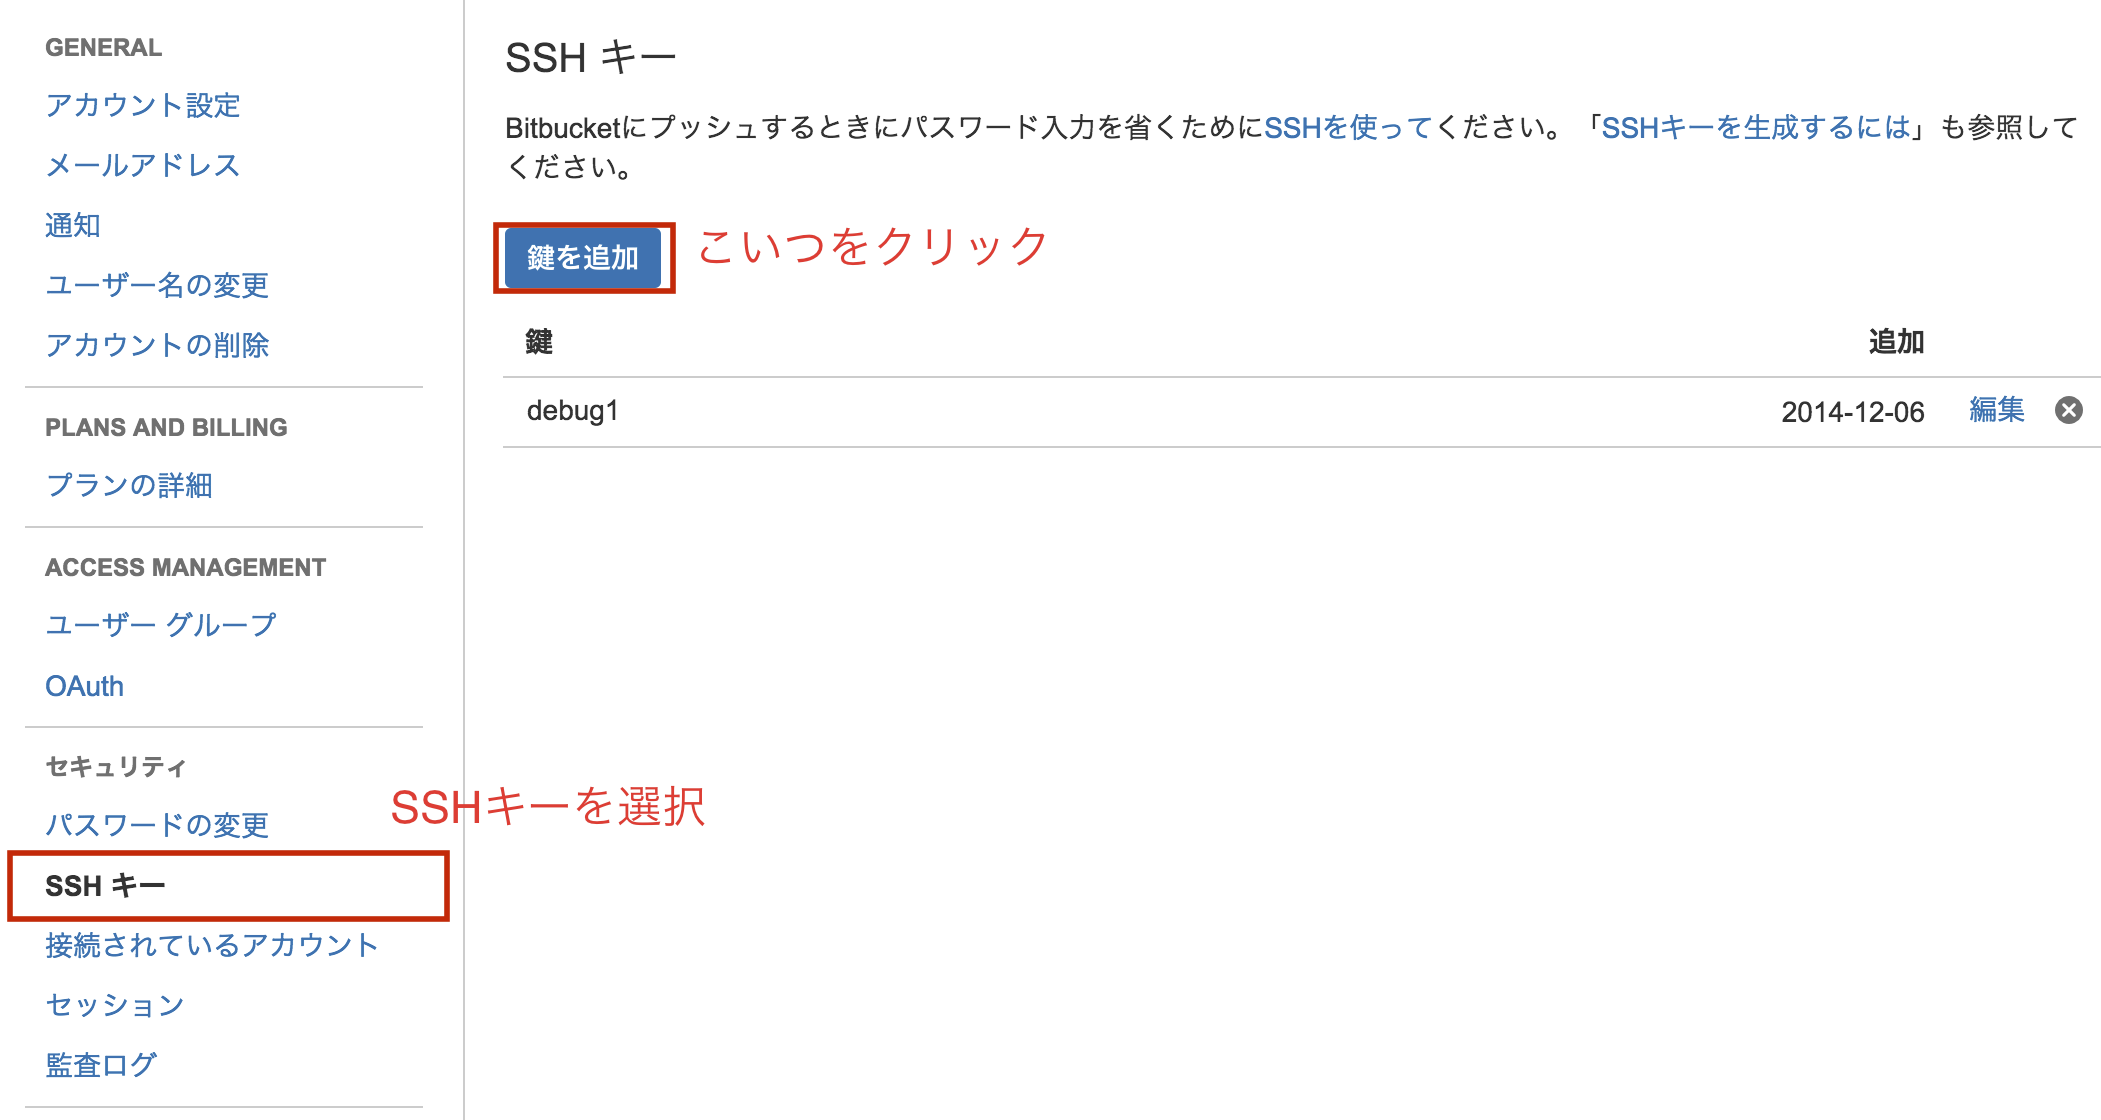
次に、左カラムからSSHキーを選択し、画面右の鍵を追加ボタンをクリック。
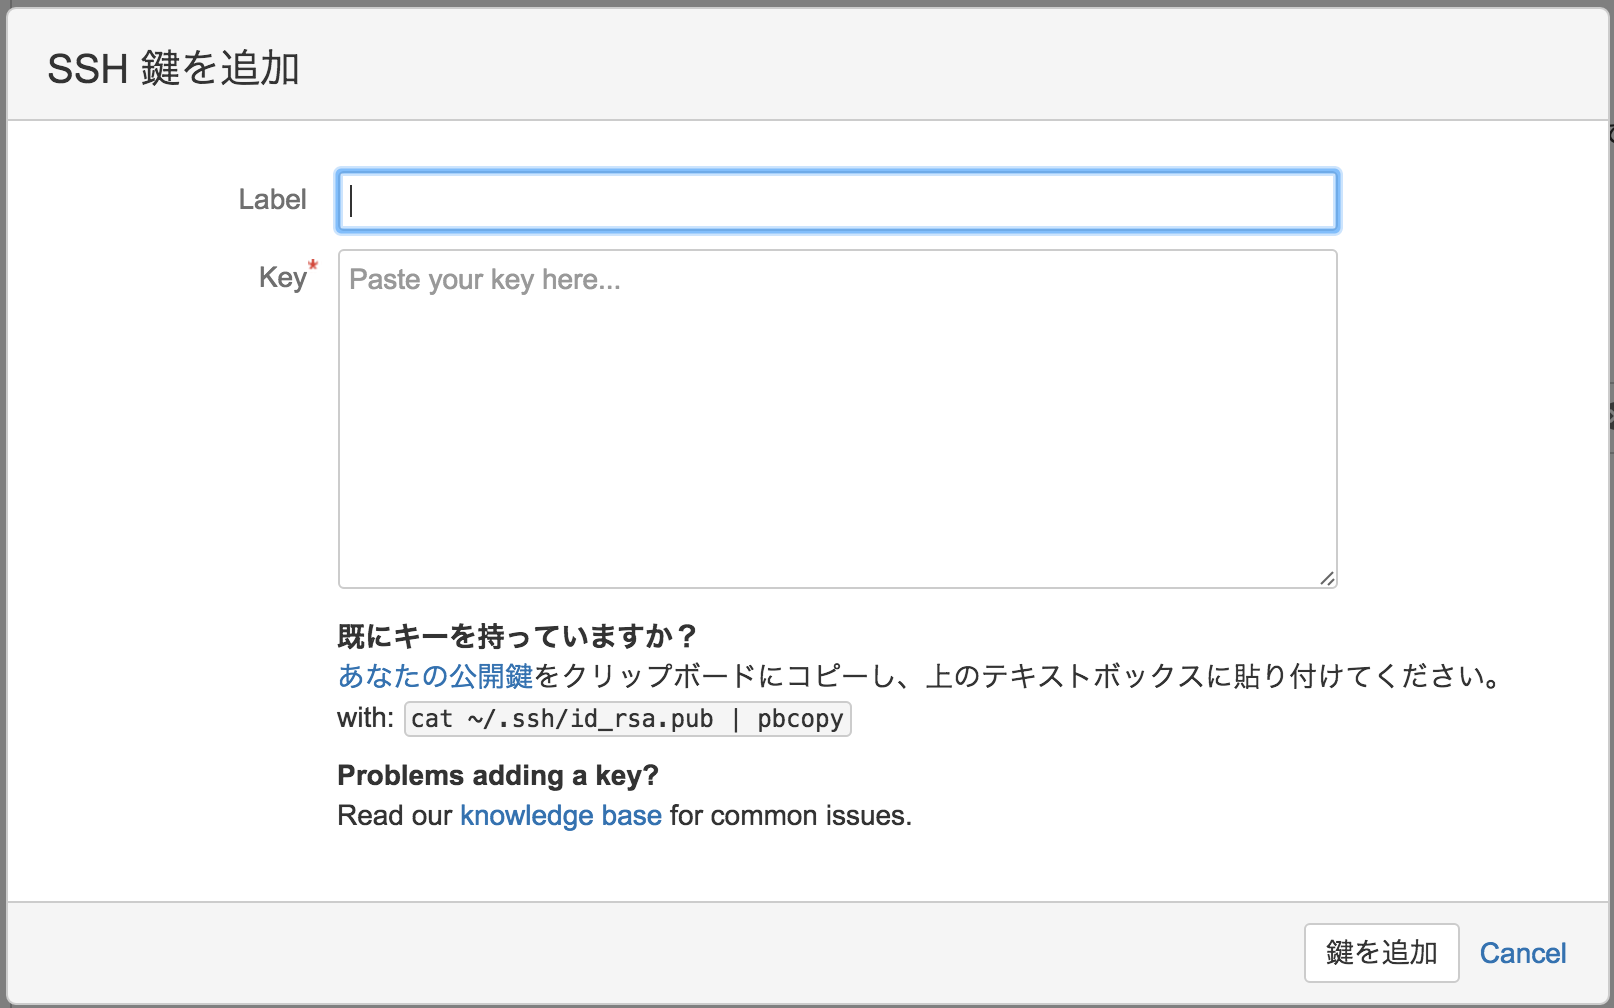
下記のようなpopup画面が表示されるので、好きなLabel名と先ほど作った公開鍵の中身をKeyに貼り付けます。
※鍵の作成場所を変更しているので、
$ cat ~/.ssh/bitbucket/id_rsa.pub | pbcopy
を実行した後に、そのまま貼り付けをすればOKです。
サーバ側の設定
configファイルを作り、bitbucketへの接続は自動的にbitbucket配下の鍵が使われるようにします。
$ cd ~/.ssh
$ touch config
$ chmod 700 config
$ vi config
configを以下の通り設定します。
Host bitbucket.org
  HostName bitbucket.org
  IdentityFile ~/.ssh/bitbucket/id_rsa
  User git
  Port 22
  TCPKeepAlive yes
  IdentitiesOnly yes
入力が終わったら:wqで保存して終了。
ちなみに各項目の設定は以下の通りです。
| 設定値 | 説明 |
|---|---|
| Host | ホスト名 |
| HostName | ホストのアドレス or IP |
| IdentityFile | 秘密鍵のパス |
| User | ログインユーザ |
| Port | ポート |
| TCPKeepAlive | 持続的接続 |
| IdentitiesOnly | ヘルスチェック |
接続のテスト
サーバ側から接続のテストを行います。
$ ssh -T bitbucket.org
logged in as yyamanaka.

You can use git or hg to connect to Bitbucket. Shell access is disabled.
エラーが表示されなければOK。
ローカルリポジトリの作成
CentOS上にローカルリポジトリを作成します。
## ローカルリポジトリのディレクトリを作成
$ mkdir /opt/app/testrepo
$ cd /opt/app/testrepo

## git初期化
$ git init

## リモートリポジトリをコピー
$ git remote add origin git@bitbucket.org:test/testrepo.git
## 紐付きを確認
$ git remote -v
これで/opt/app/testrepoがリモートリポジトリと紐付きました。
実際にファイルをpushしてみます。
# サンプルファイルの作成
$ echo "This is sample file." > test.txt
$ git status
# On branch master
#
# Initial commit
#
# Changes to be committed:
#   (use "git rm --cached <file>..." to unstage)
#
#	new file:   test.txt
#
$ git add test.txt
$ git commit -m "First Commit"
$ git push
これでBitbucket上のリモートリポジトリにtest.txtが反映されます。
参考リンク
Bitbucket:
https://www.atlassian.com/ja/software/bitbucket/overview
Bitbucket Document:
https://confluence.atlassian.com/display/BITBUCKET/Bitbucket+Documentation+Home
サルでもわかるGit入門:
http://www.backlog.jp/git-guide/
Git公式ドキュメント(リモートブランチ):
http://git-scm.com/book/ja/v1/Git-%E3%81%AE%E3%83%96%E3%83%A9%E3%83%B3%E3%83%81%E6%A9%9F%E8%83%BD-%E3%83%AA%E3%83%A2%E3%83%BC%E3%83%88%E3%83%96%E3%83%A9%E3%83%B3%E3%83%81
以上です。


