要約
CIサービスであるShippableにおいて、Build成果物を別のbranchのcommitしてSSH経由でpushすることに成功した
背景
JavaScript/CSSのminifyであったり、sass/lessのコンパイルやJavaScriptのトランスコンパイル、GitBook等によるHTMLの生成など、近代のWeb開発はビルドフェーズがついて回る。
ところでGithubは、Github Pagesと呼ばれるサービスを提供している。これは
https://github.com/<user or organization name>/<repo name>
のgh-pages branchもしくはmaster branchの/docs ディレクトリを
https://<user or organization name>/github.io/<repo name>
(注:<repo name>が<user or organization name>.github.ioの場合はhttps://<user or organization name>/github.io)
にWeb ホスティングするサービスである。
ここで、master branchのビルド結果をgh-pages branchにDeployしたいという需要がある。
先行例
@azu 氏を中心として、JavaScriptの入門書をGitBookで作成しているプロジェクトがある。
ここでは、CIサービスであるTravis CIを利用してgh-pages branchへのdeployを行っている。
具体的には
という2つのnpm packageを利用してSSH経由でDeployしている。
問題点
Travis CIを使いたくない
何かの都合ですでにTravis CIは使っていて別のCIでDeployしたいということはままある。
Deployのためにnpmの依存やnpm scriptsを増やしたくない
個人的にlocalで動かせないものはあんまnpm使いたくない。というかどうせshell scripts書く時点で環境依存なんだからわざわざnpm scriptsなんて挟まないでshell scriptsで完結したい
解決策
Shippableを使ってみる
ShippableもCIサービスで、docker image使えたりpipeline組めたりもするらしい。
全体像
CI実行前
- local machineで公開鍵と秘密鍵を生成
- Shippableに公開鍵と秘密鍵を登録
- Githubに公開鍵を登録
CI実行時
- CIによってtarget branchがclone/checkoutされる
- buildする
- SSH keyをloadして別途Repogitryをclone、
gh-pagesをcheckoutする - 2の結果を3でcloneした場所にcopyする
- commitする。この時
[skip ci]と記述しないとdeployしたgh-pagesに対するCIが動いてしまう - SSH keyをloadしてpushする
詳細
local machineで公開鍵と秘密鍵を生成
これは特に難しくない。
$ssh-keygen -t rsa -b 4096 -C "yume-wikijp@live.jp" -f github_deploy_key -N ''
とするとカレントディレクトリに
github_deploy_keygithub_deploy_key.pub
の2つができる。github_deploy_keyは秘密鍵なので取り扱いには注意する。
Windowsの場合はmsys2を入れて
$pacman -S openssh
とかすると、ssh-keygenが使える。
メールアドレス(-C)や鍵の名前(-f)は適宜読み替えて。
信頼できるエントロピー源のないVPSや一部の仮想環境では鍵を作らないほうがいい。
Shippableに公開鍵と秘密鍵を登録
- ShippableのDashboardに行きsettingsを開く

- Integrations へ行く
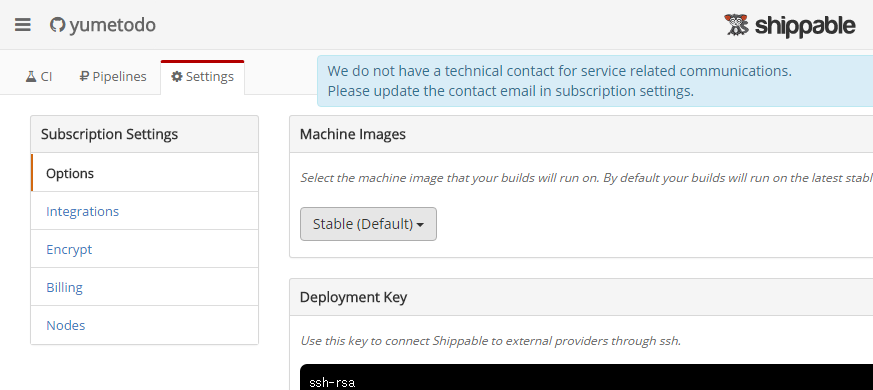
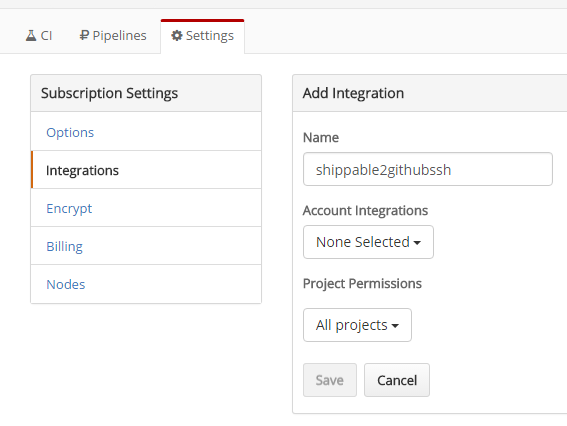
- Add Integrationをクリック

- ここではintegrationの名前は
shippable2githubsshとした
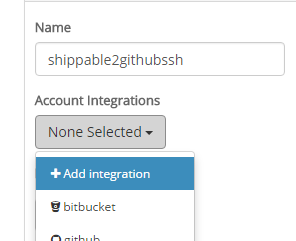
- Account Integrations -> Add integration
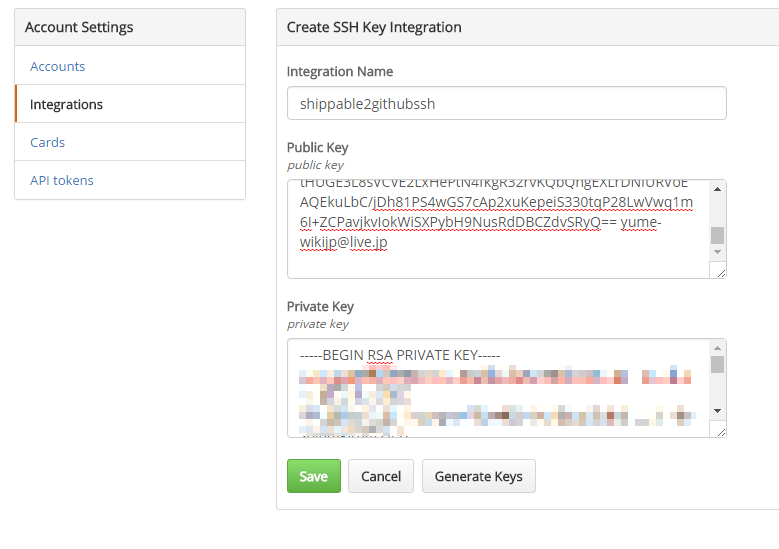
- SSH Keyを選択

- ここでは名前は
shippable2githubsshにした。公開鍵と秘密鍵を貼り付ける。 Saveをクリックする。
- Saveをクリックする
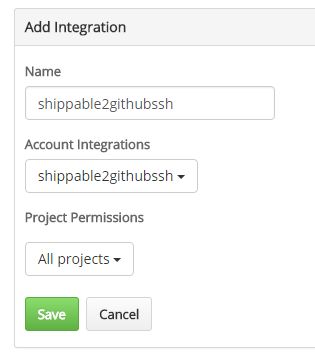
- 正しく登録されている

Githubに公開鍵を登録
- GithubのRepogitryを開き、Setting -> Deploy keys -> Add deploy Keyをクリック
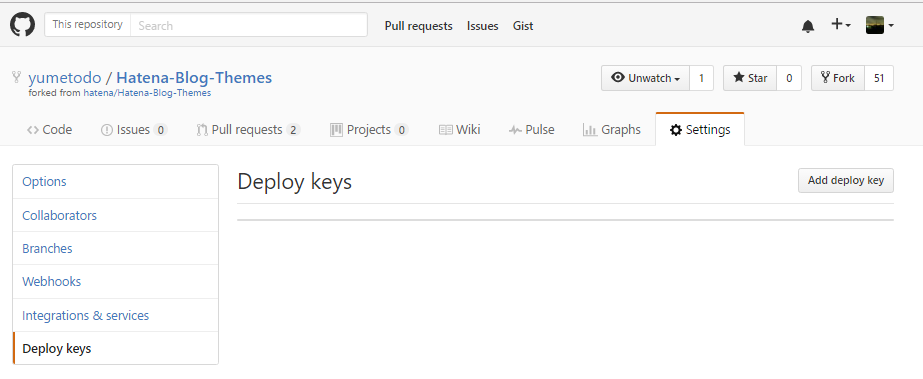
-
公開鍵を貼り付け、
Allow write accsessにチェックを付ける。Add keyをクリック
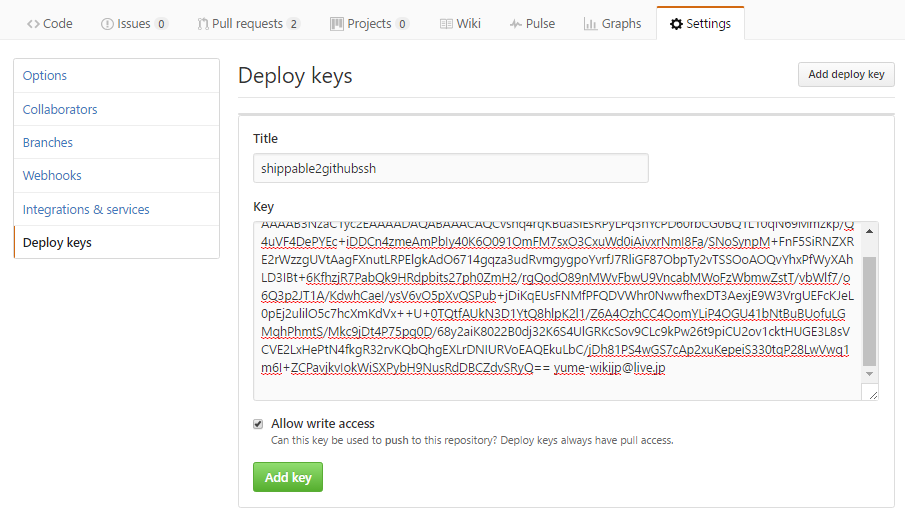
- 正しく登録された。

ymlを書く
intagrationを有効にする
integrations:
  key:
    - integrationName: shippable2githubssh
      type: ssh-key
を追記する。すると実行時に
$ls -l /tmp/ssh
total 12
-rw------- 1 root root 1680 Feb 10 23:53 00_sub
-rw------- 1 root root 1676 Feb 10 23:53 01_deploy
-rw------- 1 root root 3243 Feb 10 23:53 shippable2githubssh
SSH keyが/tmp/sshにある。
注意点として、公開レポジトリの場合、Pull Requestのビルド時にはintagrationは無効化される。じゃないとだれでもDeployをできることになっちゃうしね。
Deployの条件
- ビルドが成功
- 任意のbranch(今回は
yumetodo/masterというbranch)に対する実行時 - Pull Request Buildではない(上述のとおり)
をすべて満たしたとき、Deployを実行するには
build:
  on_success:
    - if [ "$BRANCH" == "yumetodo/master" ] && [ "${IS_PULL_REQUEST}" != "true" ]; then ./tools/shippable_deploy.sh; fi
のようにする。
BRANCHやIS_PULL_REQUESTはShippableで定義されている環境変数で、一覧は
Using Environment Variables for Continuous Integration - Shippable Docs
で見られる。
Deploy Script
ymlにDeployの手順を全部書くのはだるいので普通にshell Scriptを書いて呼び出す。
先行例で上げたjs-primerの場合はgh-pagesのcommitを全部消してからcommitしているが、今回はそうせずに普通にcommitする。
# !/bin/bash -eu
echo "ll /tmp/ssh"
ls -l /tmp/ssh
echo "ll /dev/shm"
ls -l /dev/shm

echo "clone taget repogitry..."
ssh-agent bash -c 'ssh-add /tmp/ssh/shippable2githubssh; git clone -b gh-pages git@github.com:yumetodo/Hatena-Blog-Themes.git /dev/shm/Hatena-Blog-Themes'
bash -c 'cd /dev/shm/Hatena-Blog-Themes; git status;'
cd $SHIPPABLE_BUILD_DIR

echo "copy minified result..."
cp -r bin /dev/shm/Hatena-Blog-Themes
cd /dev/shm/Hatena-Blog-Themes
git config user.name "yumetodo"
git config user.email "yume-wikijp@live.jp"
git config push.default simple
git add .

echo "commit changes..."
git commit -m "Deploy minified css/js [skip ci]" &&:
errno=$? # bind error code
if [ $errno != 0 ]; then
    echo "git commit exit with ${errno}"
    exit 0 # nothing to commit means nothing to deploy.
fi

echo "push commit..."
ssh-agent bash -c 'ssh-add /tmp/ssh/shippable2githubssh; git push'

echo "finish deploy."
cd $SHIPPABLE_BUILD_DIR
まあ特に難しいことはしていない。
cp -r bin /dev/shm/Hatena-Blog-Themes
の部分がビルド成果物をdeploy用にcloneしたディレクトリへコピーしている部分だ。適宜書き換えれば良い。
SSH keyを呼び出すのはssh-addコマンドを使っている。
ssh-agentについては
ssh-agentの使い方 - Qiita
が詳しい。
当たり前だが、SSH Keyが必要なのはcloneする時とpushする時のみで、ほかは必要ない。
冒頭の
# !/bin/bash -eu
が大事で、-euがないとscriptの途中でコケたときにexit codeがscript呼び出し側に伝わらないだけではなく、実行が中断されない。この辺については
が詳しい。
commit logを消してからcommitとしてない都合上、commitするような変更がない可能性がある。そのときにエラーで終了されるとShippableの実行ステータスが失敗になってしまうので握りつぶす必要がある。
git commit -m "Deploy minified css/js [skip ci]" &&:
errno=$? # bind error code
if [ $errno != 0 ]; then
    echo "git commit exit with ${errno}"
    exit 0 # nothing to commit means nothing to deploy.
fi
またcommit messageには忘れずに[skip ci]を書いておきましょう。
できたもの
ほい。このレポジトリがなんなのかについては
FC2からはてなブログに移行した - yumetodoの旅とプログラミングとかの記録
を参照。
最後に
公開レポジトリの場合、Pull Requestのビルド時にはintagrationは無効化される
というのを知らずになんでやーーーとなった挙句、Shippableのサポートに泣きついたのはここだけの秘密
found SSH Key integration but SSH key not found in /tmp/ssh · Issue #3347 · Shippable/support
追記
SSH key integrationを使うときに新たにkeyの場所を取れる環境変数が追加された。