最近 Google Compute Engine でも CoreOS が選択できるようになりましたし、国産VPSでも導入できないかなと思いさくらのVPSに入れてみることにしました。
CoreOS is Linux for Massive Server Deployments
https://coreos.com/
事前準備
ISOイメージのダウンロード
さくらのVPSでは「ISOイメージインストール」でISOイメージをSFTP経由でアップロードし、任意のOSをインストールすることが可能です。
CoreOSのサイトからISOイメージをダウンロードします。
Dockerのバージョンを0.11系を利用したいので、「Alpha Channel」を選択し、「Download Alpha ISO」をクリックしダウンロードします。
ISO - CoreOS
https://coreos.com/docs/running-coreos/platforms/iso/
もちろん、さくらのVPSも新規で申込も済ませておきます。
VPS(仮想専用サーバ)のさくらインターネット
http://vps.sakura.ad.jp/
ISOイメージのアップロードと起動
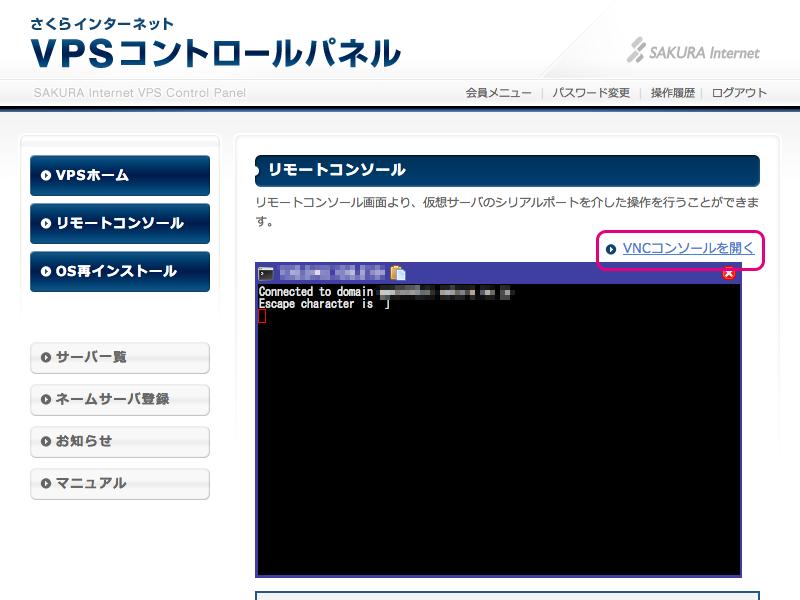
VPSコントロールパネルにログインし、左サイドバーから「OS再インストール」をクリックします。
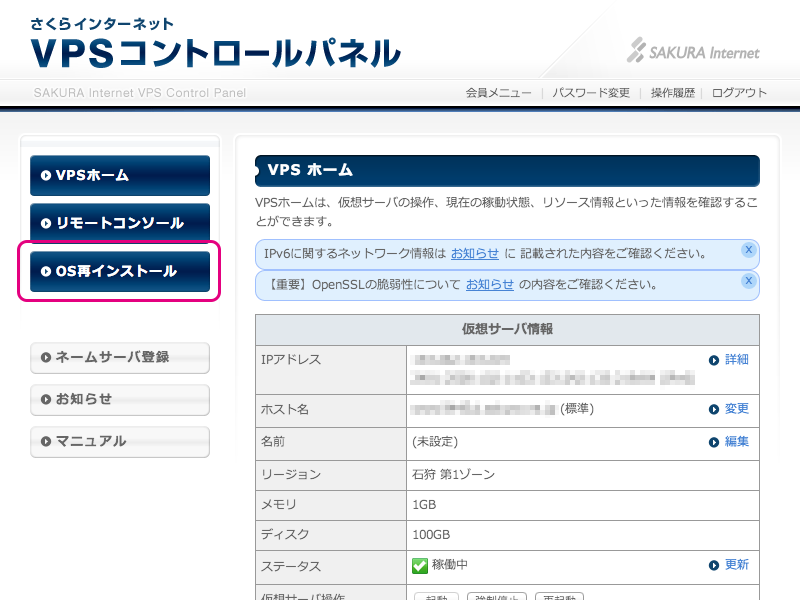
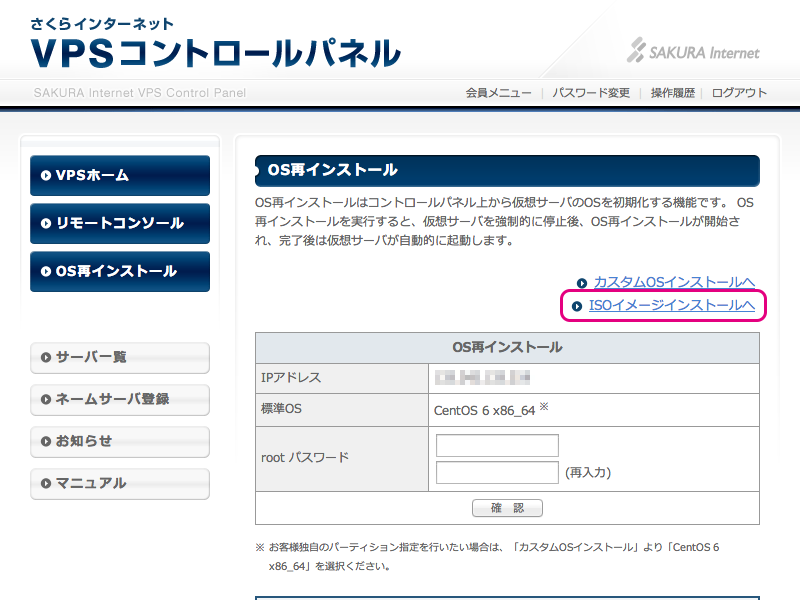
事前準備でISOイメージを用意していますので、「ISO イメージインストールへ」をクリックします。
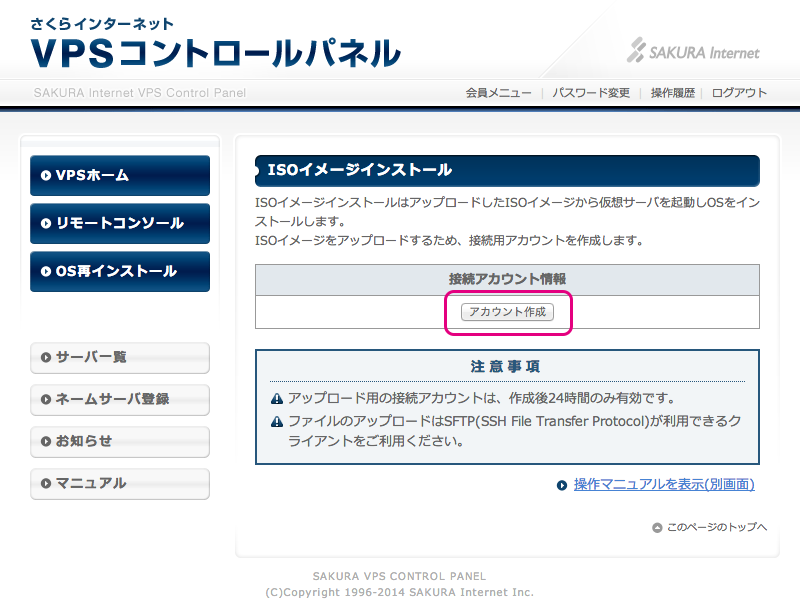
SFTPでアップロードを行うため、接続用アカウントを作成します。「アカウント作成」をクリックすると、24時間だけ利用できるアカウントが作成されます。

表示されたアカウント情報をもとにアップロードを行います。以下はsftpコマンドを利用する場合の例です。
$ sftp vps000000000000@vps-iso1.sakura.ad.jp
vps000000000000@vps-iso1.sakura.ad.jp's password:
Connected to vps-iso1.sakura.ad.jp.
sftp> cd /iso
sftp> put coreos_production_iso_image.iso
Uploading coreos_production_iso_image.iso to /iso/coreos_production_iso_image.iso
coreos_production_iso_image.iso                     100%  132MB   9.4MB/s   00:14
sftp>
アップロードを完了したら、先ほどの「ISOイメージインストール」画面の中ほどにある「ISOイメージ」の「更新」ボタンをクリックします。
ISOイメージに先ほどアップロードしたISOイメージファイル名が表示されていれば問題ありません。画面下部にある「確認」をクリックして進みます。
確認画面が表示されますので、問題がなければ「実行」をクリックします。
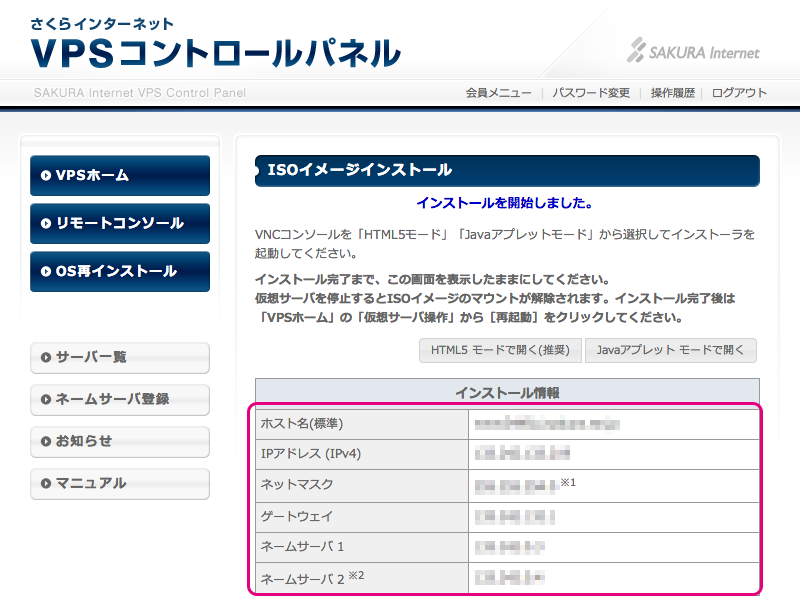
実行すると「インストール情報」というページが表示されますので、インストールにはこれらの情報が必要となりますのでメモしておくかページを移動したり閉じずに残しておきます。
cloud-config の準備
CoreOSのネットワークはDHCPがディフォルトとなっているうえに、ログインできるユーザーのパスワードも設定されていないため、何もしなければログインもできません。
インストール時にネットワークの設定、SSHキーの設定を行うため、YAMLファイルを準備しておきます。
# cloud-config

write_files:
  - path: /etc/systemd/network/static.network
    permissions: 0644
    content: |
      [Match]
      Name=ens3

      [Network]
      Address=<IPアドレス>/<サブネットマスク>
      Gateway=<ゲートウェイ>
      DNS=<DNS1>
      DNS=<DNS2>

ssh_authorized_keys:
  - ssh-rsa ABCDABCDABCDABCDABCDABCDABCDABCDABCD...
ネットワークの設定は先ほどの「インストール情報」を元に入力を行います。このとき、サブネットマスクはビットで入力する必要がありますので、 255.255.254.0 の場合は 23 とします。
ssh_authorized_keys にはSSHのログインに利用する公開鍵を指定しますので、お使いの秘密鍵に対応する公開鍵をペースとするか、新規に作りましょう。
ネットワーク設定とパスワード設定
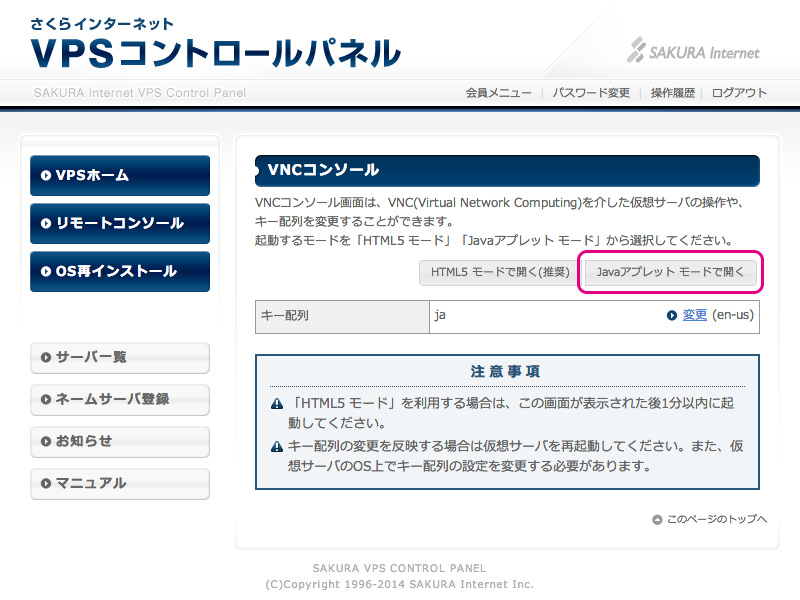
ネットワーク設定を固定IPアドレスにするため、リモートコンソールで設定を行う必要があります。
HTML版のリモートコンソールはなぜか開けませんので、Javaアプレットモードで開きます。ここで注意が1点あって、MacOS の Chrome では Java のバージョンによってアプレットモードを開くことができません。もし MacOS で開けない場合は Safari から開くと良いでしょう。
ネットワーク設定
/etc/systemd/network/static.network をvimで開き、ネットワークの設定を行います。残念ながらコピペが利用できないため、手打ちが必要です。内容はさきほどの cloud-config の write_files に記載されているものと同じ内容になります。
$ sudo vi /etc/systemd/network/static.network
[Match]
Name=ens3

[Network]
Address=<IPアドレス>/<サブネットマスク>
Gateway=<ゲートウェイ>
DNS=<DNS1>
DNS=<DNS2>
保存したらネットワークを再起動し、外部への通信が行えるか確認します。
$ sudo systemctl restart systemd-networkd
$ wget -O /dev/null example.com
--2014-05-26 19:27:25--  http://example.com/
Resolving example.com... 93.184.216.119
Connecting to example.com|93.184.216.119|:80... connected.
HTTP request sent, awaiting response... 200 OK
Length: 1270 (1.2K) [text/html]
Saving to: '/dev/null'

100%[============================>] 1,270       --.-K/s   in 0s

2014-05-26 19:27:26 (25.2 MB/s) - '/dev/null' saved [1270/1270]
ちゃんと通信できていますね。
パスワード設定とSSHログイン
ここからの作業はVNCコンソールからの入力だと少し辛くなってきます。coreユーザーのパスワードを設定し、SSHログインして作業を進めることとします。ここで設定するパスワードは1度しか使いませんので、なるべく複雑なものがいいでしょう。
$ sudo passwd core
Enter the new password (minimum of 5 characters)
Please use a combination of upper and lower case letters and numbers.
New password:
Re-enter new password:
passwd: password changed.
パスワードを変更したらSSHでログインできます。
ssh core@<IPアドレス>
The authenticity of host 'xxx.xxx.xxx.xxx (xxx.xxx.xxx.xxx)' can't be established.
RSA key fingerprint is xx:xx:xx:xx:xx:xx:xx:xx:xx:xx:xx:xx:xx:xx:xx:xx.
Are you sure you want to continue connecting (yes/no)? yes
Warning: Permanently added 'xxx.xxx.xxx.xxx' (RSA) to the list of known hosts.
core@xxx.xxx.xxx.xxx's password:
Last login: Mon May 26 10:16:45 2014
CoreOS (alpha)
Update Strategy: No Reboots
core@localhost ~ $
インストール
cloud-configのアップロード
インストール時にネットワーク設定とSSH公開鍵を設定するため、先ほどの cloud-config をアップロードします。以下はscpでコピーする例です。
local) $ scp cloud-config core@<IPアドレス>:~/
インストール
さて、いよいよインストールです。インストールは coreos-install コマンドで行います。さくらのVPSでは /dev/vda がストレージのデバイスになっているようなので、インストール先に指定します。
先ほどアップロードした cloud-config を指定し、Alpha Channel からダウンロードしインストールします。
$ sudo coreos-install -d /dev/vda -c cloud-config -C alpha
Downloading and verifying coreos_production_image.bin.bz2...
--2014-05-26 10:21:19--  http://alpha.release.core-os.net/amd64-usr/324.1.0/coreos_production_image.bin.bz2
Resolving alpha.release.core-os.net... 173.194.72.128, 2404:6800:4008:c01::80
Connecting to alpha.release.core-os.net|173.194.72.128|:80... connected.
HTTP request sent, awaiting response... 200 OK
Length: 172839024 (165M) [application/octet-stream]
Saving to: `/tmp/coreos-install.BpifWMN6ON/coreos_production_image.bin.bz2'

100%[======================================================>] 172,839,024  233K/s   in 12m 3s

2014-05-26 10:33:23 (233 KB/s) - `/tmp/coreos-install.BpifWMN6ON/coreos_production_image.bin.bz2' saved [172839024/172839024]

2014-05-26 10:33:23 URL:http://alpha.release.core-os.net/amd64-usr/324.1.0/coreos_production_image.bin.bz2.sig [543/543] -> "/tmp/coreos-install.BpifWMN6ON/coreos_production_image.bin.bz2.sig" [1]
gpg: Signature made Wed May 21 23:37:02 2014 UTC using RSA key ID 74E7E361
gpg: key 93D2DCB4 marked as ultimately trusted
gpg: checking the trustdb
gpg: 3 marginal(s) needed, 1 complete(s) needed, PGP trust model
gpg: depth: 0  valid:   1  signed:   0  trust: 0-, 0q, 0n, 0m, 0f, 1u
gpg: Good signature from "CoreOS Buildbot (Offical Builds) <buildbot@coreos.com>"
Writing coreos_production_image.bin.bz2 to /dev/vda...
  /tmp/coreos-install.BpifWMN6ON/coreos_production_image.bin.bz2: done
Installing cloud-config...
Success! CoreOS alpha 324.1.0 is installed on /dev/vda
インストールが完了したら、VPSコントロールパネルから「再起動」を実施します。

注意が1点あって、cloud-config に記載したネットワーク設定がどうやらネットワークを起動した後に動作するようでIPアドレスが設定されないため、起動後しばらくしたあと再度再起動が必要になりました。
SSHでログインする
$ ssh core@<IPアドレス>
@@@@@@@@@@@@@@@@@@@@@@@@@@@@@@@@@@@@@@@@@@@@@@@@@@@@@@@@@@@
@    WARNING: REMOTE HOST IDENTIFICATION HAS CHANGED!     @
@@@@@@@@@@@@@@@@@@@@@@@@@@@@@@@@@@@@@@@@@@@@@@@@@@@@@@@@@@@
IT IS POSSIBLE THAT SOMEONE IS DOING SOMETHING NASTY!
Someone could be eavesdropping on you right now (man-in-the-middle attack)!
It is also possible that a host key has just been changed.
The fingerprint for the RSA key sent by the remote host is
xx:xx:xx:xx:xx:xx:xx:xx:xx:xx:xx:xx:xx:xx:xx:xx.
Please contact your system administrator.
Add correct host key in /Users/xxxx/.ssh/known_hosts to get rid of this message.
Offending RSA key in /Users/xxxx/.ssh/known_hosts:xxx
RSA host key for xxx.xxx.xxx.xxx has changed and you have requested strict checking.
Host key verification failed.
インストール中にSSHにログインしてしまうと known_hosts にホストのキーが書き込まれてしまい、インストール後のホストのキーと違うため接続できなくなってしまいます。初めてのログインだけは -o 'StrictHostKeyChecking no' オプションを付けて無視します。
$ ssh core@<IPアドレス> -o 'StrictHostKeyChecking no'
@@@@@@@@@@@@@@@@@@@@@@@@@@@@@@@@@@@@@@@@@@@@@@@@@@@@@@@@@@@
@    WARNING: REMOTE HOST IDENTIFICATION HAS CHANGED!     @
@@@@@@@@@@@@@@@@@@@@@@@@@@@@@@@@@@@@@@@@@@@@@@@@@@@@@@@@@@@
IT IS POSSIBLE THAT SOMEONE IS DOING SOMETHING NASTY!
Someone could be eavesdropping on you right now (man-in-the-middle attack)!
It is also possible that a host key has just been changed.
The fingerprint for the RSA key sent by the remote host is
xx:xx:xx:xx:xx:xx:xx:xx:xx:xx:xx:xx:xx:xx:xx:xx.
Please contact your system administrator.
Add correct host key in /Users/xxxx/.ssh/known_hosts to get rid of this message.
Offending RSA key in /Users/xxxx/.ssh/known_hosts:107
Password authentication is disabled to avoid man-in-the-middle attacks.
Keyboard-interactive authentication is disabled to avoid man-in-the-middle attacks.
@@@@@@@@@@@@@@@@@@@@@@@@@@@@@@@@@@@@@@@@@@@@@@@@@@@@@@@@@@@
@    WARNING: REMOTE HOST IDENTIFICATION HAS CHANGED!     @
@@@@@@@@@@@@@@@@@@@@@@@@@@@@@@@@@@@@@@@@@@@@@@@@@@@@@@@@@@@
IT IS POSSIBLE THAT SOMEONE IS DOING SOMETHING NASTY!
Someone could be eavesdropping on you right now (man-in-the-middle attack)!
It is also possible that a host key has just been changed.
The fingerprint for the RSA key sent by the remote host is
xx:xx:xx:xx:xx:xx:xx:xx:xx:xx:xx:xx:xx:xx:xx:xx.
Please contact your system administrator.
Add correct host key in /Users/xxxx/.ssh/known_hosts to get rid of this message.
Offending RSA key in /Users/xxxx/.ssh/known_hosts:107
CoreOS (alpha)
core@localhost ~ $
正常にログインできましたね。
Dockerの動作確認
Dockerで何か動かしてみましょう。手っ取り早く WordPress でも動かしてみることにします。
$ docker run -d -p 8080:80 tutum/wordpress
上の例ではコンテナの 80 ポートをホストの 8080 に転送していますので、http://<IPアドレス>:8080 をブラウザで開きます。
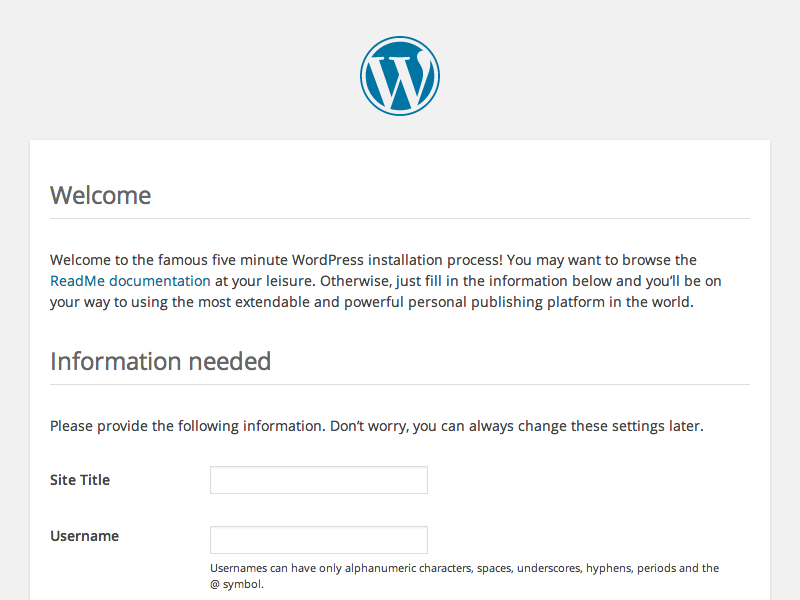
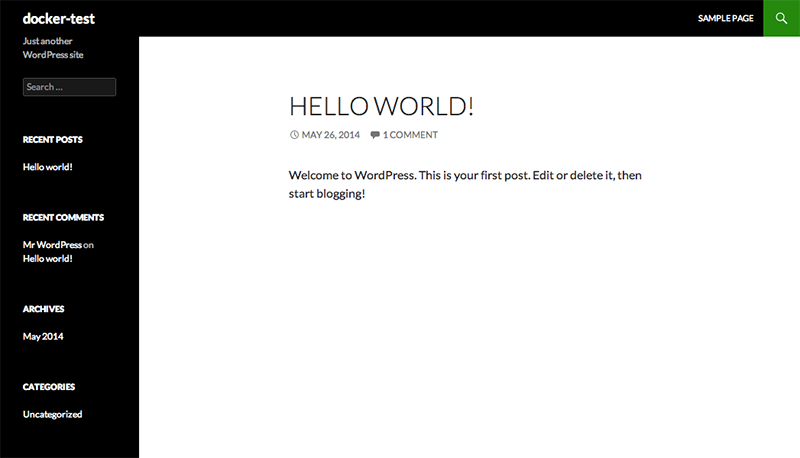
ばっちり動いています。
最後に
途中ネットワークの設定やSSH公開鍵の設定で少し手間がかかりますが、恐らくは CoreOS をリビルドすれば実現可能です。が、IPアドレスが変わるごとにイメージを作る必要があるので、そちらのほうが手間かなと思いましたのでリビルドはしません。
あと、ISOイメージからのインストールはISOイメージにあるアーカイブをインストールするものではなく、インストーラーを起動すると結局CoreOSのインストールイメージをダウンロードしにいくので、ISOイメージはお好きなディストリビューションでもいいと思います。その場合は、インストーラーである coreos-install は https://raw.github.com/coreos/init/master/bin/coreos-install からダウンロードしたものを利用するといいでしょう。
本当は自宅のMac miniの物理マシン上(いわゆるベアメタル)にインストールしたいのですが、CoreOS のインストーラーはパーティションではなくデバイスを指定する必要があるので、既存のMacOSも残しつつデュアルブートは難しそうです。
といっても Mac は Lion からインターネット経由のOS復元ができるようになっているので、玉砕覚悟でそのうち試してみようと思っています。さっとできそうであれば、またそのレポートを投稿したいと思います。