1. 概要
今までESP8266とMilkcocoaを使って工作をしていましたが、openFrameworksとESP8266を連携させようと思うとMilkcocoaをどう使っていいかわからず、友人に聞くとMQTTサーバを立てればいいよとのアドバイスを得たので、そのための勉強の覚え書きです。
2. 用意するもの
3. 作業環境
- MacBook Air (13-inch, Mid 2012) & Mac OS 10.11.4
- Arduino IDE 1.6.5
- openFrameworks 0.9.3
4. 参考サイト
-
電子工作界隈で話題のWi-Fiモジュール「ESP8266」でMQTTを使う方法 | 株式会社LIG
- ESP8266側はほとんどこのサイトを参考にしました。めっちゃ丁寧。
-
osx で brew update が error の時に、試すこと - Qiita
- mosquittoのインストールの途中でエラーが出たときに役立った
-
esp8266-mqtt-quicktest/mqtt_esp8266_test.ino at master · kiyopikko/esp8266-mqtt-quicktest
- 1つ目のサイトに載っていたサンプルプログラム
-
256dpi/ofxMQTT: MQTT addon for openframeworks based on libmosquitto
- openFrameworks用のMQTTアドオン ofxMQTT
-
ESP8266 | Adafruit IO Basics: Digital Output | Adafruit Learning System
- ESP8266でAdafruitのMQTTライブラリを使ったときにMQTTのpayloadのasciiをintに変えるところを参考にした。
5. MQTTブローカを立てる
参考サイト(電子工作界隈で話題のWi-Fiモジュール「ESP8266」でMQTTを使う方法 | 株式会社LIG)にしたがって作業を行います。この辺りは全く詳しくないのですが、とても分かりやすく書いてあるので、そちらを見てもらうのが早いです。
5.1 Mosquitoのインストール
- Homebrewをインストール(インストールされていない場合)
$ ruby -e "$(curl -fsSL https://raw.githubusercontent.com/Homebrew/install/master/install)"
私はHomebrewがインストールされているか分からなかったので、とりあえず上のコマンドを打ってみました。するとすでにインストールされているというメッセージが表示されました。
Miyano-MacBook-Air:~ YujiMiyano$ ruby -e "$(curl -fsSL https://raw.githubusercontent.com/Homebrew/install/master/install)"

It appears Homebrew is already installed. If your intent is to reinstall you
should do the following before running this installer again:
    ruby -e "$(curl -fsSL https://raw.githubusercontent.com/Homebrew/install/master/uninstall)"
The current contents of /usr/local are bin Cellar CODEOFCONDUCT.md CONTRIBUTING.md etc foreman git heroku include lib Library LICENSE.txt opt README.md share SUPPORTERS.md texlive var .git .gitignore
- Mosquittoのインストール
$ brew install mosquitto
しばらく経ったあと以下のメッセージが…。
==> Summary
🍺  /usr/local/Cellar/openssl/1.0.2d_1: 464 files, 17M, built in 6.4 minutes
==> Installing mosquitto dependency: libwebsockets
==> Downloading http://git.libwebsockets.org/cgi-bin/cgit/libwebsockets/snapshot

curl: (56) SSLRead() return error -9806
Error: Failed to download resource "libwebsockets"
Download failed: http://git.libwebsockets.org/cgi-bin/cgit/libwebsockets/snapshot/libwebsockets-1.4-chrome43-firefox-36.tar.gz
Miyano-MacBook-Air:~ YujiMiyano$
メッセージを検索してみるとQiitaの記事が見つかりました。
- osx で brew update が error の時に、試すこと - Qiita
ここに書かれたとおりに以下のコマンドを打ってみました。
$ cd /usr/local
$ git status
$ git reset --hard && git clean -df
$ sudo brew update
この後、再び以下のコマンドを実行。
$ brew install mosquitto
今度は以下のエラーが。
Error: The `brew link` step did not complete successfully
The formula built, but is not symlinked into /usr/local
Could not symlink sbin/mosquitto
/usr/local/sbin is not writable.

You can try again using:
  brew link mosquitto
ただしこれは参考サイト(電子工作界隈で話題のWi-Fiモジュール「ESP8266」でMQTTを使う方法 | 株式会社LIG)に書いてあったエラーなので、その通りに対処してみる。
$ sudo chown -R $(whoami) /usr/local
$ brew link mosquitto
5.2 Mosquitoの実行
いざ実行してみると次はこんなエラーがでる。
Miyano-MacBook-Air:local YujiMiyano$ mosquitto
-bash: mosquitto: command not found
これも参考サイト(電子工作界隈で話題のWi-Fiモジュール「ESP8266」でMQTTを使う方法 | 株式会社LIG)に書いてあったので、その通り対処してみる。
$ sudo vim /etc/paths
vimが起動するので、iを押して挿入モードにしたあとで/usr/local/sbinを追加したあとescを押してノーマルモードに戻して:wqで保存して終了します。
ターミナルを再起動してから再度mosquittoを実行してみる。
Miyano-MacBook-Air:~ YujiMiyano$ mosquitto
1466227860: mosquitto version 1.4.8 (build date 2016-05-27 16:28:37+0100) starting
1466227860: Using default config.
1466227860: Opening ipv4 listen socket on port 1883.
1466227860: Opening ipv6 listen socket on port 1883.
ようやく上手くいったっぽい。
6. ESP8266にプログラムを書き込む
6.1 Arduino IDEにESP8266を対応させる
今までにArduino IDEでESP8266を使ったことがあれば飛ばしていいと思います。
ということで飛ばしますが、まだな人は参考サイトにしたがってやってみてください。
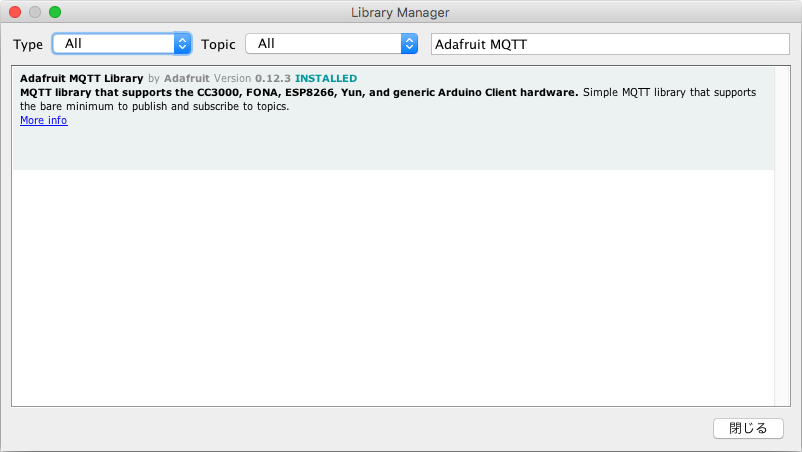
6.2 Adafruit MQTT Libraryのインストール
こちらも参考サイト(電子工作界隈で話題のWi-Fiモジュール「ESP8266」でMQTTを使う方法 | 株式会社LIG)通りにやればすぐに終わります。
Arduino IDEでLibrary Managerを開いて「Adafruit MQTT」で検索。
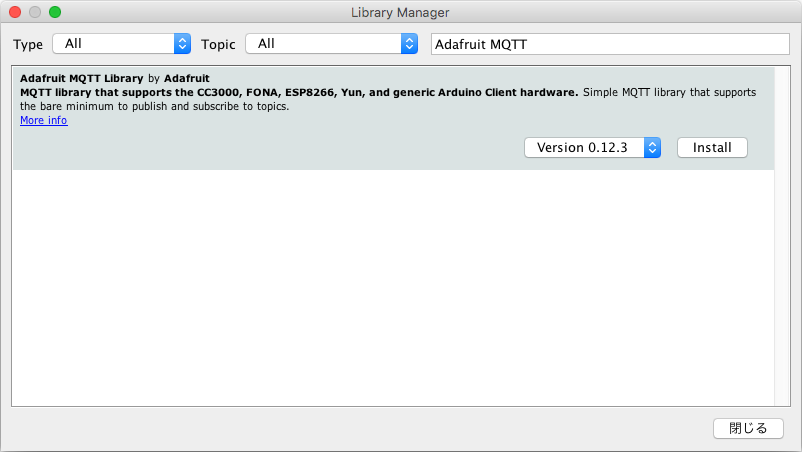
インストールボタンを押すとインストールされます。
6.3 動作確認
参考サイトに記載の以下のURLにあるコードをコピー。WLAN_SSIDとWLAN_PASS、ブローカのホスト、Username、Passwordを入力。
esp8266-mqtt-quicktest/mqtt_esp8266_test.ino at master · kiyopikko/esp8266-mqtt-quicktest
ちなみにifconfigを実行するためにターミナルを再起動して、再度mosquittoを実行すると以下のようなエラーが出ましたが問題なさそうでした。
Miyano-MacBook-Air:~ YujiMiyano$ mosquitto
1466233989: mosquitto version 1.4.8 (build date 2016-05-27 16:28:37+0100) starting
1466233989: Using default config.
1466233989: Opening ipv4 listen socket on port 1883.
1466233989: Error: Address already in use
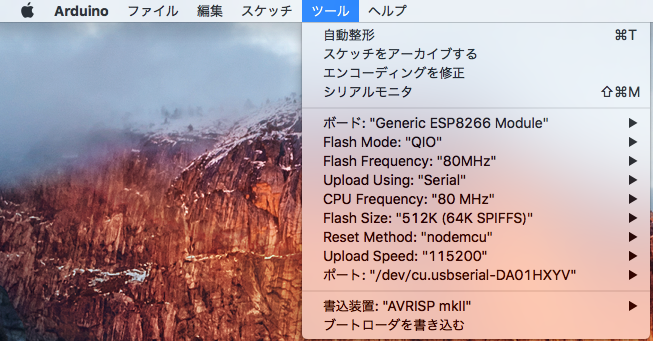
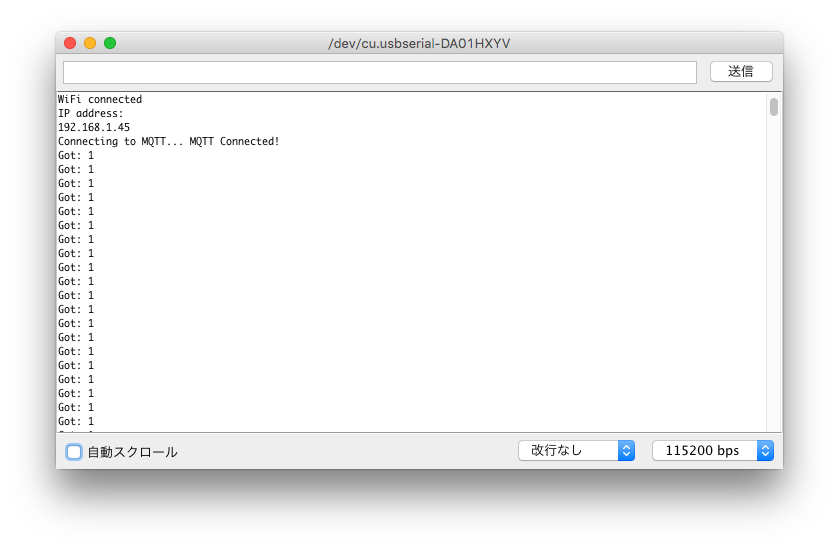
ESP8266を接続し書き込み、シリアルモニタを立ち上げます。
書き込みの設定は以下のようにしました。この通りでなくても大丈夫だと思います。
シリアルモニタはこんな感じです。
7. openFrameworksのプログラムを作成
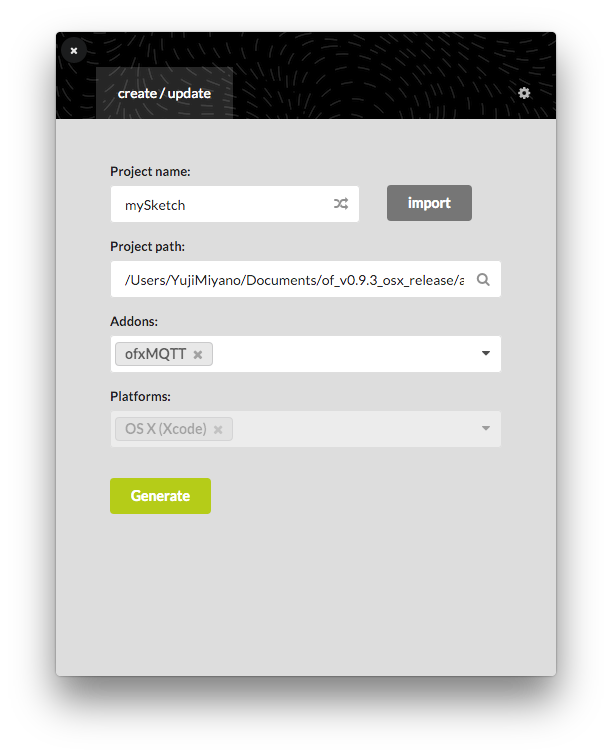
7.1 ofxMQTTアドオンを入手
MQTTを使うためのアドオンがいくつかあったのですが、とりあえず以下のものをインストールしてみる。
256dpi/ofxMQTT: MQTT addon for openframeworks based on libmosquitto
7.2 ofxMQTTのサンプルプログラムを実行
こちら(ofxMQTT/example-ofxMQTT/src at master · 256dpi/ofxMQTT)に記載のサンプルプログラムを実行してみます。
#include "ofApp.h"
#include "ofAppGlutWindow.h"

int main(){
  ofAppGlutWindow window;
  ofSetupOpenGL(&window, 1024, 768, OF_WINDOW);
  ofRunApp(new ofApp());
}
#include "ofApp.h"

void ofApp::setup(){
  client.begin("broker.shiftr.io", 1883);
  client.connect("openframeworks", "try", "try");

  ofAddListener(client.onOnline, this, &ofApp::onOnline);
  ofAddListener(client.onOffline, this, &ofApp::onOffline);
  ofAddListener(client.onMessage, this, &ofApp::onMessage);
}

void ofApp::update() {
  client.update();
}

void ofApp::exit(){
  client.disconnect();
}

void ofApp::onOnline(){
  ofLog() << "online";

  client.subscribe("hello");
}

void ofApp::onOffline(){
  ofLog() << "offline";
}

void ofApp::onMessage(ofxMQTTMessage &msg){
  ofLog() << "message: " << msg.topic << " - " << msg.payload;
}

void ofApp::keyPressed(int key){
  client.publish("hello", "world");
}
#pragma once

#include "ofMain.h"
#include "ofxMQTT.h"

class ofApp : public ofBaseApp {
public:
  ofxMQTT client;
  void setup();
  void update();
  void exit();

  void onOnline();
  void onOffline();
  void onMessage(ofxMQTTMessage &msg);

  void keyPressed(int key);
};
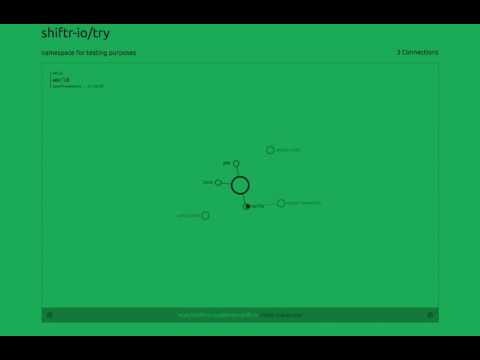
こちらのページshiftr-io/try · shiftr.ioを見ながら実行すると画面上にopenframeworksと書かれた丸が表示され、oFの実行画面で何かのキーを押すとhello worldというメッセージが送信されていることがわかります。
- 実行画面(ofMQTT test - YouTubeに飛びます)
8. ofxMQTTでマウスのX座標をESP8266に送信しLEDの明るさを制御
これまでのプログラムをベースにマウスX座標をMQTTでESP8266に送信し、LEDの明るさを変えてみます。
8.1 openFrameworksのプログラム
ofApp.cppでbroker.shiftr.ioをlocalhostに変更しました。(usernameとpasswordもtryからtestに変更していますが多分どっちでもいいです。)
TopicはサンプルのままhelloにしてPayloadをworldからマウスのx座標に変更しました。
あとはサンプルでキーを押した時にpublishしていたのをマウスが動いた時に変更し、payloadもworldからマウスのx座標に変更しています。
#include "ofApp.h"
#include "ofAppGlutWindow.h"

int main(){
  ofAppGlutWindow window;
  ofSetupOpenGL(&window, 1024, 768, OF_WINDOW);
  ofRunApp(new ofApp());
}
#include "ofApp.h"

void ofApp::setup(){
  client.begin("localhost", 1883);
  client.connect("openframeworks", "test", "test"); // bool connect(string clientId, string username, string password);

  ofAddListener(client.onOnline, this, &ofApp::onOnline);
  ofAddListener(client.onOffline, this, &ofApp::onOffline);
  ofAddListener(client.onMessage, this, &ofApp::onMessage);
}

void ofApp::update() {
  client.update();
}

void ofApp::exit(){
  client.disconnect();
}

void ofApp::onOnline(){
  ofLog() << "online";

  client.subscribe("hello");
}

void ofApp::onOffline(){
  ofLog() << "offline";
}

void ofApp::onMessage(ofxMQTTMessage &msg){
  ofLog() << "message: " << msg.topic << " - " << msg.payload;
}

void ofApp::mouseMoved(int x, int y){
  if(x >= 0 && x <= 1024){
    client.publish("hello", ofToString(x)); // void publish(string topic, string payload);
  }
}
#pragma once

#include "ofMain.h"
#include "ofxMQTT.h"

class ofApp : public ofBaseApp {
public:
  ofxMQTT client;
  void setup();
  void update();
  void exit();

  void onOnline();
  void onOffline();
  void onMessage(ofxMQTTMessage &msg);

  void mouseMoved(int x, int y);
};
8.2 ESP8266のプログラムと接続
回路についてはLEDをPin4とGNDに接続してください。
| ESP8266 | LED |
|---|---|
| Pin4 | アノード(足の長い方) |
| GND | カソード(足の短い方) |
プログラムについては、LEDに関する部分を追加しています。
openFrameworksのプログラムに合わせてtopicをtestからhelloに変更しています。(const char TEST_TOPIC[] PROGMEM = "hello";の部分です)
あとは以下のサイトを参考にして、payloadをAsciiからintに変換しています。
/***************************************************
  Adafruit MQTT Library ESP8266 Example
  Must use ESP8266 Arduino from:
    https://github.com/esp8266/Arduino
  Adafruit invests time and resources providing this open source code,
  please support Adafruit and open-source hardware by purchasing
  products from Adafruit!
  Written by Tony DiCola for Adafruit Industries.
  MIT license, all text above must be included in any redistribution
 ****************************************************/
#include <ESP8266WiFi.h>
#include <Adafruit_MQTT.h>
#include <Adafruit_MQTT_Client.h>

/************************* WiFi Access Point *********************************/

#define WLAN_SSID       "*****"  // 各自の環境に応じて変更してください
#define WLAN_PASS       "*****"  // 各自の環境に応じて変更してください

/***************************** Your Setup ************************************/

#define YOUR_SERVER      "***.***.*.**"  // 各自の環境に応じて変更してください
#define YOUR_SERVERPORT  1883
#define YOUR_USERNAME    "test"
#define YOUR_PASSWORD    "test"

/************************* Harware Setup *********************************/

#define LED0 4 // LED用ピンアサイン GPIO 4 -> LED0

/************ Global State (you don't need to change this!) ******************/

// Create an ESP8266 WiFiClient class to connect to the MQTT server.
WiFiClient client;

// Store the MQTT server, client ID, username, and password in flash memory.
// This is required for using the Adafruit MQTT library.
const char MQTT_SERVER[] PROGMEM    = YOUR_SERVER;
const char MQTT_CLIENTID[] PROGMEM  = __TIME__ "_tes t_client_id";
const char MQTT_USERNAME[] PROGMEM  = YOUR_USERNAME;
const char MQTT_PASSWORD[] PROGMEM  = YOUR_PASSWORD;

// Setup the MQTT client class by passing in the WiFi client and MQTT server and login details.
Adafruit_MQTT_Client mqtt(&client, MQTT_SERVER, YOUR_SERVERPORT, MQTT_CLIENTID, MQTT_USERNAME, MQTT_PASSWORD);

/****************************** Topic ***************************************/

// Setup a pubulisher & subscriber.
//const char TEST_TOPIC[] PROGMEM = "test";
const char TEST_TOPIC[] PROGMEM = "hello";
Adafruit_MQTT_Publish testPublisher = Adafruit_MQTT_Publish(&mqtt, TEST_TOPIC);
Adafruit_MQTT_Subscribe testSubscriber = Adafruit_MQTT_Subscribe(&mqtt, TEST_TOPIC);

/*************************** Sketch Code ************************************/

void setup() {
  Serial.begin(115200);
  delay(10);

  Serial.println(F("MQTT demo"));

  // Connect to WiFi access point.
  Serial.println(); Serial.println();
  Serial.print("Connecting to ");
  Serial.println(WLAN_SSID);

  WiFi.begin(WLAN_SSID, WLAN_PASS);
  while (WiFi.status() != WL_CONNECTED) {
    delay(500);
    Serial.print(".");
  }
  Serial.println();

  Serial.println("WiFi connected");
  Serial.println("IP address: "); Serial.println(WiFi.localIP());

  // Setup MQTT subscription.
  mqtt.subscribe(&testSubscriber);

  // GPIO0 as an output
  pinMode(LED0, OUTPUT);
}

uint32_t x=0;

void loop() {
  // Ensure the connection to the MQTT server is alive (this will make the first
  // connection and automatically reconnect when disconnected).  See the MQTT_connect
  // function definition further below.
  MQTT_connect();

  // this is our 'wait for incoming subscription packets' busy subloop
 Adafruit_MQTT_Subscribe *subscription;
 while ((subscription = mqtt.readSubscription(1000))) {
   if (subscription == &testSubscriber) {
     char *value = (char *)testSubscriber.lastread;  // convert mqtt ascii payload to int
     Serial.print(F("Got: "));
     Serial.println(value);

     int mouseX = atoi(value);
     analogWrite(LED0, map(mouseX, 0, 1024, 0, 255));  // turn LED on
   }
 }

  delay(10);
}

// Function to connect and reconnect as necessary to the MQTT server.
// Should be called in the loop function and it will take care if connecting.
void MQTT_connect() {
  int8_t ret;

  // Stop if already connected.
  if (mqtt.connected()) {
    return;
  }

  Serial.print("Connecting to MQTT... ");

  while ((ret = mqtt.connect()) != 0) { // connect will return 0 for connected
       Serial.println(mqtt.connectErrorString(ret));
       Serial.println(ret);
       Serial.println("Retrying MQTT connection in 5 seconds...");
       mqtt.disconnect();
       delay(5000);  // wait 5 seconds
  }
  Serial.println("MQTT Connected!");
}
8.3 実行結果
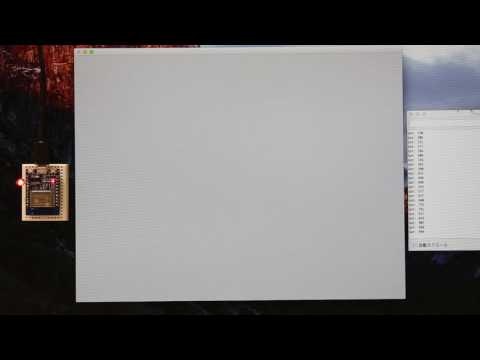
マウスカーソルを左右に動かすとシリアルモニタに座標が表示され、ESP8266に接続されたLEDの明るさが変化していることが分かります。
- 実行画面(20160618 ofMQTT ESP8266 test - YouTubeに飛びます)