UITableViewを利用して、簡易チェックボックスを作成する。
UITableViewStyleがgroupedのUITableViewControllerをStoryBoardに作成し、ViewControllerと紐付ける。チェックマークは、簡単のためUITableViewStyleのCheckMarkを利用。
以下、テーブルビューを実装していく。実行環境はXcode7.1.1。
特に複雑なことはやっていない。チェックリストの項目を示す文字列を配列にして、cellLabelsという変数に代入。また、チェックボックスを選択した時のグレーのハイライトを無くしたいので、tableView(_:cellForRowAtIndexPath:)において、セルのselectedBackgroundViewを白背景にしている。
TableViewController
import UIKit

class TableViewController: UITableViewController {

    let cellLabels = [
        "Hoge",
        "Fuga",
        "Foo",
        "Bar"
    ]

    override func viewDidLoad() {
        super.viewDidLoad()
    }

    // MARK: - Table view data source

    override func numberOfSectionsInTableView(tableView: UITableView) -> Int {
        return 1
    }

    override func tableView(tableView: UITableView, numberOfRowsInSection section: Int) -> Int {
        if section < 1 {
            return cellLabels.count
        }
        return 0
    }

    override func tableView(tableView: UITableView, cellForRowAtIndexPath indexPath: NSIndexPath) -> UITableViewCell {
        if indexPath.section < 1 {
            let cell = tableView.dequeueReusableCellWithIdentifier("reuseIdentifier", forIndexPath: indexPath)
            if indexPath.row < cellLabels.count {
                cell.textLabel?.text = cellLabels[indexPath.row]
            }

            let backgroundView = UIView()
            backgroundView.backgroundColor = UIColor.whiteColor()
            cell.selectedBackgroundView = backgroundView

            return cell
        }
        return UITableViewCell()
    }

    override func tableView(tableView: UITableView, titleForHeaderInSection section: Int) -> String? {
        if section < 1 {
            return "Check List"
        }
        return nil
    }

}
これでビューのベースができた。
tableView(_:didSelectRowAtIndexPath:)にセルを選択した際の処理を書けば終わり。
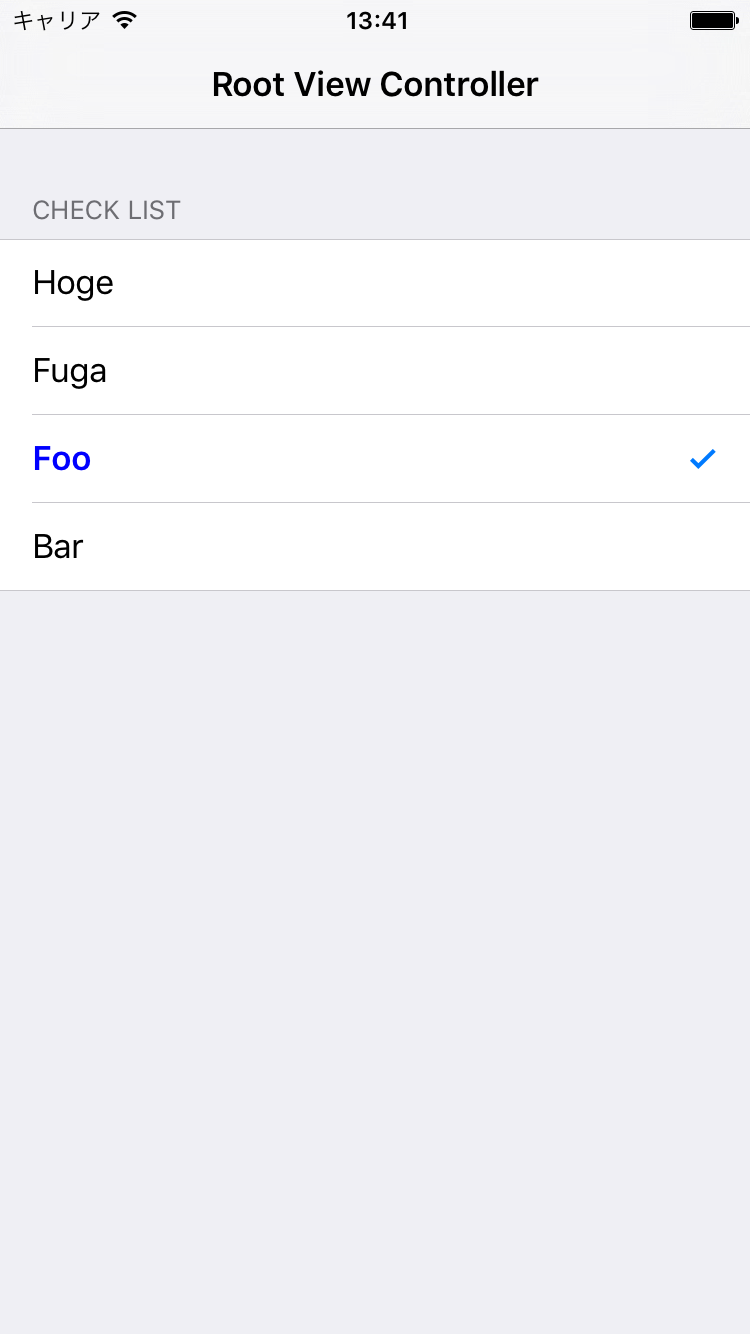
選択したセルにチェックマークがつき、それ以外のセルのチェックは解除される(= 1つだけ選択可能なチェックボックス)ものとする。
- 選択したセルの
accessoryTypeが.Noneの時、accessoryTypeを.CheckMarkに変更- フォントやテキストの色も変更
- どのセルが選択されているか保存するため、
checkMarksという長さ4の配列を用意 -
checkMarksの要素をflatMapで処理し、選択したセルのインデックスの要素がtrue, 選択していないセルの要素がfalseになるように - その処理の中で、もう1つの処理もついでに。選択した以外のセルに対して変更を行う。
accessoryTypeを.Noneに戻し、色やフォントも元々の見た目に戻す。 - 最後に
deselectRowAtIndexPath(_:animated:)でセルの選択を解除
選択したデータを保存・サーバに送信する必要があるときは、checkMarksの要素を利用すれば良い。
TableViewController
var checkMarks = [false, false, false, false]

// MARK: - Table view delegate

override func tableView(tableView: UITableView, didSelectRowAtIndexPath indexPath: NSIndexPath) {
    if indexPath.section > 0 { return }

    if let cell = tableView.cellForRowAtIndexPath(indexPath) {
        if cell.accessoryType == .None {
            cell.accessoryType = .Checkmark
            cell.textLabel?.font = UIFont.boldSystemFontOfSize(17)
            cell.textLabel?.textColor = UIColor.blueColor()

            checkMarks = checkMarks.enumerate().flatMap { (elem: (Int, Bool)) -> Bool in
                if indexPath.row != elem.0 {
                    let otherCellIndexPath = NSIndexPath(forRow: elem.0, inSection: 0)
                    if let otherCell = tableView.cellForRowAtIndexPath(otherCellIndexPath) {
                        otherCell.accessoryType = .None
                        otherCell.textLabel?.font = UIFont.systemFontOfSize(17)
                        otherCell.textLabel?.textColor = UIColor.blackColor()
                    }
                }
                return indexPath.row == elem.0
            }
        }
    }
    tableView.deselectRowAtIndexPath(indexPath, animated: true)
}
以上で完了。下の写真のような簡易チェックボックスが実装できた。