はじめに
10月頃に思い切ってEl Capitanにしたものの、あまりの不具合の多さに1日でYosemiteにTime machineしたのは苦い思い出。。。
大分不具合も落ち着いた様なので再度El Captain移行をチャレンジした時の記録です。
参考文献にも記載した「ターミナルマルチプレクサ tmux をカスタマイズする」の内容をかなり参考にしています。(ありがとうございます)
完成図
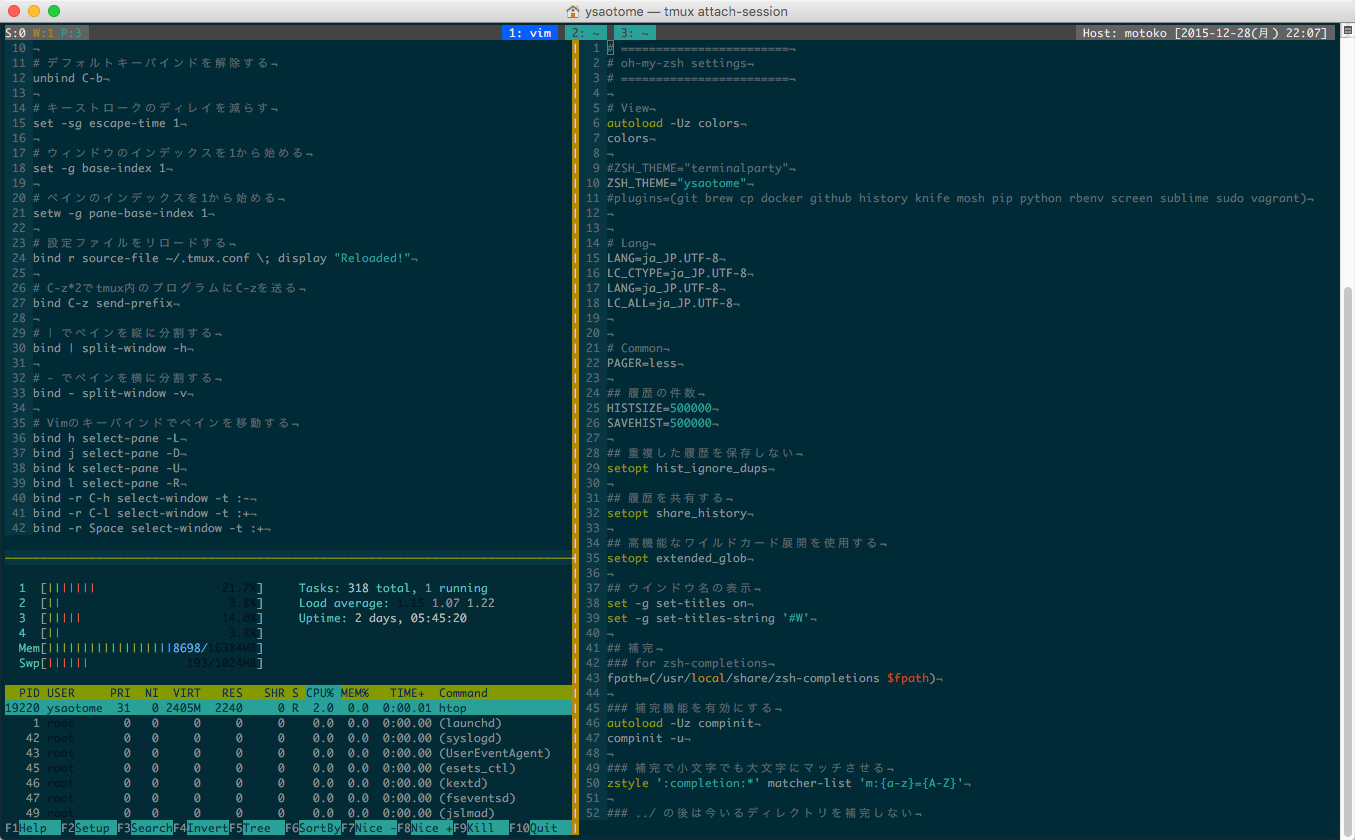
こんな感じのターミナルをセットアップします。
環境
- OS X 11.11 El Capitan 11.11.2
- ターミナル.app 2.6.1 (361.1)
- Homebrew 0.9.5
- zsh 5.2
- tmux 2.1
- vim 7.4.979
カラースキームを揃えよう
各ツールでカラースキームを揃えた方が見やすいと思います。
個人的にSolarizedのDarkが気に入っているので、各ツール用に作られたSolarizedなカラースキームで揃えていきます。

環境構築
ターミナルをセットアップ
カラースキーム設定をするだけ。
-
ターミナルで実行下記を実行して
ターミナル.app用Solarizedなプロファイルをダウンロードターミナルで実行$ curl -o ~/Downloads/Solarized\ Dark.terminal https://raw.githubusercontent.com/tomislav/osx-terminal.app-colors-solarized/master/Solarized%20Dark.terminal && open ~/Downloads/ -
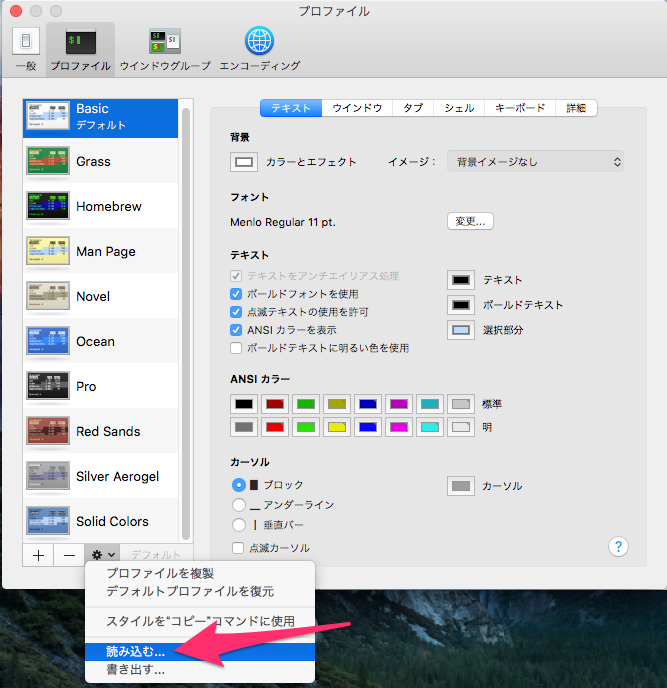
ターミナル上でキーボードの
Command+,を押下して環境設定を開きプロファイルタブをクリック -
リスト下部の
歯車をクリックしてダウンロードフォルダ内にあるSolarized Dark.terminalを選択して開く
-
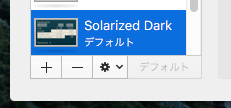
プロファイルを読み込み後、
デフォルトをクリックしておく
-
プロファイル名の
Solarized Darkをダブルクリックすると、プロファイルが設定された新しいターミナルウインドウが開く
Homebrewをセットアップ
-
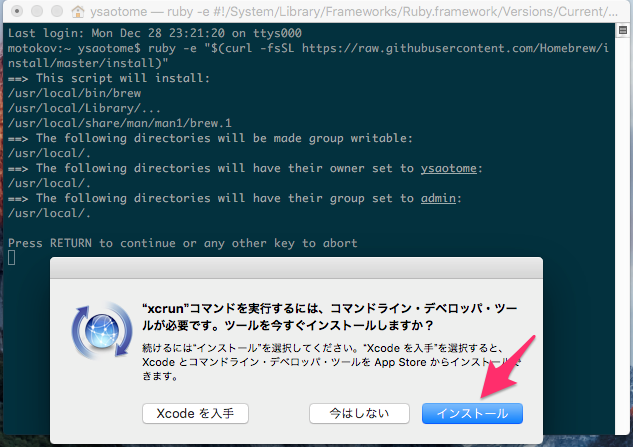
ターミナルでインスト-ルシェルを実行
ターミナルで実行$ ruby -e "$(curl -fsSL https://raw.githubusercontent.com/Homebrew/install/master/install)" -
Xcodeもコマンドライン・デベロッパ・ツールも何れもインストールされていない場合、コマンドライン・デベロッパ・ツールのインストール画面が表示されるので、問題なければ
インストールをクリック
-
Command Line Tools使用許諾契約が表示されるので、内容を確認して同意するをクリック -
インストールが完了したら、ターミナルに戻って
Returnキーを押下 -
管理者パスワードの入力を求められるので、入力して
Reruenキーを押下でインストール開始
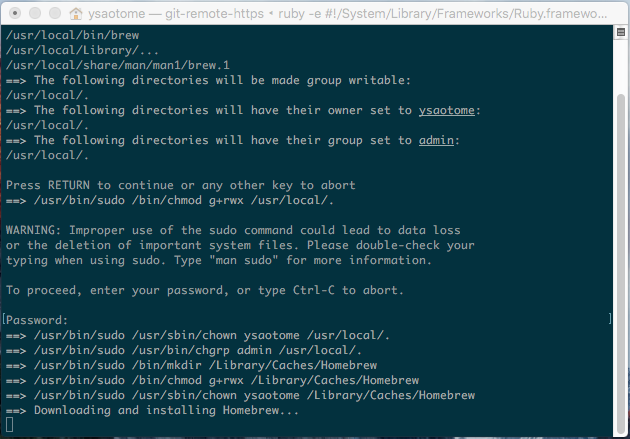
-
Installation successful!と表示されたらインストール完了 -
brew --versionコマンドでバージョン確認ターミナルで実行$ brew --version Homebrew 0.9.5 (git revision e043; last commit 2015-12-28) -
コマンド類をインストール
ターミナルで実行$ brew update $ brew install zsh zsh-completions tmux $ brew install vim --override-system-vi $ brew install reattach-to-user-namespace # tmuxとOSXのクリップボード共有で利用
zshをセットアップ
-
Homebrewでインストールしたzshを標準シェルへ設定する
ターミナルで実行$ sudo sh -c "echo '/usr/local/bin/zsh' >> /etc/shells" $ chsh -s /usr/local/bin/zsh -
zsh設定管理ツール
oh-my-zshをセットアップターミナルで実行$ curl -L https://github.com/robbyrussell/oh-my-zsh/raw/master/tools/install.sh | sh -
個別設定ファイルの設置
- 設定ファイルは
~/.oh-my-zsh/custom/配下に*.zshファイルを置くと自動的にロードされる - テーマファイルは
~/.oh-my-zsh/theme/配下に*.zsh-themeファイルを置くと自動的にロードされる
ターミナルで実行$ vi ~/.oh-my-zsh/custom/setting.zsh~/.oh-my-zsh/custom/setting.zsh# ======================== # oh-my-zsh settings # ======================== # 読み込むテーマを指定 ZSH_THEME="prompt" # カラーを有効化 autoload -Uz colors colors # 文字コード LANG=ja_JP.UTF-8 LC_CTYPE=ja_JP.UTF-8 LANG=ja_JP.UTF-8 LC_ALL=ja_JP.UTF-8 # ページャー PAGER=less # 履歴の件数 HISTSIZE=500000 SAVEHIST=500000 # 重複した履歴を保存しない setopt hist_ignore_dups # 履歴を共有する setopt share_history # 高機能なワイルドカード展開を使用する setopt extended_glob # ウインドウ名の表示 set -g set-titles on set -g set-titles-string '#W' # 補完 ## for zsh-completions fpath=(/usr/local/share/zsh-completions $fpath) ## 補完機能を有効にする autoload -Uz compinit compinit -u ## 補完で小文字でも大文字にマッチさせる zstyle ':completion:*' matcher-list 'm:{a-z}={A-Z}' ## ../ の後は今いるディレクトリを補完しない zstyle ':completion:*' ignore-parents parent pwd .. ## sudo の後ろでコマンド名を補完する zstyle ':completion:*:sudo:*' command-path /usr/local/sbin /usr/local/bin \ /usr/sbin /usr/bin /sbin /bin /usr/X11R6/bin ## ps コマンドのプロセス名補完 zstyle ':completion:*:processes' command 'ps x -o pid,s,args' # 日本語ファイル名を表示可能にする setopt print_eight_bit # '#' 以降をコメントとして扱う setopt interactive_comments # ディレクトリ名だけでcdする setopt auto_cd # 賢いmvを有効にする autoload zmv # エイリアス export CLICOLOR=1 alias vi='vim' alias rm='rm -i' alias cp='cp -i' alias mv='mv -i' alias mkdir='mkdir -p' alias sudo='sudo ' alias ls='ls -G -F' # C で標準出力をクリップボードにコピーする ## mollifier delta blog : http://mollifier.hatenablog.com/entry/20100317/p1 if which pbcopy >/dev/null 2>&1 ; then alias -g C='| pbcopy' fi # Sublime Text 3 エイリアス alias subl='/Applications/Sublime\ Text.app/Contents/SharedSupport/bin/subl'ターミナルで実行$ vi ~/.oh-my-zsh/custom/tmux.zsh~/.oh-my-zsh/custom/tmux.zsh# tmux用zsh設定ファイル ## http://qiita.com/b4b4r07/items/01359e8a3066d1c37edc function is_exists() { type "$1" >/dev/null 2>&1; return $?; } function is_osx() { [[ $OSTYPE == darwin* ]]; } function is_screen_running() { [ ! -z "$STY" ]; } function is_tmux_runnning() { [ ! -z "$TMUX" ]; } function is_screen_or_tmux_running() { is_screen_running || is_tmux_runnning; } function shell_has_started_interactively() { [ ! -z "$PS1" ]; } function is_ssh_running() { [ ! -z "$SSH_CONECTION" ]; } function tmux_automatically_attach_session() { if is_screen_or_tmux_running; then ! is_exists 'tmux' && return 1 if is_tmux_runnning; then echo "${fg_bold[red]} _____ __ __ _ ___ __ ${reset_color}" echo "${fg_bold[red]}|_ _| \/ | | | \ \/ / ${reset_color}" echo "${fg_bold[red]} | | | |\/| | | | |\ / ${reset_color}" echo "${fg_bold[red]} | | | | | | |_| |/ \ ${reset_color}" echo "${fg_bold[red]} |_| |_| |_|\___//_/\_\ ${reset_color}" elif is_screen_running; then echo "This is on screen." fi else if shell_has_started_interactively && ! is_ssh_running; then if ! is_exists 'tmux'; then echo 'Error: tmux command not found' 2>&1 return 1 fi if tmux has-session >/dev/null 2>&1 && tmux list-sessions | grep -qE '.*]$'; then # detached session exists tmux list-sessions echo -n "Tmux: attach? (y/N/num) " read if [[ "$REPLY" =~ ^[Yy]$ ]] || [[ "$REPLY" == '' ]]; then tmux attach-session if [ $? -eq 0 ]; then echo "$(tmux -V) attached session" return 0 fi elif [[ "$REPLY" =~ ^[0-9]+$ ]]; then tmux attach -t "$REPLY" if [ $? -eq 0 ]; then echo "$(tmux -V) attached session" return 0 fi fi fi if is_osx && is_exists 'reattach-to-user-namespace'; then # on OS X force tmux's default command # to spawn a shell in the user's namespace tmux_config=$(cat $HOME/.tmux.conf <(echo 'set-option -g default-command "reattach-to-user-namespace -l $SHELL"')) tmux -f <(echo "$tmux_config") new-session && echo "$(tmux -V) created new session supported OS X" else tmux new-session && echo "tmux created new session" fi fi fi } tmux_automatically_attach_sessionターミナルで実行$ vi ~/.oh-my-zsh/themes/prompt.zsh-theme~/.oh-my-zsh/themes/prompt.zsh-theme - 設定ファイルは
Default shell configuration set prompt
case ${UID} in
root
PROMPT="%B%{${fg[magenta]}%}#%{${reset_color}%}%b "
PROMPT2="%B%{${fg[magenta]}%}#%{${reset_color}%}%b "
RPROMPT="[%~]"
SPROMPT="%B%{${fg[red]}%}%r is correct? [n,y,a,e]:%{${reset_color}%}%b "
#[ -n "${REMOTEHOST}${SSH_CONNECTION}" ] &&
PROMPT="[%{${fg[white]}%}${USER}]${PROMPT}"
;;
user
*)
PROMPT="%{${fg[magenta]}%}%%%{${reset_color}%} "
PROMPT2="%{${fg[magenta]}%}%%%{${reset_color}%} "
RPROMPT="[%~]"
SPROMPT="%{${fg[red]}%}%r is correct? [n,y,a,e]:%{${reset_color}%} "
#[ -n "${REMOTEHOST}${SSH_CONNECTION}" ] &&
PROMPT="[%{${fg[white]}%}${USER}]${PROMPT}"
;;
esac
```
tmuxをセットアップ
-
設定ファイルを配置
ターミナルで実行$ vi ~/.tmux.conf~/.tmux.conf# ========================== # tmux settings # color : https://github.com/seebi/tmux-colors-solarized # ========================== # prefixキーをC-zに変更する unbind C-z set -g prefix C-z # デフォルトキーバインドを解除する unbind C-b # キーストロークのディレイを減らす set -sg escape-time 1 # ウィンドウのインデックスを1から始める set -g base-index 1 # ペインのインデックスを1から始める setw -g pane-base-index 1 # 設定ファイルをリロードする bind r source-file ~/.tmux.conf \; display "Reloaded!" # C-z*2でtmux内のプログラムにC-zを送る bind C-z send-prefix # | でペインを縦に分割する bind | split-window -h # - でペインを横に分割する bind - split-window -v # Vimのキーバインドでペインを移動する bind h select-pane -L bind j select-pane -D bind k select-pane -U bind l select-pane -R bind -r C-h select-window -t :- bind -r C-l select-window -t :+ bind -r Space select-window -t :+ # Vimのキーバインドでペインをリサイズする bind -r H resize-pane -L 5 bind -r J resize-pane -D 5 bind -r K resize-pane -U 5 bind -r L resize-pane -R 5 # マウス操作を有効にする setw -g mouse # 256色端末を使用する set -g default-terminal "screen-256color" # ウィンドウリストの色を設定する setw -g window-status-fg cyan setw -g window-status-bg default setw -g window-status-attr dim # アクティブなウィンドウを目立たせる setw -g window-status-current-fg white setw -g window-status-current-bg red setw -g window-status-current-attr bright # ペインボーダーの色を設定する set -g pane-border-fg green set -g pane-border-bg black # アクティブなペインを目立たせる set -g pane-active-border-fg white set -g pane-active-border-bg yellow # コマンドラインの色を設定する set -g message-fg white set -g message-bg black set -g message-attr bright # ステータスバーを設定する ## ステータスバーの色を設定する set -g status-fg colour255 set -g status-bg colour238 ## ステータスバーを下部に表示する set -g status-position top ## 左右のステータスバーの長さを決定する set-option -g status-left-length 40 set-option -g status-right-length 40 ## 左パネルを設定する set -g status-left "#[fg=colour255,bg=colour241]S:#S #[fg=yellow]W:#I #[fg=cyan]P:#P #[default]" ## 右パネルを設定する set -g status-right "#[fg=colour255,bg=colour241] Host: #h [%Y-%m-%d(%a) %H:%M] #[default]" ## window-status のフォーマットを指定する。 set-window-option -g window-status-format " #I: #W " ## カレントウィンドウの window-status のフォーマットを指定する set-window-option -g window-status-current-format "#[fg=colour255,bg=colour27,bold] #I: #W #[default]" ## ステータスバーのUTF-8サポートを有効にする set -g status-utf8 on ## リフレッシュの間隔を設定する(デフォルト 15秒) set -g status-interval 1 ## ウィンドウリストの位置を中心寄せにする set -g status-justify centre ## ヴィジュアルノーティフィケーションを有効にする setw -g monitor-activity on set -g visual-activity on # コピーモードを設定する ## viのキーバインドを使用する setw -g mode-keys vi ## vim <=> tmux 間でクリップボード利用を可能にする ### 事前にbrewしておく-> brew install reattach-to-user-namespace set-option -g default-command "reattach-to-user-namespace -l $SHELL" ## コピーモードの操作をvi風に設定する bind-key v copy-mode \; display "Copy mode!" bind-key -t vi-copy v begin-selection bind-key -t vi-copy y copy-pipe "reattach-to-user-namespace pbcopy" unbind -t vi-copy Enter bind-key -t vi-copy Enter copy-pipe "reattach-to-user-namespace pbcopy" ## Prefix+p でペースト ## クリップボードにも保存されているので Cmd-v でもペースト可能 bind-key p paste-buffer
vimをセットアップ
-
フォルダの作成
ターミナルで実行$ mkdir ~/.vim/colors $ mkdir ~/.vim/backup -
vim用Solarizedカラースキームをダウンロード
ターミナルで実行$ git clone https://github.com/altercation/vim-colors-solarized $ mv ./vim-colors-solarized/colors/solarized.vim ~/.vim/colors/ $ rm -rf ./vim-colors-solarized -
設定ファイルを配置
ターミナルで実行$ vi ~/.vimrc~/.vimrc"-------------------- "" vim settings "-------------------- "" Theme syntax enable set background=dark colorscheme solarized ""新しい行のインデントを現在行と同じにする set autoindent "バックアップファイルのディレクトリを指定する set backupdir=$HOME/.vim/backup "クリップボードをWindowsと連携する set clipboard=unnamed "vi互換をオフする set nocompatible "スワップファイル用のディレクトリを指定する set directory=$HOME/.vim/backup "タブの代わりに空白文字を指定する set expandtab "タブ幅の設定 set tabstop=4 "変更中のファイルでも、保存しないで他のファイルを表示する set hidden "インクリメンタルサーチを行う set incsearch "行番号を表示する set number "閉括弧が入力された時、対応する括弧を強調する set showmatch "新しい行を作った時に高度な自動インデントを行う set smarttab "新しい行を作った時に高度な自動インデントを行う set smarttab " grep検索を設定する set grepformat=%f:%l:%m,%f:%l%m,%f\ \ %l%m,%f set grepprg=grep\ -nh " 検索結果のハイライトをEsc連打でクリアする nnoremap <ESC><ESC> :nohlsearch<CR> " vimgrepやgrep した際に、cwindowしてしまう autocmd QuickFixCmdPost *grep* cwindow " エスケープシーケンスの表示 tab eol set list set listchars=tab:▸\ ,eol:¬ " 全角スペースの表示 function! ZenkakuSpace() highlight ZenkakuSpace cterm=reverse ctermfg=DarkGray gui=reverse guifg=DarkGray endfunction if has('syntax') augroup ZenkakuSpace autocmd! "ZenkakuSpace をカラーファイルで設定するなら、 "次の行をコメントアウト autocmd ColorScheme * call ZenkakuSpace() autocmd VimEnter,WinEnter * match ZenkakuSpace / / augroup END call ZenkakuSpace() endif