目次
1. はじめに
友人に「PythonでAPIをサクッと作ってよ」と言われたのでシンプルなREST APIを作ってみた。
作ったものを渡すだけでなく作り方も教えて欲しいとのことなので、ここに記事として掲載する。少し手順書のような記載なため、初学者向けかもしれない。
Pythonと聞いて「Djangoでも使うか?」と思いつつも、よりサクッと感のあるフレームワークを探してみたところ
FastAPIなるものがあり、今回はこれを採用してみた。
公式より引用
FastAPI は、Pythonの標準である型ヒントに基づいてPython 3.6 以降でAPI を構築するための、モダンで、高速(高パフォーマンス)な、Web フレームワークです。
FastAPI には Swagger UI と ReDoc の両スタイルのドキュメントを自動で生成してくれる機能があります。
コーディング負荷が軽量でありドキュメントも自動生成とのことで、サクッと度合い高めな印象。
DB接続を伴うAPI構築については下記記事に記載している。
2. コーディング
まずは構成の説明。
.
├── app/
│   └── main.py
└── requirements.txt
パッケージ一括管理用にrequirements.txtを(使用する内容は少数だが)作成しておく。
fastapi==0.70.0
uvicorn==0.15.0
早速installしてみる。
pip3 install -r requirements.txt
FastAPI のインストール完了。
早速コーディングしてみる。
from fastapi import FastAPI

app = FastAPI()

@app.get("/")
async def root():
    return {"message": "Hello World"}
起動してみる。
cd app
uvicorn main:app --reload
するとterminal上でサーバが動いている様が見える。
INFO:     Will watch for changes in these directories: ['xxxx/app']
INFO:     Uvicorn running on http://127.0.0.1:8000 (Press CTRL+C to quit)
INFO:     Started reloader process [5129] using statreload
INFO:     Started server process [5131]
INFO:     Waiting for application startup.
INFO:     Application startup complete.
では早速curlコマンドを打ってみる。
~ % curl localhost:8000
{"message":"Hello World"}
無事に世界に挨拶することが出来た。
サーバーログにもしっかりと出力されていて安心。
INFO: 127.0.0.1:52258 - "GET / HTTP/1.1" 200 OK
CTRL+C でサーバーを止めることが出来るが、起動時に指定したOption--reload はソースコードの変更を検知して自動で反映してくれるらしい。止めずにこのまま構築を続けてみる。
次はPathParameterやQueryParameterを受け付けてみる。
@app.get("/items/{item_id}")
def read_item(item_id: int, q: str = None):
    if q:
        return {"item_id": item_id, "q": q}
    return {"item_id": item_id}
item_idはPathParameterで受け取りつつ、qはQueryで受け取る。
queryは省略できるように= Noneを指定しておき、存在の有無でresponse bodyを切り替えてみた。
curlコマンドで動きを見る。
curl "localhost:8000/items/123"
{"item_id":123}
curl "localhost:8000/items/123?q=hoge"
{"item_id":123,"q":"hoge"}
いい感じ。
次にPOSTを受け付けたい。
データやオブジェクトをいい感じに取り扱たのでBaseModelを使用する。
下記を追加してみる。
from pydantic import BaseModel

class Item(BaseModel):
    name: str
    price: float

@app.post("/items")
def update_item(item: Item):
    return {"item_name": item.name, "twice price": item.price * 2}
curlで動きをみる。今回はjsonを投げるため headerとbodyを指定する。
curl -X POST "localhost:8000/items" -H 'Content-Type: application/json' -d '{"name":"おなまえ","price":123}'
{"item_name":"おなまえ","twice price":246.0}
いい感じ。
ここまでで、リクエストのパラメーターをPath/Queryで受け付けつつJsonBodyで受け付ける内容が実装されたためOKとする。あとはコピペを繰り返せば一旦はI/Fはできると思う。RDBとの接続などは別の記事で記述予定。
ソースコードの全量は下記。
from fastapi import FastAPI
from pydantic import BaseModel

app = FastAPI()

class Item(BaseModel):
    name: str
    price: float

@app.get("/")
async def root():
    return {"message": "Hello World"}


@app.get("/items/{item_id}")
def read_item(item_id: int, q: str = None):
    if q:
        return {"item_id": item_id, "q": q}
    return {"item_id": item_id}

@app.post("/items")
def update_item(item: Item):
    return {"item_name": item.name, "twice price": item.price * 2}
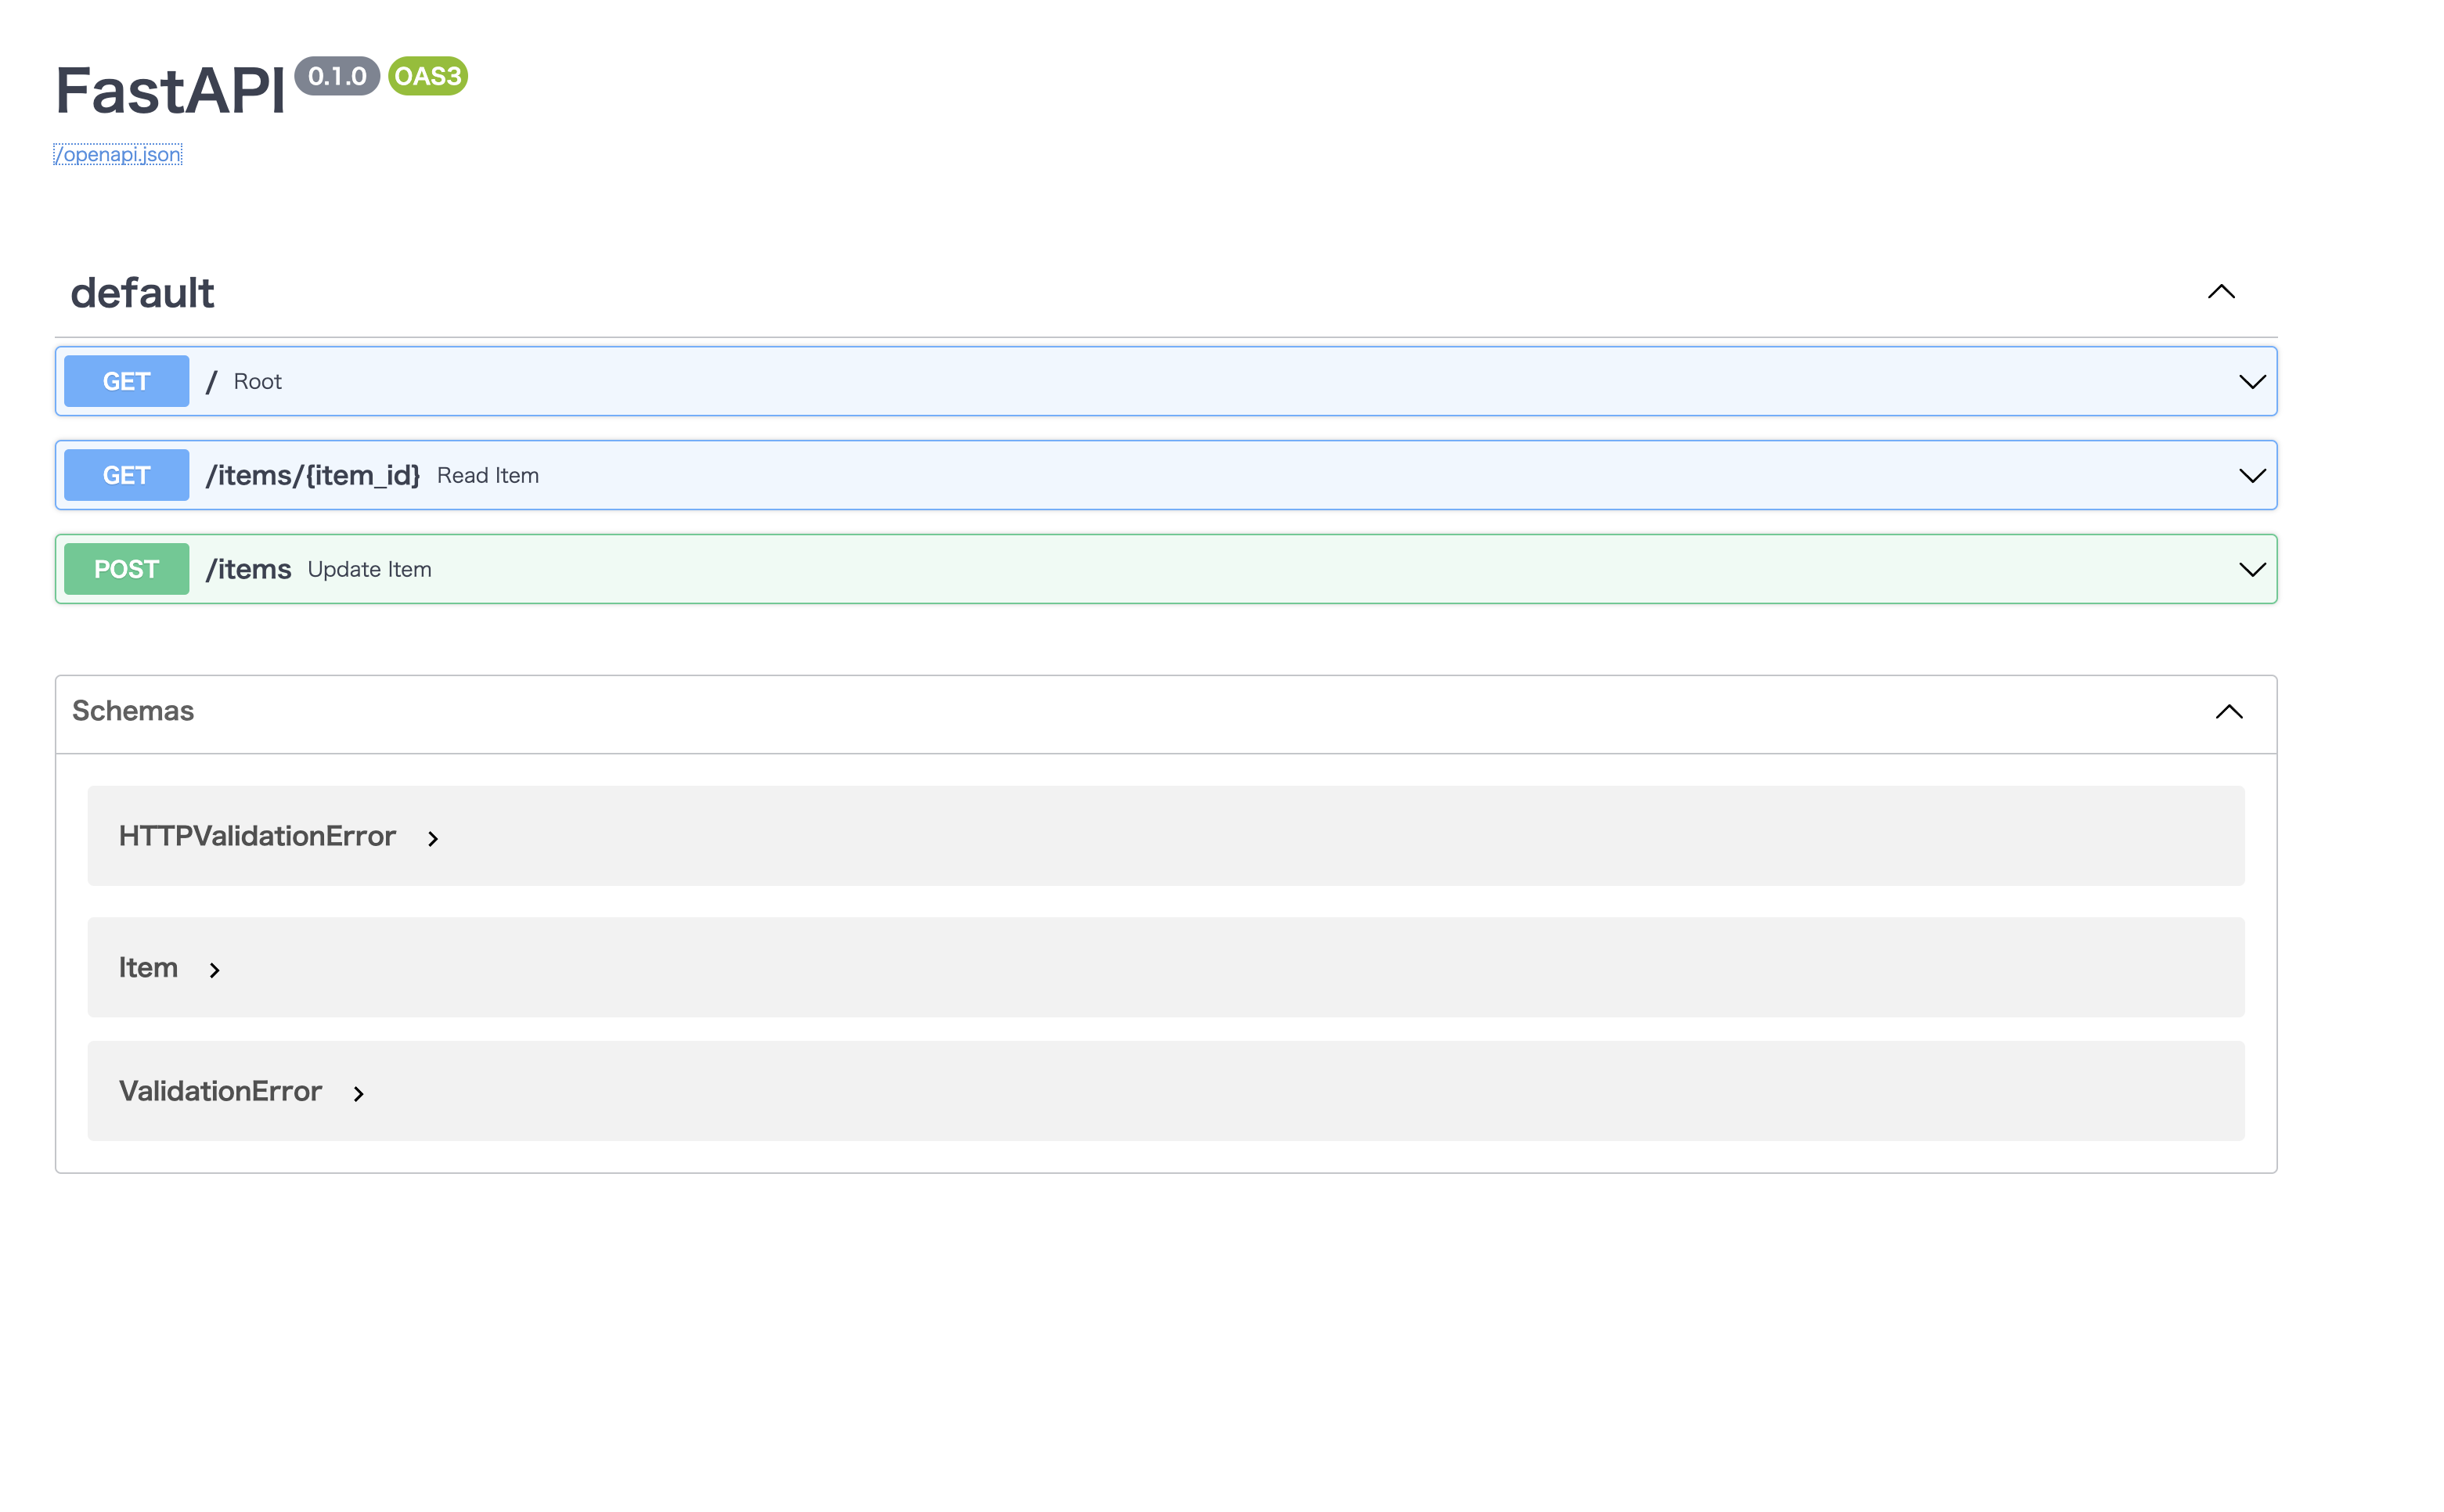
ちなみにhttp://localhost:8000/docsにブラウザでアクセスするとSwaggerのドキュメントがみれるらしいので確認してみる。
すごく便利。openapi.jsonを取得できるのは嬉しい。合わせてgitにでもあげておきたい。
次にコンテナ化に移る。CTRL+Cでサーバーは止めておこう。
3. コンテナ化
コーディングとしては以上だが、流行り的に DockerImageも作っておく。
まずは構成の説明。
.
├── app/
│   └── main.py
├── Dockerfile
└── requirements.txt
次にDockerfileを記述。
FROM tiangolo/uvicorn-gunicorn-fastapi:python3.9-slim

COPY ./app /app
公式のDockerImageが利用できるようで、記述が非常に楽。
詳しくはFastAPIの公式を参照。
では早速imageをbuild。
docker build -t sample-api:1.0.0 .
確認。
docker images | grep sample-api
sample-api                       1.0.0                f91600e19608   About an hour ago   991MB
いた。
次にコンテナも立ち上げてみる。
どうやらportは80で空いているようだ。特に変える必要もないため80のまま解放。
docker run -d --name sample-api-container -p 80:80 sample-api:1.0.0
コンテナログを見てみる。
docker ps -q -f "name=sample-api-container" | xargs docker logs -f
timestampが付与されていて公式のDokcerImageの優秀さを感じる。
Checking for script in /app/prestart.sh
Running script /app/prestart.sh
Running inside /app/prestart.sh, you could add migrations to this file, e.g.:

#! /usr/bin/env bash

# Let the DB start
sleep 10;
# Run migrations
alembic upgrade head

[2022-02-12 09:44:50 +0000] [1] [INFO] Starting gunicorn 20.1.0
[2022-02-12 09:44:50 +0000] [1] [INFO] Listening at: http://0.0.0.0:80 (1)
[2022-02-12 09:44:50 +0000] [1] [INFO] Using worker: uvicorn.workers.UvicornWorker
[2022-02-12 09:44:50 +0000] [7] [INFO] Booting worker with pid: 7
[2022-02-12 09:44:50 +0000] [8] [INFO] Booting worker with pid: 8
[2022-02-12 09:44:50 +0000] [7] [INFO] Started server process [7]
[2022-02-12 09:44:50 +0000] [7] [INFO] Waiting for application startup.
[2022-02-12 09:44:50 +0000] [7] [INFO] Application startup complete.
[2022-02-12 09:44:50 +0000] [9] [INFO] Booting worker with pid: 9
[2022-02-12 09:44:50 +0000] [8] [INFO] Started server process [8]
[2022-02-12 09:44:50 +0000] [8] [INFO] Waiting for application startup.
[2022-02-12 09:44:50 +0000] [8] [INFO] Application startup complete.
[2022-02-12 09:44:50 +0000] [9] [INFO] Started server process [9]
[2022-02-12 09:44:50 +0000] [9] [INFO] Waiting for application startup.
[2022-02-12 09:44:50 +0000] [9] [INFO] Application startup complete.
[2022-02-12 09:44:50 +0000] [10] [INFO] Booting worker with pid: 10
[2022-02-12 09:44:50 +0000] [10] [INFO] Started server process [10]
[2022-02-12 09:44:50 +0000] [10] [INFO] Waiting for application startup.
[2022-02-12 09:44:50 +0000] [10] [INFO] Application startup complete.
[2022-02-12 09:44:50 +0000] [11] [INFO] Booting worker with pid: 11
[2022-02-12 09:44:50 +0000] [12] [INFO] Booting worker with pid: 12
[2022-02-12 09:44:50 +0000] [11] [INFO] Started server process [11]
[2022-02-12 09:44:50 +0000] [11] [INFO] Waiting for application startup.
[2022-02-12 09:44:50 +0000] [11] [INFO] Application startup complete.
[2022-02-12 09:44:50 +0000] [12] [INFO] Started server process [12]
[2022-02-12 09:44:50 +0000] [12] [INFO] Waiting for application startup.
[2022-02-12 09:44:50 +0000] [12] [INFO] Application startup complete.
コンテナの外からcurlを打ってみる。portが異なることに注意。
curl localhost:80
{"Hello":"World"}
再び世界とこんにちは。
ログもしっかりと確認する。
{"loglevel": "info", "workers": 6, "bind": "0.0.0.0:80", "graceful_timeout": 120, "timeout": 120, "keepalive": 5, "errorlog": "-", "accesslog": "-", "workers_per_core": 1.0, "use_max_workers": null, "host": "0.0.0.0", "port": "80"}
172.17.0.1:56684 - "GET / HTTP/1.1" 200
良い。再びCTRL+Cで閉じておく。
containerとimageの消し方などは別途記事にする予定。
以上。
