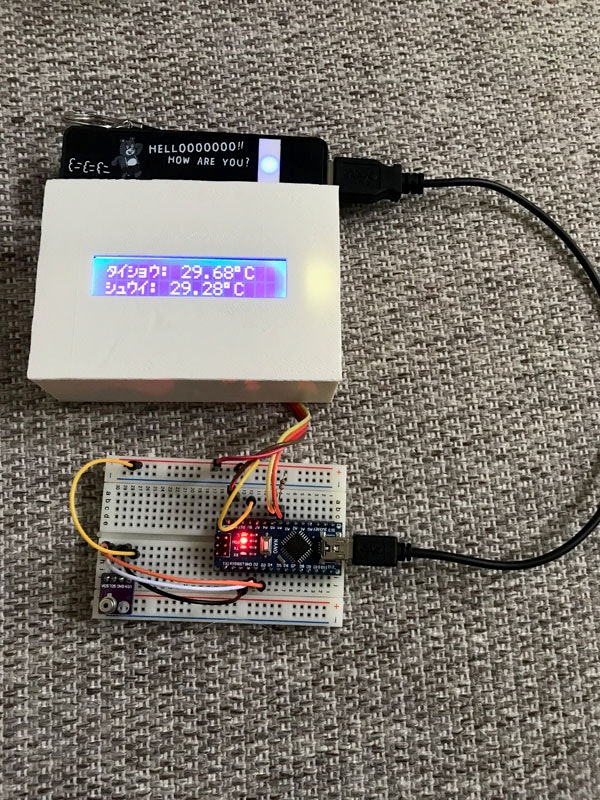
赤外線温度センサーが安くなってきたので、MLX90615 を AliExpress から購入(送料込みで756円)して、非接触温度計を試作してみました。
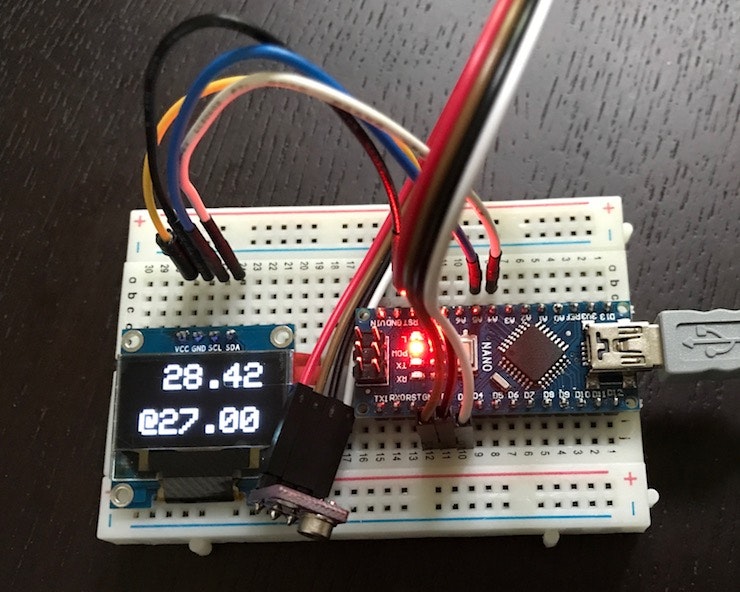
<追記:2017.7.23> 0.96インチ128x64 の有機ELディスプレイを購入して使って見たので、その情報も追記した。
使用したもの
コントローラ
Arduino nano 互換機(300円くらい)、LCDディスプレイは一般的な HD44780 1602 LCD ディスプレイモジュール(I2Cシリアルインターフェースと併せて300円ちょっと)を流用しました。
赤外線センサー
MLX90615 Digital Infrared Temperature Sensor は AliExpress で送料込み $4.90でした。
LCD ディスプレイ
HiLetgo DC 5V HD44780 1602 LCD ディスプレイモジュール 16×2 と
HiLetgo IIC/I2C/TWI/SPI シリアル インタフェース ボード モジュールを組合せて使用。
Amazonで両方合わせて送料込み310円。
有機ELディスプレイ
HiLetgo 0.96インチ128x64 有機ELディスプレイ I2C/SSD1306(Amazonで送料込み420円)
使用ライブラリー
- LCD表示用 : LiquidCrystal_I2C.h
- 温度センサー用:Digital_Infrared_Temperature_Sensor_MLX90615
配線のメモ
LCDディスプレイ
-SDA を A4 (10KΩでプルアップ)
-SCL を A5 (10KΩでプルアップ)
-GND を GND
-VCC を +5v
(プルアップは無くても動作した)
有機ELディスプレイ
LCDディスプレイと同じ
温度センサー
-SDA を D3
-SCL を D2
-GND を GND
-VIN を +5v
プログラムのソース(LCD)
Ondokei.ino
# include "MLX90615.h"
# include <I2cMaster.h>
# include <Wire.h>
# include <LiquidCrystal_I2C.h>

# define printIIC(args) Wire.write(args)
inline size_t LiquidCrystal_I2C::write(uint8_t value) {
send(value, Rs);
return 1;
}


# define SDA_PIN 3   //define the SDA pin
# define SCL_PIN 2   //define the SCL pin

SoftI2cMaster i2c(SDA_PIN, SCL_PIN);
MLX90615 mlx90615(DEVICE_ADDR, &i2c);

LiquidCrystal_I2C lcd(0x27, 16, 2);


void setup()
{
  Serial.begin(9600);
  Serial.println("Setup...");
  lcd.init();
  lcd.backlight();

  //mlx90615.writeEEPROM(Default_Emissivity); //write data into EEPROM when you need to adjust emissivity.
  //mlx90615.readEEPROM(); //read EEPROM data to check whether it's a default one.
}

void loop()
{
  Serial.print("Object temperature: ");
  Serial.println(mlx90615.getTemperature(MLX90615_OBJECT_TEMPERATURE));
  Serial.print("Ambient temperature: ");
  Serial.println(mlx90615.getTemperature(MLX90615_AMBIENT_TEMPERATURE));

  lcd.clear();
  lcd.setCursor(0, 0);
  lcd.print("\xc0\xb2\xbc\xae\xb3");  //「タイショウ」
  lcd.print(": ");
  lcd.print(mlx90615.getTemperature(MLX90615_OBJECT_TEMPERATURE));
  lcd.print("\xdf");   // 上付きの○
  lcd.print("C");
  lcd.setCursor(0, 1);
  lcd.print("\xbc\xad\xb3\xb2"); // 「シュウイ」
  lcd.print(": ");
  lcd.print(mlx90615.getTemperature(MLX90615_AMBIENT_TEMPERATURE));
  lcd.print("\xdf");   // 上付きの○
  lcd.print("C");

  delay(2000);
}
プログラムのソース(有機ELディスプレイ)
Ondokei.ino
# include "MLX90615.h"
# include <I2cMaster.h>

# include <SPI.h>
# include <Wire.h>
# include <Adafruit_GFX.h>
# include <Adafruit_SSD1306.h>

# define OLED_RESET 4
Adafruit_SSD1306 display(OLED_RESET);

# define SDA_PIN 3   //define the SDA pin
# define SCL_PIN 2   //define the SCL pin

SoftI2cMaster i2c(SDA_PIN, SCL_PIN);
MLX90615 mlx90615(DEVICE_ADDR, &i2c);


void setup(void) {
  display.begin(SSD1306_SWITCHCAPVCC, 0x3C);  // initialize with the I2C addr
  display.clearDisplay();
  display.setTextSize(1);
  display.setTextColor(WHITE);

}

void loop(void) {
  display.setTextSize(3);
  display.setTextColor(WHITE);
  display.clearDisplay();
  display.setCursor(30,0);
  display.println(mlx90615.getTemperature(MLX90615_OBJECT_TEMPERATURE));
  display.setCursor(10,40);
  display.print('@');
  display.println((mlx90615.getTemperature(MLX90615_AMBIENT_TEMPERATURE)));
  display.display();

  delay(2000);
}
参考URL
- LCDのカナ文字コード:SC1602 LCDモジュール (HD44780コンパチブル) の使い方