環境
windows7 32bit
python2.7.13
事前準備
python2.7インストール
https://www.python.org/downloads/ で、「Download the latest version for Windows」の「Download Python 2.7.13」をクリック。
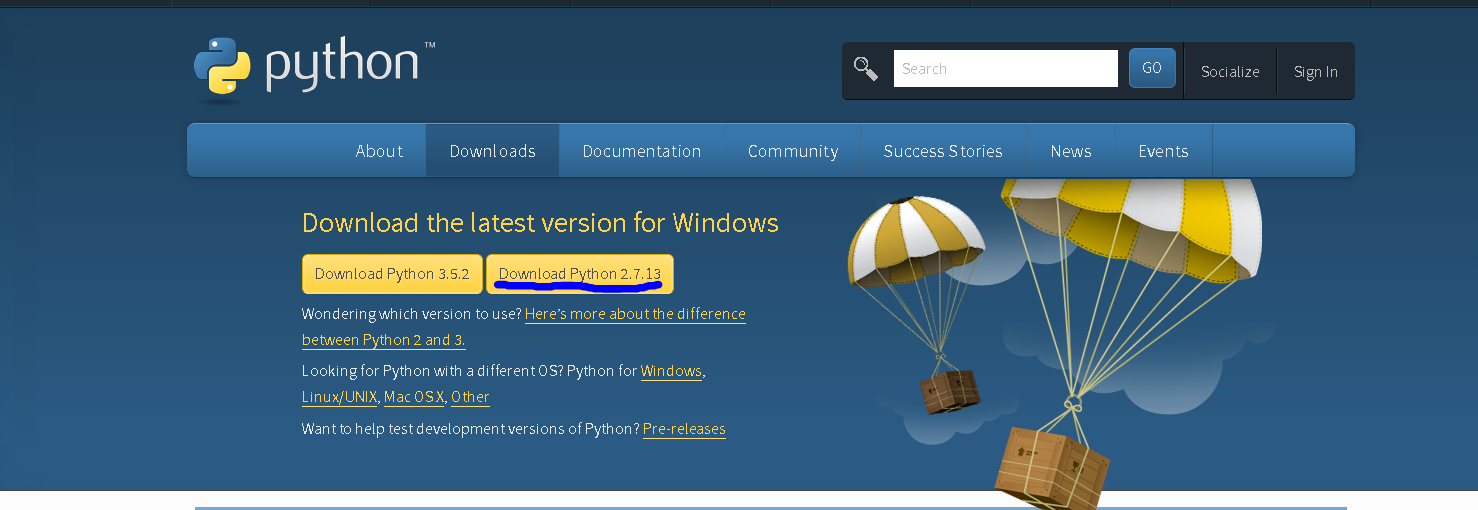
ダウンロードした「python-2.7.13.msi」をダブルクリックしてインストーラを実行。
デフォルトだと「C:\Python27」にインストールされるはず。
環境変数の設定
インストールしたpythonのpathの設定を行う。
Windowsスタートメニューから、 [コンピューター] -> [プロパティ] -> [システムの詳細設定] -> [環境変数] で、システム環境変数の「Path」の末尾に「;C:\Python27」を追加。
pythonのインストール確認
コマンドプロンプトかpowershellから下記コマンドを実施し、バージョンが表示されること
> python.exe --version
Python 2.7.13
Selenium WebDriverの設定
Selenium WebDriverインストール
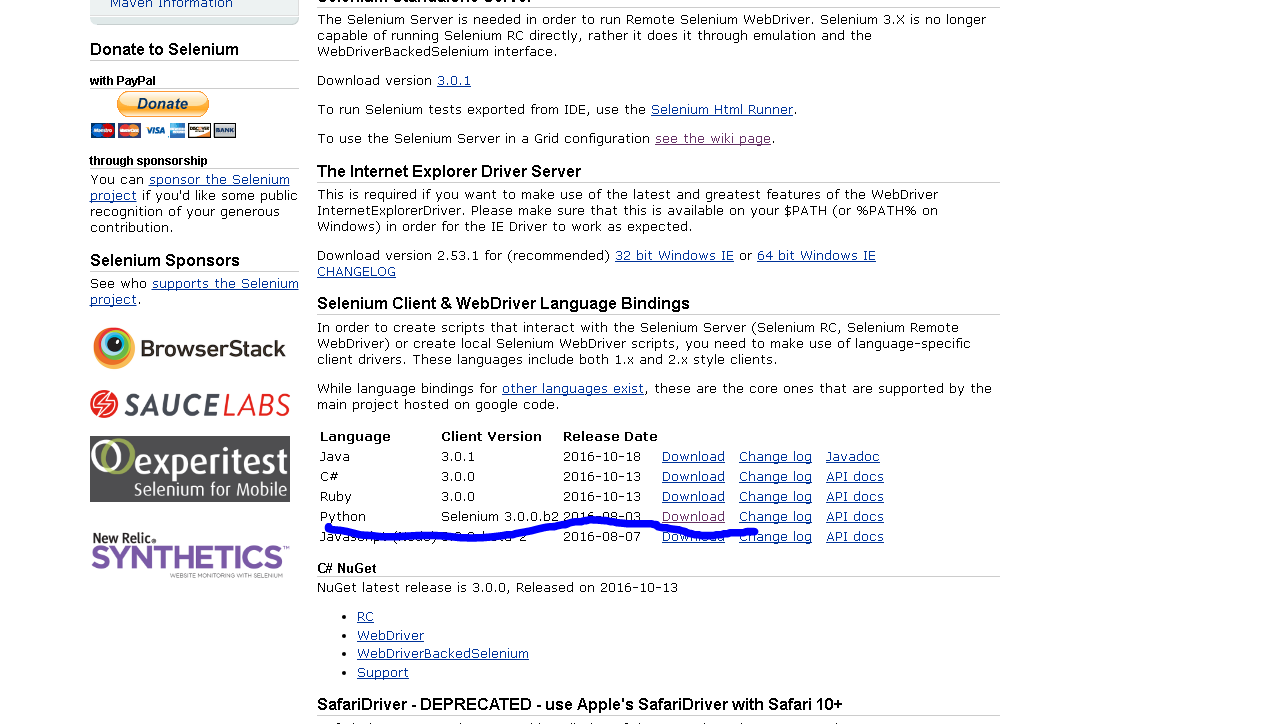
http://docs.seleniumhq.org/download/ から、「Selenium Client & WebDriver Language Bindings」の「Python3.0.0.b2」のDownload リンクをクリックし、次のページで、「selenium-3.0.2.tar.gz」をダウンロード。
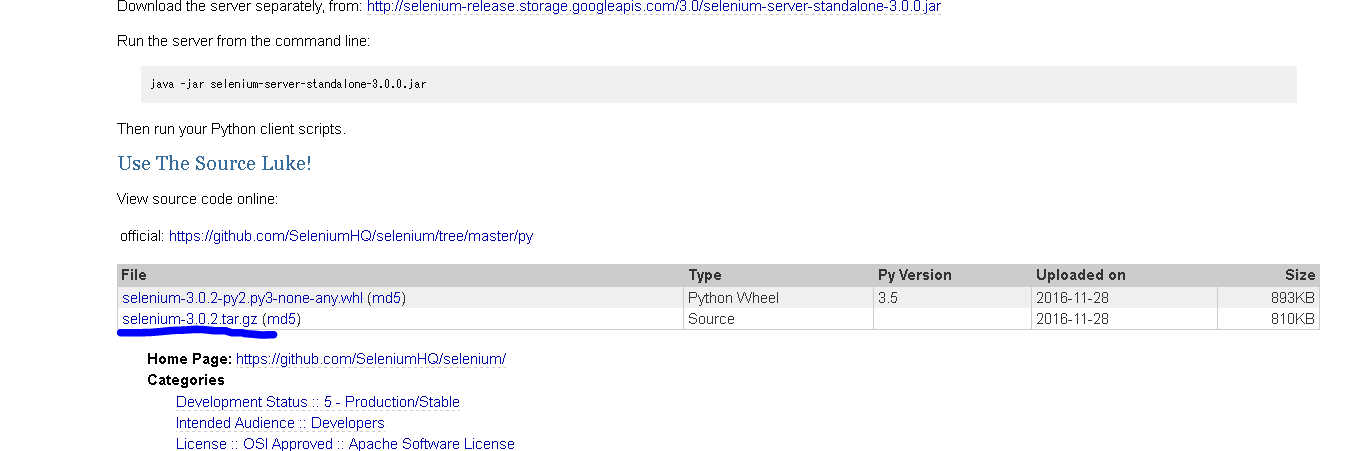
ダウンロードした「selenium-3.0.2.tar.gz」を解凍し、その中から、「selenium-3.0.2\py\selenium」の「selenium」フォルダごと、「C:\Python27\Lib」の直下にコピペ。
chromedriver設置
FireFoxならデフォルトで問題ないがChromeの場合はdriverが必要となる。
http://chromedriver.storage.googleapis.com/index.html?path=2.25/ から、
自分の環境にあったファイルをダウンロードする。(今回、chromedriver_win32.zipをダウンロード)
「chromedriver_win32.zip」の中にある「chromedriver.exe」を
「C:\selenium\」の直下にコピする。(seleniumディレクトリない場合は作成する。)
自動操作のためのプログラム作成
chromeブラウザを開いて、サイトのボタンをクリックし、スクリーンショットを取り、ブラウザを閉じるサンプルプログラム。
from selenium import webdriver
from selenium.webdriver.common.by import By
from selenium.webdriver.common.keys import Keys
from selenium.webdriver.support.ui import Select
from selenium.common.exceptions import NoSuchElementException
import unittest, time, re

class TestWebdriver(unittest.TestCase):
    def setUp(self):
        self.driver = webdriver.Chrome('C:\selenium\chromedriver')
        self.driver.implicitly_wait(30)
        self.base_url = "http://docs.seleniumhq.org/"
        self.verificationErrors = []
        self.accept_next_alert = True

    def test_webdriver(self):
        driver = self.driver
        driver.get(self.base_url + "/")
        driver.find_element_by_link_text("Documentation").click()
        driver.find_element_by_link_text("Selenium WebDriver").click()
        driver.find_element_by_xpath("//input[@value='python']").click()
        driver.save_screenshot("screenshot.png")

    def is_element_present(self, how, what):
        try: self.driver.find_element(by=how, value=what)
        except NoSuchElementException, e: return False
        return True

    def is_alert_present(self):
        try: self.driver.switch_to_alert()
        except NoAlertPresentException, e: return False
        return True

    def close_alert_and_get_its_text(self):
        try:
            alert = self.driver.switch_to_alert()
            alert_text = alert.text
            if self.accept_next_alert:
                alert.accept()
            else:
                alert.dismiss()
            return alert_text
        finally: self.accept_next_alert = True

    def tearDown(self):
        self.driver.quit()
        self.assertEqual([], self.verificationErrors)

if __name__ == "__main__":
    unittest.main()
下記のところがブラウザを指定している
self.driver = webdriver.Chrome('C:\selenium\chromedriver')
FireFoxの場合はパス指定なしでいけるらしい
例
self.driver = webdriver.Firefox()
実行
powershellまたは、コマンドプロンプトでコマンド実行
> python test_webdriver.py

OK  <- うまく実行されればokがでる