**iOS:**http://itunes.apple.com/jp/app/charide-laita.kamera/id566313348?mt=8
**Android:**https://play.google.com/store/apps/details?id=com.yedo.chyaridekita
チャリが欲しい。ヱドファクトリーの坂口です。
iOS/Androidアプリ**「チャリで来た。カメラ」**をリリースしました!
本アプリはUnityで開発しました。ここではチャリで来た。カメラの開発話を公開したいと思います。
チャリで来た。カメラとは
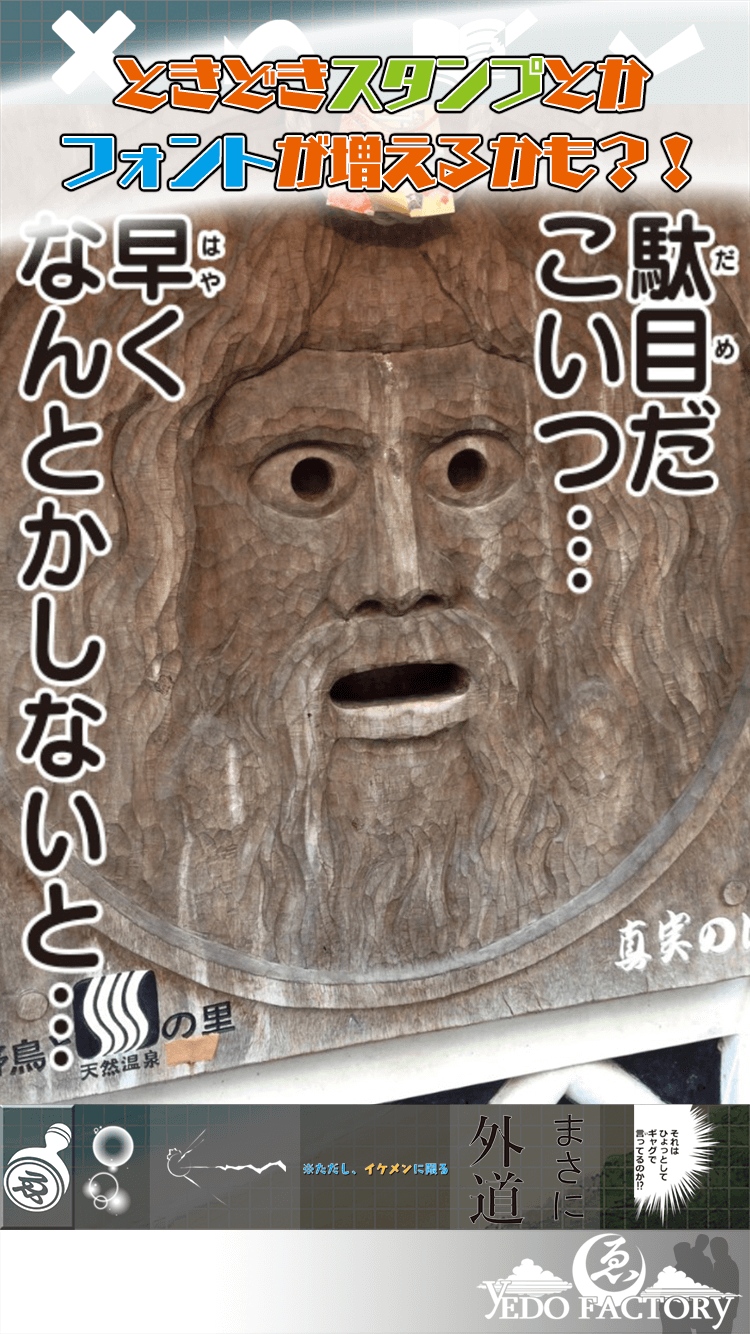
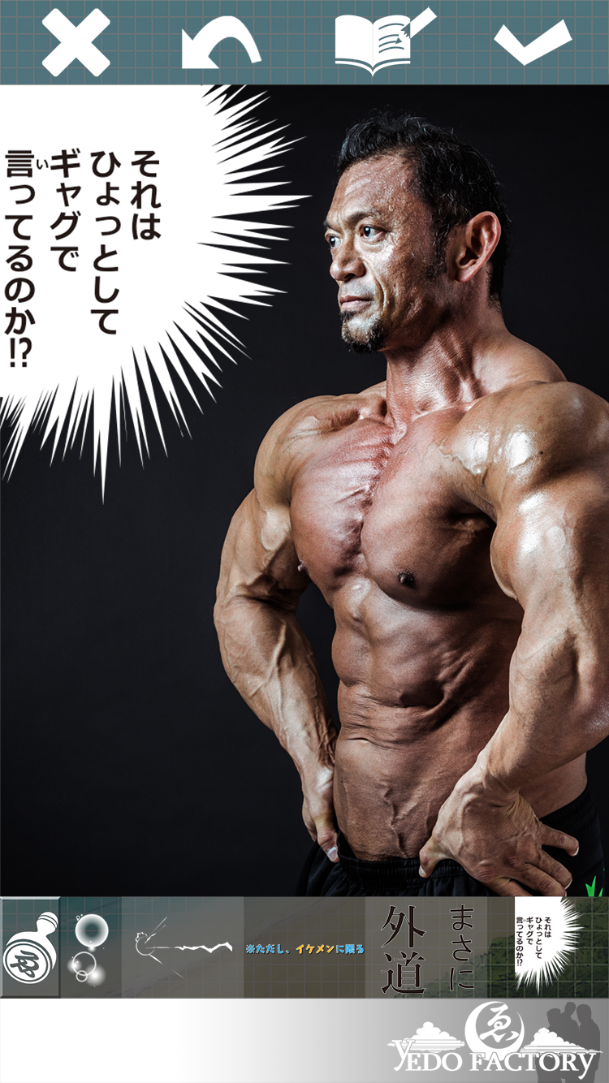
2ちゃんで話題になったあの伝説的プリクラ「チャリで来た」を誰でも簡単に再現できるアプリです。
2012年にiOS版がリリースされ、今回、装いも新たにAndroid版をリリースしました!iOS版もVer2.0.0に伴い大幅リニューアルです。


Androidに対応 [新機能]
Androidユーザの皆様、大変長らくお待たせしました。
Androidでもチャリで来た。カメラを宜しくお願いします。
スタンプを大幅追加 [新機能]
今回の一番大きな更新です。今まで写真編集画面の下にあった5つのスタンプですが、それを大幅追加しました!追加された様々な種類のスタンプ、是非お試し下さい☆
写真の形選択を追加 [新機能]
カメラ撮影とアルバム選択時に今までは長方形の写真しか使用出来ませんでしたが、「長方形」「正方形」の写真を選択出来るようになりました。
好みに合わせて写真の形をお選び下さい♪
スタンプの回転機能を追加 [新機能]
今までスタンプはピンチ・移動の編集が行えましたが、そこに回転も行えるようになりました。2本指を回転させることでスタンプ回転が行えます。
ここだけの話しですが、本当は初期バージョンで組み込む機能でした。Unityで作り直すに当たり対応可能になった機能です。
写真の大きさ/向き/位置の編集機能を追加 [新機能]
写真編集画面で、写真をピンチ・回転・移動させることで編集が可能になりました。スタンプ編集と同様の機能が写真にも追加された形です。ただし写真に関しては回転は90度の固定回転になります(向き変更です)。
連携SNSにLine/Instagramを追加 [新機能]
作成した写真のShare機能にLine/Instagramが使用可能になりました。
UIリニューアル
UIを一新しました。今回、多くの新機能が追加されたので、それに合わせてデザインを全体的に調整しました。
全体的なバグ修正
iOS版でカメラ画面から遷移出来なくなるバグ等、改めて全体的にバグ修正を行いました。
是非みなさん、チャリで来た。カメラで遊んでみて下さい☆
チャリで来た。カメラを宜しくお願いします。
それではここからは開発話に移りたいと思います。
開発環境
メンバー
プランナー ・・・ 1人
デザイナー ・・・ 1人
プログラマ ・・・ 1人
PC
Mac Yosemite、Windows7
開発エンジン
Unity5.2.3
IDE
MonoDevelop、Visual Studio 2013、Eclipse 4.4
サーバ環境
PHP、MySQL
対応端末
iOS7.0+、iPhone5+(※iPhone4s、iPodは非対応)
Android2.3+
使用UnityAsset
MVVM 4 uGUI
uGUIでMVVMの仕組みを導入。
SocialWorker
SNS連携を行う。
SpritePacker
テクスチャをパックする。
iTween
Tweenライブラリ。
DotNetZip、SSZipArchive
ZIPライブラリ。ダウンロードデータに使用。
Stats
iOSでのメモリ表示ライブラリ。Androidは自作。
nendSDK
バナー広告SDK。
AdColony-Unity-SDK
動画広告SDK。
Unityを使用したわけ
元々、初期リリース時のチャリで来た。カメラはObjective-Cを使用した純正のネイティブアプリでした。
それをAndroidもリリースするに当たり、Unityに移植することにしたわけですが、それには以下のような事情がありました。
iOSも大きな改修の必要があった
iOS版がリリースされたのが2012年。それから3年が経過し、メンテナンスがされておらず、バグでアプリが正常に動作しない状態でした。
全体的な修正の必要があったため、それならば新規でUnityで作り直そう、と考えました。
マルチプラットフォーム対応
今後の更新も考えた時、純正のネイティブアプリで作った場合は、マルチプラットフォーム対応がおっくうでした。
その点、Unityはバージョン対応さえ行っていればそこらへんは安心なので、Unityでマルチプラットフォーム対応の恩恵を得ようと思いました。
アプリの柔軟なカスタマイズ
Objective-Cで作った時は、自分が初めてObjective-Cに触れたこともあってか、なかなか思うような開発を行えませんでした。
本当はもっとこうしたい、というものがあったのですが、結果的に規模を縮小してリリースせざるを得ませんでした。
なので、今回アプリのリニューアルも兼ねて、より柔軟にアプリのカスタマイズが出来るよう、Unityを使用することに決めました。
カメラ機能
カメラ機能は以下のように実装しました。
- iOS ・・・ UIImagePickerController(Objective-C)
- Android ・・・ WebCamTexture(Unity)
最初は両方ともWebCamTextureを使用していたのですが、クォリティの面から(WebCamTextureはただのキャプチャ画像のため)、iOSの方はネイティブで処理することにしました。
iOS:UIImagePickerController(Objective-C)
# import <UIKit/UIKit.h>
# import <Foundation/Foundation.h>
# import <AssetsLibrary/AssetsLibrary.h>

@interface CharikitaPlugin : NSObject<UIImagePickerControllerDelegate>
@property(nonatomic, retain)UIImagePickerController *_ipc;
@property(nonatomic, retain)NSMutableArray *_cameraBacks;
@property(nonatomic, copy)NSString *_imagePath;
@property(nonatomic, assign)int _photoStyle;
@end

@implementation CharikitaPlugin
@synthesize _ipc;
@synthesize _cameraBacks;
@synthesize _imagePath;
@synthesize _photoStyle;

/**
 * 初期化
 */
- (id)init {
    self = [super init];
    if (self != nil) {
    	// リスト初期化
        _cameraBacks = [NSMutableArray array];
    }
    return self;
}

/**
 * カメラ表示
 * @param imagePath 画像保存パス
 * @param photoStyle フォトスタイル。0:長方形、1:正方形
 */
- (void)showCamera:(NSString *)imagePath photoStyle:(int)photoStyle {
	_imagePath = imagePath;
	_photoStyle = photoStyle;

	// UIImagePickerController初期化
	_ipc = [[UIImagePickerController alloc] init];
    _ipc.sourceType = UIImagePickerControllerSourceTypeCamera;
    _ipc.delegate = self;
    _ipc.showsCameraControls = NO;
	_ipc.allowsEditing = NO;

    // カメラビュー
    CGRect s = [[UIScreen mainScreen] bounds];
    float sw = s.size.width;
    float sh = s.size.height;
    float cw = 720 / 2;
    float ch = 1280 / 2;
    float r  = (sh * cw) / (sw * ch);
    float a  = ((r > 1) ? (sh / ch) : (sw / cw)) / 2;
    UIView *parent = [[UIView alloc] initWithFrame:CGRectMake(0, 0, sw, sh)];

    // 背景
	NSString *name;
	CGRect rect;
	for(int i = 0; i < 2; i++) {
		name = [NSString stringWithFormat:@"%@%d", @"common_camera_", i];
		float height = ((i == 0) ? 320 : 560) * a;
		rect = CGRectMake(0, sh - height, 720 * a, height);
		[_cameraBacks addObject:[self createImageView:parent tag:0 imageNamed:name frame:rect]];
    }

    // 撮影ボタン
	name = @"common_button_camera";
	rect = CGRectMake(210 * a, 1010 * a, 300 * a, 120 * a);
	[self createButton:parent tag:0 imageNamed:name frame:rect action:@selector(takeCamera)];

    // キャンセルボタン
	name = @"common_button_cancel";
	rect = CGRectMake(10 * a, 1077 * a, 150 * a, 90 * a);
	[self createButton:parent tag:0 imageNamed:name frame:rect action:@selector(hideCamera)];

	// 長方形ボタン
    name = @"common_button_rectangle";
    rect = CGRectMake(560 * a, 970 * a, 150 * a, 90 * a);
    [self createButton:parent tag:0 imageNamed:name frame:rect action:@selector(updateRectangle)];

    // 正方形ボタン
    name = @"common_button_square";
    rect = CGRectMake(560 * a, 1077 * a, 150 * a, 90 * a);
    [self createButton:parent tag:1 imageNamed:name frame:rect action:@selector(updateSquare)];

    // フォトスタイル初期化
	if(_photoStyle == 0) {
		[self updateRectangle];
	} else {
		[self updateSquare];
	}

	// カメラ表示
    _ipc.cameraOverlayView = parent;
    [UnityGetGLViewController() presentViewController:_ipc animated:YES completion:nil];
}

/**
 * UIImageView作成
 * @param parent 親ビュー
 * @param tag タグ
 * @param imageNamed イメージ名
 * @param frame 描画フレーム
 * @return UIImageView
 */
- (UIImageView *)createImageView:(UIView *)parent tag:(int)tag imageNamed:(NSString *)imageNamed frame:(CGRect)frame {
	UIImage *image = [UIImage imageNamed:imageNamed];
	UIImageView *view = [[UIImageView alloc] initWithImage:image];
	[view setTag:tag];
	[view setFrame:frame];
	[parent addSubview:view];
	return view;
}

/**
 * UIButton作成
 * @param parent 親ビュー
 * @param tag タグ
 * @param imageNamed イメージ名
 * @param frame 描画フレーム
 * @param action ボタンクリック時のコールバック
 * @return UIButton
 */
- (UIButton *)createButton:(UIView *)parent tag:(int)tag imageNamed:(NSString *)imageNamed frame:(CGRect)frame action:(SEL)action {
	UIImage *image = [UIImage imageNamed:imageNamed];
	UIButton *button = [UIButton buttonWithType:UIButtonTypeCustom];
	[button setTag:tag];
    [button setImage:image forState:UIControlStateNormal];
    [button setImage:image forState:UIControlStateHighlighted];
    [button setFrame:frame];
    [button.imageView setContentMode:UIViewContentModeScaleAspectFit];
    [button setContentMode:UIViewContentModeScaleAspectFit];
    [button addTarget:self action:action forControlEvents:UIControlEventTouchUpInside];
    [parent addSubview:button];
	return button;
}

/**
 * カメラ撮影
 */
- (void)takeCamera {
	[_ipc takePicture];
}

/**
 * カメラ非表示
 */
- (void)hideCamera {
	[UnityGetGLViewController() dismissViewControllerAnimated:YES completion:nil];
	[self releaseImagePicker];
}

/**
 * フォトスタイルを長方形に更新
 */
- (void)updateRectangle {
    [self updatePhotoStyle:true isSquare:false];
}

/**
 * フォトスタイルを正方形に更新
 */
- (void)updateSquare {
    [self updatePhotoStyle:false isSquare:true];
}

/**
 * フォトスタイル更新
 * @param isRectangle 長方形の場合 true
 * @param isSquare 正方形の場合 true
 */
- (void)updatePhotoStyle:(BOOL)isRectangle isSquare:(BOOL)isSquare {
    _photoStyle = (isRectangle) ? 0 : 1;
	((UIView *)[_cameraBacks objectAtIndex:0]).hidden = isSquare;
	((UIView *)[_cameraBacks objectAtIndex:1]).hidden = isRectangle;
}

/**
 * アルバム表示
 * @param imagePath 画像保存パス
 * @param photoStyle フォトスタイル。0:長方形、1:正方形
 */
- (void)showAlbum:(NSString *)imagePath photoStyle:(int)photoStyle {
	_imagePath = imagePath;
	_photoStyle = photoStyle;
    _ipc = [[UIImagePickerController alloc] init];
    _ipc.sourceType = UIImagePickerControllerSourceTypePhotoLibrary;
    _ipc.allowsEditing = NO;
    _ipc.delegate = self;
    [UnityGetGLViewController() presentViewController:_ipc animated:YES completion:nil];
}

/**
 * フォト保存
 * @param path 保存パス
 */
- (void)savePhoto:(NSString *)path {
	UIImageWriteToSavedPhotosAlbum([UIImage imageWithContentsOfFile:path], self, nil, nil);
}

/**
 * UIImagePickerController:画像選択完了
 * @param picker UIImagePickerController
 * @param info 情報
 */
- (void)imagePickerController:(UIImagePickerController *)picker didFinishPickingMediaWithInfo:(NSDictionary *)info{
 	// ローディングを先に走らせる(画像処理に時間が掛かるため)
    UnitySendMessage("SceneTitle", "OnLoadPhoto", "");

    // 元のシーンへ
    [UnityGetGLViewController() dismissViewControllerAnimated:YES completion:^{
    	// 画像取得
        UIImage *origin = [info objectForKey:UIImagePickerControllerOriginalImage];
        UIImage *edited = [info objectForKey:UIImagePickerControllerEditedImage];
        UIImage *image = (edited) ? edited : origin;

        // サイズが大きいものはリサイズ
        if(image.size.width > 2048 || image.size.height > 2048) {
            image = [self resizedImage:image size:CGSizeMake(image.size.width / 2, image.size.height / 2)];
        }

        // フォトスタイルが正方形の場合はトリミング
        if(_ipc.sourceType == UIImagePickerControllerSourceTypeCamera && _photoStyle == 1) {
            image = [self clippedImage:image rect:CGRectMake(0, 0, image.size.width, image.size.width)];
        }

        // 端末に保存
        NSData *data = UIImagePNGRepresentation(image);
        NSString *path = _imagePath;
        [data writeToFile:path atomically:YES];

        // Unity側に情報を返す
        if(image.imageOrientation == UIImageOrientationUp) {
            path = [path stringByAppendingFormat:@",0,%d", _photoStyle];
        } else if(image.imageOrientation == UIImageOrientationRight) {
            path = [path stringByAppendingFormat:@",1,%d", _photoStyle];
        } else if(image.imageOrientation == UIImageOrientationDown) {
            path = [path stringByAppendingFormat:@",2,%d", _photoStyle];
        } else if(image.imageOrientation == UIImageOrientationLeft) {
            path = [path stringByAppendingFormat:@",3,%d", _photoStyle];
        }
        UnitySendMessage("SceneTitle", "OnSelectPhoto", [self parseStr:path.UTF8String]);

        // 破棄
		[self releaseImagePicker];
    }];
}

/**
 * 画像リサイズ
 * @param image UIImage
 * @param size リサイズサイズ
 * @return UIImage
 */
- (UIImage *)resizedImage:(UIImage *)image size:(CGSize)size {
    UIGraphicsBeginImageContext(size);
    CGContextRef context = UIGraphicsGetCurrentContext();
    CGContextSetInterpolationQuality(context, kCGInterpolationHigh);
    [image drawInRect:CGRectMake(0, 0, size.width, size.height)];
    image = UIGraphicsGetImageFromCurrentImageContext();
    UIGraphicsEndImageContext();
    return image;
}

/**
 * 画像クリップ
 * @param image UIImage
 * @param rect クリップ領域
 * @return UIImage
 */
- (UIImage *)clippedImage:(UIImage *)image rect:(CGRect)rect {
    rect = CGRectApplyAffineTransform(rect, [self transformForOrientation:image]);
    CGImageRef cgImage = CGImageCreateWithImageInRect(image.CGImage, rect);
    image = [UIImage imageWithCGImage:cgImage scale:image.scale orientation:image.imageOrientation];
    CGImageRelease(cgImage);
    return image;
}

/**
 * Affine変換
 * @param image UIImage
 * @return CGAffineTransform
 */
- (CGAffineTransform)transformForOrientation:(UIImage *)image {
    CGAffineTransform t = CGAffineTransformIdentity;
    CGSize visibleImageSize = image.size;
    CGSize originalImageSize = image.size;
    switch (image.imageOrientation) {
        case UIImageOrientationLeft:
        case UIImageOrientationLeftMirrored:
        case UIImageOrientationRight:
        case UIImageOrientationRightMirrored:
            originalImageSize = CGSizeMake(visibleImageSize.height, visibleImageSize.width);
            break;
        default:
            originalImageSize = visibleImageSize;
    }

    t = CGAffineTransformTranslate(t, originalImageSize.width / 2, originalImageSize.height / 2);
    switch (image.imageOrientation) {
        case UIImageOrientationDownMirrored:
            t = CGAffineTransformScale(t, -1, 1);
        case UIImageOrientationDown:
            t = CGAffineTransformRotate(t, M_PI);
            break;
        case UIImageOrientationLeftMirrored:
            t = CGAffineTransformScale(t, -1, 1);
        case UIImageOrientationLeft:
            t = CGAffineTransformRotate(t, M_PI/2);
            break;
        case UIImageOrientationRightMirrored:
            t = CGAffineTransformScale(t, -1, 1);
        case UIImageOrientationRight:
            t = CGAffineTransformRotate(t, -M_PI/2);
            break;
        case UIImageOrientationUpMirrored:
            t = CGAffineTransformScale(t, -1, 1);
        case UIImageOrientationUp:
        default:
            break;
    }
    t = CGAffineTransformTranslate(t, -visibleImageSize.width / 2, -visibleImageSize.height / 2);
    return t;
}

/**
 * UIImagePickerController:画像選択キャンセル
 * @param picker UIImagePickerController
 */
- (void)imagePickerControllerDidCancel:(UIImagePickerController *)picker{
	[self hideCamera];
}

/**
 * UIImagePickerController解放
 */
- (void)releaseImagePicker {
	self._ipc = nil;
	[_cameraBacks removeAllObjects];
}

/**
 * 文字列パース
 * @param str 文字列
 * @return 文字列
 */
- (char *)parseStr:(const char *)str {
    if (str == NULL) { return NULL; }
    char *res = (char *)malloc(strlen(str) + 1);
    strcpy(res, str);
    return res;
}
@end

/**
 * ネイティブメソッド
 */
extern "C" {
    static CharikitaPlugin *plugin =[[CharikitaPlugin alloc] init];
    UIView *UnityGetGLView();
    UIViewController *UnityGetGLViewController();
    void UnitySendMessage(const char *, const char *, const char *);

    static NSString *getStr(char *str){
        if (str) {
            return [NSString stringWithCString: str encoding:NSUTF8StringEncoding];
        } else {
            return [NSString stringWithUTF8String: ""];
        }
    }

	void showCamera(char *imagePath, int photoStyle){
        [plugin showCamera:getStr(imagePath) photoStyle:photoStyle];
    }

    void showAlbum(char *imagePath, int photoStyle){
        [plugin showAlbum:getStr(imagePath) photoStyle:photoStyle];
    }

    void savePhoto(char *path){
        [plugin savePhoto:getStr(path)];
    }
}
Android:WebCamTexture(Unity)
using UnityEngine;
using UnityEngine.UI;
using System;
using System.Collections;
using System.Collections.Generic;
using System.IO;
using M4u;

/// <summary>
/// カメラシーン
/// </summary>
public class SceneCamera : SceneMother
{
    /// <summary>
	/// カメラFPS
	/// </summary>
	private static readonly int CameraFPS = 30;

	/// <summary>
	/// ゲームオブジェクト
	/// </summary>
	public RawImage PhotoImage;

	/// <summary>
	/// WebCamTexture
	/// </summary>
	private WebCamTexture wct = null;
    /// <summary>
    /// フォトサイズ
    /// </summary>
    private M4uProperty<Vector2> photoSize = new M4uProperty<Vector2>();

    /// <summary>
    /// フォトサイズ
    /// </summary>
    public Vector2 PhotoSize { get { return photoSize.Value; } set { photoSize.Value = value; } }

	/// <summary>
	/// 初期化処理
	/// </summary>
	public override void Awake ()
	{
		base.Awake ();
		App.Instance.Camera = this;
	}

	/// <summary>
	/// 開始処理
	/// </summary>
	public override void Start()
	{
		base.Start();

        if (AppConst.IsDevice)
		{
			// カメラ起動
			wct = new WebCamTexture(WebCamTexture.devices[0].name, AppConst.ScreenWidth, AppConst.ScreenHeight, CameraFPS);
			PhotoImage.texture = wct;
			wct.Play();

			// フォトサイズ設定
			float sw = wct.height; // 回転してるので逆
			float sh = wct.width;  // 回転してるので逆
			float cw = AppConst.ClipWidth;
//			float ch = AppConst.ClipHeight;
			float a  = cw / sw; // 必ず横基準(縦に切り取られるようにUI設計されてる)
			float px = sh * a;  // 回転してるので逆
			float py = sw * a;  // 回転してるので逆
            PhotoSize = new Vector2(px, py);

			// カメラフォト初期化
			if (App.Instance.Data.CameraRectangleTexture == null)
			{
				App.Instance.Data.CameraRectangleTexture = AppUtil.CreateTexture2D ((int)(sw * 4f / 3f), (int)sw);
				App.Instance.Data.CameraSquareTexture    = AppUtil.CreateTexture2D ((int)sw, (int)sw);
			}
		}
        else
        {
            // エディタの場合は固定画像設定しとく
			if (App.Instance.Data.CameraRectangleTexture == null)
            {
				App.Instance.Data.CameraRectangleTexture = AppUtil.CreateTexture2D(File.ReadAllBytes(AppConst.DebugResPath + AppConst.FilePhotoDebug));
            }
			App.Instance.Data.PhotoTexture = App.Instance.Data.CameraRectangleTexture;
        }
	}

    /// <summary>
    /// Android/バックキー
    /// </summary>
    public override void OnAndroidBackKey()
    {
        base.OnAndroidBackKey();
        OnClickCancel();
    }

	/// <summary>
	/// カメラボタンクリック
	/// </summary>
	public void OnClickCamera()
	{
		// シャッター音再生
		SceneCommon.Instance.Audio.Play ();

		// フォトTexture保存
        if (AppConst.IsDevice)
		{
			// トリミング
			Texture2D t = (App.Instance.Data.PhotoStyle == PhotoStyle.Rectangle) ? App.Instance.Data.CameraRectangleTexture : App.Instance.Data.CameraSquareTexture;
			Color[] c0  = wct.GetPixels ();
			Color[] c1  = new Color[t.width * t.height];
			int idx     = 0;
			for (int i = 0; i < c0.Length; i++)
			{
				int x = i % wct.width;
				int y = i / wct.width;
				if (x < t.width && y >= wct.height - t.height)
				{
					c1 [idx++] = c0 [i];
				}
			}
			t.SetPixels (c1);
			t.Apply ();

			App.Instance.Data.PhotoTexture = t;
			App.Instance.Data.PhotoDir     = 1;

			wct.Stop();
		}

		// 次のシーンへ
		Scene.Instance.Load(AppConst.ScenePhoto);
	}

	/// <summary>
	/// キャンセルボタンクリック
	/// </summary>
	public void OnClickCancel()
	{
        if (AppConst.IsDevice) { wct.Stop(); }
		Scene.Instance.Load(AppConst.SceneTitle);
	}

	/// <summary>
	/// 四角形ボタンクリック
	/// </summary>
	public void OnClickRectangle()
	{
        App.Instance.Data.PhotoStyle = PhotoStyle.Rectangle;
	}

	/// <summary>
	/// 正方形ボタンクリック
	/// </summary>
	public void OnClickSquare()
	{
        App.Instance.Data.PhotoStyle = PhotoStyle.Square;
	}
}
アルバムから写真選択
iOSは先ほど載せましたが、Androidの方が少し苦労しました。
最初はUnityで写真選択の画面を作成しようかと考えたのですが、完成度の高いビューアーを作るのは難しいと感じ、それならばAndroidのIntent機能を利用しようと思いました。
Intentに画像選択のアクションを渡し、外部アプリと連携する方法です。
ただこのやり方ですが、どうやらAndroid4.4(KitKat)から処理の仕方が変わったようで、バージョンによる処理分けを行っています。また、ダウンロードフォルダから選択した場合だけアプリが落ちるので、その対策も行っています。
Intentの設定、takePersistableUriPermissionを行わないといけない点、ダウンロードフォルダの場合アプリが落ちる、など気をつけないといけない点が多く、動作確認が大変でした。。。
package com.yedo.chyaridekita;

import android.annotation.SuppressLint;
import android.app.Activity;
import android.content.ContentUris;
import android.content.Intent;
import android.database.Cursor;
import android.media.MediaScannerConnection;
import android.net.Uri;
import android.os.Build;
import android.os.Bundle;
import android.provider.DocumentsContract;
import android.provider.MediaStore;
import android.provider.MediaStore.MediaColumns;

import com.unity3d.player.UnityPlayer;
import com.unity3d.player.UnityPlayerActivity;

/**
 * CharikitaPlugin
 */
@SuppressLint("NewApi")
public class CharikitaPlugin extends UnityPlayerActivity {
	/** タグ */
	public static final String TAG = CharikitaPlugin.class.getSimpleName();
	/** ACTION_PICK:REQUEST_CODE */
	public static final int REQUEST_PICK_CONTENT = 1;

	/** 画像保存パス */
	private String imagePath = "";
	/** フォトスタイル */
	private int photoStyle = 0;

	@Override
	protected void onCreate(Bundle savedInstanceState) {
		super.onCreate(savedInstanceState);
	}

	@Override
	protected void onActivityResult(int requestCode, int resultCode, Intent data) {
        super.onActivityResult(requestCode, resultCode, data);

        // アルバムから画像パス取得
        if(requestCode == REQUEST_PICK_CONTENT) {
        	imagePath = "";
        	if(resultCode == Activity.RESULT_OK) {
        		Uri uri = data.getData();
                if (Build.VERSION.SDK_INT < 19) {
                	// KitKat以前
                	Cursor c = getContentResolver().query(uri, new String[] { MediaStore.Images.Media.DATA }, null, null, null);
                	c.moveToFirst();
                	int index = c.getColumnIndex(MediaStore.Images.Media.DATA);
                	imagePath = c.getString(index);
                } else {
                	// KitKat以降(画像取得の方法が変更された)
                	final int flags = data.getFlags() & (Intent.FLAG_GRANT_READ_URI_PERMISSION | Intent.FLAG_GRANT_WRITE_URI_PERMISSION);
                	getContentResolver().takePersistableUriPermission(uri, flags);
                	if ("com.android.providers.downloads.documents".equals(uri.getAuthority())) {
                        // ダウンロードからの場合
                        String id = DocumentsContract.getDocumentId(uri);
                        Uri uri2 = ContentUris.withAppendedId(Uri.parse("content://downloads/public_downloads"), Long.valueOf(id));
                        Cursor c = getContentResolver().query(uri2, new String[] { MediaColumns.DATA }, null, null, null);
                        if (c.moveToFirst()) {
                        	imagePath = c.getString(0);
                        }
                    } else {
                    	// 通常
                        String id = DocumentsContract.getDocumentId(uri);
                        String selection = "_id=?";
                        String[] args = new String[]{ id.split(":")[1] };
                        Cursor c = getContentResolver().query(MediaStore.Images.Media.EXTERNAL_CONTENT_URI, new String[] { MediaColumns.DATA }, selection, args, null);
                        if (c.moveToFirst()) {
                        	imagePath = c.getString(0);
                        }
                    }
                }
        	}
        	UnityPlayer.UnitySendMessage("SceneTitle", "OnSelectPhoto", imagePath + ",0," + photoStyle);
        }
    }

	/**
	 * アルバム表示
	 * @param imagePath 画像パス
	 * @param photoStyle フォトスタイル
	 */
	public void showAlbum(String imagePath, int photoStyle) {
		this.photoStyle = photoStyle;
		if (Build.VERSION.SDK_INT < 19) {
			// KitKat以前
            Intent intent = new Intent(Intent.ACTION_PICK);
            intent.setAction(Intent.ACTION_GET_CONTENT);
            intent.setType("image/*");
            startActivityForResult(intent, REQUEST_PICK_CONTENT);
        } else {
        	// KitKat以降(画像取得の方法が変更された)
            Intent intent = new Intent(Intent.ACTION_OPEN_DOCUMENT);
            intent.addCategory(Intent.CATEGORY_OPENABLE);
            intent.setType("image/*");
            startActivityForResult(intent, REQUEST_PICK_CONTENT);
        }
	}

	/**
	 * フォト保存
	 * @param path 保存パス
	 */
	public void savePhoto(String path) {
		MediaScannerConnection.scanFile(this, new String[] { path }, null, null);
	}
}
複雑なタッチ操作
写真/スタンプの編集に複雑なタッチ操作が必要でした。
- シングルタッチで移動
- ダブルタッチ+ピンチで拡大/縮小
- ダブルタッチ+回転で角度変更
- 写真の場合は角度は90度変更(向き変更)
これらを一度に処理したものが以下のものです。
ポイントは、それぞれの処理が同時に走らないようにし、ダブルタッチが検出された段階でシングルタッチは処理しないよう制限をかけているところです。こうすることでストレスのないタッチ処理を実現しています。
public override void Update()
{
    base.Update();

	if (sq == Sq.EditPhoto || sq == Sq.EditStump)
    {
		// フォト or スタンプ編集
        TouchInfo touch = AppUtil.GetTouch();
        if(touch == TouchInfo.None)
        {
			// タッチ終了
			if (sq == Sq.EditPhoto)
			{
				// フォトの場合は向き変更なので角度を正常位置に戻す
				UpdatePhoto (true, false, false);
			}
			isMove      = false;
            isExecDoble = false;
            isDoble     = false;
            isPinch     = false;
            isRot       = false;
			sq          = Sq.None;
        }
        else if (Input.touchCount >= 2)
		{
            // ダブルタッチ
            isExecDoble = true;
			Touch t0    = Input.GetTouch (0);
			Touch t1    = Input.GetTouch (1);
            if (!isDoble)
			{
				// ダブルタッチ開始
                isDoble    = true;
                pinchValue = Vector2.Distance(t0.position, t1.position);
                rotDeg     = Mathf.Atan2(t0.position.y - t1.position.y, t0.position.x - t1.position.x) * Mathf.Rad2Deg;
			}
			else if (!isPinch && !isRot)
			{
				// ピンチ開始判定
                float value = Vector2.Distance(t0.position, t1.position);
                float ratio = value / pinchValue;
                if (ratio < PinchMin || ratio > PinchMax)
                {
                    // ピンチ開始
                    isPinch    = true;
                    pinchValue = value;
                }

                // 回転開始判定
                if (!isPinch)
				{
                    float deg  = Mathf.Atan2(t0.position.y - t1.position.y, t0.position.x - t1.position.x) * Mathf.Rad2Deg;
                    float ddeg = deg - rotDeg;
                    if (ddeg < RotMin || ddeg > RotMax)
					{
						// 回転開始
						isRot    = true;
						startDeg = deg;
						rotDeg   = deg;
					}
				}
			}
			else if (isPinch)
			{
				// ピンチ中
                float value = Vector2.Distance(t0.position, t1.position);
                float ratio = value / pinchValue * PinchPower;
                pinchValue  = value;
				editTarget.SetLocalScaleXY(editTarget.localScale.x * ratio, editTarget.localScale.y * ratio);
			}
			else if (isRot)
			{
				// 回転中
				float deg   = Mathf.Atan2(t0.position.y - t1.position.y, t0.position.x - t1.position.x) * Mathf.Rad2Deg;
				float ddeg  = deg - rotDeg;
				float dsdeg = startDeg - deg;
				rotDeg      = deg;
				editTarget.Rotate(0f, 0f, ddeg * RotPower);
				if (sq == Sq.EditPhoto)
				{
					// フォトの場合は一定以上動かしたら向き変更(90度変更)
					if (Mathf.Abs (dsdeg) > PhotoDirChange)
					{
						App.Instance.Data.PhotoDir += (dsdeg > 0) ? 1 : -1;
						if (App.Instance.Data.PhotoDir < 0)      { App.Instance.Data.PhotoDir = 3; }
						else if (App.Instance.Data.PhotoDir > 3) { App.Instance.Data.PhotoDir = 0; }
						UpdatePhoto ();

						// 再度判定開始へ
						isDoble = false;
						isPinch = false;
						isRot   = false;
					}
				}
			}
		}
        else
        {
            // シングルタッチ
            isDoble = false;
            isPinch = false;
            isRot   = false;
            if (!isExecDoble)
            {
                // 移動(ダブルタッチ終了時の誤移動をなくすためダブルタッチ処理がすでに行われてなければ)
				Vector3 pos = AppUtil.GetTouchPosition () - touchStartPos;
				if (sq == Sq.EditPhoto && !isMove)
				{
					// フォトの場合は一定以上動かしたら移動開始
					if (Mathf.Abs (pos.x) > PhotoPosChange || Mathf.Abs (pos.y) > PhotoPosChange)
					{
						isMove = true;
					}
				}
				else
				{
					// 移動中
					editTarget.position = moveStartPos + pos;
				}
            }
        }
    }
}
Unityの完成系
今回、チャリで来た。カメラをUnityで作り直すに当たり、少し特殊な作り方をしました。ネイティブプラグインをガンガン使用してアプリを組み立てている点です。
というのも、本アプリはカメラアプリで、Unityにもカメラ機能はあるのですが、サンプルケースが少なく、どこまでUnityで対応出来るのか疑問でした。
「ほとんどネイティブ処理になってしまうのでは?」
という不安があったのですが、結果的にはUnityを使用して良かったと思います。確かにネイティブ処理を多く使用することにはなったのですが、開発を通してそれが不便に感じるようなことはそれほどありませんでした。
- 柔軟にカスタマイズしたい部分はUnityに任せる
- 細かい制御はネイティブ処理に委ねる
という分業が出来たことにより、かなり上手く作れたのではないかと思っています。本来ならネイティブ処理は少なければ少ないほどいいと思っていたのですが(Unityの恩恵を得られない)、今回挑戦の意味も含めてやってみて、確かな手応えを掴めました。
最後に
チャリで来た。カメラは、ヱドファクトリー名義の本当に久しぶりのアプリです。
iOS版から大幅リニューアルも行っていますので、楽しんでもらえたら嬉しいです。
チャリで来た。カメラに関するお問い合わせは、ichiro@yedo-factory.co.jp までお願いします。
よろしくお願いします!
