ほぼ自分用です。すいません。
Homebrew で nginx をインストールし、オレオレ証明書を作成して HTTPS サーバを起動するための覚え書きです。
準備
Homebrew を使うので事前にインストールします。(省略)
宗教上の事由で MacPorts 等他のパッケージ管理ツールを使用している場合は、それぞれのツールに合わせて操作を行ってください。
OpenSSL
$ openssl version
$ brew install openssl
$ brew link openssl --force
$ openssl version
Yosemite にデフォルトでインストールされている OpenSSL は 0.9.8zc と古いので、最新物をインストールします。
※理由があって 0.9.8zc を使い続ける場合はインストール不要です。
インストールした場合でも brew unlink openssl を実行することで元の OpenSSL が利用できます。
自己署名証明書の作成
/usr/local/etc/openssl/certs 以下に作成します。
-keyout と -out に同じファイル名を指定することで、同じファイルに秘密鍵と証明書が書き込まれます。
$ cd /usr/local/etc/openssl/certs
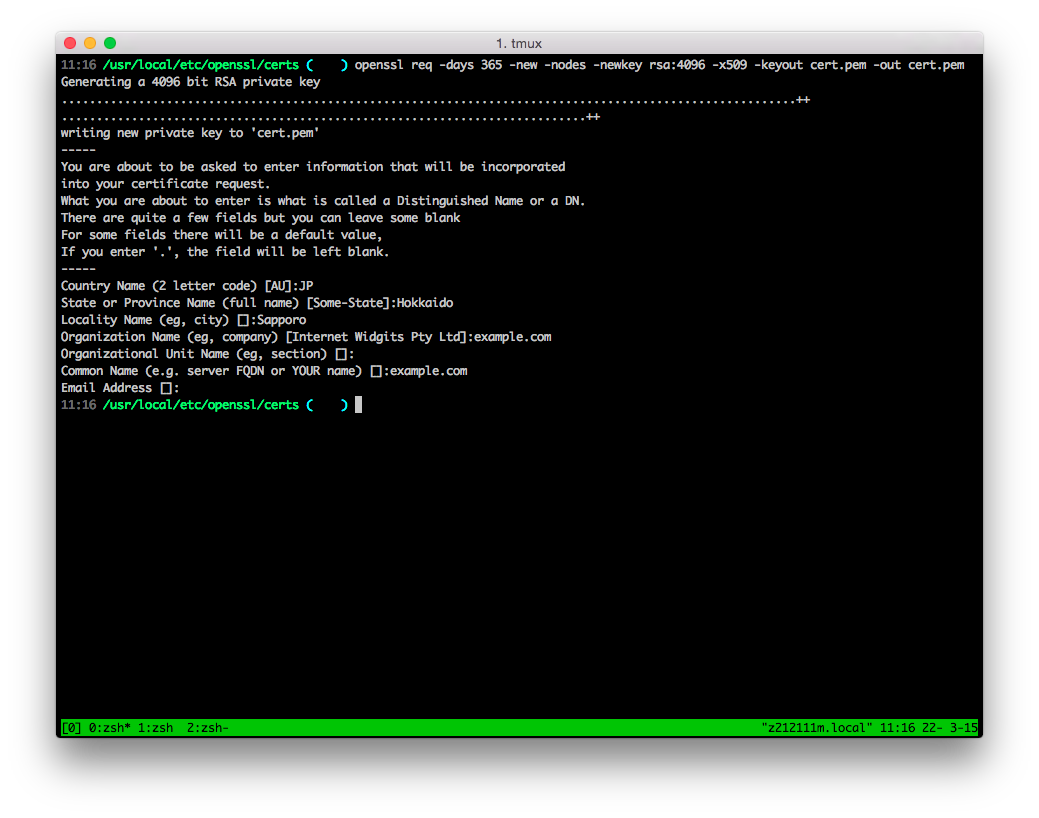
$ openssl req -days 365 -new -nodes -newkey rsa:4096 -x509 -keyout cert.pem -out cert.pem
これで、有効期間が 1 年の証明書(と秘密鍵)が作成されました。
対話形式で証明書の内容を記入します。
今回、 Common Name の項目だけは重要になります。
ここに指定する FQDN は後述の hosts ファイルに記載する FQDN と同じものに設定してください。
証明書のインストール
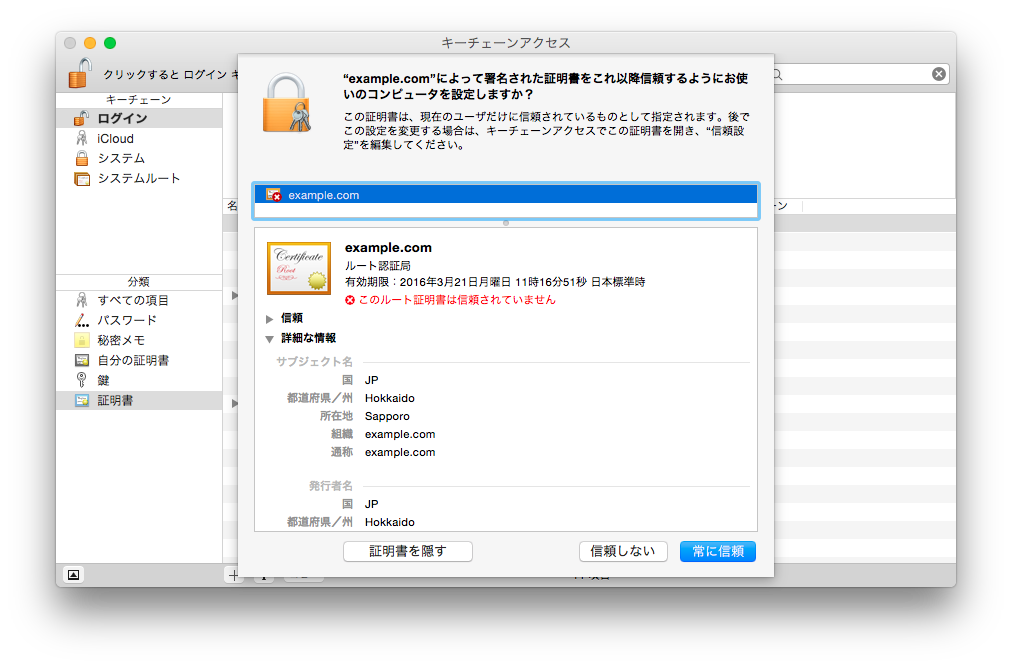
作成した証明書をキーチェーンに読み込みます。
$ open cert.pem
常に信頼を選択します。
Hosts ファイルの設定
以下のように末尾に1行追記します。
##
# Host Database
#
# localhost is used to configure the loopback interface
# when the system is booting.  Do not change this entry.
##
127.0.0.1       localhost
255.255.255.255 broadcasthost
::1             localhost

# add
127.0.0.1       example.com
これで、 example.com は 127.0.0.1 で名前解決されます。
⚠不要になったら追加した行は削除しておきましょう。
Diffie-Hellman パラメータの生成
$ openssl dhparam -out dhparam.pem 2048
そこそこ時間かかります。
Nginx
Nginx でローカルに HTTPS サーバを構築します。
$ brew install nginx
http セクションに include conf.d/*.conf が存在しなければ追加します。
# user www-data;
worker_processes 2;
worker_rlimit_nofile 4096;
# pid /run/nginx.pid;

events {
        worker_connections 1024;
        # multi_accept on;
}

http {
        ##
        # Basic Settings
        ##

        sendfile on;
        tcp_nopush on;
        tcp_nodelay on;
        keepalive_timeout 65;
        types_hash_max_size 2048;
        server_tokens off;

        # server_names_hash_bucket_size 64;
        # server_name_in_redirect off;

        include mime.types;
        default_type application/octet-stream;

        ##
        # Virtual Host Configs
        ##

        include conf.d/*.conf;
}
個人的には sites-enabled から sites-available へシンボリックリンクを張る方法が好きですが、ここでは割愛。
conf.d/example.com.conf を作成します。
upstream backend {
        server unix:/tmp/backend.sock;
}

server {
        listen 4433 ssl;
        server_name _;

        # SSL
        ssl_certificate /usr/local/etc/openssl/certs/cert.pem;
        ssl_certificate_key /usr/local/etc/openssl/certs/cert.pem;
        ssl_session_timeout 5m;
        ssl_session_cache shared:SSL:50m;
        ssl_dhparam /usr/local/etc/openssl/certs/dhparam.pem;
        ssl_protocols TLSv1.1 TLSv1.2;
        ssl_ciphers 'ECDHE-RSA-AES128-GCM-SHA256:ECDHE-ECDSA-AES128-GCM-SHA256:ECDHE-RSA-AES256-GCM-SHA384:ECDHE-ECDSA-AES256-GCM-SHA384:DHE-RSA-AES128-GCM-SHA256:DHE-DSS-AES128-GCM-SHA256:kEDH+AESGCM:ECDHE-RSA-AES128-SHA256:ECDHE-ECDSA-AES128-SHA256:ECDHE-RSA-AES128-SHA:ECDHE-ECDSA-AES128-SHA:ECDHE-RSA-AES256-SHA384:ECDHE-ECDSA-AES256-SHA384:ECDHE-RSA-AES256-SHA:ECDHE-ECDSA-AES256-SHA:DHE-RSA-AES128-SHA256:DHE-RSA-AES128-SHA:DHE-DSS-AES128-SHA256:DHE-RSA-AES256-SHA256:DHE-DSS-AES256-SHA:DHE-RSA-AES256-SHA:!aNULL:!eNULL:!EXPORT:!DES:!RC4:!3DES:!MD5:!PSK';
        ssl_prefer_server_ciphers on;

     # document root
        root /Users/user/Documents/www;

        location / {
                try_files $uri $uri/index.html @backend;
        }

        # reverse proxy
        location @backend {
                proxy_pass http://backend;
        }
}
SSL (TLS) の設定は Generate Mozilla Security Recommended Web Server Configuration Files を参照しました。
document root は適宜変更してください。
起動 : $ nginx
再起動: $ nginx -s reload
停止 : $ nginx -s stop
自動起動
$ ln -sfv /usr/local/opt/nginx/*.plist ~/Library/LaunchAgents
最後に
ドキュメントルートに適当な index.html ファイルを置いてコマンドを叩く。
$ open https://example.com:4433/
以上。
Note
外部のサーバで HTTPS 運用する場合は、 SSL Server Test (Powered by Qualys SSL Labs) で脆弱性を診断し、 Japan Vulnerability Notes を定期的に確認して OpenSSL は常に更新しましょう。

