たまにしかやらないもんだから、すぐ忘れてしまう。
作業の流れ
- 秘密鍵/CSRの発行
- 証明書の申請
- 証明書をELBに設置
詳細
1. 秘密鍵/CSRの発行
Webサーバーの秘密鍵と公開証明書署名要求(CSR)の対を生成します。
$ openssl req -new -newkey rsa:2048 -nodes -keyout private.key -out server.csr
対話形式で色々質問されるので、入力します。
Country Name (2 letter code) [AU]:JP
State or Province Name (full name) [Some-State]:Tokyo
Locality Name (eg, city) []:23Ku
Organization Name (eg, company) [Internet Widgits Pty Ltd]:Your Company Inc.
Organizational Unit Name (eg, section) []: (blank)
Common Name (e.g. server FQDN or YOUR name) []:*.example.com
Email Address []:mail@example.com

Please enter the following 'extra' attributes
to be sent with your certificate request
A challenge password []:
An optional company name []:
private.key と server.csr の2つのファイルが生成されるので、無くさないように保管しておきましょう。
2. 証明書の申請
- で作成した
server.csrを使って Comodo に証明書発行を依頼します。
Web上の申請画面から行ってください。詳細は割愛します。
3. 証明書の設置
Comodo から証明書群が zip 形式で届きますので、展開してください。
以下のものが含まれてると思います。
1.AddTrustExternalCARoot.crt (ルート証明書)
2.COMODORSAAddTrustCA.crt    (中間証明書 その1)
3.COMODORSADomainValidationSecureServerCA.crt (中間証明書 その2)
4.STAR_example_com.crt   (サーバ証明書)
この4つと 1. で作成した private.key をELBに登録していきます。
AmazonWebConsole を開きます。
EC2 > Load Balancers > Listeners > SSL Certificate カラムの Change をクリックすると以下のような画面が表示されます。
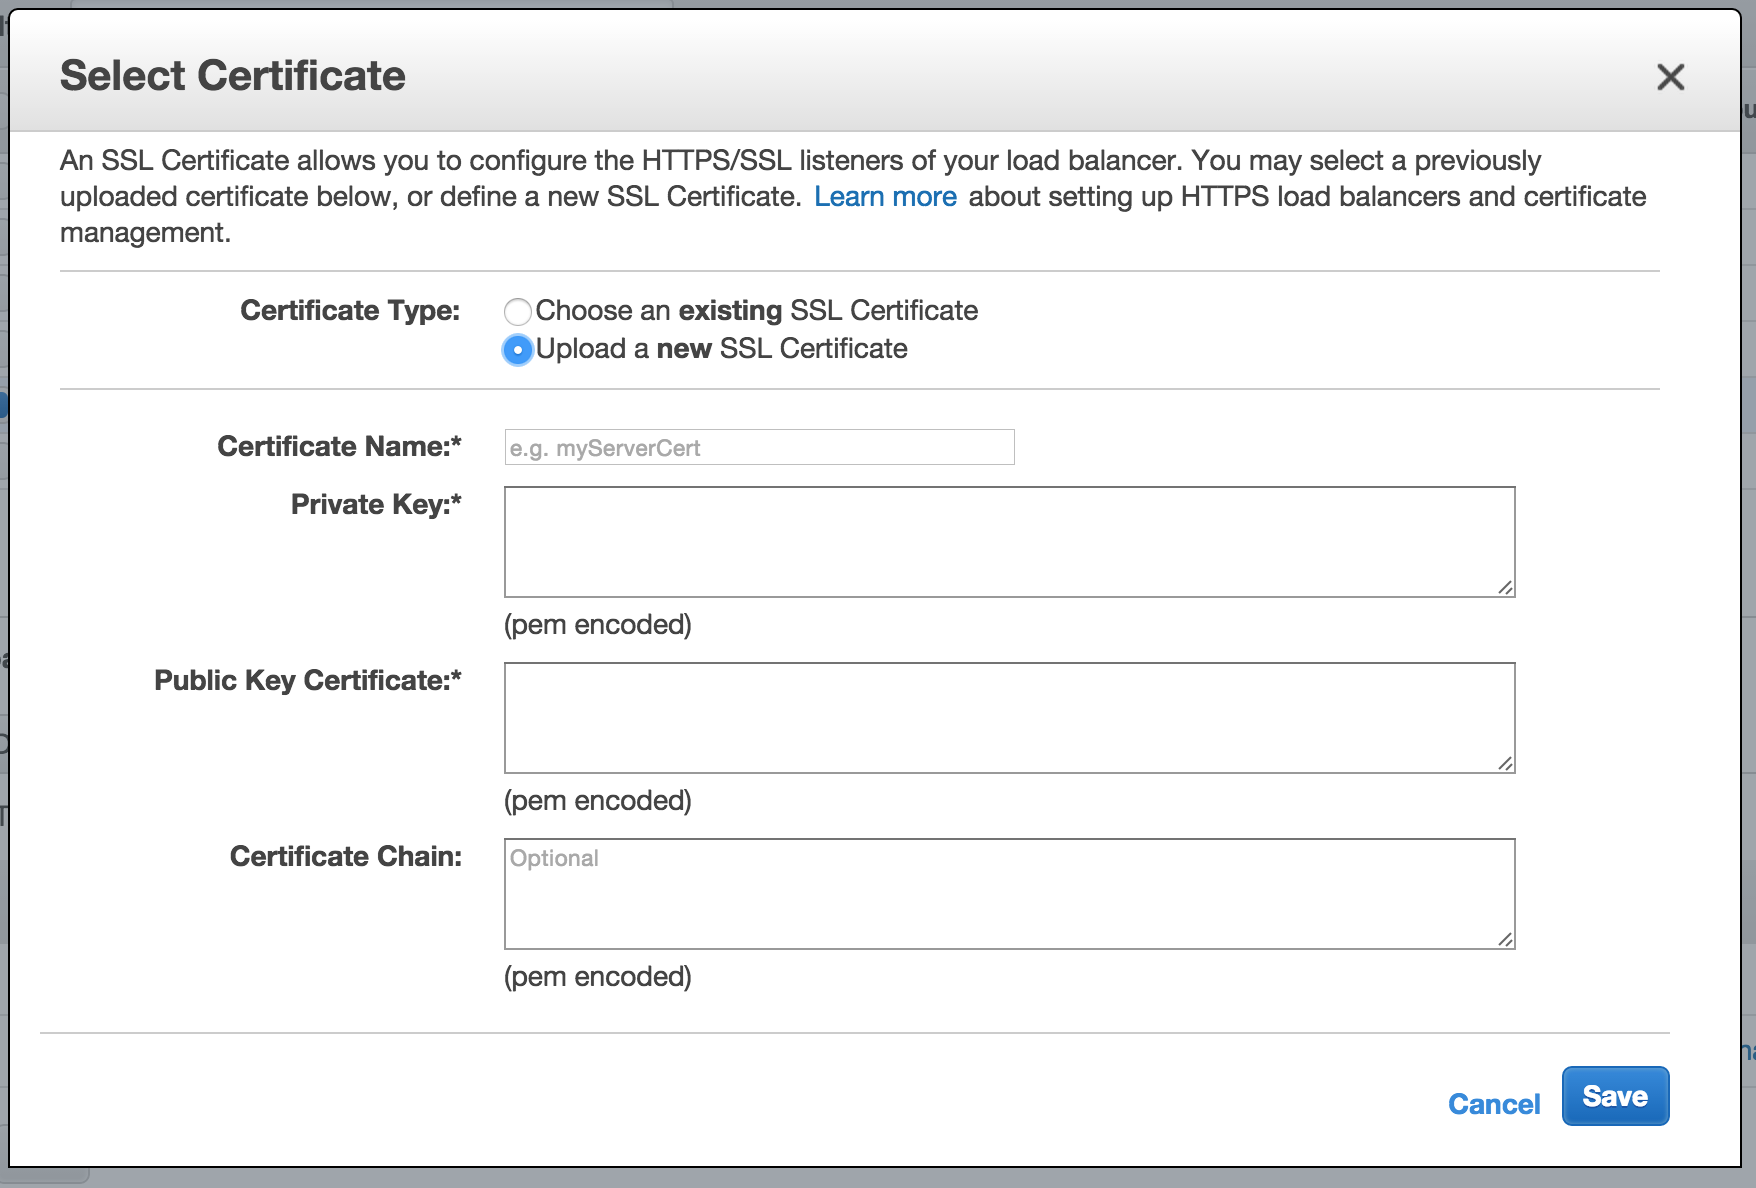
この4項目を登録する必要があります。
| 項目 | 入力するもの |
|---|---|
| Certificate Name | 名前(ただの識別子なのでなんでも良い) |
| Private Key |
1. で作成した private.key
|
| Public Key Certificate | サーバ証明書( STAR_example_com.crt )を pem 形式にしたもの |
| Certificate Chain | 中間証明書とルート証明書をつないだもの |
Public Key Certificate に関して
送られてきたサーバ証明書( STAR_example_com.crt )を、 pem 形式のファイルに変更してやる必要があります。
※直接 crt -> pem にはいけないので、一度 der 形式に変換します
$ openssl x509 -in STAR_example_com.crt -out STAR_example_com.der -outform DER
$ openssl x509 -in STAR_example_com.der -inform DER -out STAR_example_com -outform PEM
出来上がったサーバ証明書( STAR_example_com.pem )の中身をコピーして貼っつけてください。
Certificate Chain に関して
Comodoから送られてきたファイルのうち、残りの証明書
1.AddTrustExternalCARoot.crt (ルート証明書)
2.COMODORSAAddTrustCA.crt    (中間証明書 その1)
3.COMODORSADomainValidationSecureServerCA.crt (中間証明書 その2)
を全て順番に貼っつけていきます。
$順番が大事$なので、そこだけ気をつけてください。
具体的には以下の順番となります。
- COMODORSADomainValidationSecureServerCA.crt
- COMODORSAAddTrustCA.crt
- AddTrustExternalCARoot.crt
予め一つのファイルにしておくと確実です。
$ cat COMODORSADomainValidationSecureServerCA.crt COMODORSAAddTrustCA.crt AddTrustExternalCARoot.crt > CertChain.bundle
出来上がった CertChain.bundle の中身をコピーして、貼り付けます。
※各証明書を各々コピーして貼っつけてもOKです。 ---BEGIN CERTIFICATE--- と ---END CERTIFICATE--- の行を消さないように注意してください
最終的に以下のようになってればOKです。
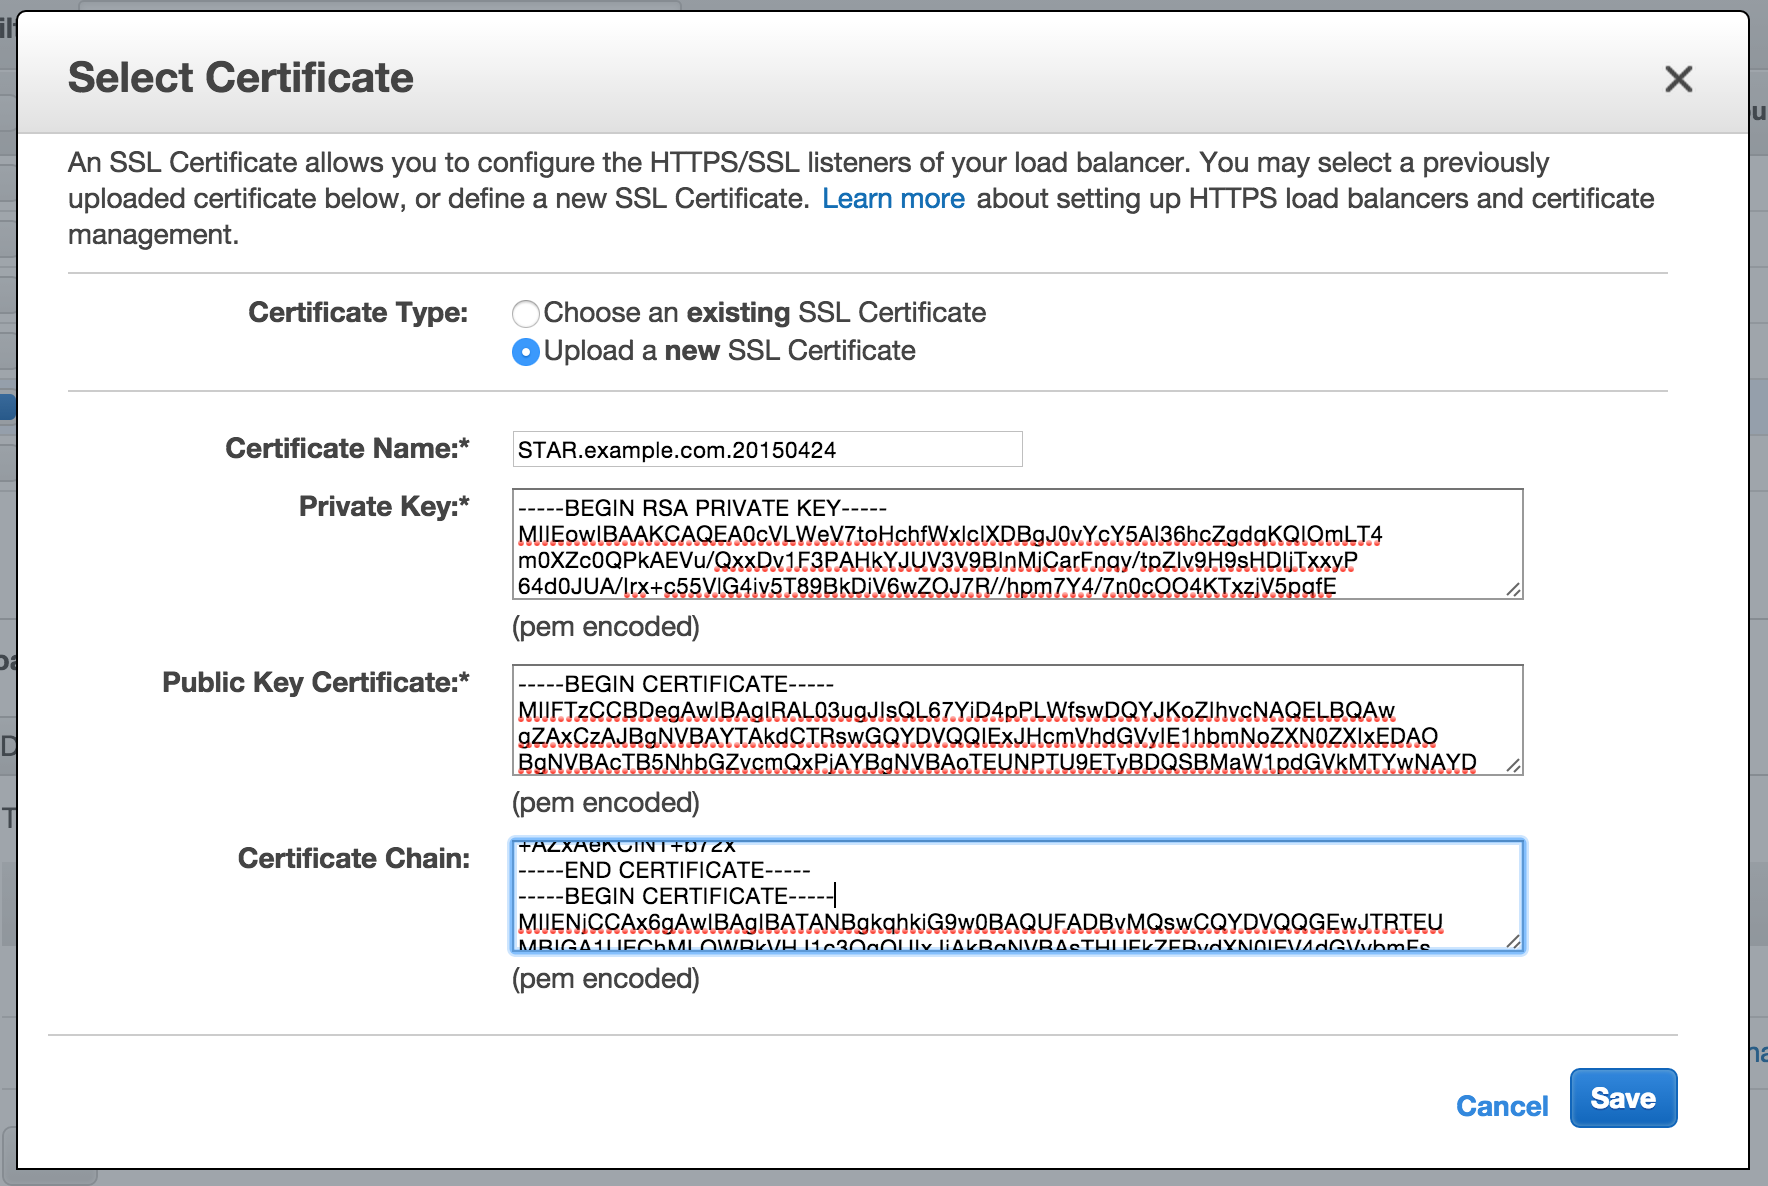
あとは SAVE を押して登録した証明書に忘れずに変更してください。
設置した証明書が動いてるかの確認は以下のようなサイトでできます。
https://www.wormly.com/test_ssl