こんにちは。初めて Qiita に投稿する wezardnet です。
記念すべき最初の投稿はベータ版で公開された Google Cloud Vision API を Google Apps Script(以下GAS) で実行するサンプルを作ってみたので紹介したいと思います。
#1. 作ったもの
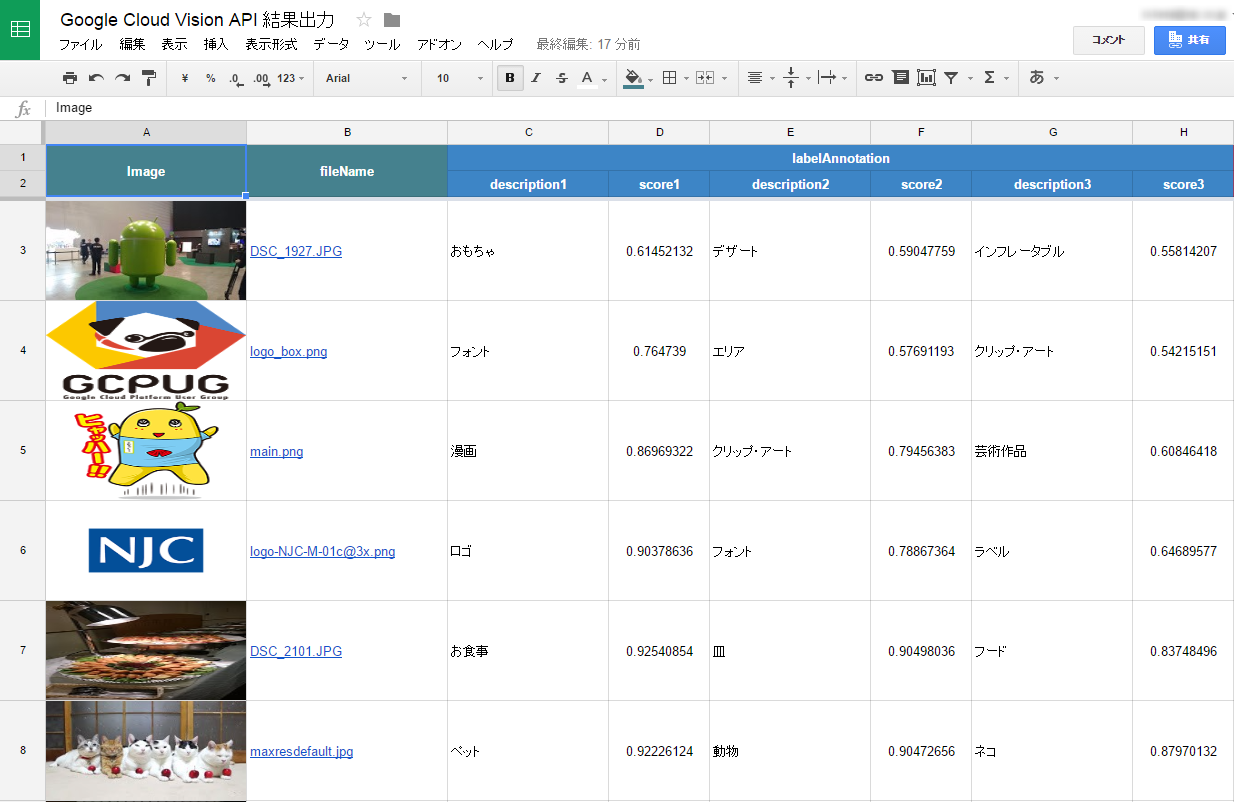
単純に Google ドライブの特定のフォルダに格納された画像を Vision API で解析させて、その結果をスプレッドシートに書き出してみることにしました。
今回は Vision API が提供する画像認識(LABEL_DETECTION)と画像内の文字認識(TEXT_DETECTION)を結果として出力してみました。ほほぅ、なかなか面白い解析結果が返ってきます ![]()
それでは GAS の中身について、ざっくり解説したいと思います。
#2. 作成したスクリプトの解説
Vision API は GAS の標準サービスに用意されていないため、直接 API をコールする格好になります。このやり方については GAS エキスパートの大橋さんが寄稿された良記事がありますので、以下を参考にしていただければと思います。。。
Google Apps Script DE OAuth2 ~ GASで直接触れない Google APIを叩いてみるお~
2.1. デベロッパーコンソールで Vision API を有効にする
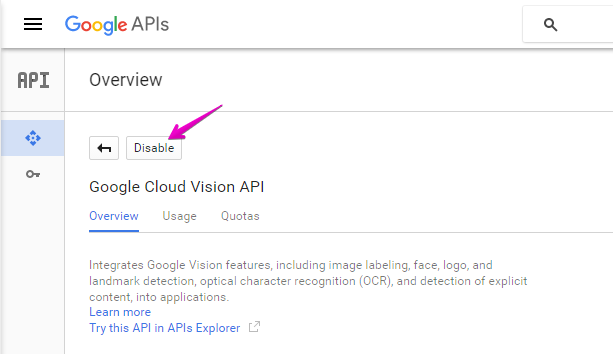
Google Developers Console で Vision API を有効(Enable)にします。
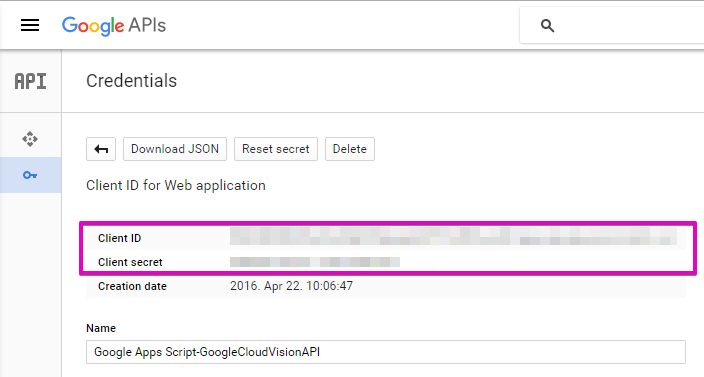
また Credentials のページで OAuth2 で必要になる Client ID と Client secret の値をコピっておきます。
2.2. Vision API をコールするための OAuth2 アクセストークンを取得する
次に Vision API の解析結果を書き出すスプレッドシート埋め込みの GAS プロジェクトを作成し、前述した大橋さんが解説されている方法でアクセストークンを取得します。異なる部分は Vision API を利用するためのスコープだけです。実装例を以下に示します。
function doGet(e){
	var scriptProperties = PropertiesService.getScriptProperties() ;
	var accessToken = scriptProperties.getProperty('access_token') ;
	if ( UnderscoreGS._isNull(accessToken) ) {
		var param = {
			"response_type": 'code',
			"client_id": scriptProperties.getProperty('googleClientId'),
			"redirect_uri": getCallbackURL_(),
			"state": ScriptApp.newStateToken().withMethod('callback').withArgument('name', 'value').withTimeout(2000).createToken(),
			"scope": 'https://www.googleapis.com/auth/cloud-platform',
			"access_type": 'offline',
			"approval_prompt": 'force'
		};
		var params = [] ;
		for ( var name in param )
			params.push(name + '=' + encodeURIComponent(param[name])) ;

		var url = 'https://accounts.google.com/o/oauth2/auth?' + params.join('&') ;
		return HtmlService.createHtmlOutput('<a href="' + url + '" target="_blank">認証</a>') ;
	}
	return HtmlService.createHtmlOutput('<p>設定済です</p>') ;
}

function getCallbackURL_(){
	var url = ScriptApp.getService().getUrl() ;
	if ( url.indexOf('/exec') >= 0 ) return url.slice(0, -4) + 'usercallback' ;
	return url.slice(0, -3) + 'usercallback' ;
}

function callback(e){
	var credentials = fetchAccessToken_(e.parameter.code) ;
	var scriptProperties = PropertiesService.getScriptProperties() ;
	scriptProperties.setProperty('access_token', credentials.access_token) ;
	scriptProperties.setProperty('refresh_token', credentials.refresh_token) ;
}
取得したアクセストークンとリフレッシュトークンはスクリプトプロパティに入れておきます。また Vision API を利用するための OAuth2 のスコープは以下になります。
https://www.googleapis.com/auth/cloud-platform
2.3. 実際に Vision API をコールする
それでは実際に Vision API を使ってみます。今回のサンプルは Google ドライブの特定のフォルダにある画像を Vision API で解析させたいので、まずは Google Drive API を使ってフォルダに格納されている画像ファイルを取得します。
ここでのポイントは、画像ファイルを Vision API で渡す方法は、画像ファイルを base64 でエンコードしたものになります。が Google ドライブに格納されている画像ファイルのリンク(URL)は、画像を直接開くものではなく、ドライブのプレビューになってしまいますので、画像のサムネイルリンク(thumbnailLink)を base64 させることにしました。以下に実装例を示します。
function imagesAnnotate(imageUrl){
	var scriptProperties = PropertiesService.getScriptProperties() ;
	var accessToken = scriptProperties.getProperty('access_token') ;

	var picture = UrlFetchApp.fetch(imageUrl) ;
	var payload = JSON.stringify({
		"requests":[
			{
				"image": {
					"content": Utilities.base64Encode(picture.getContent())
				},
				"features": [
					{
						"type": "LABEL_DETECTION",
						"maxResults": 3
					},
					{
						"type": "TEXT_DETECTION",
						"maxResults": 1
					}
				]
			}
		]
	});

	var json = null ;
	var requestUrl = 'https://vision.googleapis.com/v1/images:annotate' ;
	while ( true ) {
		var response = UrlFetchApp.fetch(requestUrl, {
			method: 'POST',
			headers: {
				authorization: 'Bearer ' + accessToken
			},
			contentType: 'application/json',
			payload: payload,
			muteHttpExceptions: true
		});

		json = JSON.parse(response) ;
		if ( json.error && (json.error.code == '401' || json.error.code == '403') ) {
			// リフレッシュトークンを使ってアクセストークンを再取得しリトライする
			accessToken = refleshAccessToken_() ;
			scriptProperties.setProperty('access_token', accessToken) ;
			continue ;
		}
		break ;
	}
	return json ;
}
Vision API が返すレスポンスは、以下のような JSON になりますので、ゴニョゴニョしてスプレッドシートに書き出します。
{
  "responses": [
    {
      "labelAnnotations": [
        {
          "mid": "/m/03gq5hm",
          "description": "font",
          "score": 0.764739
        },
        {
          "mid": "/m/0n0j",
          "description": "area",
          "score": 0.57691193
        },
        {
          "mid": "/m/03g09t",
          "description": "clip art",
          "score": 0.54215151
        }
      ],
      "textAnnotations": [
        {
          "locale": "en",
          "description": "GCpUG\nGoogle Cloud Platform User Group\n",
          "boundingPoly": {
            "vertices": [
              {
                "x": 12,
                "y": 145
              },
              {
                "x": 146,
                "y": 145
              },
              {
                "x": 146,
                "y": 199
              },
              {
                "x": 12,
                "y": 199
              }
            ]
          }
        },
        {
          "description": "GCpUG",
          "boundingPoly": {
            "vertices": [
              {
                "x": 13,
                "y": 147
              },
              {
                "x": 146,
                "y": 145
              },
              {
                "x": 146,
                "y": 187
              },
              {
                "x": 13,
                "y": 189
              }
            ]
          }
        },
        {
          "description": "Google",
          "boundingPoly": {
            "vertices": [
              {
                "x": 12,
                "y": 189
              },
              {
                "x": 39,
                "y": 189
              },
              {
                "x": 39,
                "y": 199
              },
              {
                "x": 12,
                "y": 199
              }
            ]
          }
        },
        {
          "description": "Cloud",
          "boundingPoly": {
            "vertices": [
              {
                "x": 42,
                "y": 189
              },
              {
                "x": 62,
                "y": 189
              },
              {
                "x": 62,
                "y": 199
              },
              {
                "x": 42,
                "y": 199
              }
            ]
          }
        },
        {
          "description": "Platform",
          "boundingPoly": {
            "vertices": [
              {
                "x": 66,
                "y": 189
              },
              {
                "x": 98,
                "y": 189
              },
              {
                "x": 98,
                "y": 199
              },
              {
                "x": 66,
                "y": 199
              }
            ]
          }
        },
        {
          "description": "User",
          "boundingPoly": {
            "vertices": [
              {
                "x": 103,
                "y": 189
              },
              {
                "x": 119,
                "y": 189
              },
              {
                "x": 119,
                "y": 199
              },
              {
                "x": 103,
                "y": 199
              }
            ]
          }
        },
        {
          "description": "Group",
          "boundingPoly": {
            "vertices": [
              {
                "x": 122,
                "y": 189
              },
              {
                "x": 144,
                "y": 189
              },
              {
                "x": 144,
                "y": 199
              },
              {
                "x": 122,
                "y": 199
              }
            ]
          }
        }
      ]
    }
  ]
}
結果は英語なので、解りやすいように日本語に Translate させると良いでしょう。
#3. 利用料金について
Vision API は、ユニット単位で課金されます。つまり、ひとつの画像ファイルであっても、ラベル(物体)検知とテキスト検知(OCR)を行なった場合は 2 ユニットとしてカウントされます。公式サイト によると 1,000 ユニット/月まで無料枠があるようですが、がっつり使うなら課金は必須になるでしょう。この API はデバイス系、たとえば Google Glass などと組み合わせると面白いと思いますね。
#4. 最後に、、、
という訳で初記事を書いてみました。まだ書き方や作法など慣れない点は多いですが、今年は Advent Calendar にも参戦してみようと思っています。よろしくお願いします!


