やりたいこと
djangoを使ってheroku上でデプロイ。hello world出力までが今回の目的。
disclaimer: メモがてら淡々と書いているだけなので多少不親切かもしれません。
デプロイの際に参考した以下のリンクにとても親切に書かれているのでこちらを参照することをおすすめします。
その他参考になったリンク:
- heroku で python 動かすチュートリアルをやったメモ
- 初めてのDjango開発
- Rubyに負けるな!HerokuでPython(Django)動かす方法
- HerokuにDjangoアプリをデプロイするときのまとめ
動作環境
python3.5.1
heroku
virtualenv
手順
プロジェクトフォルダに移動(自分の場合はcd Projects/github)する。mkdir project_nameとcd project_nameディレクトリ作成しそこへ移動。python3 -m venv projedct_nameで仮想環境構築の準備。source project_name/bin/activate (project_name)user$ ...になっているのを確認。これでとりあえず仮想環境が構築されていることを確認。cd project_nameで移動しdjango-admin startproject project_nameを実行してdjangoベースのアプリケーションを作成。
/Users/user_name/Projects/github/project/venv_project
.
├── bin
├── db.sqlite3
├── include
├── lib
├── manage.py
├── pip-selfcheck.json
├── pyvenv.cfg
└── project

$ cd project

.
├── __init__.py
├── __pycache__
├── settings.py
├── urls.py
└── wsgi.py
初期設定
TIME_ZONE = 'Asia/Tokyo'

USE_TZ = False
ちなみにデータベースはデフォルトで以下のようになっている。
DATABASES = {
    'default': {
        'ENGINE': 'django.db.backends.sqlite3',
        'NAME': os.path.join(BASE_DIR, 'db.sqlite3'),
    }
}
python3 manage.py migrateを実行。
Operations to perform:
  Apply all migrations: admin, auth, contenttypes, sessions
Running migrations:
  Applying contenttypes.0001_initial... OK
  Applying auth.0001_initial... OK
  Applying admin.0001_initial... OK
  Applying admin.0002_logentry_remove_auto_add... OK
  Applying contenttypes.0002_remove_content_type_name... OK
  Applying auth.0002_alter_permission_name_max_length... OK
  Applying auth.0003_alter_user_email_max_length... OK
  Applying auth.0004_alter_user_username_opts... OK
  Applying auth.0005_alter_user_last_login_null... OK
  Applying auth.0006_require_contenttypes_0002... OK
  Applying auth.0007_alter_validators_add_error_messages... OK
  Applying auth.0008_alter_user_username_max_length... OK
  Applying sessions.0001_initial... OK
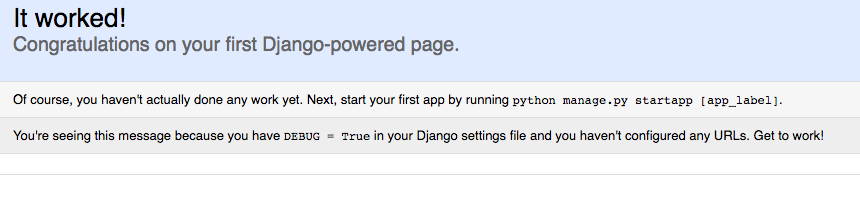
python3 manage.py runserverでサーバーを動かしてみた後127.0.0.1:8000に接続。
ターミナル上ではこのままサーバ用にタブを放置しておくことをおすすめします。別件でタブを開いて作業をするといいかと。
新しくモデルを作成
python3 manage.py startapp blogでプロジェクト内に新たに別のアプリケーションを作成。
.
├── bin
├── blog
├── db.sqlite3
├── include
├── lib
├── manage.py
├── pip-selfcheck.json
├── pyvenv.cfg
└── ryugakuotaku
blog
├── __init__.py
├── admin.py
├── apps.py
├── migrations
├── models.py
├── tests.py
└── views.py
djangoにblogアプリケーションを作ったことを教える。
# Application definition

INSTALLED_APPS = [
    'django.contrib.admin',
    'django.contrib.auth',
    'django.contrib.contenttypes',
    'django.contrib.sessions',
    'django.contrib.messages',
    'django.contrib.staticfiles',
    'blog'
]
from django.db import models
from django.utils import timezone

class Post(models.Model):
    author = models.ForeignKey('auth.User')
    title = models.CharField(max_length=200)
    text = models.TextField()
    created_date = models.DateTimeField(
            default=timezone.now)
    published_date = models.DateTimeField(
            blank=True, null=True)

    def publish(self):
        self.published_date = timezone.now()
        self.save()

    def __str__(self):
        return self.title
を以下のように書き換え。ここではポストメソッドを定義している。次にpython3 manage.py makemigrations blogを実行し新しいモデルをデータベースに追加することをdjangoに伝える。
Migrations for 'blog':
  blog/migrations/0001_initial.py:
    - Create model Post
続いてpython3 manage.py migrate blogを実行
Operations to perform:
  Apply all migrations: blog
Running migrations:
  Applying blog.0001_initial... OK
adminの設定
from django.contrib import admin
from .models import Post

# Register your models here.

admin.site.register(Post)
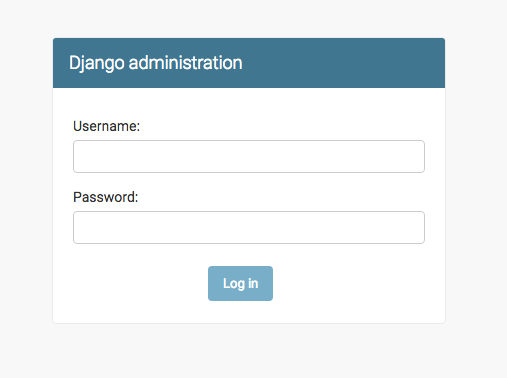
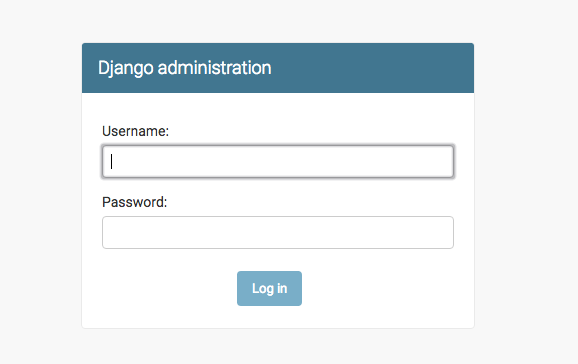
admin.pyを以上のように設定した後、http://127.0.0.1:8000/admin/に接続してみる。
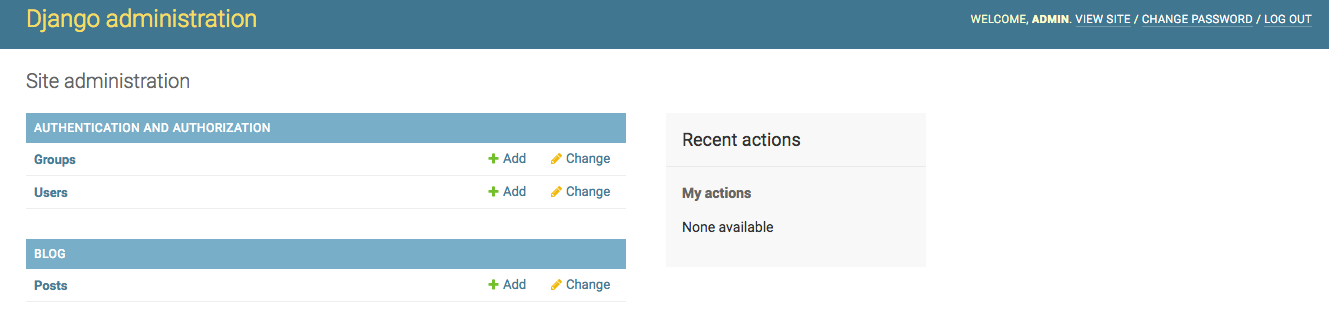
ユーザー情報を何も登録していないのでpython3 manage.py createsuperuserでユーザー作成。Superuser created successfully.を確認。実際にログインしてみる。
実験的に実際にポストをしてみることをオススメします。
デプロイ
デプロイとは簡単に言えばウェブ上でみんながサイトを見れるようにすること。
今回は小規模かつ無料で使えるherokuをつかってデプロイをする。
dj-database-url, gunicorn, whitenoiseとpip3 freeze > requirements.txtを実行。これでrequirements.txtというファイルが出来ているはず。
pip freeze は、あなたのvirtualenvにインストール済みの全てのPythonライブラリを一覧にして出力します。そのpip freezeした出力先を、> の後に示しファイルに保存します。> requirements.txt を含まずに pip freeze だけで実行してみて、何が起こるか試してみるとよいでしょう。
#<...>
psycopg2==2.5.4
を追加。
次にprocfileを用意。procfileとは
このファイルが、どのコマンドを実行してウェブサイトをスタートするかHerokuに伝えます。
プロジェクトディレクトリないでProcfileを作成して
web: gunicorn mysite.wsgi
を追加。
私たちはweb アプリケーションをデプロイしようとしていること、そしてgunicorn mysite.wsgiというコマンドを実行することでデプロイすることを意味しています。
次にruntime.txtを作成して以下を追加。
python-3.5.2
コンピューター上のローカルとサーバーでは設定に違いがあります。Herokuとコンピューターでは別のデータベースをそれぞれつかっています。そこで、別途ファイルを作成し、ローカル環境で動かすための設定を保存しておく必要があります。
import os
BASE_DIR = os.path.dirname(os.path.dirname(__file__))

DATABASES = {
    'default': {
        'ENGINE': 'django.db.backends.sqlite3',
        'NAME': os.path.join(BASE_DIR, 'db.sqlite3'),
    }
}

DEBUG = True
続いてsettings.pyも編集
DATABASES['default'] = dj_database_url.config()

SECURE_PROXY_SSL_HEADER = ('HTTP_X_FORWARDED_PROTO', 'https')

ALLOWED_HOSTS = ['*']

STATIC_ROOT = 'staticfiles'

DEBUG = False

try:
    from .local_settings import *
except ImportError:
    pass
上記を追加。
このファイルは、Herokuに必要な構成だけでなく、
mysite/local_settings.pyファイルがある時にはローカルの設定にも重要な役割となります。
from whitenoise.django import DjangoWhiteNoise
application = DjangoWhiteNoise(application)
続いてheroku toolbeltをインストール。詳しいやり方はこちらを参考に。macの方でbrewがインストールされていればbrew install heroku-toolbeltをして取れるはずですが、保証はありません。笑
herokuでアカウントを作成した後、heroku loginをしてheroku内へログイン。
Git周辺を整えておく
プロジェクトディレクトリ内で.gitignoreを作成。
myvenv
__pycache__
staticfiles
local_settings.py
db.sqlite3
*.py[co]
プロジェクトディレクトリのトップ階層でgit initを実行。git statusで状態を確認しておく。
On branch master

Initial commit

Untracked files:
  (use "git add <file>..." to include in what will be committed)

    .gitignore
    Procfile
    bin/
    blog/
    lib/
    manage.py
    pip-selfcheck.json
    pyvenv.cfg
    requirements.txt
    runtime.txt
     project/
続けてgit add -A .とgit commit -m "first commit"を実行。
heroku上でアプリケーションを作成
続いてheroku create project_nameを実行してheroku上でプロジェクトを作成してgit push heroku master
続いてheroku ps:scale web=1を設定して無料で使えるように。。
Scaling dynos... done, now running web at 1:Free
そしてheroku openを実行。するとエラーページが表示される。
コマンドで、https://project_name.herokuapp.com/といったあなたのアプリケーションのURLがブラウザで開かれます。おそらくエラーページが表示されることでしょう。これは、私たちがまだadmin viewしか作成していないからです。URLの後ろに admin/ をつけてアプリケーションが動いているのをみてみましょう。(例 https://djangogirlsblog.herokuapp.com/admin/)
エラーが表示されたのは、Herokuにデプロイする時に新しいデータベースを作成したため、まだデータベースが空っぽの状態だからです。そこで、プロジェクトの最初にローカルにデータベースをセットアップした時のように、再度migrate コマンドを実行します:
そこでheroku run python3 manage.py migrateとheroku run python manage.py createsuperuserを実行。任意の情報を入力してデプロイ完了!ページ編集など細かいところでやることはまだまだあるがとりあえずデプロイが終ったのでめでたしめでたし。まだページはNot foundのままですがそこからの工程はまた後日追記致します。
ルーティング(追記)
続けて今回はルーティングを行っていこうと思う。
from django.conf.urls import include, url
from django.contrib import admin

urlpatterns = [
    url(r'^admin/', include(admin.site.urls)),
    url(r'', include('blog.urls')),
]
from django.conf.urls import include, url
from . import views

urlpatterns = [
    url(r'^$', views.post_list),
]
r'^$'は何もないURL(ここでは127.0.0.1:8000を指している)ので127.0.0.1:8000に飛んできたユーザーをviews.post_listへ誘導するように設定している。
するとAttributeError: module 'blog.views' has no attribute 'post_list'と怒られてしまう。これはpost_listを定義してくれたのは良いけどそんなものはviewsの中にないよと言っている。
Viewsの作成
from django.shortcuts import render

# Create your views here.

def post_list(request):
    return render(request, 'blog/post_list.html', {})
引数としてのrequestがblog/post_list.htmlを受け取ってrenderで出力している。
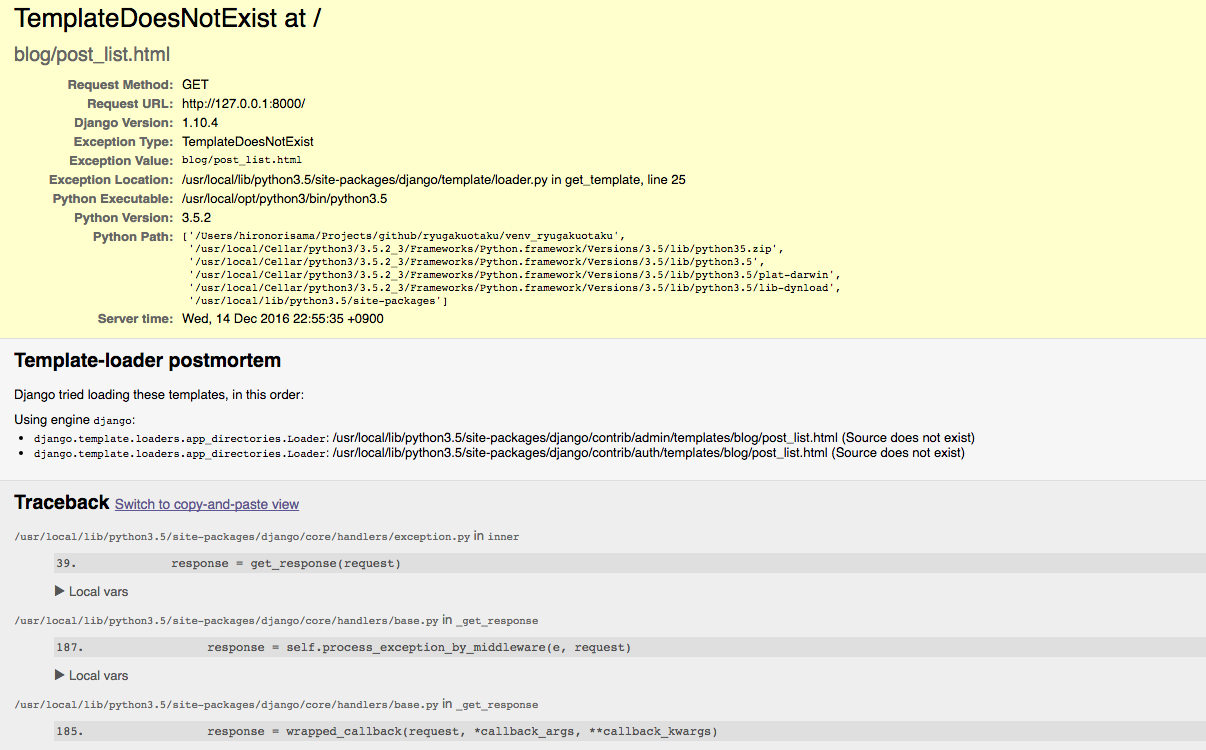
テンプレートファイルがないと言っている。ということでつくりましょ。
HTMLテンプレートの作成
形はこんなかんじ
blog
└───templates
    └───blog
以下を作成
#中身は空っぽで
これでhttp://127.0.0.1:8000/に進むと真っ白のページがでてくるはず。
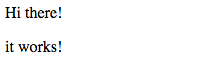
<html>
    <p>Hi there!</p>
    <p>it works!</p>

</html>
で再度接続してみると、
htmlの簡単な紹介は上記のサイトの内容を引用します。以下Django Girls Tutorialより引用。
次に
<html>
    <head>
        <title>ryugakuotaku</title>
    </head>
    <body>
        <div>
            <h1><a href="">ryugakuotaku</a></h1>
        </div>

        <div>
            <p>published: 14.06.2014, 12:14</p>
            <h2><a href="">My first post</a></h2>
            <p>test</p>
        </div>

        <div>
            <p>published: 14.06.2014, 12:14</p>
            <h2><a href="">My second post</a></h2>
            <p>test</p>
        </div>
    </body>
</html>
を試してみる。
キリの良いところまできたのでgit statusとgit add -A .でどこか変わったのかを確かめる。
    new file:   blog/templates/blog/post_list.html
    new file:   blog/urls.py
    modified:   blog/views.py
    modified:   ryugakuotaku/urls.py
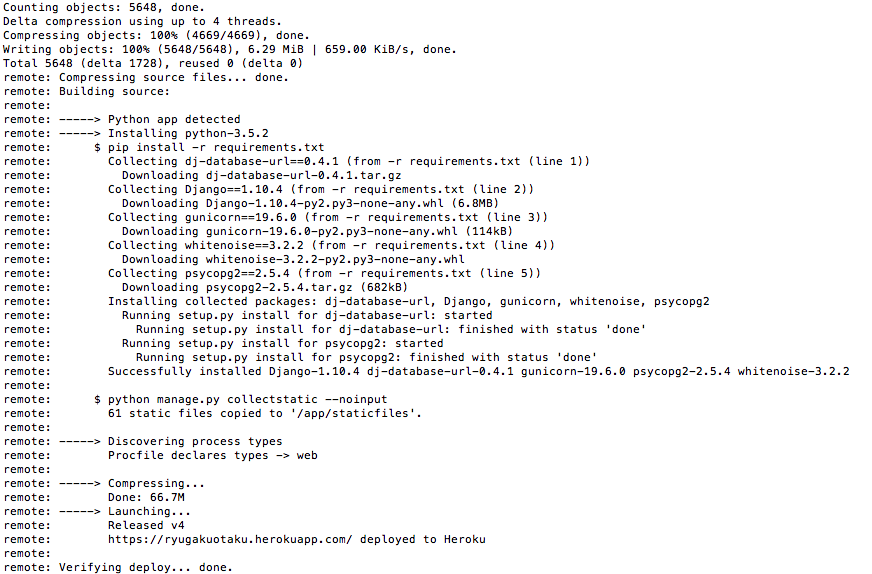
続いてgit commit -m "Changed the HTML for the site."してgit push heroku master行う。これでherokuへの処理が終われば正常に反映されているはず。
Counting objects: 10, done.
Delta compression using up to 4 threads.
Compressing objects: 100% (8/8), done.
Writing objects: 100% (10/10), 1.04 KiB | 0 bytes/s, done.
Total 10 (delta 4), reused 0 (delta 0)
remote: Compressing source files... done.
remote: Building source:
remote:
remote: -----> Python app detected
remote:      $ pip install -r requirements.txt
remote:
remote:      $ python manage.py collectstatic --noinput
remote:        61 static files copied to '/app/staticfiles'.
remote:
remote: -----> Discovering process types
remote:        Procfile declares types -> web
remote:
remote: -----> Compressing...
remote:        Done: 66.8M
remote: -----> Launching...
remote:        Released v5
remote:        https://ryugakuotaku.herokuapp.com/ deployed to Heroku
remote:
remote: Verifying deploy... done.
とりまここまででhtmlにhello worldを出力させるまで。