原文:gh-unit/README.md at master · gh-unit/gh-unit
GHUnit
GHUnitはMac OSXとiOSのためのテスト・フレームワークの一つです。
単体でも、SenTestingKitやGTMのような他のテスト・フレームワークと一緒でも、使うことができます。
特徴
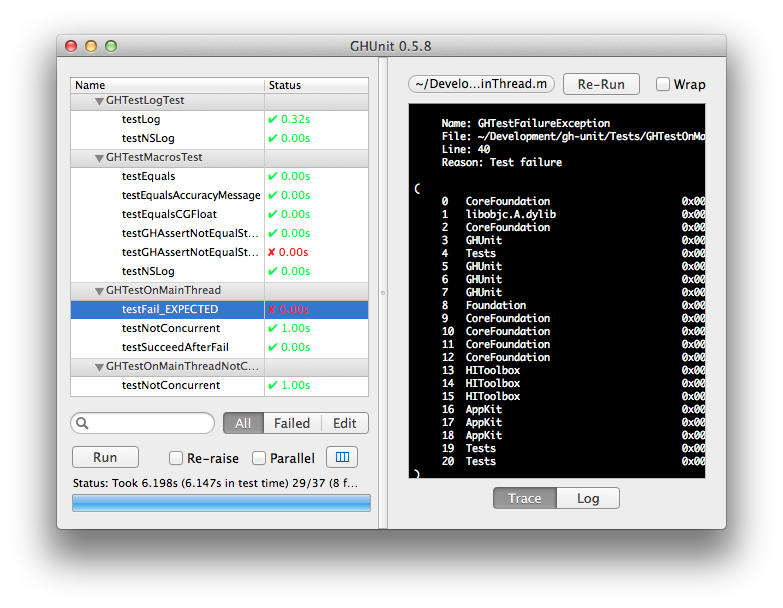
- テストを走らせたりブレークポイントを置いたりすることができ、XCodeデバッガと直接やりとりをすることができる。
- コマンドラインやMakefileから走らせることができる
- 並行してテストを走らせることができる
- UI部品のテストが可能である
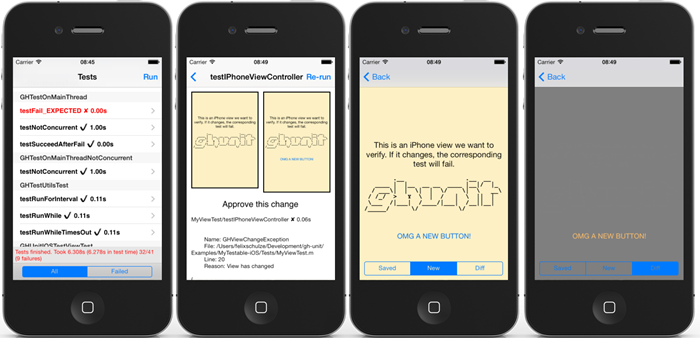
- テスト部品の寸法をキャプチャして表示することができる
- テストをキーワードで検索して絞り込むことができる
- View logging by test case.
- Show stack traces and useful debugging information.
- Include as a framework in your projects
- Determine whether views have changed (UI verification)
- Quickly approve and record view changes
- View image diff to see where views have changed
Install (iOS)
Install the GHUnit gem
$ gem install ghunit
Install the Tests target
This will edit your ProjectName.xcodeproj file and create a Tests target, scheme, and a sample test file.
$ ghunit install -n ProjectName
Add the Tests target to your Podfile
Create a new file named Podfile in the directory that contains the your .xcodeproj file, or edit it if it already exists.
# Podfile
platform :ios, '6.0'

target :Tests do
	pod 'GHUnit', '~> 0.5.9'
end
Install your project's pods. CocoaPods will then download and configure the required libraries for your project:
$ pod install
You should use the .xcworkspace file to work on your project:
$ open ProjectName.xcworkspace
Install Command Line
$ ghunit install_cli -n ProjectName
Install ios-sim using homebrew:
$ brew install ios-sim
Now you can run tests from the command line:
$ ghunit run -n ProjectName
Add a test
To generate a test in your test target with name SampleTest:
$ ghunit add -n ProjectName -f SampleTest
Install (From Source)
iOS
cd Project-iOS && make
Add the GHUnitIOS.framework to your project
OS X
cd Project-MacOSX && make
Add the GHUnit.framework to your project
Documentation
- How to install, create and run tests
- Online documentation
- Google Group (Deprecated - Use Github Issues instead)
iOS
Mac OS X
ブログやってます:weed software 開発者ブログ