環境
下記の環境を使用しています。
- Unity 5.4.1
- C#
1.下準備
- [File > Build Settings]から[Android]を選択しSwitch Platform
- [Assets > Import Package > CrossPlatformInput]を選択、インポート
2.オブジェクトを配置
- [Assets/Standard Assets/CrossPlatformInput/Prefabs]から[MobileSingleStickControl]をヒエラルキーにドラッグ&ドロップ
- [GameObject > UI > EventSystem]を選択し、EventSystemを追加
- [Mobile Input > Enable]を選択。(選択出来なければ選択した状態なので問題なし)
基本的にここまで完了すれば動きます。
Move.cs
using UnityEngine;
using System.Collections;
using UnityStandardAssets.CrossPlatformInput;

public class Move : MonoBehaviour
{

    // Update is called once per frame
    void Update()
    {
        var x = CrossPlatformInputManager.GetAxis("Horizontal");
        var y = CrossPlatformInputManager.GetAxis("Vertical");
        transform.position += (Vector3.right * x + Vector3.up * y) * Time.deltaTime;

        if (CrossPlatformInputManager.GetButton("Jump"))
        {
            this.GetComponent<Renderer>().material.color = Color.red;
        } else
        {
            this.GetComponent<Renderer>().material.color = Color.white;
        }
    }
}
こんな感じのコードを作って適当に作ったオブジェクトに追加するとこんな感じ。
3.カスタマイズ
ボタンの追加
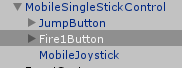
- ヒエラルキーにあるMobileSingleStickControlの下にいるJumpButtonをDuplicate
- InspectorのButtonHandlerのNameの項目をFire1に変更
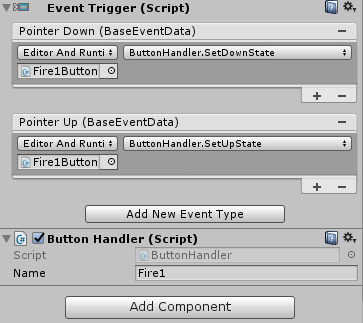
これで
CrossPlatformInputManager.GetButton("Fire1");
的なノリで入力を取得できます。
スティックの追加
- ヒエラルキーにあるMobileSingleStickControlの下にいるMobileJoystickをDuplicate
- InspectorのJoystickのHorizontal Axis NameをMouse Xに変更
- InspectorのJoystickのVertical Axis NameをMouse Yに変更
Move.cs
using UnityEngine;
using System.Collections;
using UnityStandardAssets.CrossPlatformInput;

public class Move : MonoBehaviour
{

    // Update is called once per frame
    void Update()
    {
        var x = CrossPlatformInputManager.GetAxis("Horizontal");
        var y = CrossPlatformInputManager.GetAxis("Vertical");
        transform.position += (Vector3.right * x + Vector3.up * y) * Time.deltaTime;

        var x_r = CrossPlatformInputManager.GetAxis("Mouse X");
        var y_r = CrossPlatformInputManager.GetAxis("Mouse Y");
        transform.Rotate(new Vector3(y_r, 0f, x_r) * Time.deltaTime * 30f);
    }
}
テスト用のコードをこんな感じにしてオブジェクトを右スティックで回転させる的な事が出来ます。

カスタマイズの補足
ButtonHandlerやJoystickで指定した名前はInputManagerに追加されているものじゃないと**[Mobile Input>Disable]で無効にして実行した時にエラーが発生します。
なので、追加/変更するときはInputManagerを確認して合わせるなり追加するなりする必要があります。
また、Joystickに関してはMovement Rangeで可動範囲を調整したりAxes To Useで可動方向を制限**したりできます。
改善
このJoystickですがスティックに当たる部分をドラッグする必要が有り、可動範囲内を押しても何も反応しません。その為なんとも言えない操作感と言うかあまり直感的じゃない気がします。
そこで、可動範囲をタップしたらスティックを移動、そのままドラッグ出来るようにしてみました。

下記の手順で実装しました。
- Joystick.csをMyJoystick.csとかにまるっとコピペ
- 下記のコードを追加
MyJoystick.cs
public Transform stick;
- transform.position を stick.position に置換
- OnPointerDownの中身を実装
MyJoystick.cs
public void OnPointerDown(PointerEventData data)
{
    OnDrag(data);
}
- 下図のような感じで設定

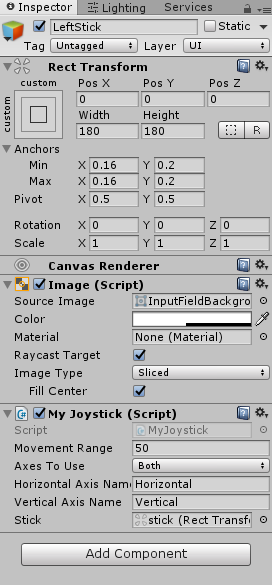
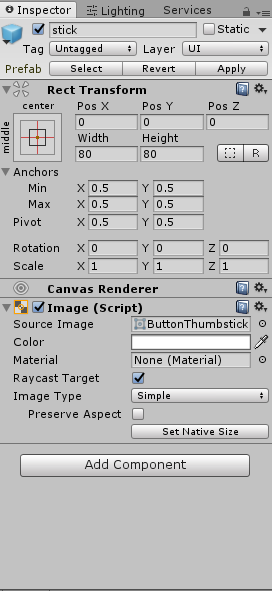
設定でJoystick.csの挙動と切り替えたいときはstickオブジェクトにJoystick.csを追加して
CrossPlatformInputManager.UnRegisterVirtualAxis()
とか呼んだ後にそれぞれのenable切り替えれば良いと思います。