前一篇 筆記寫到怎麼基本的指定 library 以及使用的版本,今天第二部分則會提到如何設定可以協助日常開發。
今天一樣以 AFNetworking 作為範例。
本地引用
pod 'AFNetworking', :path => '../AFNetworking'
在 :path 指定的位置是在本地端資料夾的位置,所指到的位置裡面必須有 .podspec 檔案來協助主專案安裝。
這是我滿常使用的方式,函式庫在開發期間便可以即時搭配主專案開發;不用像 git submodule 一樣,函式庫的 git repo 不用等 commit 就可以即時看出來使用的結果,這是最吸引我使用的原因之一。
Development Pods 目錄
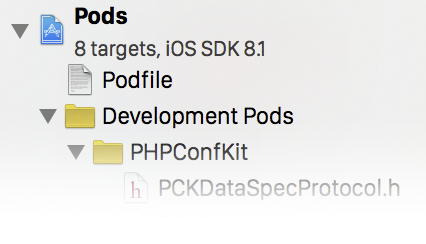
CocoaPods - Development
當透過 :path 指定本地位置的時候, CocoaPods 會自動幫你在主 workspace 中 Pods 下建立一個 Development Pod 目錄,這邊就會存放所加入的本地 library 。顧名思義,他也是一個用來開發的資料夾,因此搭配開發函式庫使用,我覺得是最合適的方式之一。
外部或自有資源 > :git, :svn 等
pod 'AFNetworking', :git => 'https://github.com/username/AFNetworking.git' # Git
pod 'AnotherLibrary', :svn => 'https://another-library.googlecode.com/svn/trunk/' # SVN
當公司或是自己有自行開發或是 fork 他人的 library 來用,就可以指定自己 repository 的位置。
根據官方的 source code 則看出來 .podspec 中可使用的安裝方式除了 Git 和 SVN, 還有其他的版本控制可以使用:Mercurial, Bazaar, 甚至可以直接透過 HTTP 下載 source 來安裝;在 Podfile 中 :git 及 :svn 皆有使用過,其他的方式應該我猜也是都可以使用。
指定位置 > :commit, :branch, :tag
除了第一部份的文章提到可以使用 :version 來指定 library 的版本,使用這三個方式,都可以指定自己想要的位置
pod 'AFNetworking', :git => 'https://github.com/username/AFNetworking.git', :commit => 'c1b3541'

pod 'AFNetworking', :git => 'https://github.com/username/AFNetworking.git', :branch => 'release'

pod 'AFNetworking', :git => 'https://github.com/username/AFNetworking.git', :tag => 'v1.0'