UINavigationBarとUITabBarのカスタマイズ方法について。
ナビバーの背景を透過させる・下線を消す
- -[UINavigationBar setBackgroundImage:forBarMetrics:]
- -[UINavigationBar setShadowImage:]
- それぞれで空の UIImage インスタンスを指定する。nil にすると駄目らしい
ObjC
[navigationBar setBackgroundImage:[[UIImage alloc] init] forBarMetrics:UIBarMetricsDefault];
[navigationBar setShadowImage:[[UIImage alloc] init]];
Swift3
navigationBar.setBackgroundImage(UIImage(), for: UIBarMetrics.default)
navigationBar.shadowImage = UIImage()
| 空の UIImage を指定(効果あり) | nil を指定(効果なし) |
|---|---|
 |
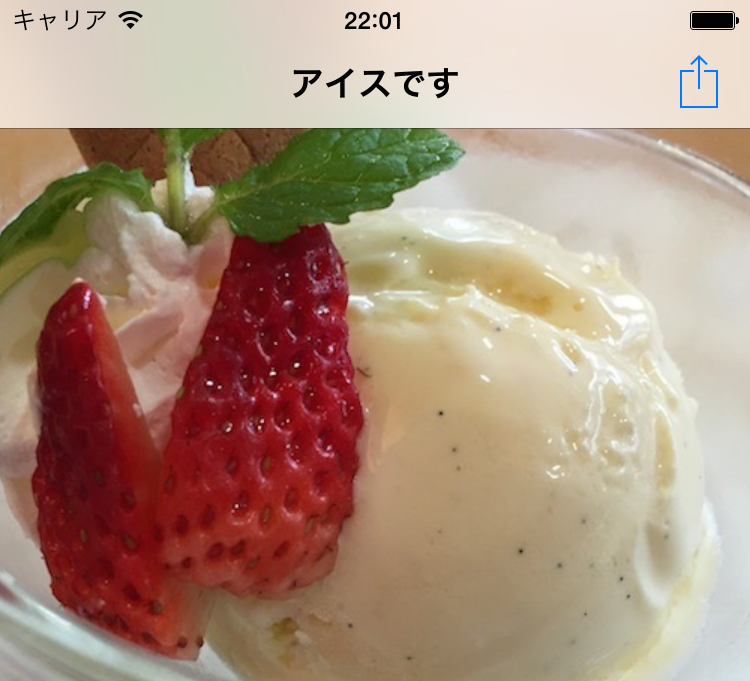 |
ナビバーの下線を消す他の方法として、サブビューを走査していって UIImageView に対して hidden プロパティを指定するという方法もあるが、上記の方法で消せるのでそんな面倒なことをしなくても良い。
http://stackoverflow.com/questions/19226965/how-to-hide-ios7-uinavigationbar-1px-bottom-line
ナビバーの中央に画像を配置する
Swift3
let image = UIImage(…)
navigationItem.titleView = UIImageView(image: image)
タブバーの背景を透過させる・下線を消す
同様の方法でタブバーの背景も消せる。
[tabBar setBackgroundImage:[[UIImage alloc] init]];
[tabBar setShadowImage:[[UIImage alloc] init]];
[tabBar setTranslucent:YES];
[tabBar setBarTintColor:[UIColor clearColor]];
UIAppearance で UINavigationBar の見た目を変更
    // すべてのナビバーの背景の色を変える
    [[UINavigationBar appearance] setBackgroundColor:[UIColor redColor]];

    // すべてのナビバーの背景を画像にする
    UIImage *navibarImage = [UIImage imageNamed:@"bg.png"];
    [[UINavigationBar appearance] setBackgroundImage:navibarImage forBarMetrics:UIBarMetricsDefault];

    // すべてのナビバーのタイトルの位置を調整する
    [[UINavigationBar appearance] setTitleVerticalPositionAdjustment:-10 forBarMetrics:UIBarMetricsDefault];

    // すべてのナビバーのフォントを変更する
    NSDictionary *attributes = @{
    UITextAttributeFont : [UIFont boldSystemFontOfSize:10],
    UITextAttributeTextColor : [UIColor redColor],
    UITextAttributeTextShadowColor : [UIColor blackColor],
    UITextAttributeTextShadowOffset : [NSValue valueWithUIOffset:UIOffsetMake(0, 1)]
    };
    [[UINavigationBar appearance] setTitleTextAttributes:attributes];
タイトルの属性を変更
タイトルのフォントと色を変更する例
Swift3
UINavigationBar.appearance().titleTextAttributes = [
    NSFontAttributeName : UIFont.systemFont(ofSize: 17.0),
    NSForegroundColorAttributeName : UIColor.purple
]
NSAttributedString に使用可能な属性を与える。どの属性まで対応できるのかは未確認。
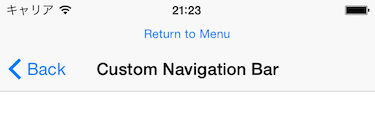
ナビバーの高さを変更
UINavigationBar のサブクラスを作ってナビバーの高さを変える方法は Apple のサンプルコードでも例が示されていた。
Customizing UINavigationBar : CustomNavigationBar
https://developer.apple.com/library/ios/samplecode/NavBar/Introduction/Intro.html
ポイント
- UINavigationBar のサブクラスを作る
- ナビバーのクラスを前述のサブクラスに変更
- -sizeThatFits: をオーバーライドして新しい高さを返す
- -layoutSubviews をオーバーライドして配置する要素のフレームを決定する
CustomNavigationBar
@implementation CustomNavigationBar

- (CGSize)sizeThatFits:(CGSize)size
{
    CGSize barSize = [super sizeThatFits:size];
    barSize.height += 100; // 高さを変更
    return barSize;
}

- (void)layoutSubviews
{
    [super layoutSubviews];

    // ナビバーに配置する子要素のフレームを決定する
    self.subview.frame = CGRectMake(...);
}

@end
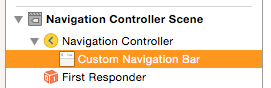
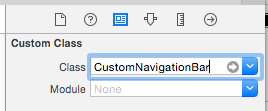
Storyboard から生成
UINavigationController を配置したらナビバーを選択して Custom Class インスペクタからクラス名(今回の例では CustomNavigationBar)を指定する。
コードから生成
NavigationController初期化
UINavigationController *navi = [[UINavigationController alloc] initWithNavigationBarClass:[CustomNavigationBar class] toolbarClass:[UIToolbar class]];
navi.viewControllers = @[rootVC];
[navi.navigationBar setNeedsLayout];