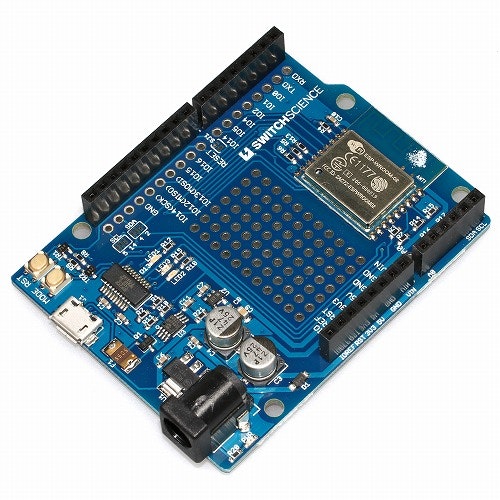
スイッチサイエンス製 ESP-WROOM-02 Arduino互換ボード
スイッチサイエンスからESP-WROOM-02 Arduino互換ボードが発売されました。今まではESP-WROOM-02(ESP8266)をArduinoのスケッチを書き込んで使うためには、モジュールをはんだ付けしてブレッドボード上で使用したりと少々使いづらい部分がありました。それをこの互換ボードが解消してくれます ![]()
ESP-WROOM-02 Arduino互換ボードと圧力センサーで圧力を計測しよう
ESP-WROOM-02 Arduino互換ボードと圧力センサーを使って、圧力が加わればLEDを点灯、そうでなければ消灯する仕組みを作ります(ネットには接続しません)。細かな設定は記事「ESP-WROOM-02開発ボードをArduino IDEで開発する方法」をご覧ください ![]()
電子部品リスト
ESP-WROOM-02 Arduino互換ボードと電子工作に必要なもろもろの道具以外に必要な電子部品のリスト。LEDはボードに搭載されているものを光らせます。
| 部品名 | 個数 | 価格 |
|---|---|---|
| 圧力センサー | 1 | 500円 |
| 10kΩ抵抗 | 1 | 実質1円 |
配線図
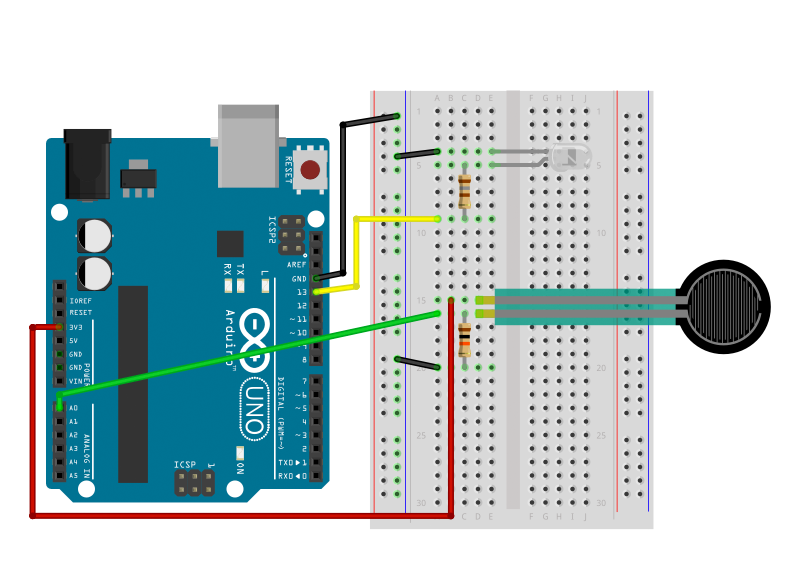
※FritzingにESP-WROOM-02 Arduino互換ボードのパーツがないため、Arduino Unoを見た目上使用しています ![]()
スケッチ
// 圧力センサーを接続するピン
const int sensorPin = A0;
// LEDを接続するピン
const int ledPin = 14;

// 圧力センサーの閾値
const int threshold = 300;

void setup() {
  pinMode(ledPin, OUTPUT);
  Serial.begin(115200);
}

void loop() {
  // 圧力センサーの値を取得
  int sensorValue = analogRead(sensorPin);

  // シリアルモニターに光センサーからの値を表示
  Serial.print("sensor = ");
  Serial.println(sensorValue);

  // 圧力を加えているなら
  if (sensorValue >= threshold) {
    // LEDを接続しているピンをHIGH状態に変更(点灯)
    digitalWrite(ledPin, HIGH);
  }
  // 圧力を加えていないなら
  else {
    // LEDを接続しているピンをLOW状態に変更(消灯)
    digitalWrite(ledPin, LOW);
  }

  delay(200);
}

