Rails初心者がサンプルを動かすまでにやったことをまとめたメモです。
実行環境
- Windows10
- VitrualBox + CentOS6.7
事前準備
- VirtualBoxのCentOSにSSH接続できるようにします
- ホスト名は
localhost@localhost.domain(デフォルトから変更無し) - ゲストOSのipアドレスは
192.168.56.101
- ホスト名は
- CentOSの3000番ポートを開放しておきます
作業用ユーザー追加
- ユーザーを追加する
[root@localhost ~]# useradd -s /bin/bash hoge
[root@localhost ~]# passwd hoge
ユーザー hoge のパスワードを変更。
新しいパスワード:
新しいパスワードを再入力してください:
passwd: 全ての認証トークンが正しく更新できました。
[root@localhost ~]#
- 作業用ユーザーでtodoを使えるようにする
# wheelグループに所属させる
[root@localhost ~]# usermod -G wheel hoge
[root@localhost ~]# id hoge
uid=500(hoge) gid=500(hoge) 所属グループ=500(hoge),10(wheel)
[root@localhost ~]#
# wheelグループに所属するユーザーがsudoを使えるようにする
[root@localhost ~]# visudo
:
## Allows people in group wheel to run all commands
%wheel  ALL=(ALL)       ALL ← 行頭のコメントを外す

## Same thing without a password
%wheel  ALL=(ALL)       NOPASSWD: ALL ← 行頭のコメントを外す
:
- 作業用ユーザーでsudoが使えるか確認する
[hoge@localhost ~]$ cd ~root
-bash: cd: /root: 許可がありません
[hoge@localhost ~]$ sudo ls ~root
anaconda-ks.cfg  install.log  install.log.syslog
[hoge@localhost ~]$
rails環境構築
[hoge@localhost ~]$ sudo yum -y install git
:
インストール:
  git.x86_64 0:1.7.1-3.el6_4.1

依存性関連をインストールしました:
  perl.x86_64 4:5.10.1-141.el6_7.1           perl-Error.noarch 1:0.17015-4.el6
  perl-Git.noarch 0:1.7.1-3.el6_4.1          perl-Module-Pluggable.x86_64 1:3.90-141.el6_7.1
  perl-Pod-Escapes.x86_64 1:1.04-141.el6_7.1 perl-Pod-Simple.x86_64 1:3.13-141.el6_7.1
  perl-libs.x86_64 4:5.10.1-141.el6_7.1      perl-version.x86_64 3:0.77-141.el6_7.1
  rsync.x86_64 0:3.0.6-12.el6

完了しました!
rbenvのインストール
[hoge@localhost ~]$ cd /opt
[hoge@localhost opt]$ sudo git clone git://github.com/sstephenson/rbenv.git
Initialized empty Git repository in /opt/rbenv/.git/
remote: Counting objects: 2325, done.
remote: Total 2325 (delta 0), reused 0 (delta 0), pack-reused 2325
Receiving objects: 100% (2325/2325), 410.44 KiB | 83 KiB/s, done.
Resolving deltas: 100% (1453/1453), done.
[hoge@localhost opt]$
etc/profileに以下の記述を追記します。
etc/profile
RBENV_ROOT="/opt/rbenv"
export PATH="${RBENV_ROOT}/bin:${PATH}"
eval "$(rbenv init -)"
[root@localhost ~]# source /etc/profile
[hoge@localhost opt]$ sudo mkdir -p /opt/rbenv/plugins
[hoge@localhost ~]$ cd /opt/rbenv/plugins
[hoge@localhost plugins]$ sudo git clone git://github.com/sstephenson/ruby-build.git
Initialized empty Git repository in /opt/rbenv/plugins/ruby-build/.git/
remote: Counting objects: 5249, done.
remote: Total 5249 (delta 0), reused 0 (delta 0), pack-reused 5249
Receiving objects: 100% (5249/5249), 985.32 KiB | 168 KiB/s, done.
Resolving deltas: 100% (2893/2893), done.
[hoge@localhost plugins]$ ls ruby-build/
LICENSE  README.md  bin  install.sh  script  share  test
rubyのインストール
事前に、必要なパッケージをインストールします。
最低限これだけあれば、問題なさそうです。
- gcc
- gcc-c++
- male
- openssl-devel
- readline-devel
[hoge@localhost plugins]$ sudo yum -y install gcc gcc-c++ make openssl-devel readline-devel
rubyをインストールします。
[root@localhost plugins]# rbenv install 2.2.4
Downloading ruby-2.2.4.tar.bz2...
-> https://cache.ruby-lang.org/pub/ruby/2.2/ruby-2.2.4.tar.bz2
Installing ruby-2.2.4...
Installed ruby-2.2.4 to /opt/rbenv/versions/2.2.4
インストール直後はsystemのrubyを見に行ってます。
[root@localhost plugins]# rbenv global
system
なので、今インストールしたものを見に行くように変更します。
[root@localhost plugins]# rbenv global 2.2.4
[root@localhost plugins]# rbenv global
2.2.4
[root@localhost plugins]# rbenv versions
* 2.2.4 (set by /opt/rbenv/version)
[root@localhost plugins]#
turnipのインストール
[root@localhost plugins]# gem install turnip
:
Installing ri documentation for rspec-3.4.0
Parsing documentation for turnip-2.0.0
Installing ri documentation for turnip-2.0.0
Done installing documentation for multi_json, gherkin, diff-lcs, rspec-support, rspec-mocks, rspec-expectations, rspec-core, rspec, turnip after 72 seconds
9 gems installed
railsのインストール
[root@localhost plugins]# gem install rails
:
Parsing documentation for rails-4.2.5
Installing ri documentation for rails-4.2.5
Done installing documentation for thread_safe, tzinfo, i18n, activesupport, rails-deprecated_sanitizer, mini_portile2, nokogiri, rails-dom-testing, loofah, rails-html-sanitizer, erubis, builder, actionview, rack, rack-test, actionpack, concurrent-ruby, sprockets, sprockets-rails, bundler, thor, railties, globalid, activejob, mime-types, mail, actionmailer, arel, activemodel, activerecord, rails after 569 seconds
31 gems installed
mysqlのインストール
[root@localhost plugins]# yum -y install http://dev.mysql.com/get/mysql-community-release-el6-5.noarch.rpm
:
トランザクションを実行しています
  インストールしています  : mysql-community-release-el6-5.noarch                         1/1
  Verifying               : mysql-community-release-el6-5.noarch                         1/1

インストール:
  mysql-community-release.noarch 0:el6-5

完了しました!
必要なパッケージも入れておきます。
[root@localhost plugins]# yum -y install mysql-community-server mysql-devel
:
インストール:
  mysql-community-devel.x86_64 0:5.6.28-2.el6
  mysql-community-libs.x86_64 0:5.6.28-2.el6
  mysql-community-libs-compat.x86_64 0:5.6.28-2.el6
  mysql-community-server.x86_64 0:5.6.28-2.el6

依存性関連をインストールしました:
  mysql-community-client.x86_64 0:5.6.28-2.el6  mysql-community-common.x86_64 0:5.6.28-2.el6
  numactl.x86_64 0:2.0.9-2.el6                  perl-DBI.x86_64 0:1.609-4.el6

置換:
  mysql-libs.x86_64 0:5.1.73-5.el6_6

完了しました!
mysqlの初期設定
まずはmysqlを起動します。
[root@localhost plugins]# service mysqld start
:
PLEASE REMEMBER TO SET A PASSWORD FOR THE MySQL root USER !
To do so, start the server, then issue the following commands:

  /usr/bin/mysqladmin -u root password 'new-password'
  /usr/bin/mysqladmin -u root -h localhost.localdomain password 'new-password'

Alternatively you can run:

  /usr/bin/mysql_secure_installation

which will also give you the option of removing the test
databases and anonymous user created by default.  This is
strongly recommended for production servers.

See the manual for more instructions.
:
--defaults-file argument to mysqld_safe when starting the server

                                                           [  OK  ]
mysqld を起動中:                                           [  OK  ]
起動時にrootユーザーのパスワードを変更するように要求されているようです。
MySQL 5.6 をインストールしたら最初に行うセットアップ によると、
ここに書いてあることは、次のいずれかを行った方が良いよということ。
- root ユーザーのパスワードを設定する
- mysql_secure_installation を実行する
ということですので、1つずつ試していきます。
まず、新しいパスワードを設定します。
[root@localhost plugins]# /usr/bin/mysqladmin -u root password '********'
次に、
[root@localhost plugins]# /usr/bin/mysql_secure_installation
:
Enter current password for root (enter for none): # ←設定したパスワードを入力する
:
Change the root password? [Y/n] n
:
Remove anonymous users? [Y/n] Y
:
Disallow root login remotely? [Y/n] Y
:
Remove test database and access to it? [Y/n] Y
:
Reload privilege tables now? [Y/n] Y
railsプロジェクトを作る
[hoge@localhost ~]$ rbenv exec rails new TurnipSample --test=rspec --database=mysql --skip-bundle
:
      create  vendor/assets/javascripts
      create  vendor/assets/javascripts/.keep
      create  vendor/assets/stylesheets
      create  vendor/assets/stylesheets/.keep
rspecをインストールする
[root@localhost ~]# gem install 'therubyracer'
:
Parsing documentation for therubyracer-0.12.2
Installing ri documentation for therubyracer-0.12.2
Done installing documentation for libv8, ref, therubyracer after 1 seconds
3 gems installed
~hoge/TurnipSample/Gemfile
:
# Use CoffeeScript for .coffee assets and views
gem 'coffee-rails', '~> 4.1.0'
# See https://github.com/rails/execjs#readme for more supported runtimes
gem 'therubyracer', platforms: :ruby # ← この行頭のコメントをはずす

# Use jquery as the JavaScript library
gem 'jquery-rails'
:
# 以下を追記する
group :test do
  gem 'rspec-rails'
  gem 'capybara'
  gem 'database_rewinder'
  gem 'turnip'
end
bundle installを実行します
[hoge@localhost TurnipSample]$ bundle install
:
Depending on your version of ruby, you may need to install ruby rdoc/ri data:

<= 1.8.6 : unsupported
 = 1.8.7 : gem install rdoc-data; rdoc-data --install
 = 1.9.1 : gem install rdoc-data; rdoc-data --install
>= 1.9.2 : nothing to do! Yay!
rspecをインストールします
[hoge@localhost TurnipSample]$ bundle exec rails g rspec:install
      create  .rspec
      create  spec
      create  spec/spec_helper.rb
      create  spec/rails_helper.rb
[hoge@localhost TurnipSample]$
rspecの設定をします。
spec/rails_helper.rb
# This file is copied to spec/ when you run 'rails generate rspec:install'
ENV['RAILS_ENV'] ||= 'test'
require 'spec_helper'
require File.expand_path('../../config/environment', __FILE__)
require 'rspec/rails'

# 以下の設定を追加する
require 'capybara/rails'
require 'turnip'
require 'turnip/rspec'
require 'turnip/capybara'
Dir.glob('spec/steps/**/*steps.rb') { |f| load f, true }
:
# 以下も追加
RSpec.configure do |config|
  # database_rewinder gem
  config.before :suite do
    DatabaseRewinder.clean_all
  end

  config.after :each do
    DatabaseRewinder.clean
  end
end
spec/spec_helper.rb
require 'rails_helper' # ←先頭行にrequireを追記する
# This file was generated by the `rails generate rspec:install` command. Conventionally, all
turnipは、spec/turnip_helper.rbを見に行くそうなので、追加します。
spec/turnip_helper.rb
require 'rails_helper'
.rpspecにも設定を追記します。
.rspec
--color
--require spec_helper
-r turnip/rspec # ← この1文を追記する
rootユーザーのパスワードを変更したので、database.yml の設定も変更します。
config/database.yml
:
default: &default
  adapter: mysql2
  encoding: utf8
  pool: 5
  username: root
  password: ******** #←rootユーザーのパスワードを指定する
  socket: /var/lib/mysql/mysql.sock
:
動作確認
[hoge@localhost TurnipSample]$ bundle exec rake db:create
[hoge@localhost TurnipSample]$ bundle exec rspec
/home/hoge/TurnipSample/db/schema.rb doesn't exist yet. Run `rake db:migrate` to create it, then try again. If you do not intend to use a database, you should instead alter /home/hoge/TurnipSample/config/application.rb to limit the frameworks that will be loaded.
No examples found.


Finished in 0.00576 seconds (files took 5.09 seconds to load)
0 examples, 0 failures

[hoge@localhost TurnipSample]$
ここまで動けばとりあえず問題ありません。
scaffoldしてテストを書いてみる
[hoge@localhost TurnipSample]$ bundle exec rails g scaffold blog title:string entry:text
      invoke  active_record
      create    db/migrate/20160103070145_create_blogs.rb
      create    app/models/blog.rb
      invoke    test_unit
      create      test/models/blog_test.rb
      create      test/fixtures/blogs.yml
:

[hoge@localhost TurnipSample]$ bundle exec rake db:migrate
== 20160103070145 CreateBlogs: migrating ======================================
-- create_table(:blogs)
   -> 0.0689s
== 20160103070145 CreateBlogs: migrated (0.0691s) =============================
config/routes.rb
Rails.application.routes.draw do
  resources :blogs
  root 'blogs#index' # ← 追記する
:
rails server でサーバーを起動してみます。
[hoge@localhost TurnipSample]$ rails s -b 192.168.56.104
=> Booting WEBrick
=> Rails 4.2.5 application starting in development on http://192.168.56.104:3000
=> Run `rails server -h` for more startup options
=> Ctrl-C to shutdown server
[2016-01-03 16:05:58] INFO  WEBrick 1.3.1
[2016-01-03 16:05:58] INFO  ruby 2.2.4 (2015-12-16) [x86_64-linux]
[2016-01-03 16:05:58] INFO  WEBrick::HTTPServer#start: pid=31617 port=3000
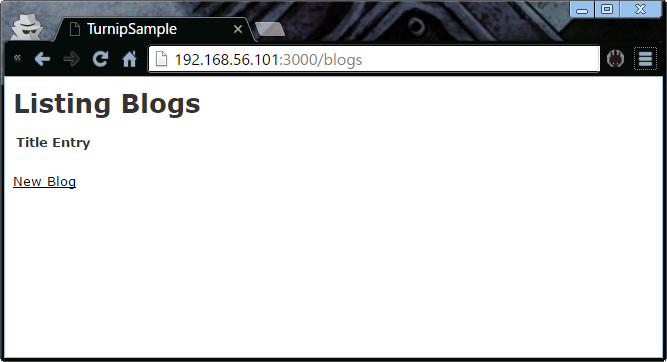
こんな風に見えていれば成功です。
受け入れ条件を定義する
受け入れ条件は次の通りとします。
- ストーリー:「ユーザーはブログ記事を作成できる」
- 受け入れ条件:「タイトルと本文を入力して記事を作成できること」
事前に必要なディレクトリを作成しておきます。
[hoge@localhost TurnipSample]$ mkdir spec/features
[hoge@localhost TurnipSample]$ mkdir spec/steps
まずはfeatureファイルから作ります。
spec/features/blog.feature
Feature: ユーザはブログ記事を作成できる
  @blog
  Scenario: タイトルと本文を入力して記事を作成できること
  When トップを訪問する
  And Newリンクをクリックする
  And タイトルと本文を入力して作成ボタンを押す
  Then 作成したタイトルが表示されていること
  And 作成した本文が表示されていること
テストを実行してみます。この時点で実行しても、stepを実装していないためpending扱いされます。
[hoge@localhost TurnipSample]$ bundle exec rspec
*

Pending: (Failures listed here are expected and do not affect your suite's status)

  1) ユーザはブログ記事を作成できる タイトルと本文を入力して記事を作成できること When トップを訪問する -> And Newリンクをクリックする -> And タイトルと本文を入力して作成ボタンを押す -> Then 作成したタイトルが表示されていること -> And 作成した本文が表示されていること
     # No such step: 'トップを訪問する'
     # ./spec/features/blog.feature:4


Finished in 0.01098 seconds (files took 5.49 seconds to load)
1 example, 0 failures, 1 pending

[hoge@localhost TurnipSample]$
次は、stepを実行します。
/etc/steps/blog_steps.rb
steps_for :blog do
  step 'トップを訪問する' do
    visit 'blogs'
  end

  step 'Newリンクをクリックする' do
    click_link 'New Blog'
  end

  step 'タイトルと本文を入力して作成ボタンを押す' do
    fill_in 'blog[title]', with: 'test title'
    fill_in 'blog[entry]', with: 'test entry'
    click_button 'Create Blog'
  end

  step '作成したタイトルが表示されていること' do
    expect(page).to have_content 'test title'
  end

  step '作成した本文が表示されていること' do
    expect(page).to have_content 'test entry'
  end
end
改めてテストを実行してみます。
[hoge@localhost TurnipSample]$ bundle exec rspec -fd

ユーザはブログ記事を作成できる
  タイトルと本文を入力して記事を作成できること
    When トップを訪問する -> And Newリンクをクリックする -> And タイトルと本文を入力して作成ボタンを押す -> Then 作成したタイトルが表示されていること -> And 作成した本文が表示されていること

Finished in 0.91277 seconds (files took 2.52 seconds to load)
1 example, 0 failures

[hoge@localhost TurnipSample]$