Dropbox や Github 経由でのデプロイはあるもののBitbucket経由でのデプロイはあまり参考が無かったので備忘録を兼ねて残します。
要はこれまでのgit push heroku master(Heroku)とgit push origin develop(Bitbucket)2箇所へのPushから、git push origin develop(Bitbucket)1箇所だけのPushで済ませることが目的です。
公式サイトはこちら(すごく簡単)
手順1.
Bitbucketにログイン→任意のリポジトリに入り「設定」→「Environment variables」を選択。
ここでHEROKU_API_KEYとHEROKU_APP_NAMEを入力。
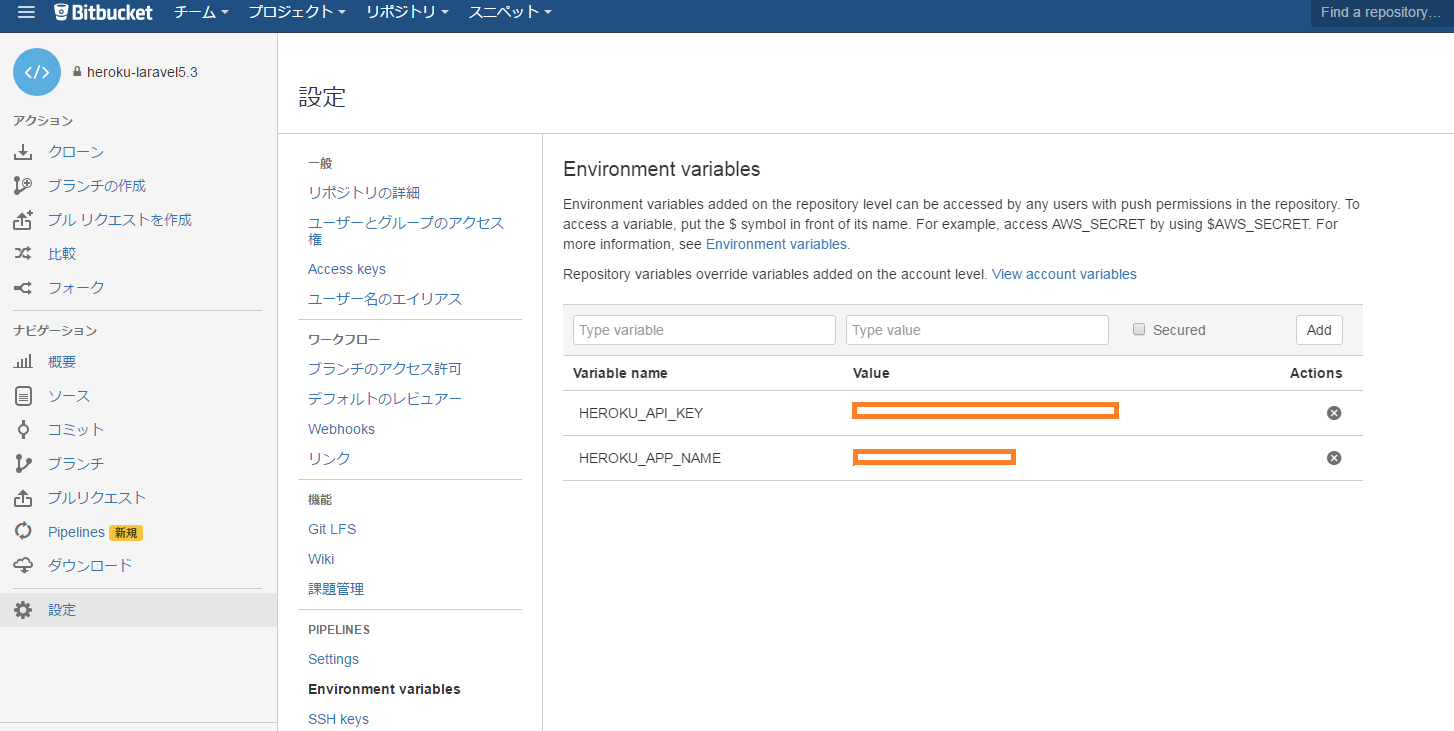
HEROKU_API_KEY...コマンドでheroku auth:tokenで出てきたやつコピペ
HEROKU_APP_NAME...同じくheroku appsで今回のアプリを選択
手順2.
bitbucket-pipelines.ymlを作成→HerokuへPush。
下記のファイルはBitbucketの公式サイトにある。一番下のURL(- git push...のところ)にHEROKU_API_KEYとHEROKU_APP_NAMEを充てればOK。
bitbucket-pipelines.yml
# This is a sample build configuration for PHP.
# Check our guides at https://confluence.atlassian.com/x/e8YWN for more examples.
# Only use spaces to indent your .yml configuration.
# -----
# You can specify a custom docker image from Docker Hub as your build environment.

image: phpunit/phpunit:5.0.3
clone:
  depth: full
pipelines:
  default:
    - step:
        script: # Modify the commands below to build your repository.
          - composer install
          - git push https://heroku:$HEROKU_API_KEY@git.heroku.com/$HEROKU_APP_NAME.git HEAD
ではでは