grunt+istanbul+mochaでNode.jsのテスト&カバレッジ計測を行う
の続きになります。
ローカルでテストを実行するだけでなく、Jenkinsのジョブとして設定することで、テスト結果やカバレッジ計測結果を集計管理できるようになります。
プロジェクトの経過を追うことができるようになり、より便利になります。
関連パッケージのインストール
mochaからJenkins用のテスト結果レポートを出力するために、mocha-jenkins-reporterを入れます。
また、このreporterは出力先ファイルの指定に環境変数JUNIT_REPORT_PATHを参照するので、gruntタスクで指定できるようgrunt-envも一緒に入れておきます。
npm install --save-dev grunt-env mocha-jenkins-reporter
gruntタスクを設定する
grunt+istanbul+mochaでNode.jsのテスト&カバレッジ計測を行う
で設定したタスクを修正します。
istanbulのreport formatとして、Jenkins処理用にcoberturaを追加、さらにmochaのreporterとしてmocha-jenkins-reporterを指定します。
また、環境変数JUNIT_REPORT_PATHを設定するために、grunt-envの設定も記述しておきます。
カバレッジレポートが
coverage以下に生成されるため、テストレポートもcoverage以下に設定していますが、別のディレクトリに設定しても問題ありません。
coverage以外のディレクトリに設定した場合はディレクトリは自動生成されませんので、予めmkdirしておいてください。
    env:
      test:
        JUNIT_REPORT_PATH: 'coverage/test-results.xml'

    mocha_istanbul:
      test:
        src: 'build/test'
        options:
          mask: '**/*.spec.js'
          reporter: 'mocha-jenkins-reporter'
          reportFormats: [ 'cobertura', 'lcov' ]
また、testタスクにはenv:test後にmocha_istanbul:testが実行されるよう修正します。
  grunt.registerTask 'test', 'run test and generate coverage information', [
    'coffee_jshint:test'
    'coffee:test'
    'env:test'
    'mocha_istanbul:test'
  ]
gruntでtestタスクを実行してみる
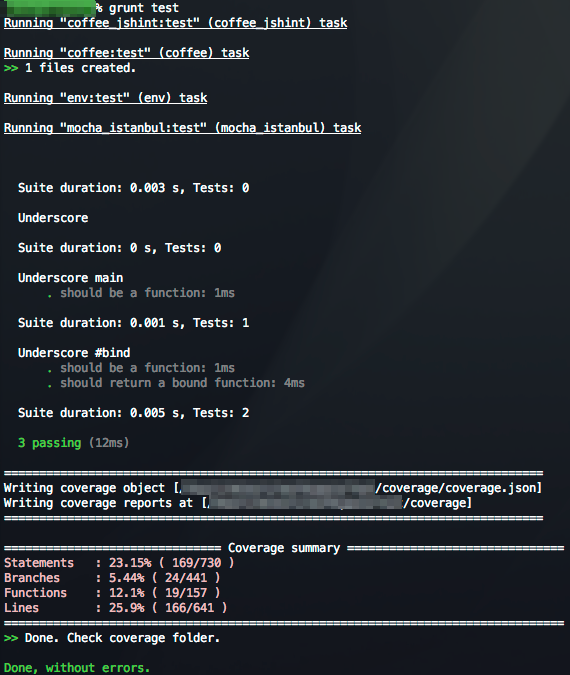
grunt testを実行して、以下の様な結果が表示されればOKです。
やや出力の見た目が変化しましたが、これまでのカバレッジレポートに加えて、cobertura-coverage.xml、test-results.xmlの2つのファイルがcoverageディレクトリ以下に生成されていれば成功です。
Jenkinsの設定
Coberturaプラグインのインストール
Jenkinsでカバレッジレポートを集計するには、Cobertura Pluginをインストールします。
Jenkinsの管理 -> プラグインの管理と進み、利用可能プラグインからCobertura Pluginをインストールします。
ジョブの設定
まずはビルド設定です。ビルド手順の追加で「シェルの実行」を選択し、シェルスクリプトの項で以下のようにgrunt testを走らせましょう。
npm install
grunt test
予めjenkinsユーザでnpmが実行できるよう環境を構築しておく必要があります。
また、test以外のgruntタスク(build処理等)は状況に応じて任意に追加してください。
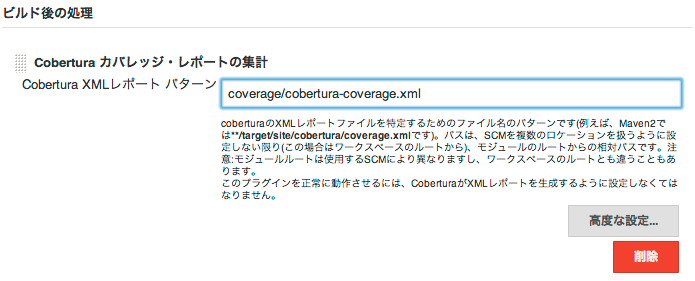
ビルド後の処理の追加で「Cobertura カバレッジ・レポートの集計」を選択し、レポートパターンにcobertura-coverage.xmlのパスを入力します。
再度ビルド後の処理の追加で今度は「JUnitテスト結果の集計」を選択し、テスト結果XMLにtest-results.xmlのパスを入力します。
Jenkins上でビルドを実行してみる
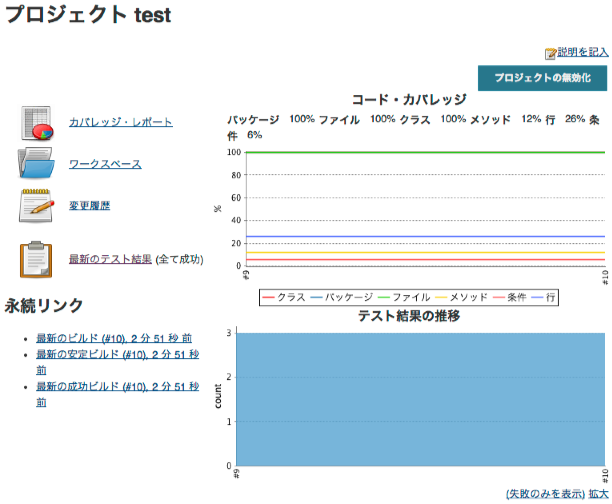
正しく設定が完了すれば、ビルドを実行した後プロジェクトのページをリロードすると、以下の様な表示になります。
テスト結果の推移は、2つ以上の成功ビルドがないと表示されません。
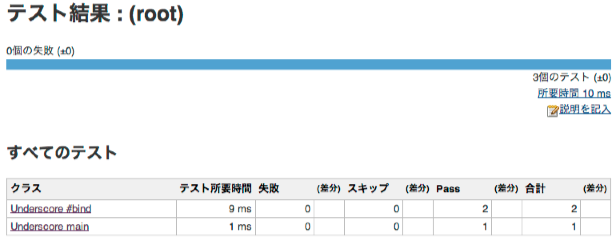
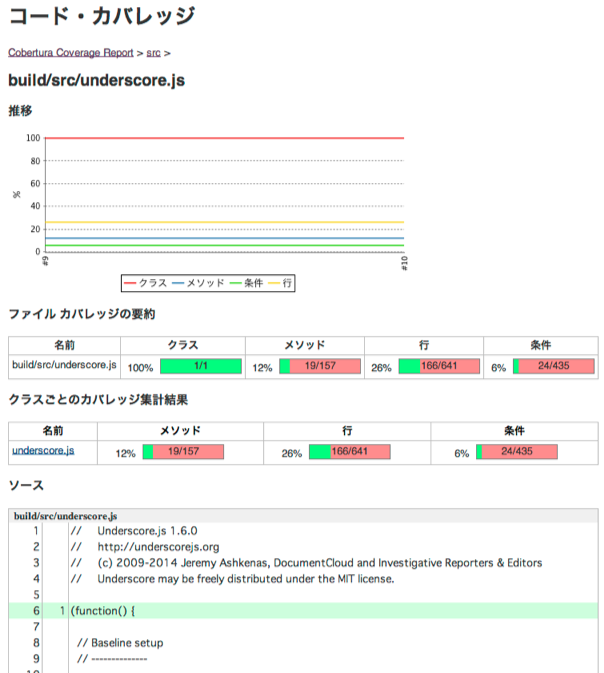
テスト結果、コードカバレッジの詳細は以下の様な表示になります。
非常に見やすい形で可視化されますので、テストを書く意欲が湧いてきます。たぶん。
JenkinsにGit Pluginをインストールし、ジョブの設定でgit pushに連動して自動実行されるようにしておけばいいでしょう。
