はじめに
ある日突然中二病の発作を起こしても生き延びられるようにCoreAnimationの力を借りて、iPhoneの画面上に魔法陣を描きます。
中二病とは
中二病(ちゅうにびょう)とは、中学2年生頃の思春期に見られる、背伸びしがちな言動を自虐する語。転じて、思春期にありがちな自己愛に満ちた空想や嗜好などを揶揄したネットスラング。「病」という表現を含むが、実際に治療の必要とされる医学的な意味での病気、または精神疾患とは無関係である。
出典: フリー百科事典『ウィキペディア(Wikipedia)』
魔法陣とは
魔法陣(まほうじん)とは、和製ファンタジー作品等での架空の魔術で用いられる紋様や文字で構成された図あるいは、それによって区切られる空間のこと。術者の魔力を増幅させたり封じたり、魔力の調節弁の働きをする。また種類によっては悪魔を呼び出すなど異界との扉としても作用するが、その場を清める時や邪気を払うときなどにも使われる。
出典: フリー百科事典『ウィキペディア(Wikipedia)』
準備
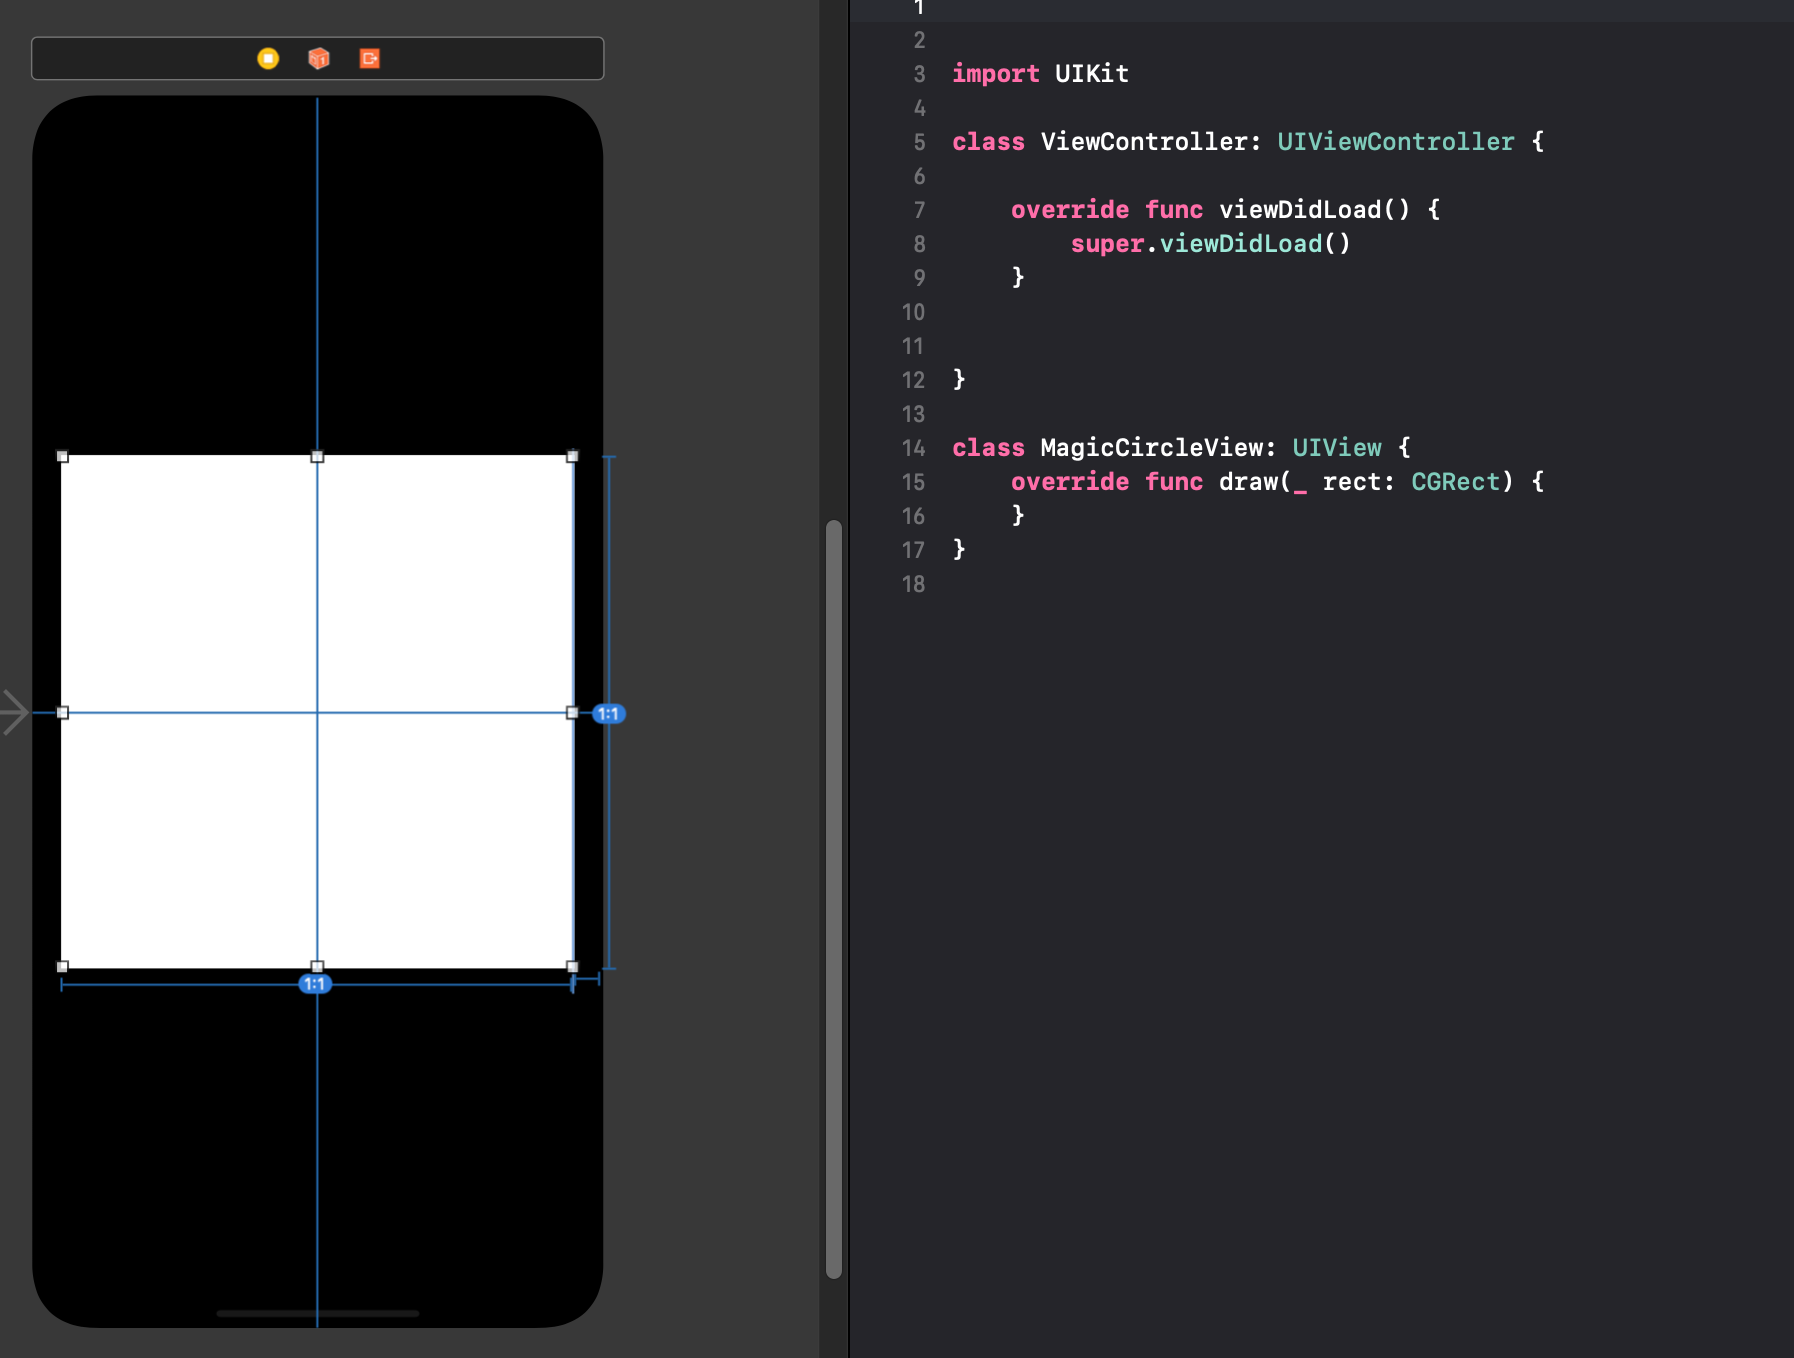 ストーリーボードを用いてViewControllerの中心に正方形のカスタムビュー(`MagicCircleView`)を配置します。
private var boundsCenter: CGPoint { CGPoint(x: bounds.midX, y: bounds.midY) }

private func degreeToRadian(_ d: CGFloat) -> CGFloat {
    return d * CGFloat.pi / 180
}
UIViewのcenterプロパティだと親ビューの座標系で計算されてしまうのでカスタムビューの中心を取得する変数を定義しておきます。また、CoreAnimationの世界ではラジアンを要求されることが多いので、角度を弧度に変換するメソッドを用意しました。
CAShapeLayer
公式ドキュメントでは下記のように記載されています。
A layer that draws a cubic Bezier spline in its coordinate space.
CAShapeLayerはベジェ曲線で様々な図形を表現できるCALayerのサブクラスです。
本記事中で最も登場頻度の高いクラスです。
円の描画
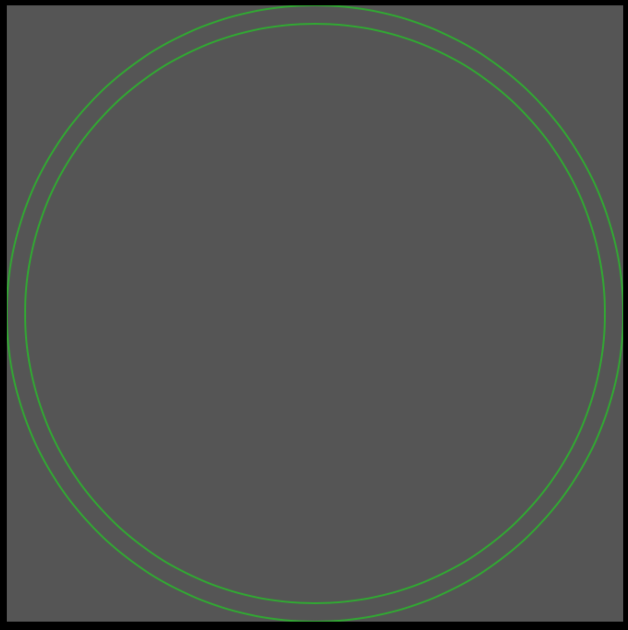
魔法陣といえば円。まずは外周に位置する円をCAShapeLayerとUIBezierPathで描いていきます。
以下のコードで直径がカスタムViewの幅いっぱいの円と、それより20pt小さい円を描画します。
     let outerCircleLayer = CAShapeLayer()
     outerCircleLayer.frame = bounds
     outerCircleLayer.path = UIBezierPath(arcCenter: boundsCenter,
                                             radius: rect.width / 2,
                                             startAngle: degreeToRadian(0),
                                             endAngle: degreeToRadian(360),
                                             clockwise: true).cgPath
     outerCircleLayer.strokeColor = UIColor.green.cgColor
     outerCircleLayer.fillColor = UIColor.clear.cgColor
     outerCircleLayer.lineWidth = 1
     layer.addSublayer(outerCircleLayer)

     let innerCircleLayer = CAShapeLayer()
     innerCircleLayer.frame = bounds
     innerCircleLayer.path = UIBezierPath(arcCenter: boundsCenter,
                                             radius:(rect.width / 2) - 10,
                                             startAngle: degreeToRadian(0),
                                             endAngle: degreeToRadian(360),
                                             clockwise: false).cgPath
     innerCircleLayer.strokeColor = UIColor.green.cgColor
     innerCircleLayer.fillColor = UIColor.clear.cgColor
     innerCircleLayer.lineWidth = 1
     layer.addSublayer(innerCircleLayer)
実行結果
背景が白だと見づらいのでダークグレーに変更しました。
アニメーション(描画)
CABasicAnimationを利用すれば非常に簡単にアニメーションを実装できます。
指定可能なkeyPathはCore Animation Programming Guideに詳しく載っています。
アニメーションのtoValue、fromValueはOptional<Any>型で、初期化の際に指定したkeyPathに依存します。タイプセーフではないので注意が必要です。
安全に実装したい場合は、そのへんをよしなにやってくれるライブラリがあるようです。 -> TheAnimation
let outerCircleStrokeAnimation = CABasicAnimation(keyPath: "strokeEnd")
    outerCircleStrokeAnimation.fromValue = 0
    outerCircleStrokeAnimation.toValue = 1
    outerCircleStrokeAnimation.duration = 1

    outerCircleLayer.add(outerCircleStrokeAnimation, forKey: nil)
let innerCircleStrokeAnimation = CABasicAnimation(keyPath: "strokeEnd")
    innerCircleStrokeAnimation.fromValue = 0
    innerCircleStrokeAnimation.toValue = 1
    innerCircleStrokeAnimation.duration = SequentialAnimationDuration.first

    innerCircleLayer.add(innerCircleStrokeAnimation, forKey: nil)
実行結果
背景の描画
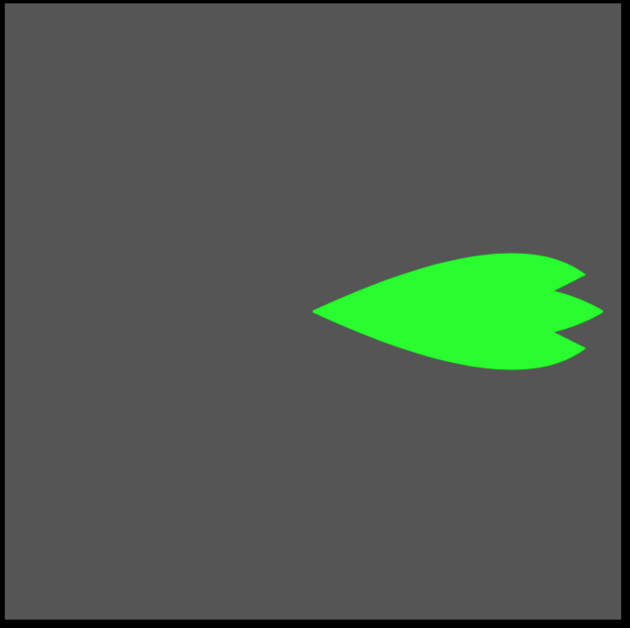
背景となる紋様を追加します。どういう図案にするか迷いどころですが、熾天覆う七つの円環を模し、七片の花弁を円状に配置したような図形をCGMutablePathで形成してみたいと思います。
 let backgroundLayer = CAShapeLayer()
 backgroundLayer.frame = bounds
 let path = CGMutablePath()

 //花弁上側の頂点
 let petalUpSideConvex = CGPoint(x: bounds.maxX - 20, y: bounds.midY - 20)
 let upSideCurveControl = CGPoint(x: bounds.maxX - 60, y: bounds.midY - 50)
 //花弁中央の窪み
 let petalCenterConcave = CGPoint(x: bounds.maxX - 60, y: bounds.midY)
 //花弁右側の頂点
 let petalDownSideConvex = CGPoint(x: bounds.maxX - 20, y: bounds.midY + 20)
 let downSideCurveControl = CGPoint(x: bounds.maxX - 60, y: bounds.midY + 50)

 //上半分
 path.move(to: boundsCenter)
 path.addQuadCurve(to: petalUpSideConvex, control: upSideCurveControl)
 path.addLine(to: petalCenterConcave)
 //下半分
 path.move(to: boundsCenter)
 path.addQuadCurve(to: petalDownSideConvex, control: downSideCurveControl)
 path.addLine(to: petalCenterConcave)

 backgroundLayer.path = path
 backgroundLayer.strokeColor = UIColor.green.cgColor
 backgroundLayer.fillColor = UIColor.green.cgColor

 layer.addSublayer(backgroundLayer)
実行結果
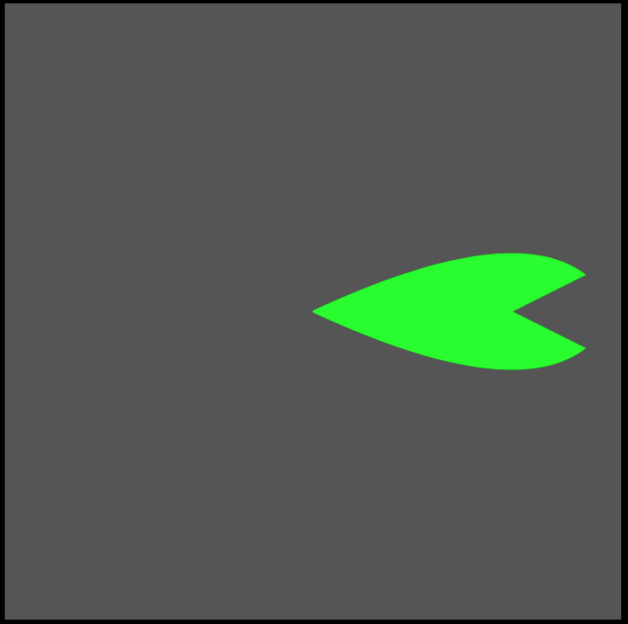
0度を基準にパスを作成しました。ここで更に花弁を重ねていきます。
ちなみに0度が時計の3時でそこから時計回りに角度が増えます。90度が6時、180度が9時・・・といった風に。
 //花弁中央
 let petalCenterConvex = CGPoint(x: bounds.maxX - 10, y: bounds.midY)
 let leftSideThinCurveControl = CGPoint(x: bounds.maxX - 60, y: bounds.midY - 30)
 let rightSideThinCurveControl = CGPoint(x: bounds.maxX - 60, y: bounds.midY + 30)
 path.move(to: boundsCenter)
 path.addQuadCurve(to: petalCenterConvex, control: leftSideThinCurveControl)
 path.move(to: boundsCenter)
 path.addQuadCurve(to: petalCenterConvex, control: rightSideThinCurveControl)
実行結果
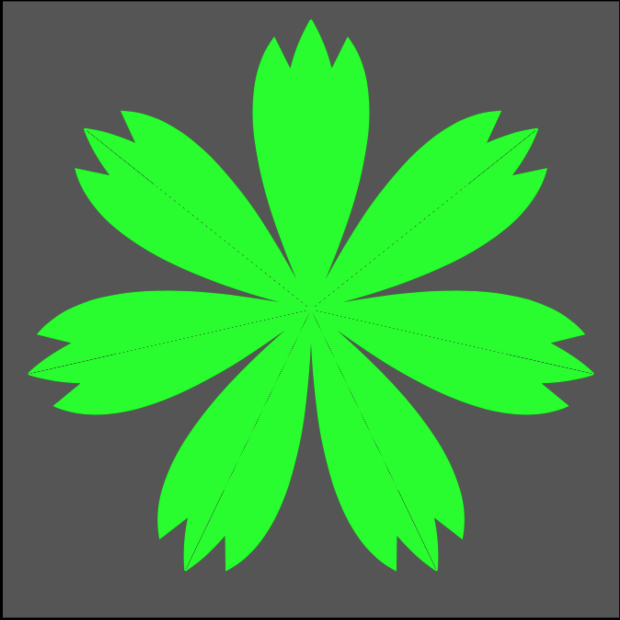
基準となる花弁が完成しました。あとはこれを七片に増やすだけなので、Swift Standard Libraryに含まれるstride関数とアフィン変換を組み合わせて繰り返し配置していきます。
CGAffineTransformを実行する際、花弁の根本を軸に回転させたいので、基準点をカスタムビューの中心に移動してからCoreGraphicsの座標系に合わせるために逆変換->回転->元に戻すという操作を行っています。
  let backgroundLayer = CAShapeLayer()
  backgroundLayer.frame = bounds
  let path = CGMutablePath()

  stride(from: 0, to: CGFloat.pi * 2, by: (CGFloat.pi * 2) / 7).forEach { angle in

     let transform  = CGAffineTransform(translationX: boundsCenter.x, y: boundsCenter.y).inverted()
                .concatenating(CGAffineTransform(rotationAngle: angle))
                .concatenating(CGAffineTransform(translationX: boundsCenter.x, y: boundsCenter.y))
     //花弁上側の頂点
     let petalUpSideConvex = CGPoint(x: bounds.maxX - 20, y: bounds.midY - 20)
     let upSideCurveControl = CGPoint(x: bounds.maxX - 60, y: bounds.midY - 50)
     //花弁中央の窪み
     let petalCenterConcave = CGPoint(x: bounds.maxX - 60, y: bounds.midY)
     //花弁右側の頂点
     let petalDownSideConvex = CGPoint(x: bounds.maxX - 20, y: bounds.midY + 20)
     let downSideCurveControl = CGPoint(x: bounds.maxX - 60, y: bounds.midY + 50)

     //上半分
     path.move(to: boundsCenter)
     path.addQuadCurve(to: petalUpSideConvex, control: upSideCurveControl, transform: transform)
     path.addLine(to: petalCenterConcave, transform: transform)
     //下半分
     path.move(to: boundsCenter)
     path.addQuadCurve(to: petalDownSideConvex, control: downSideCurveControl, transform: transform)
     path.addLine(to: petalCenterConcave, transform: transform)

     //花弁中央
     let petalCenterConvex = CGPoint(x: bounds.maxX - 10, y: bounds.midY)
     let leftSideThinCurveControl = CGPoint(x: bounds.maxX - 60, y: bounds.midY - 30)
     let rightSideThinCurveControl = CGPoint(x: bounds.maxX - 60, y: bounds.midY + 30)
     path.move(to: boundsCenter)
     path.addQuadCurve(to: petalCenterConvex, control: leftSideThinCurveControl, transform: transform)
     path.move(to: boundsCenter)
     path.addQuadCurve(to: petalCenterConvex, control: rightSideThinCurveControl, transform: transform)
  }

 backgroundLayer.path = path
 backgroundLayer.strokeColor = UIColor.green.cgColor
 backgroundLayer.fillColor = UIColor.green.cgColor
 layer.addSublayer(backgroundLayer)
また、最初に描画した花弁は0度を基準にしたので3時の方を向いています。なので、この基準となる花弁をレイヤーごと時計回りに270度回転させます。
backgroundLayer.transform = CATransform3DMakeAffineTransform(CGAffineTransform(rotationAngle: degreeToRadian(270)))
実行結果
アニメーション(明滅)
今回はkeyPathにopacityを指定します。その名の通り不透明度を変更し、0.0~1.0の範囲で有効です。
     let opacityAnimation = CABasicAnimation(keyPath: "opacity")
     opacityAnimation.repeatCount = .greatestFiniteMagnitude //無限リピート
     opacityAnimation.autoreverses = true
     opacityAnimation.fromValue = 0
     opacityAnimation.toValue = 0.2
     opacityAnimation.duration = 1
     opacityAnimation.isRemovedOnCompletion = false

     backgroundLayer.add(opacityAnimation, forKey: nil)
実行結果
それっぽくなりました。
背景の描画第二段階
背景の装飾を足すために線をたくさん引いてみます。UIBezierPathで図形を描くより簡単です。
private func getPointOnCircle(radius: CGFloat, center: CGPoint, degree: CGFloat) -> CGPoint {
     var x: CGFloat = 0
     var y: CGFloat = 0

     switch degree {
     case ..<90:
         x = cos(degreeToRadian(degree)) * radius
         y = sin(degreeToRadian(degree)) * radius
     case ..<180:
         x = -sin(degreeToRadian(degree - 90.0)) * radius
         y = cos(degreeToRadian(degree - 90.0)) * radius
     case ..<270:
         x = -cos(degreeToRadian(degree - 180.0)) * radius
         y = -(sin(degreeToRadian(degree - 180.0)) * radius)
     default:
         x = sin(degreeToRadian(degree - 270.0)) * radius
         y = -(cos(degreeToRadian(degree - 270.0)) * radius)
     }

     return CGPoint(x: center.x + x, y: center.y + y)
}
上記のメソッドは半径(radius)、中心点(center)の円の角度(degree)上に存在する円周上の座標を取得します。
こちらを使って等間隔に短い線を引いてみます。ついでに30度ごとにopacityが高くなるようにしました。
stride(from: CGFloat(0), to: 360, by: 2).forEach { angle in
    let lineLayer = CAShapeLayer()
    lineLayer.frame = bounds
    lineLayer.strokeColor = UIColor.green.cgColor
    lineLayer.fillColor = UIColor.clear.cgColor
    lineLayer.opacity = angle.truncatingRemainder(dividingBy: 30.0).isZero ? 0.6: 0.2
    lineLayer.lineWidth = 1

    let linePath = UIBezierPath()
    linePath.move(to: getPointOnCircle(radius: bounds.width/2 - 40, center: boundsCenter, degree: angle))
    linePath.addLine(to: getPointOnCircle(radius: bounds.width/2 - 45, center: boundsCenter, degree: angle))
    lineLayer.path = linePath.cgPath
    layer.addSublayer(lineLayer)
}
実行結果

アニメーション(回転+イージング)
keyPathにtransform.rotationを指定して回転アニメーションをつけます。また、アニメーションにイージングを追加します。
let animationGroup = CAAnimationGroup()
var animations:[CABasicAnimation] = []

for i in 0...4 {
    let rotateAnimation = CABasicAnimation(keyPath: "transform.rotation")
    let angle = CGFloat(i) * 6
    rotateAnimation.fromValue = degreeToRadian(angle)
    rotateAnimation.toValue = degreeToRadian(angle + 6)
    rotateAnimation.duration = 1
    //イージング
    rotateAnimation.timingFunction = CAMediaTimingFunction(controlPoints: 0.98, 0.01, 1, 0.03)
    //アニメーション遅延時間
    rotateAnimation.beginTime = CFTimeInterval(i)
    animations.append(rotateAnimation)
}

animationGroup.animations = animations
animationGroup.duration = 5
animationGroup.repeatCount = .greatestFiniteMagnitude
animationGroup.isRemovedOnCompletion = false

...
..
.

lineLayer.add(animationGroup, forKey: nil)
実行結果
gifが途切れるタイミングで巻き戻っているように見えますが、実際には切れ目なく360度回転しているように見えます。
CAAnimationGroupを使うことで複数のアニメーションをまとめて管理することが出来ます。
"transform.rotation"アニメーションのfromValue、toValue にはラジアンを指定します。
6度回転するアニメーションを1秒遅れで実行し、5回ループしています。
また、アニメーションにイージングを追加する際はtimingFunctionにCAMediaTimingFunctionを設定します。
ここでは自分でcontrolPointsを指定しましたが、コンビニエンスイニシャライザも用意されており、名前で指定することも出来ます。
convenience init(name: CAMediaTimingFunctionName)
CAMediaTimingFunctionName
背景の描画第三段階
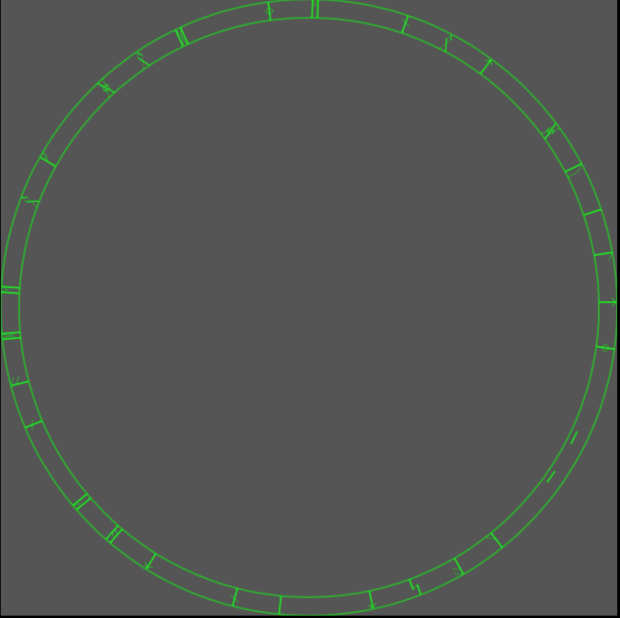
更に背景の装飾を足すために直線を引きます。第二段階では線を等間隔に配置ましたが、垂直から15度ずらした線を10度間隔で引いてみます。
stride(from: CGFloat(0), to: 360, by: 10).forEach { angle in
    let jaggedCircleLayer = CAShapeLayer()
    jaggedCircleLayer.frame = bounds
    jaggedCircleLayer.lineWidth = 1
    jaggedCircleLayer.opacity = 0.2
    jaggedCircleLayer.strokeColor = UIColor.green.cgColor
    jaggedCircleLayer.fillColor = UIColor.clear.cgColor

    let jaggedCircleLine = UIBezierPath()
    jaggedCircleLine.move(to: getPointOnCircle(radius: bounds.width/2 - 50, center: boundsCenter, degree: angle +  15))
    jaggedCircleLine.addLine(to: getPointOnCircle(radius: bounds.width/2 - 50, center: boundsCenter, degree: angle + 165))
    jaggedCircleLayer.path = jaggedCircleLine.cgPath
    layer.addSublayer(jaggedCircleLayer)
}
実行結果

アニメーション(回転+描画)
keyPathに"transform.rotation"と"strokeEnd"を指定します。
let rotateAnimation = CABasicAnimation(keyPath: "transform.rotation")
rotateAnimation.repeatCount = .greatestFiniteMagnitude
rotateAnimation.fromValue = degreeToRadian(0)
rotateAnimation.toValue = degreeToRadian(30)
rotateAnimation.duration = 5
rotateAnimation.isRemovedOnCompletion = false
rotateAnimation.fillMode = .forwards
rotateAnimation.timingFunction = CAMediaTimingFunction(name: .linear)

let strokeAnimation = CABasicAnimation(keyPath: "strokeEnd")
strokeAnimation.repeatCount = 1
strokeAnimation.fromValue = 0
strokeAnimation.toValue = 1
strokeAnimation.duration = 2
strokeAnimation.isRemovedOnCompletion = false
strokeAnimation.fillMode = .forwards

...
..
.

jaggedCircleLayer.add(rotateAnimation, forKey: nil)
jaggedCircleLayer.add(strokeAnimation, forKey: nil)
実行結果
内側の円は回転アニメーションのイージングにリニアキーワードを指定したので滑らかに動き、外側の円はアナログ時計の秒針のように一拍置いてから動くような動きになっています。

まとめ
CAShapeLayerにUIBezierPath、CGMutablePathで形成した図形を表示させてみました。
単純な図形であれば、CAShapeLayerを用いることで比較的簡単に表現できるかと思います。
以下、ここまでの作業の組み合わせ。
CATextLayer
公式ドキュメントでは下記のように記載されています。
A layer that provides simple text layout and rendering of plain or attributed strings.
CATextLayerは文字列を扱うことができるCALayerのサブクラスです。
魔法陣といえばやはり何らかの術式が刻まれていないと締りがありません。避けては通れない道でしょう。
文字列の円状配置
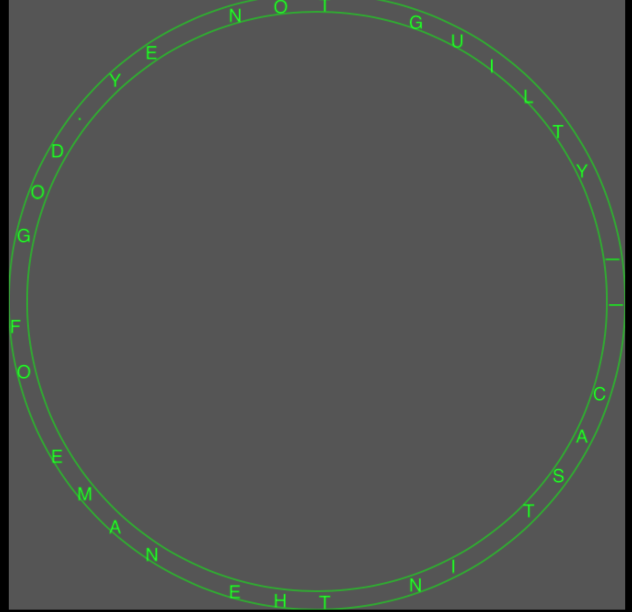
最初の作業でCAShapeLayerを用いた二重線の円を描画しました。その円をガイドにして、魔法陣外周に文字を巡らせてみます。
let castingSpell = "― CAST IN THE NAME OF GOD,YE NOT GUILTY ―"
let splitedTextArray = castingSpell.map(String.init)

for i in 0..<splitedTextArray.count {
    let delta = CGFloat(360.0 / Float(splitedTextArray.count))
    let degree = CGFloat(i) * delta

    let textLayer = CATextLayer()
    textLayer.frame = CGRect(origin: .zero, size: CGSize(width: 10, height: 10))
    textLayer.position = getPointOnCircle(radius: bounds.width/2 - 5, center: boundsCenter, degree: degree)
    textLayer.string = splitedTextArray[i]
    textLayer.fontSize = 10
    textLayer.foregroundColor = UIColor.green.cgColor
    textLayer.contentsScale = UIScreen.main.scale  //Retina対応
    layer.addSublayer(textLayer)
}
実行結果
アニメーション(回転+移動)
このままでは格好が悪いので、文字が中心を向くように回転しつつ円周上を移動するようにアニメーションさせてみます。
レイヤーの移動アニメーションにはCAKeyframeAnimationを採用しました。CAKeyframeAnimation段階的に変化するアニメーションの制御に向いていますが、CGPathに沿って動くようなアニメーションも利用できるので、こちらを使っていきます。
    //回転アニメーション
    let rotateAnimation = CABasicAnimation(keyPath: "transform.rotation.z")
    rotateAnimation.repeatCount = .greatestFiniteMagnitude
    //0度を基準に90度右にずらす。
    rotateAnimation.fromValue = degreeToRadian(90 + degree)
    rotateAnimation.byValue = degreeToRadian(270 + degree)
    rotateAnimation.toValue = degreeToRadian(450 + degree)
    rotateAnimation.fillMode =.forwards
    rotateAnimation.isRemovedOnCompletion = false
    rotateAnimation.duration = 10
    textLayer.add(rotateAnimation, forKey: nil)
    //移動アニメーション
    let moveAnimation = CAKeyframeAnimation(keyPath: "position")
    let path = UIBezierPath(arcCenter: boundsCenter,
                            radius: rect.width/2 - 5,
                            startAngle: degreeToRadian(degree),
                            endAngle: degreeToRadian(degree) + degreeToRadian(360),
                            clockwise: true).cgPath
     moveAnimation.path = path
     moveAnimation.repeatCount = Float.infinity
     moveAnimation.fillMode = CAMediaTimingFillMode.forwards
     moveAnimation.isRemovedOnCompletion = false
     moveAnimation.duration = 10.0
     textLayer.add(moveAnimation, forKey: nil)
実行結果
フォントの切り替え
CATextLayerはカスタムフォントにも対応しています。せっかくなのでカスタムフォントに置き換えます。
素材
こちらのフォントをお借りしました。A^zまで割り当てられた、イケてるルーン文字フォントです。
https://daisy-bell.booth.pm/items/81865
カスタムフォントの導入については詳細を書きませんが、今回はコードでフォントを指定しているので、
Info.plistにFonts provided by applicationキーを追加しないと正常に動作しません。
textLayer.font = UIFont(name: "RuneAMN_Serif", size: 1.0)
textLayer.fontSize = 10
また、テキストレイヤーのfontプロパティにUIFontのインスタンスを渡す際は、そのインスタンスが保持するサイズは無視されるので注意が必要です。
If the font property is a CTFontRef, a CGFontRef, or an instance of NSFont, the font size of the property is ignored.
Documentation > Core Animation > CATextLayer > font
実行結果
無事にルーン文字になりました。とりあえず外円はこれで良さそうです。
文字列の円状配置第二段階
冗長になるためコードは省略しますが、追加でCAShapeLayerで円を3つ、CATextLayerで文字列を円状に配置し、CABasicAnimationで明滅するアニメーションを付与しました。
実行結果
まとめ
CATextLayerで文字列を扱いました。CoreAnimationで文字列を扱いたい場合は一択となるでしょう。
以下、ここまでの作業の組み合わせ
CAEmitterLayer
公式ドキュメントでは下記のように記載されています。
A layer that emits, animates, and renders a particle system.
CAEmitterLayerはパーティクル(粒子)を扱うことが出来るCALayerのサブクラスです。
流石にSpriteKitのSKEmitterNodeほどの機能はありませんが、その分簡単に扱えるようになっていると思います。
粒子の描画
空間に横溢するマナ的な何かをCAEmitterLayerで描画します。
まずは放出されるパーティクルを定義するCAEmitterCellを作り、その後EmitterLayerに追加します。
private func makeEmitterCell(color: UIColor) -> CAEmitterCell {
    let cell = CAEmitterCell()
    cell.birthRate = 300 //1秒ごとに生成される粒子の数
    cell.lifetime = 5 //粒子の生存期間(秒)
    cell.lifetimeRange = 2 //生存期間の変化量。この場合粒子の生存期間は3~7秒
    cell.color = color.cgColor
    cell.velocity = 10 // 粒子が放出される際の初速度
    cell.velocityRange = 9
    cell.alphaSpeed = -0.1 // 粒子が生存中のalpha値の変化率(秒)
    cell.scale = 0.5 // 粒子の大きさに影響するスケール係数。使用するアセットに合わせて適宜変更する
    cell.emissionRange = degreeToRadian(360) //粒子の放出方向の変化量。
    cell.contents = UIImage(named: "particle")?.cgImage //粒子の形状をCGImageで指定

    return cell
}
let emitterLayer = CAEmitterLayer()
let greenCell = makeEmitterCell(color: UIColor.green)

emitterLayer.emitterPosition = boundsCenter
emitterLayer.emitterShape = .circle
emitterLayer.emitterMode = .surface
emitterLayer.emitterSize = CGSize(width: frame.width/2, height: frame.height/2)
emitterLayer.emitterCells = [greenCell]
emitterLayer.opacity = 0.5

layer.addSublayer(emitterLayer)
実行結果
emitterShapeで粒子を放出するレイヤーの形状を決定し、emitterModeでレイヤー上のどの地点から粒子を放出するか決定します。
Documentation -> Core Animation -> CAEmitterLayer -> Emitter Shape
Documentation -> Core Animation -> CAEmitterLayer -> Emitter Modes
まとめ
CAEmitterLayerでパーティクルを扱いました。しかしここで触れたのはCoreAnimationが提供するパーティクルシステムの一端に過ぎません。パラメーターを適当にいじって、粒子が流れていくのを眺めるだけで面白いのでぜひお試し下さい。
CAReplicatorLayer
公式ドキュメントでは下記のように記載されています。
A layer that creates a specified number of sublayer copies with varying geometric, temporal, and color transformations.
CAReplicatorLayerは、そのサブレイヤーに様々な変換を加えた上で複製を作成できるCALayerのサブクラスです。
アニメーションとの親和性も高く、規則的な形状を描画するのに向いています。
六芒星の描画
六芒星を描画するために、まず三角形を描き、そのレイヤーを反転させてみます。
ただの線だともの足りないので、錬金術記号で線を引いてみます。
private func makeTriangleLayer(radius: CGFloat, center: CGPoint, fontSize: CGFloat) -> CAShapeLayer {
    let shapeLayer = CAShapeLayer()
    shapeLayer.frame = bounds

    stride(from: CGFloat(30), through: 270, by: 120).forEach { angle in
        let rhsPoint = getPointOnCircle(radius: radius, center: boundsCenter, degree: angle)
        let lhsPoint = getPointOnCircle(radius: radius, center: boundsCenter, degree: angle + 120)
        let deltaX = Double(rhsPoint.x - lhsPoint.x)
        let deltaY = Double(rhsPoint.y - lhsPoint.y)
        let distance = sqrt((deltaX * deltaX) + (deltaY * deltaY))
        let textLayer = CATextLayer()
        textLayer.anchorPoint = CGPoint(x: 0, y: 0)
        textLayer.frame = CGRect(origin: rhsPoint, //三角形の頂点
                                     size: CGSize(width: distance, height: 10))

        let alchemicSymbols = [ "🜀","🜁","🜂","🜃","🜄","🜅","🜆","🜇","🜈","🜉","🜊","🜋","🜌","🜍","🜎",
                                "🜏","🜐","🜑","🜒","🜓","🜔","🜕","🜖","🜗","🜘","🜙","🜚","🜛","🜜","🜝","🜞",
                                "🜟","🜠","🜡","🜢","🜣","🜤","🜥","🜦","🜧","🜨","🜩","🜪","🜫","🜬","🜭","🜮","🜯",
                                "🜰","🜱","🜲","🜳","🜴","🜵","🜶","🜷","🜸","🜹","🜺","🜻","🜼","🜽","🜾","🜿",
                                "🝀","🝁","🝂","🝃","🝄","🝅","🝆","🝇","🝈","🝉","🝊","🝋","🝌","🝍","🝎","🝏",
                                "🝐","🝑","🝒","🝓","🝔","🝕","🝖","🝗","🝘","🝙","🝚","🝛","🝜","🝝","🝞","🝟",
                                "🝠","🝡","🝢","🝣","🝤","🝥","🝦","🝧","🝨","🝩","🝪","🝫","🝬","🝭","🝮","🝯",
                                "🝰","🝱","🝲","🝳"]

        var rundomSymbolString: String {
             var str = ""
             while str.count < 30 {
                str += alchemicSymbols.randomElement()!
             }
             return str
        }

        textLayer.string = rundomSymbolString
        textLayer.foregroundColor = UIColor.green.cgColor
        textLayer.contentsScale = UIScreen.main.scale
        textLayer.fontSize = fontSize
        textLayer.transform = CATransform3DMakeRotation(degreeToRadian(angle + 150), 0.0, 0.0, 1.0) //頂点同士を結ぶように回転
        shapeLayer.addSublayer(textLayer)
    }
    return shapeLayer
}
実行結果
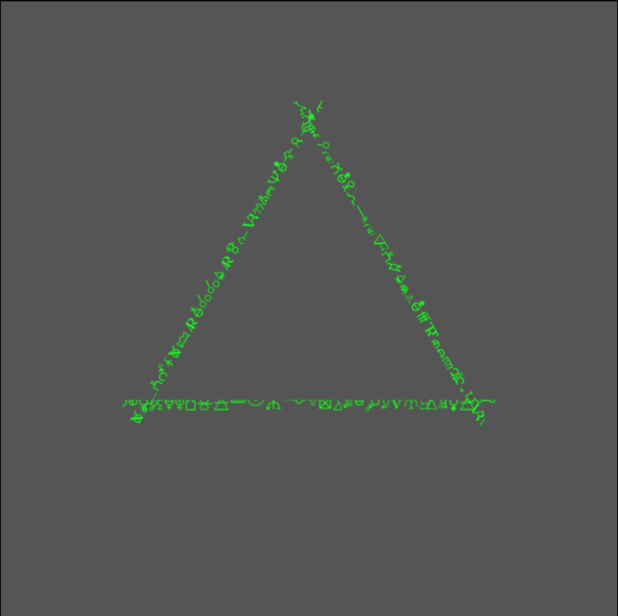
無事に錬金術記号で三角形が作れました。三角形の一変となるTextLayerを回転させる際にanchorPointを変更しています。このプロパティのデフォルト値は(0.5, 0.5)であり、Layerに対する幾何学的な操作はanchorPointを基準に行われます。ここでは頂点を基準に回転させるため(0,0)を指定しました。
あとはCAReplicatorLayerで複製して回転させるだけです。
let triangleLayer = makeTriangleLayer(radius: bounds.width/2 - 50, center: boundsCenter, fontSize: 10)
let replicatorLayer = CAReplicatorLayer()
replicatorLayer.frame = bounds
replicatorLayer.addSublayer(triangleLayer)
replicatorLayer.instanceCount = 2
replicatorLayer.instanceTransform = CATransform3DMakeRotation(degreeToRadian(180), 0, 0, 1) //180度回転

layer.addSublayer(triangleLayer)
実行結果
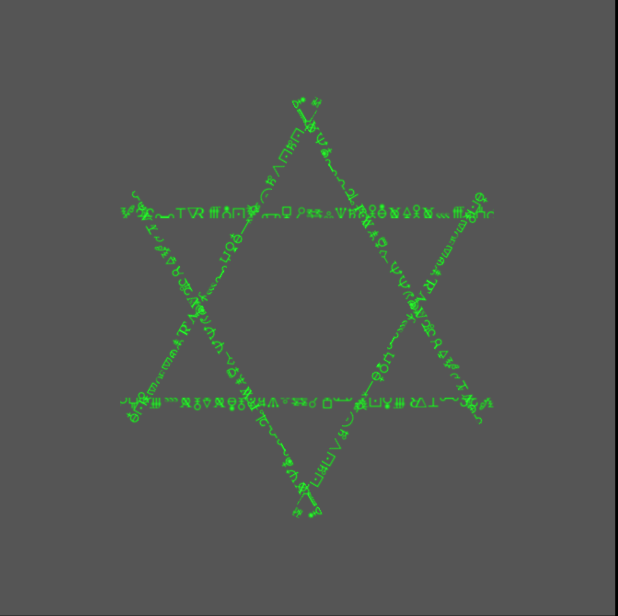
六芒星が完成しました。
アニメーション(伸長)
三角形を形成する一辺が、隣の頂点に向かって伸びるようなアニメーションを付与します。
makeTriangleLayer(radius:,center:,fontSize:)にCAKeyframeAnimationを追記します。
let extendAnimation = CAKeyframeAnimation(keyPath: "transform.scale.x")
extendAnimation.values = [0,1]
extendAnimation.duration = 1
extendAnimation.isRemovedOnCompletion = false
extendAnimation.fillMode = .forwards
textLayer.add(extendAnimation, forKey: nil)
実行結果
まとめ
CAReplicatorLayerを用いて六芒星を描画しました。図形を一定の規則に従って表示する際に非常に強力なクラスだと思います。
以下、これまでの作業の組み合わせ+α(六芒星を二重にしました)

CAGradientLayer
公式ドキュメントでは下記のように記載されています。
A layer that draws a color gradient over its background color, filling the shape of the layer (including rounded corners)
CAGradientLayerは、その名の通りグラデーションを描画するレイヤーです。
着色する
まずはカスタムビューいっぱいに適当な色を付けたCAGradientLayerを追加します。
let gradientLayer = CAGradientLayer()
gradientLayer.frame = bounds
gradientLayer.colors = [UIColor.red.cgColor, UIColor.blue.cgColor]
gradientLayer.startPoint = CGPoint(x: 0.0, y: 1.0)
gradientLayer.endPoint = CGPoint(x: 1.0, y: 0.0)
layer.addSublayer(gradientLayer)
実行結果
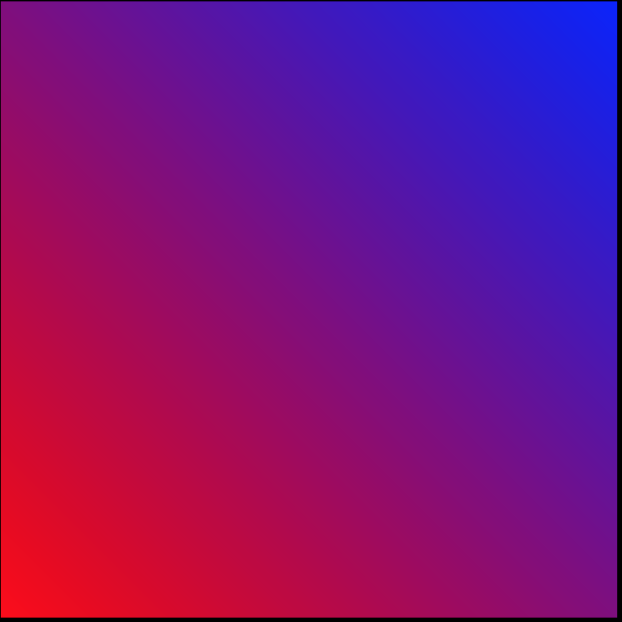
GradientLayerのcolorsにはグラデーションさせるCGColorの配列を指定します。またstartPoint,endPointで色が変化していく方向を決定します。
あとはGradientLayerでこれまでの作業で作成した魔法陣をマスクしてやることで着色が出来ます。
GradientLayerは親レイヤーをマスクすることは出来ないので、新たにCALayerをカスタムビューに追加する必要があります。
let maskLayer = CALayer()
maskLayer.frame = bounds
layer.addSublayer(maskLayer)
これまでの作業で作成したレイヤーは全てカスタムビュー直下のlayerにaddSublayerしていました。それをmaskLayerに対してaddSublayerする形に変更します。
すべての箇所を変更したらgradientLayerのmaskプロパティにmaskLayerを指定します。
let maskLayer = CALayer()
maskLayer.frame = bounds
gradientLayer.mask = maskLayer
実行結果
禍々しい色合いとなりましたが、レイヤーを無事マスクすることが出来ました。
完成
長く苦しい戦いでしたが、ようやく魔法陣が完成しました。
はじめは軽い気持ちで作り始めたものの、CoreAnimationの世界は奥が深く、その真髄に迫るにはまだまだ時間がかかりそうだと感じました。
以下には中央の渦と3D回転する円を追加し、アニメーションのbeginTimeをずらしてシーケンシャルにした上で、魔法陣の色がランダムに変化するように手を加えたものになります。
厨二病の発作を起こしたので、CoreAnimationで魔法陣を描いた pic.twitter.com/UD4twQn63p
— Kuso_Dev (@Dev30273009) October 13, 2019