Wikiを作り始めたメモ
前準備
rbenvがインストールされていること
セットアップ
$ mkdir wikigo
$ rbenv local 2.3.1 # rubyのバージョンを指定
$ bundle init # Gemfileを作る
Gemfileを編集してrailsのコメントを外す
そしたらRailsをインストール
$ bundle install --path vendor/bundle # 最新のRailsをvendor/bundleにインストールする
次にRailsアプリのひな形を作る
$bundle exec rails new .
サーバを起動して確認
wikigo $ bin/rails s
=> Booting Puma
=> Rails 5.0.0.1 application starting in development on http://localhost:3000
=> Run `rails server -h` for more startup options
Puma starting in single mode...
* Version 3.6.0 (ruby 2.3.0-p0), codename: Sleepy Sunday Serenity
* Min threads: 5, max threads: 5
* Environment: development
* Listening on tcp://localhost:3000
Use Ctrl-C to stop
http://localhost:3000/を開いてみる。と「Yay! You’re on Rails!」の画面が表示されればオッケー
モデルを作る
シンプルにタイトルと説明文だけで作る。履歴やユーザー情報などをはあとで考える。
wikigo $ bin/rails g scaffold Word title:string body:text
Running via Spring preloader in process 23959
      invoke  active_record
      create    db/migrate/20160923142333_create_words.rb
      create    app/models/word.rb
      invoke    test_unit
      create      test/models/word_test.rb
      create      test/fixtures/words.yml
      invoke  resource_route
       route    resources :words
      invoke  scaffold_controller
      create    app/controllers/words_controller.rb
      invoke    erb
      create      app/views/words
      create      app/views/words/index.html.erb
      create      app/views/words/edit.html.erb
      create      app/views/words/show.html.erb
      create      app/views/words/new.html.erb
      create      app/views/words/_form.html.erb
      invoke    test_unit
      create      test/controllers/words_controller_test.rb
      invoke    helper
      create      app/helpers/words_helper.rb
      invoke      test_unit
      invoke    jbuilder
      create      app/views/words/index.json.jbuilder
      create      app/views/words/show.json.jbuilder
      create      app/views/words/_word.json.jbuilder
      invoke  assets
      invoke    coffee
      create      app/assets/javascripts/words.coffee
      invoke    scss
      create      app/assets/stylesheets/words.scss
      invoke  scss
      create    app/assets/stylesheets/scaffolds.scss
テーブルを作る
wikigo $ bin/rails db:create db:migrate
Database 'db/development.sqlite3' already exists
Created database 'db/test.sqlite3'
== 20160923142333 CreateWords: migrating ======================================
-- create_table(:words)
   -> 0.0015s
== 20160923142333 CreateWords: migrated (0.0017s) =============================
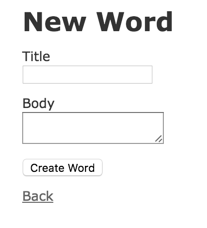
http://localhost:3000/words/newにアクセスしてみると、入力フォームができているのが確認できる。
キーワードでアクセスできるようにする
 class Word < ApplicationRecord
+  def self.find(input)
+    if input.is_a?(Integer)
+      super
+    else
+      find_by_title(input)
+    end
+  end
+
+  def to_param
+    title
+  end
 end
自動でキーワードへのリンクがされるようにする
 module WordsHelper
+  def add_word_link(body)
+    word_list.each do |w|
+      body.sub!(w, link_to(w, url_for(controller: :words, action: :show, id: w)))
+    end
+    body
+  end
+
+  private
+  def word_list
+    Word.all.pluck(:title)
+  end
 end
+++ b/app/views/words/show.html.erb
@@ -7,7 +7,7 @@

 <p>
   <strong>Body:</strong>
-  <%= @word.body %>
+  <%= raw add_word_link(@word.body) %>
 </p>
Routesを書き換えて/wikiでアクセスできるようにする
ついでに/へのアクセスをwords#indexに変更
 Rails.application.routes.draw do
-  resources :words
-  # For details on the DSL available within this file, see http://guides.rubyonrails.org/routing.html
+  root to: 'words#index'
+  resources :words, path: :wiki
 end
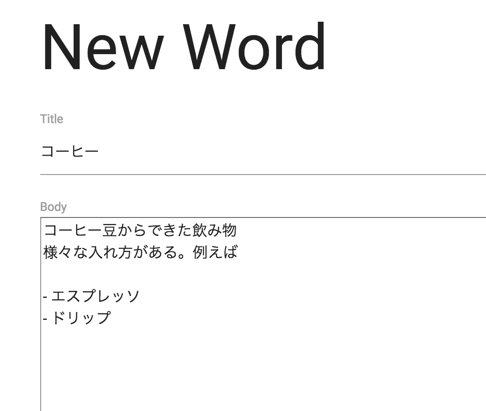
見た目を整えてなんとなくできた
Todo
- マークダウンのライブプレビュー
- マークダウンエディタの導入
- ファイルのアップロード
- ユーザー認証
- テストを書く・CIの設定
- Deploy to Herokuボタン作ってみたい
アイデア
- 記事に親子関係を持たせる

