はじめに
固定IPサービスといえばマイIP(株式会社インターリンク)が有名でしょうか。
1アカウント1,000円(税抜)/月ですので、リーズナブルです。
しかし、もっと安価に使いたい&複数アカウントでも使いたい、というニーズもあると思います。
自分でサーバを管理していくという手間は発生しますが、
安価かつ柔軟に(≒複数人で)固定IPアドレスを使えるよう、
VPNサーバを立ち上げる手順をまとめます。
手順を作るにあたり詰まってしまった部分は、以下のWebページで解消できました(順不同)。
感謝申し上げます。
- VPNサーバー構築(OpenVPN) (サイト:CentOSで自宅サーバー構築)
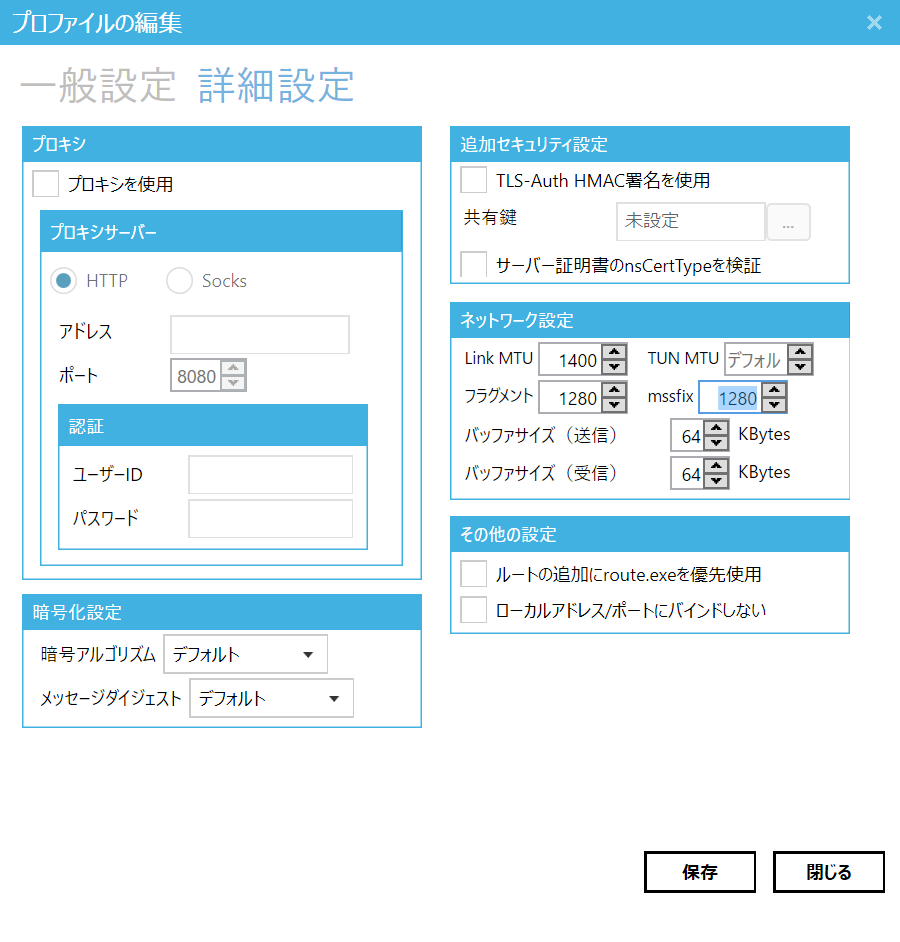
- OpenVPNで通信が遅い場合 (サイト:パソコン鳥のブログ)
作業前提(自己責任でご判断ください)
- 今回は「さくらのVPS 512プラン(月々税抜635円 2016/02/06現在)」を使う
- CentOS7.1
- OpenVPN
- ほかの機能(Webサーバ等)は一切設けない
- 複数人で使えるようにする
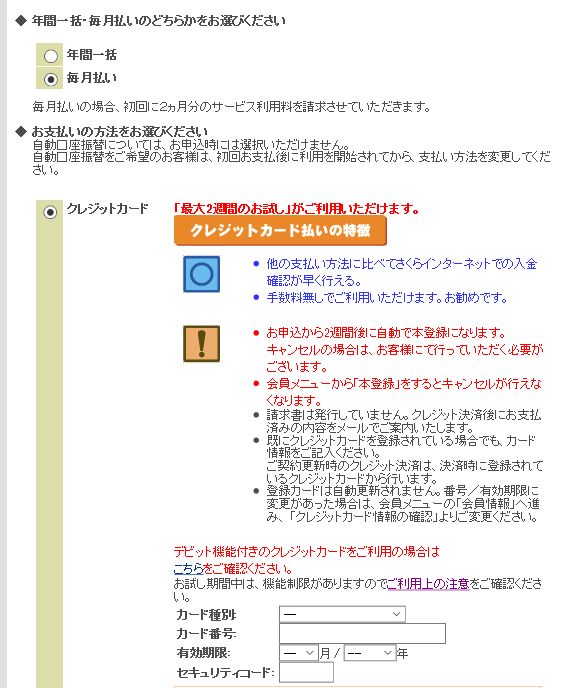
- クレジットカード決済にすると2週間お試しが可能(2016/02/06現在)
- お試し期間中は回線速度制限などがあり充分には評価できない可能性がある
- 説明の簡略化のため、ほぼすべてrootで作業
- コマンドの入力、viによるファイルの編集などがあり、漏れなく作業が必要
- 契約・請求・キャンセル方法等については、さくらインターネット株式会社からの案内に従ってください
問題なければ始めましょう。
作業手順
申込の開始
さくらのVPSの「2週間お試し無料!お申込みはこちら>」から申込を開始します。

リージョンとスペックの選択では、512プランを選択してください。
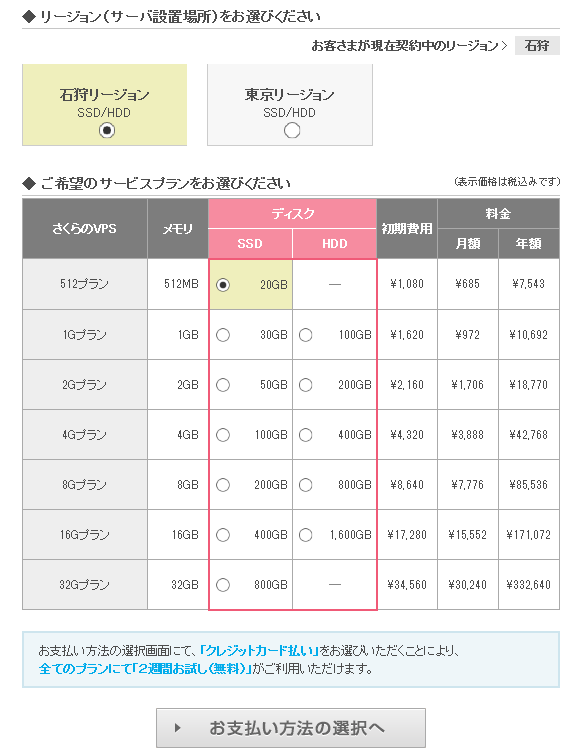
確認画面にも記載がありますが、無料期間中に解約すれば料金はかかりません(2016/02/06現在)。

仮登録完了通知の受信・コントロールパネルへのログイン
申込が確定してしばらく経過すると、「仮登録完了のお知らせ」という件名のメールが届きます。
VPSコントロールパネルにログインして状態を確認してみましょう。
 ▼サーバ情報

  [サーバ基本情報]
   IPアドレス:XXX.XXX.XXX.XXX

  [管理用ユーザ]
   ユーザ名      :XXXXXXXXXX
   初期パスワード:XXXXXXXXXX

  [VPSコントロールパネル ログイン情報]
     URL       :https://XXXXXXXXXXXXXXXXXXXXXXXXXXXXXX
     IPアドレス:XXX.XXX.XXX.XXX
     パスワード:XXXXXXXXXX

  ※ご提供時の初期状態ではサーバは停止状態になっていますので、利用を開始
    する際は「VPSコントロールパネル」にログインしサーバを起動して下さい。
サーバ一覧の確認
サーバ一覧に、作られたばかりのサーバが表示されています。初期状態は「停止中」です。

カスタムOSインストールの開始
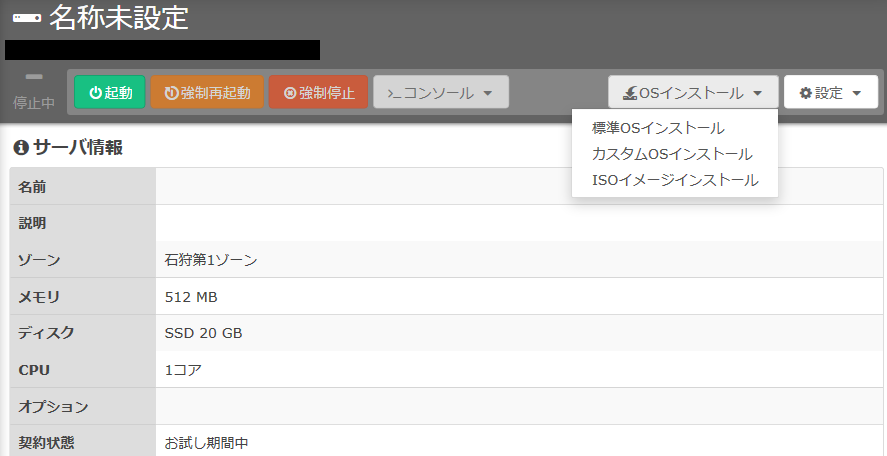
サーバをクリックすると詳細な情報を表示する画面に遷移しますので、
「OSインストール」のプルダウンから「カスタムOSインストール」を選択してください。
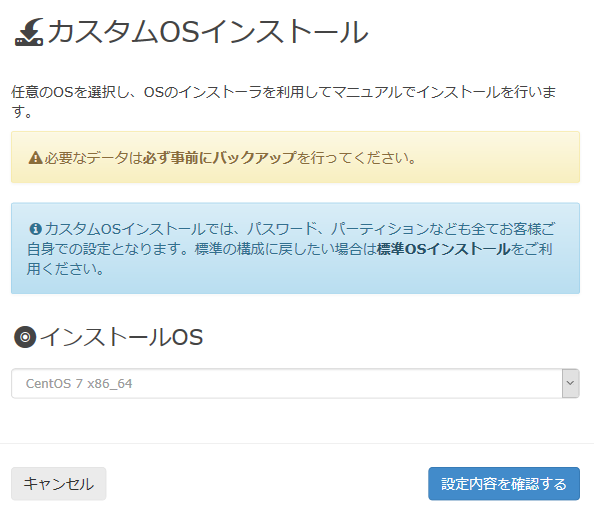
インストールOSに「CentOS7 x86_64」を選択して次に進みます。
インストールが開始されると、コンソールを開いて作業を進めるように指示されます。
「VNCコンソール(HTML5版)を起動」で次に進みます。

インストール初期画面が表示されていますので、エンターキーで次に進みます。
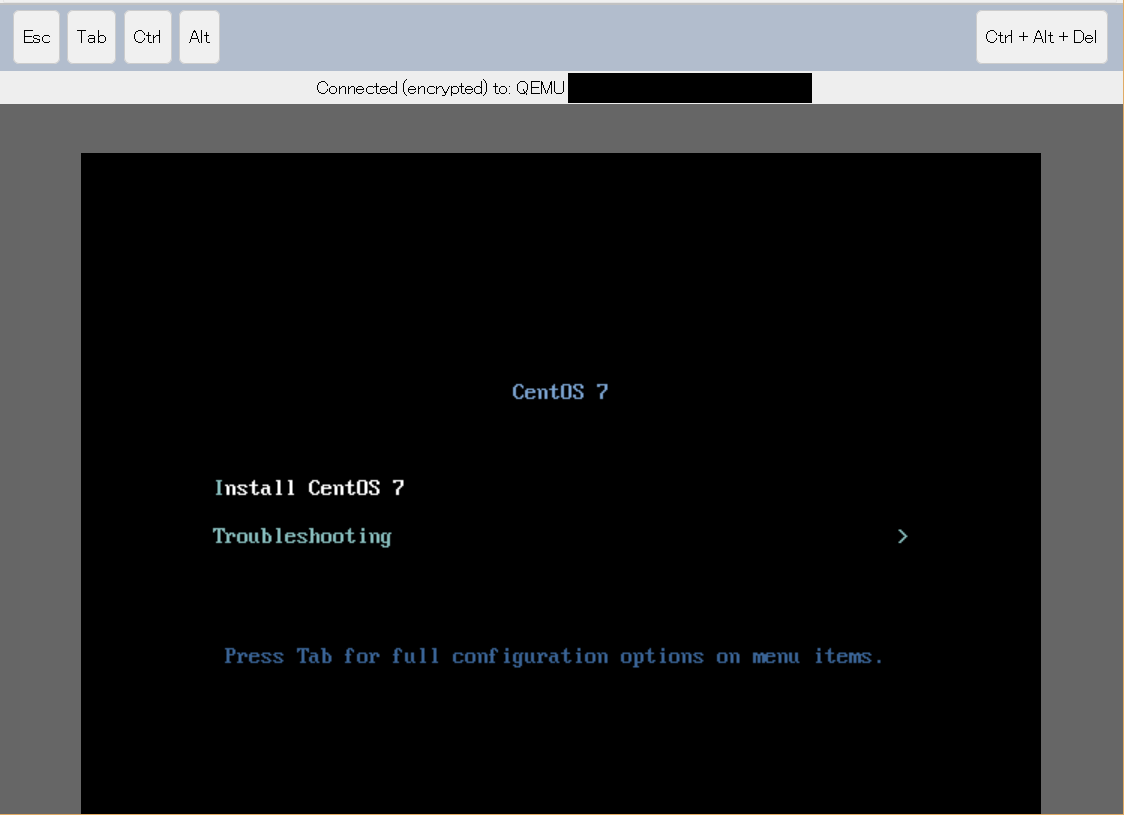
ここから先の画面は少し広くなりますので、ウィンドウを適宜広げてください。
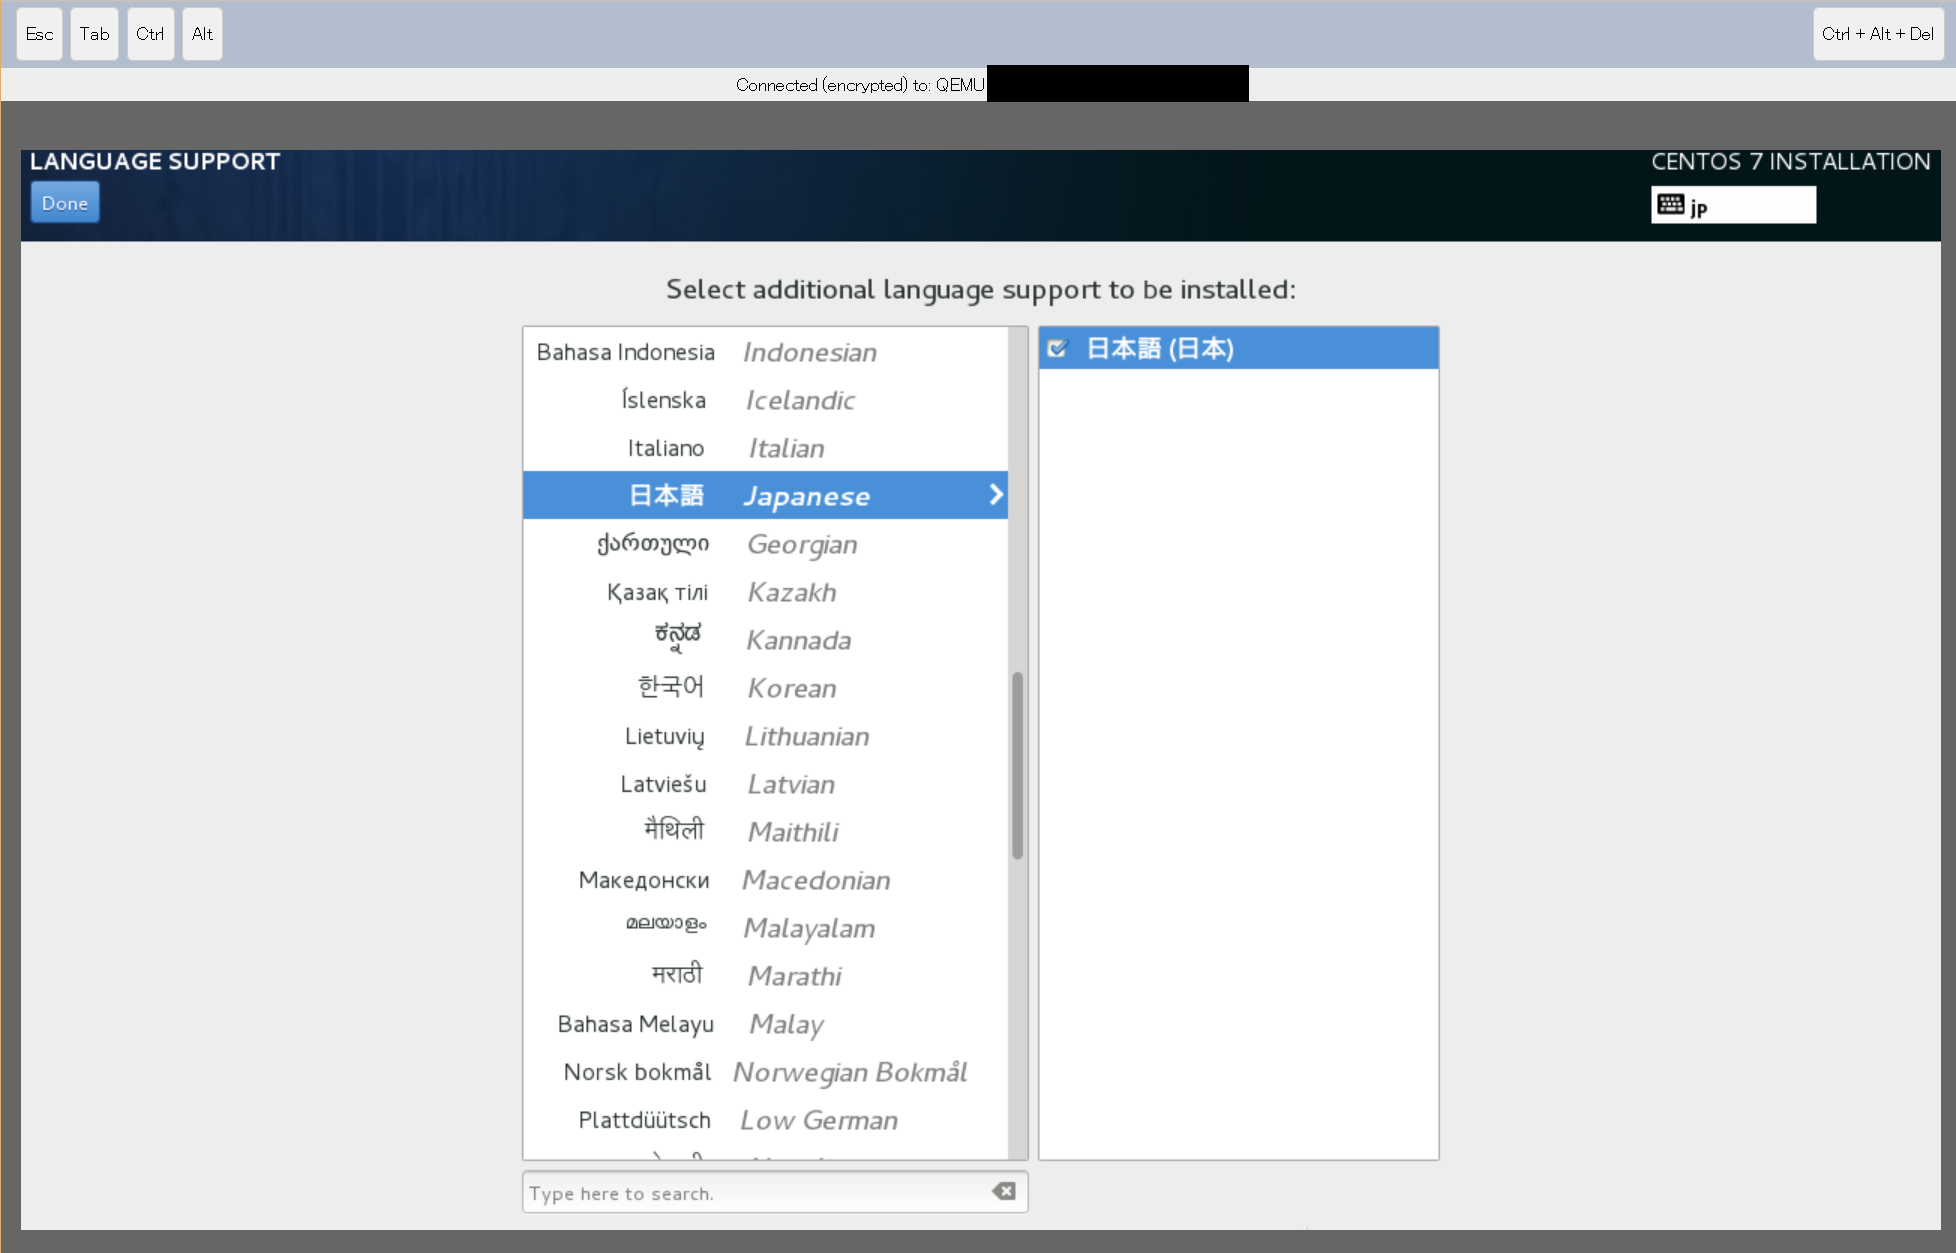
まずは「LANGUAGE SUPPORT」で言語選択画面に入り、日本語を追加して確定(Done)します。
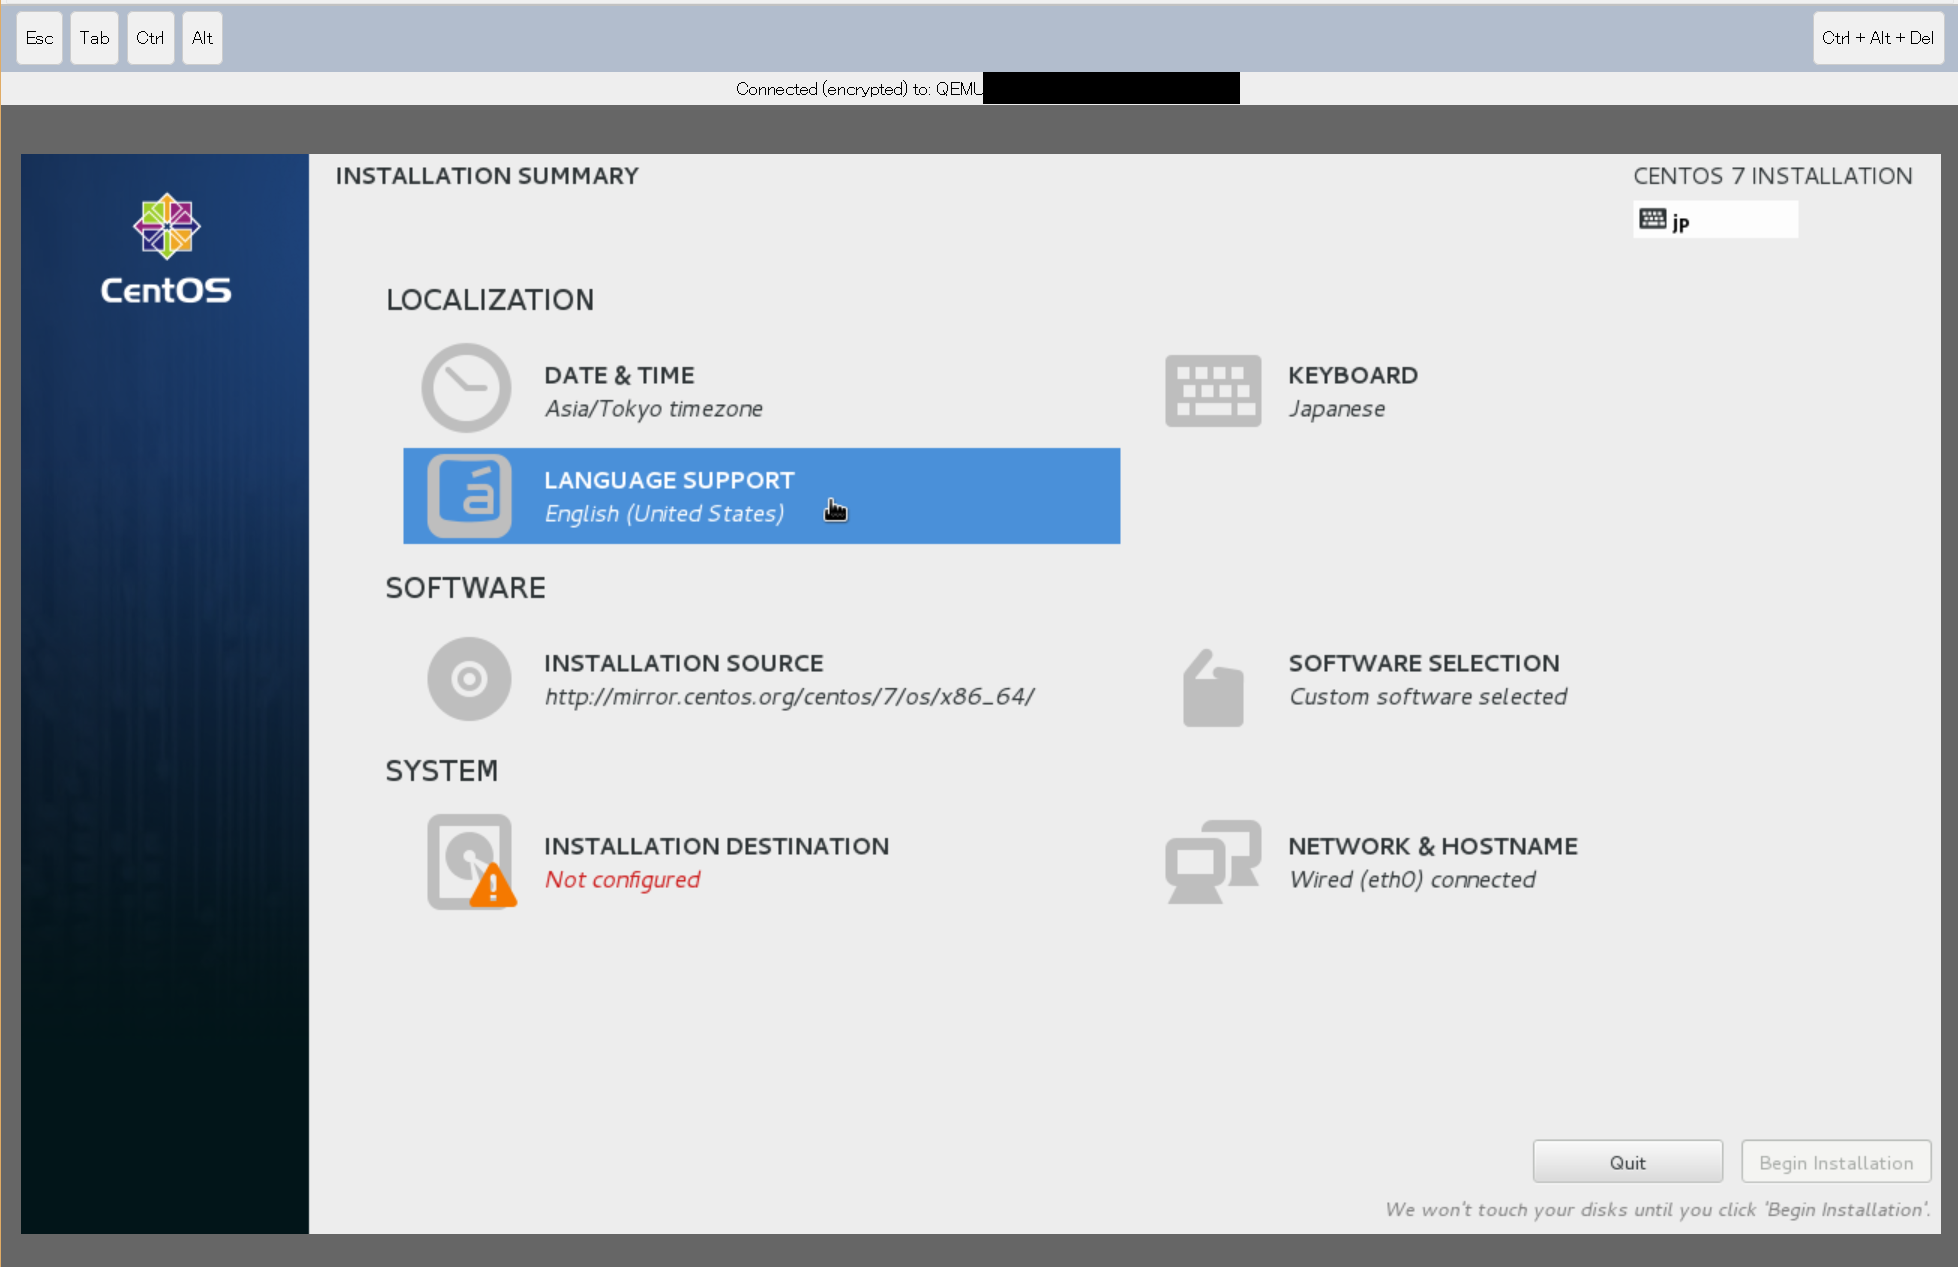
次に「INSTALLATION DESTINATION」でインストール先のディスク選択画面に入ります。
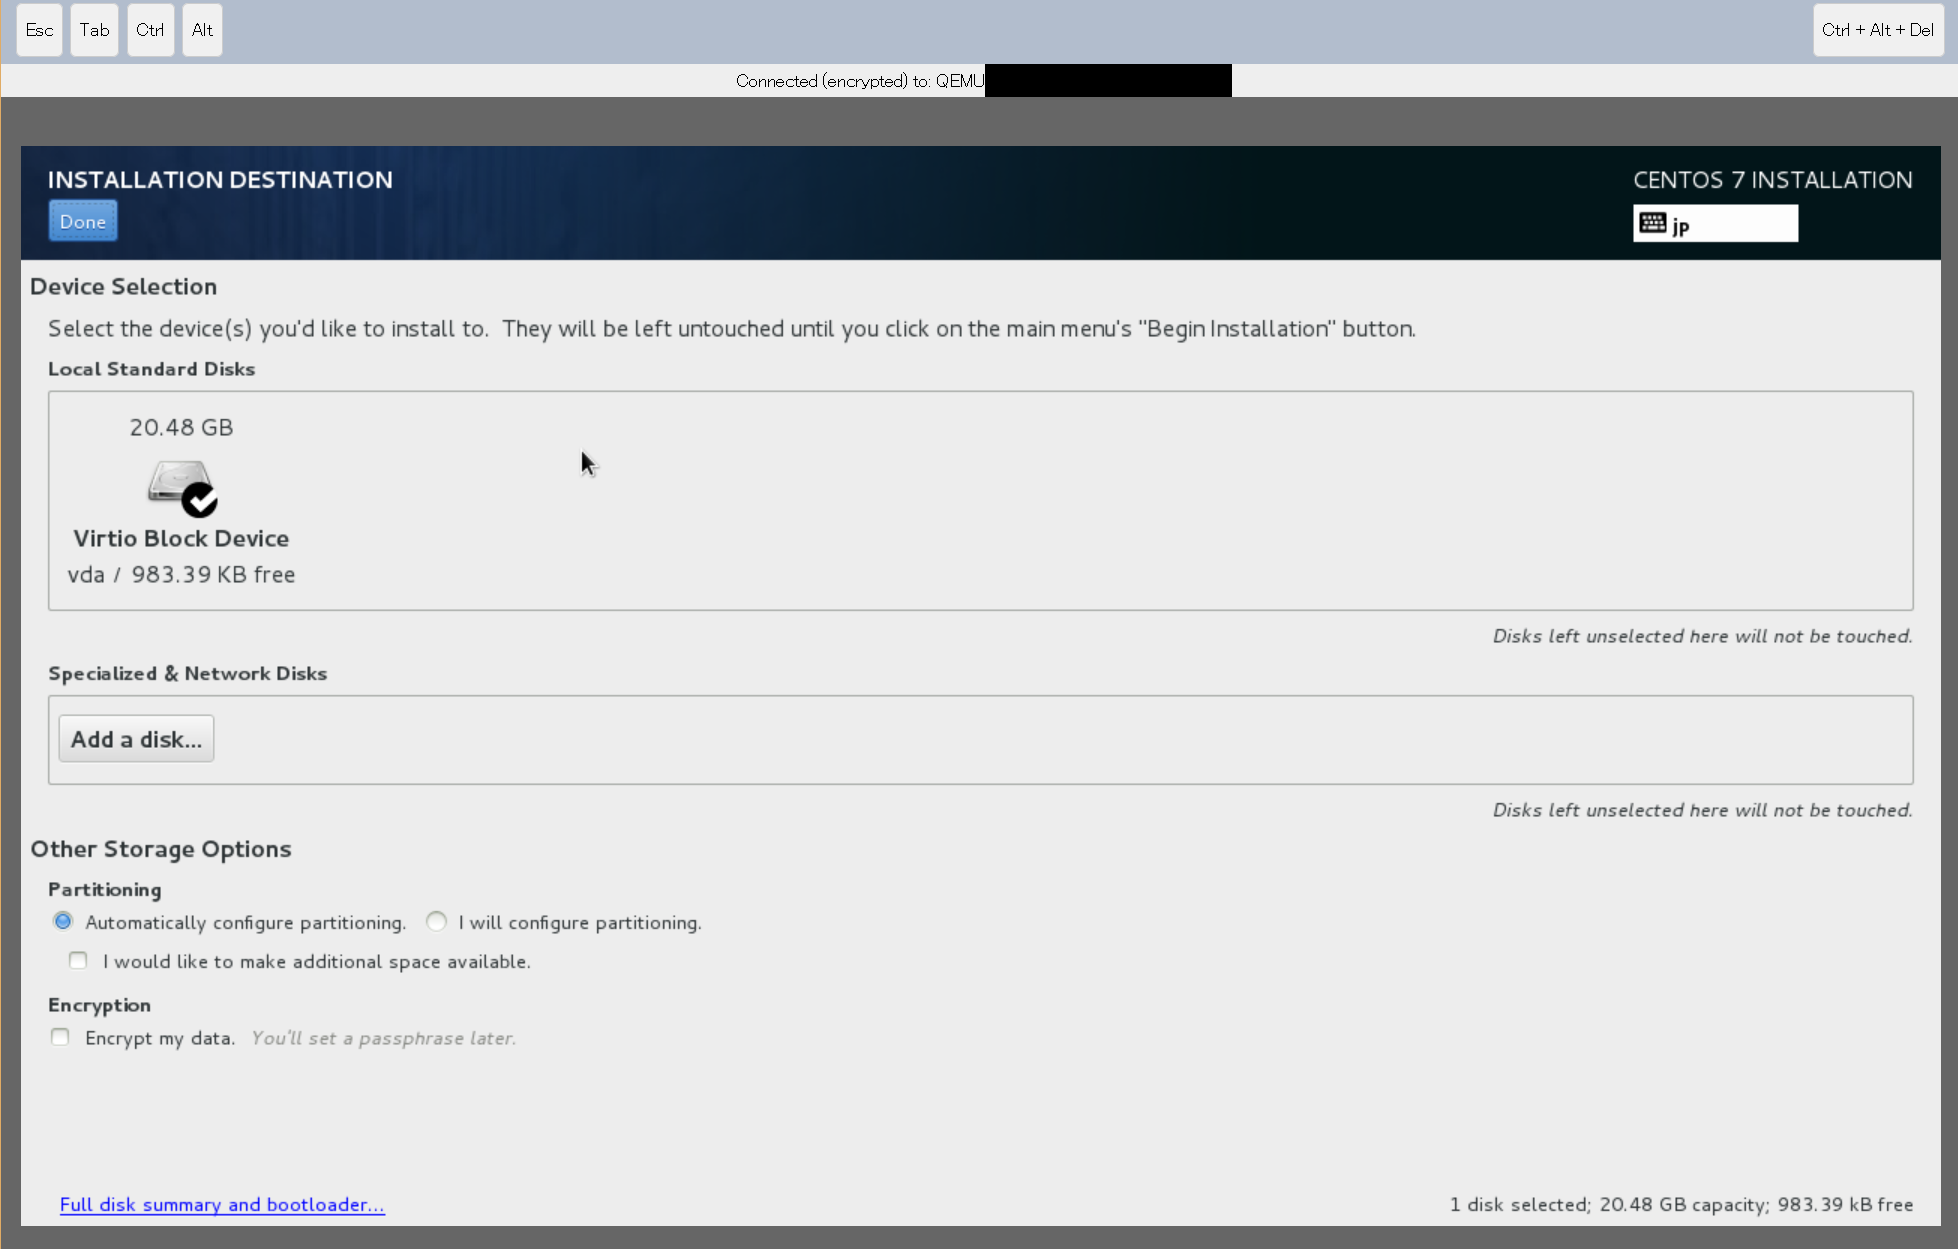
ここで、追加できるディスクはありませんのでいったん確定(Done)してください。
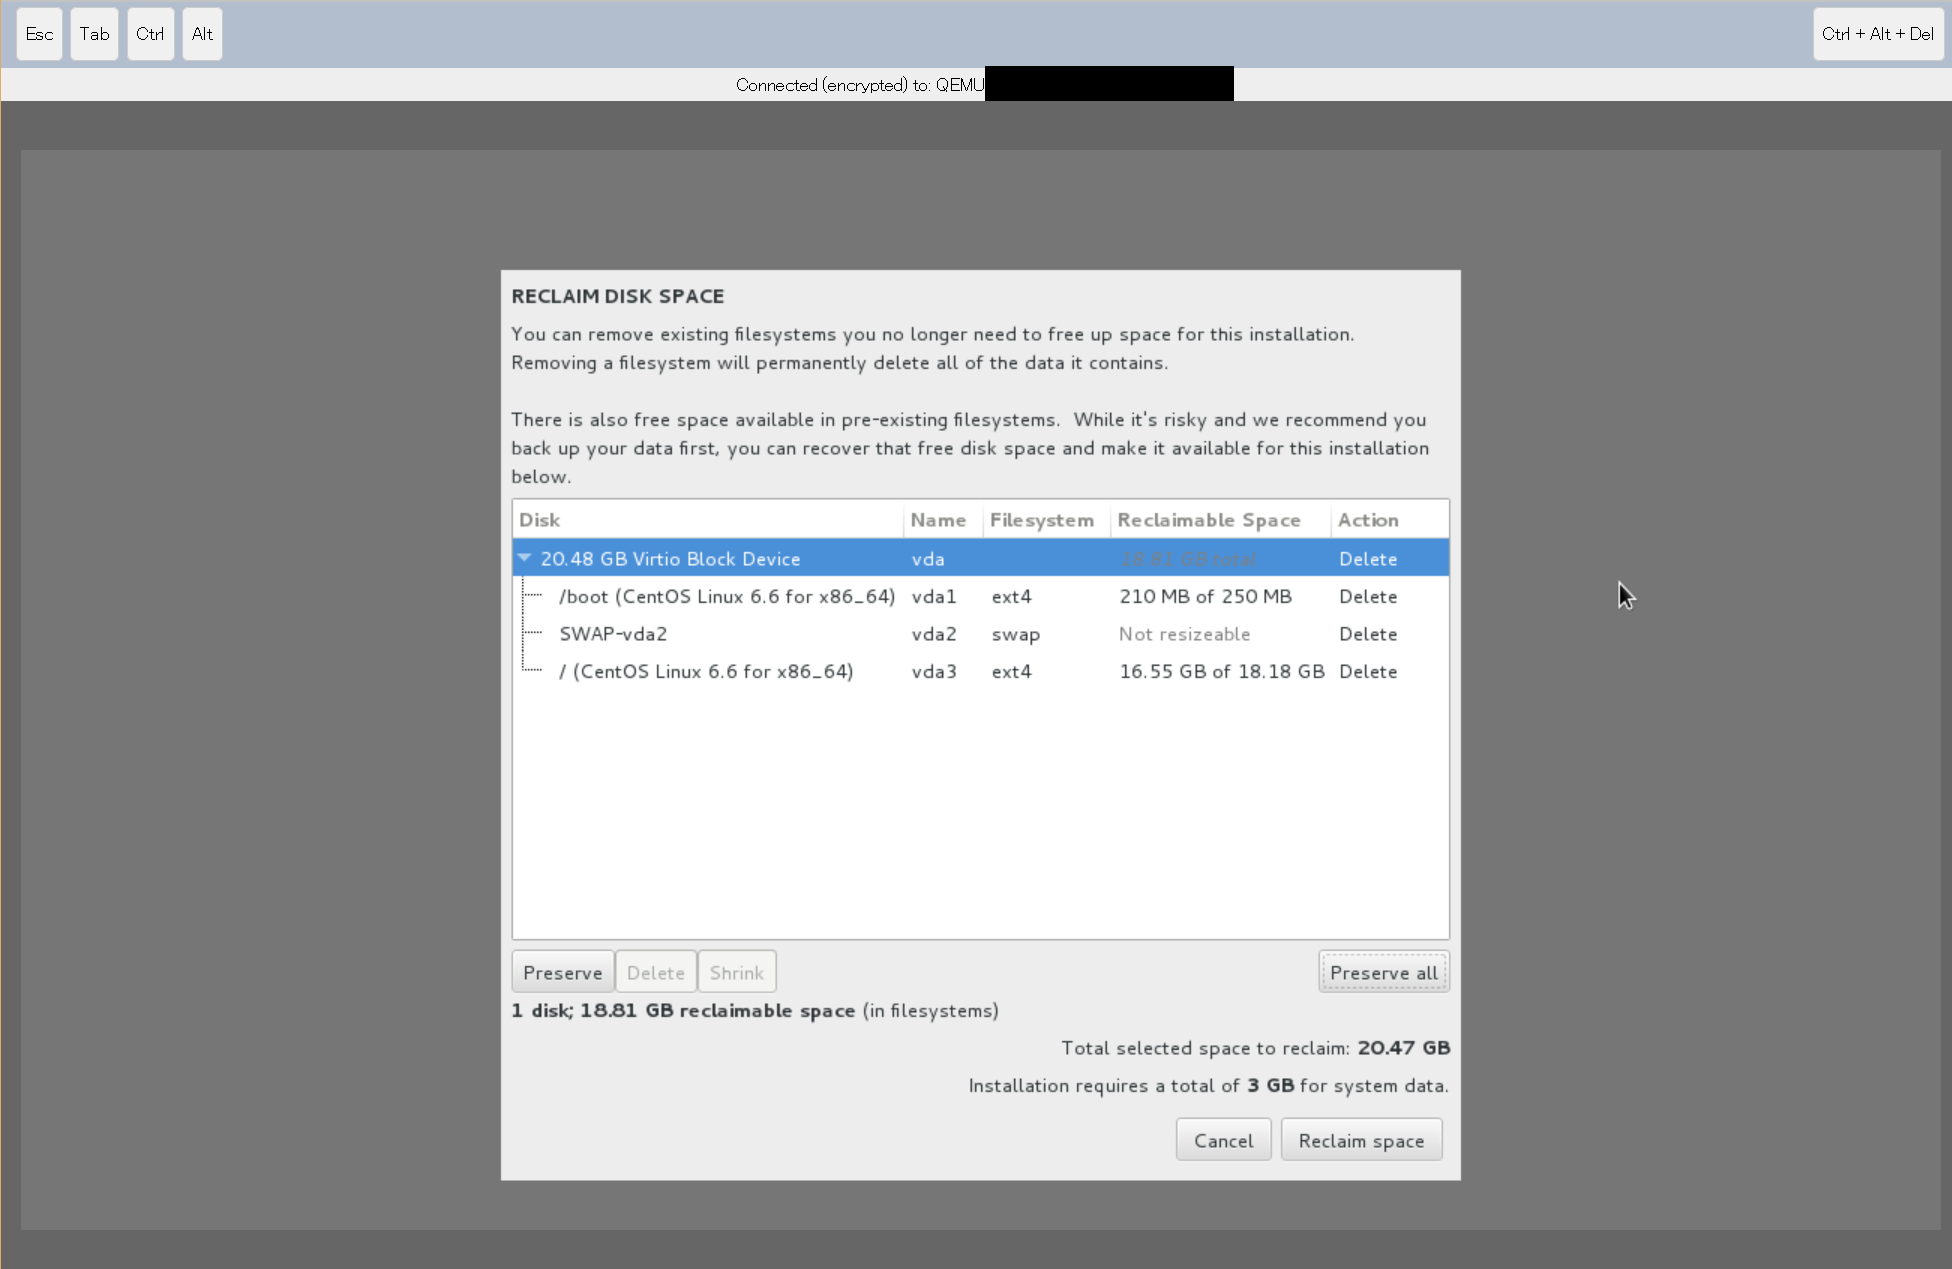
次のような画面が表示されます。
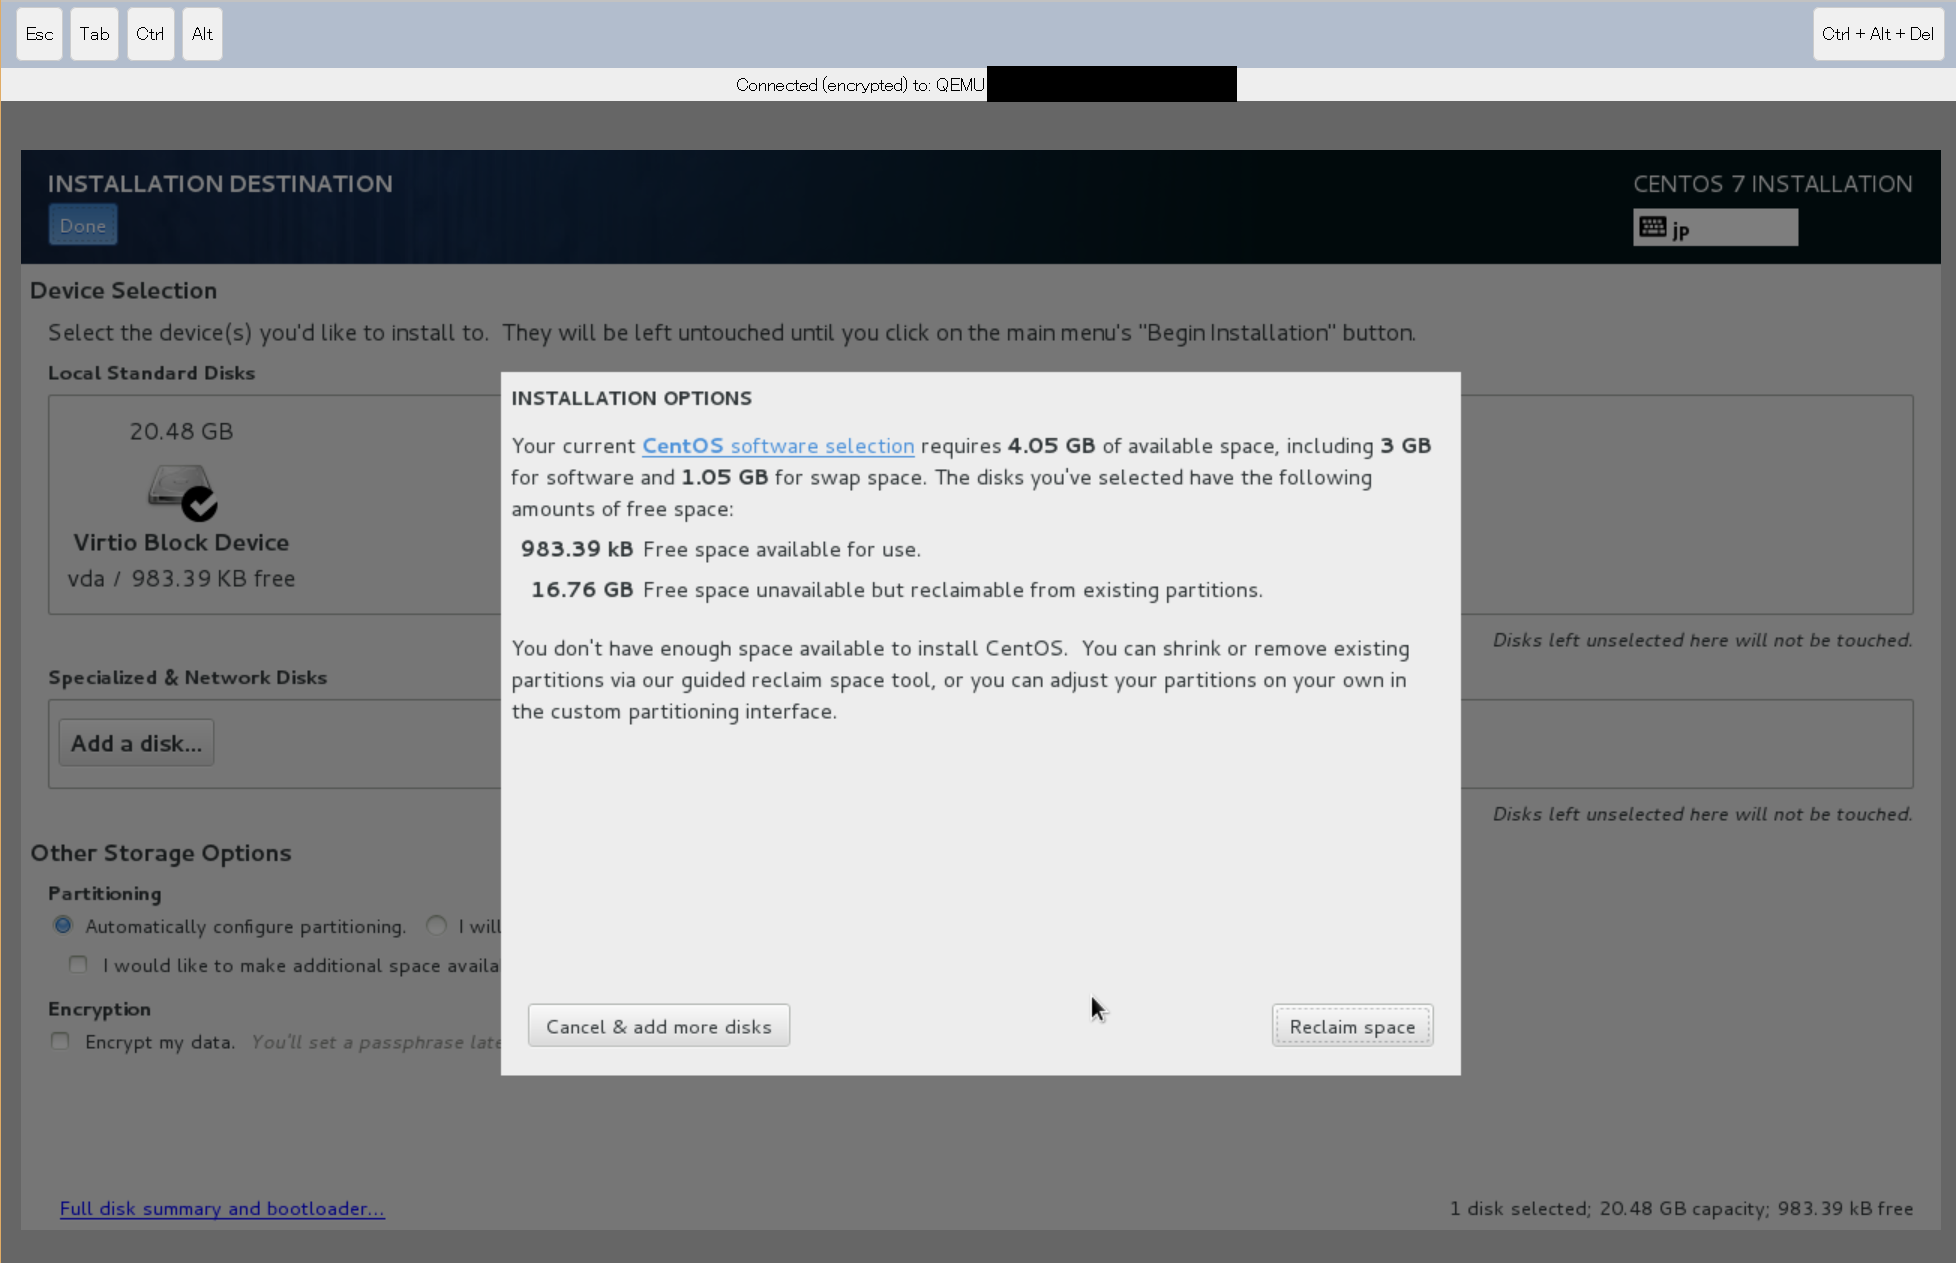
もともとインストールされていた別のバージョンのCentOSがディスクを消費していて、
このままではインストールできません。「Reclaim space」で次に進みます。
今回は細かい設定をせず、「Delete all」を実行します。
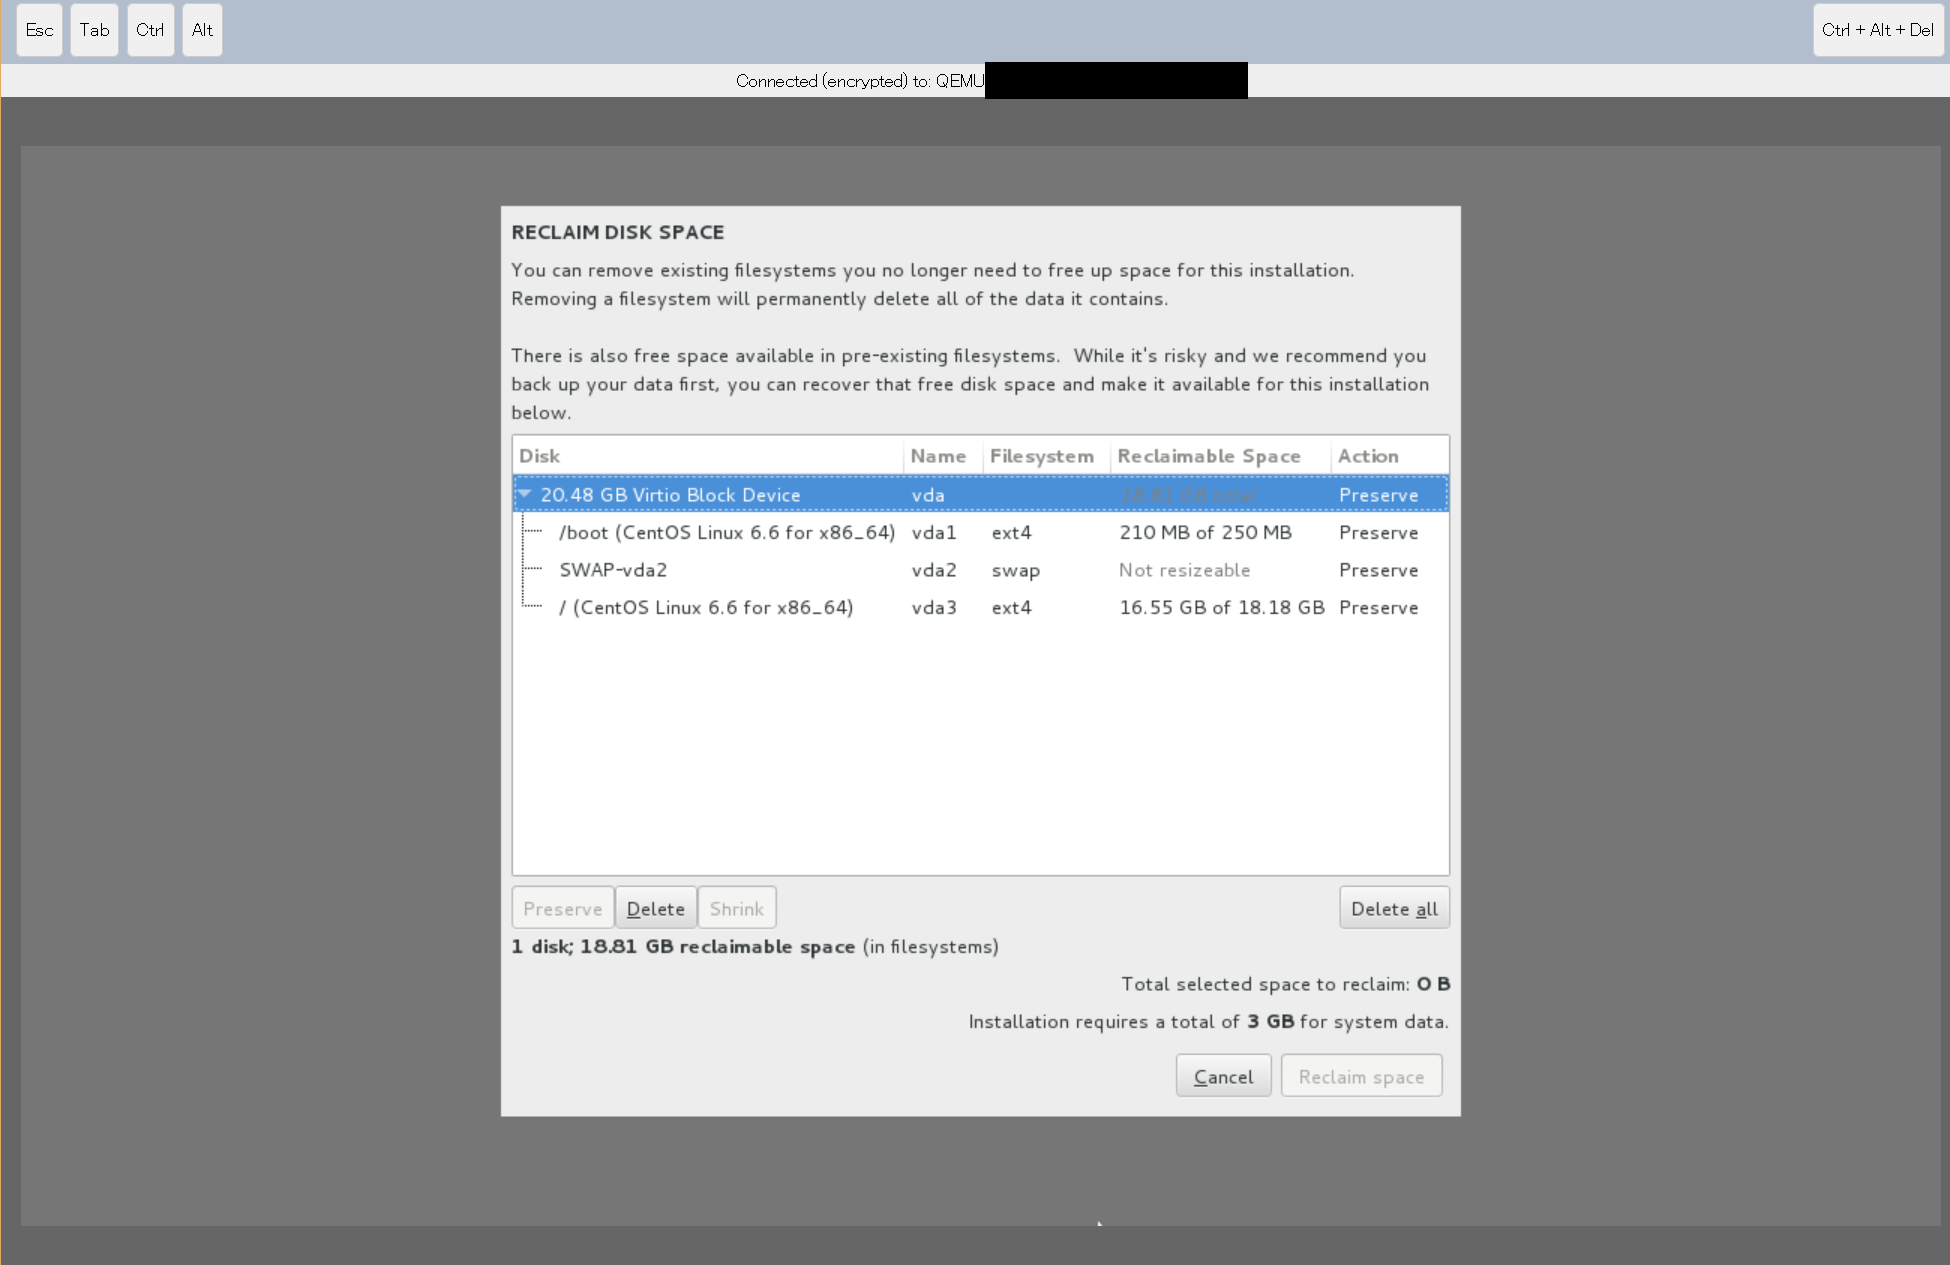
すべてのディスクのActionが「Delete」に変わったのを確認したら、「Reclaim space」を実行します。
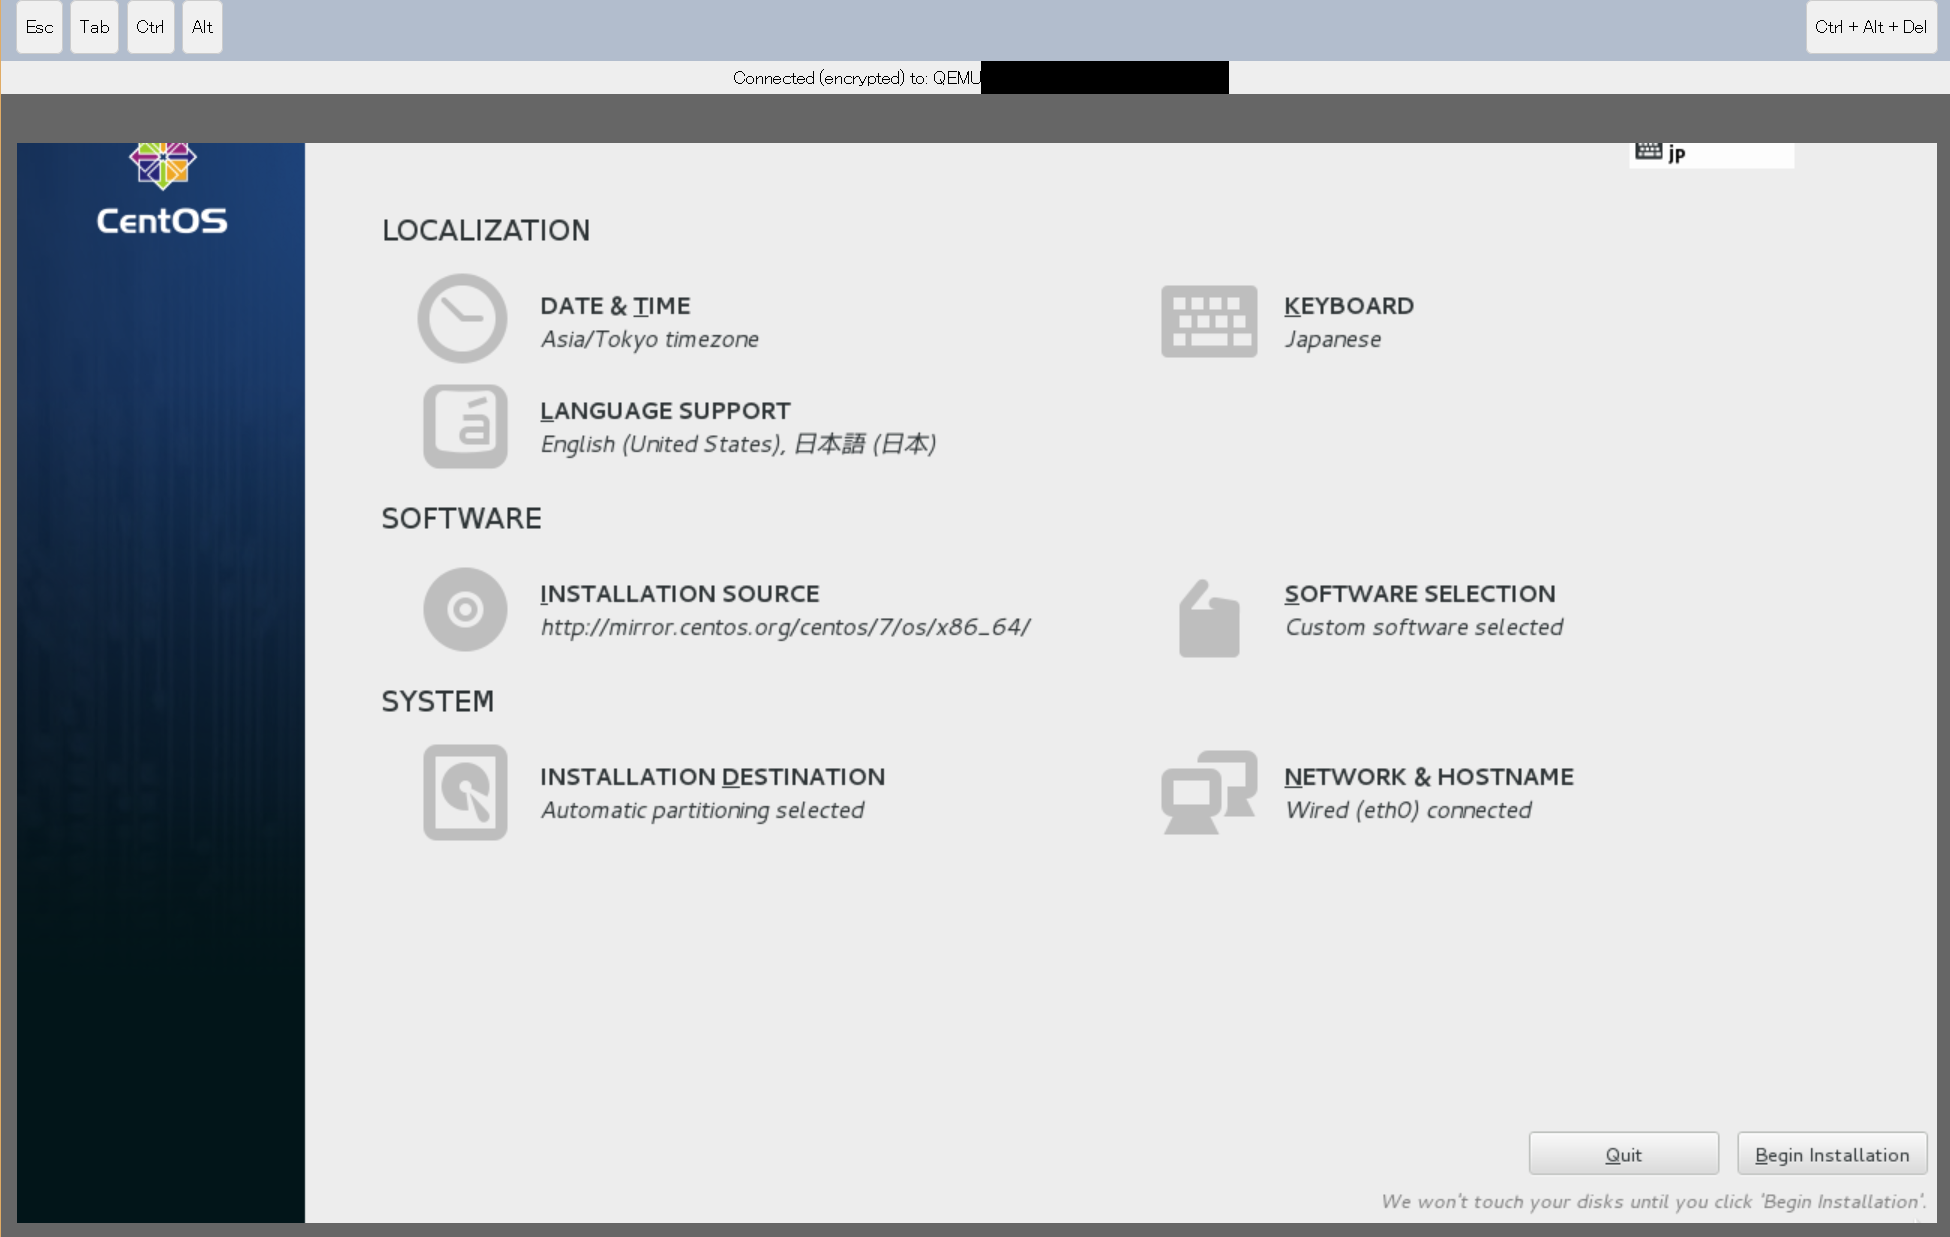
元の画面に戻ったら、「Begin Installation」で次に進みます。
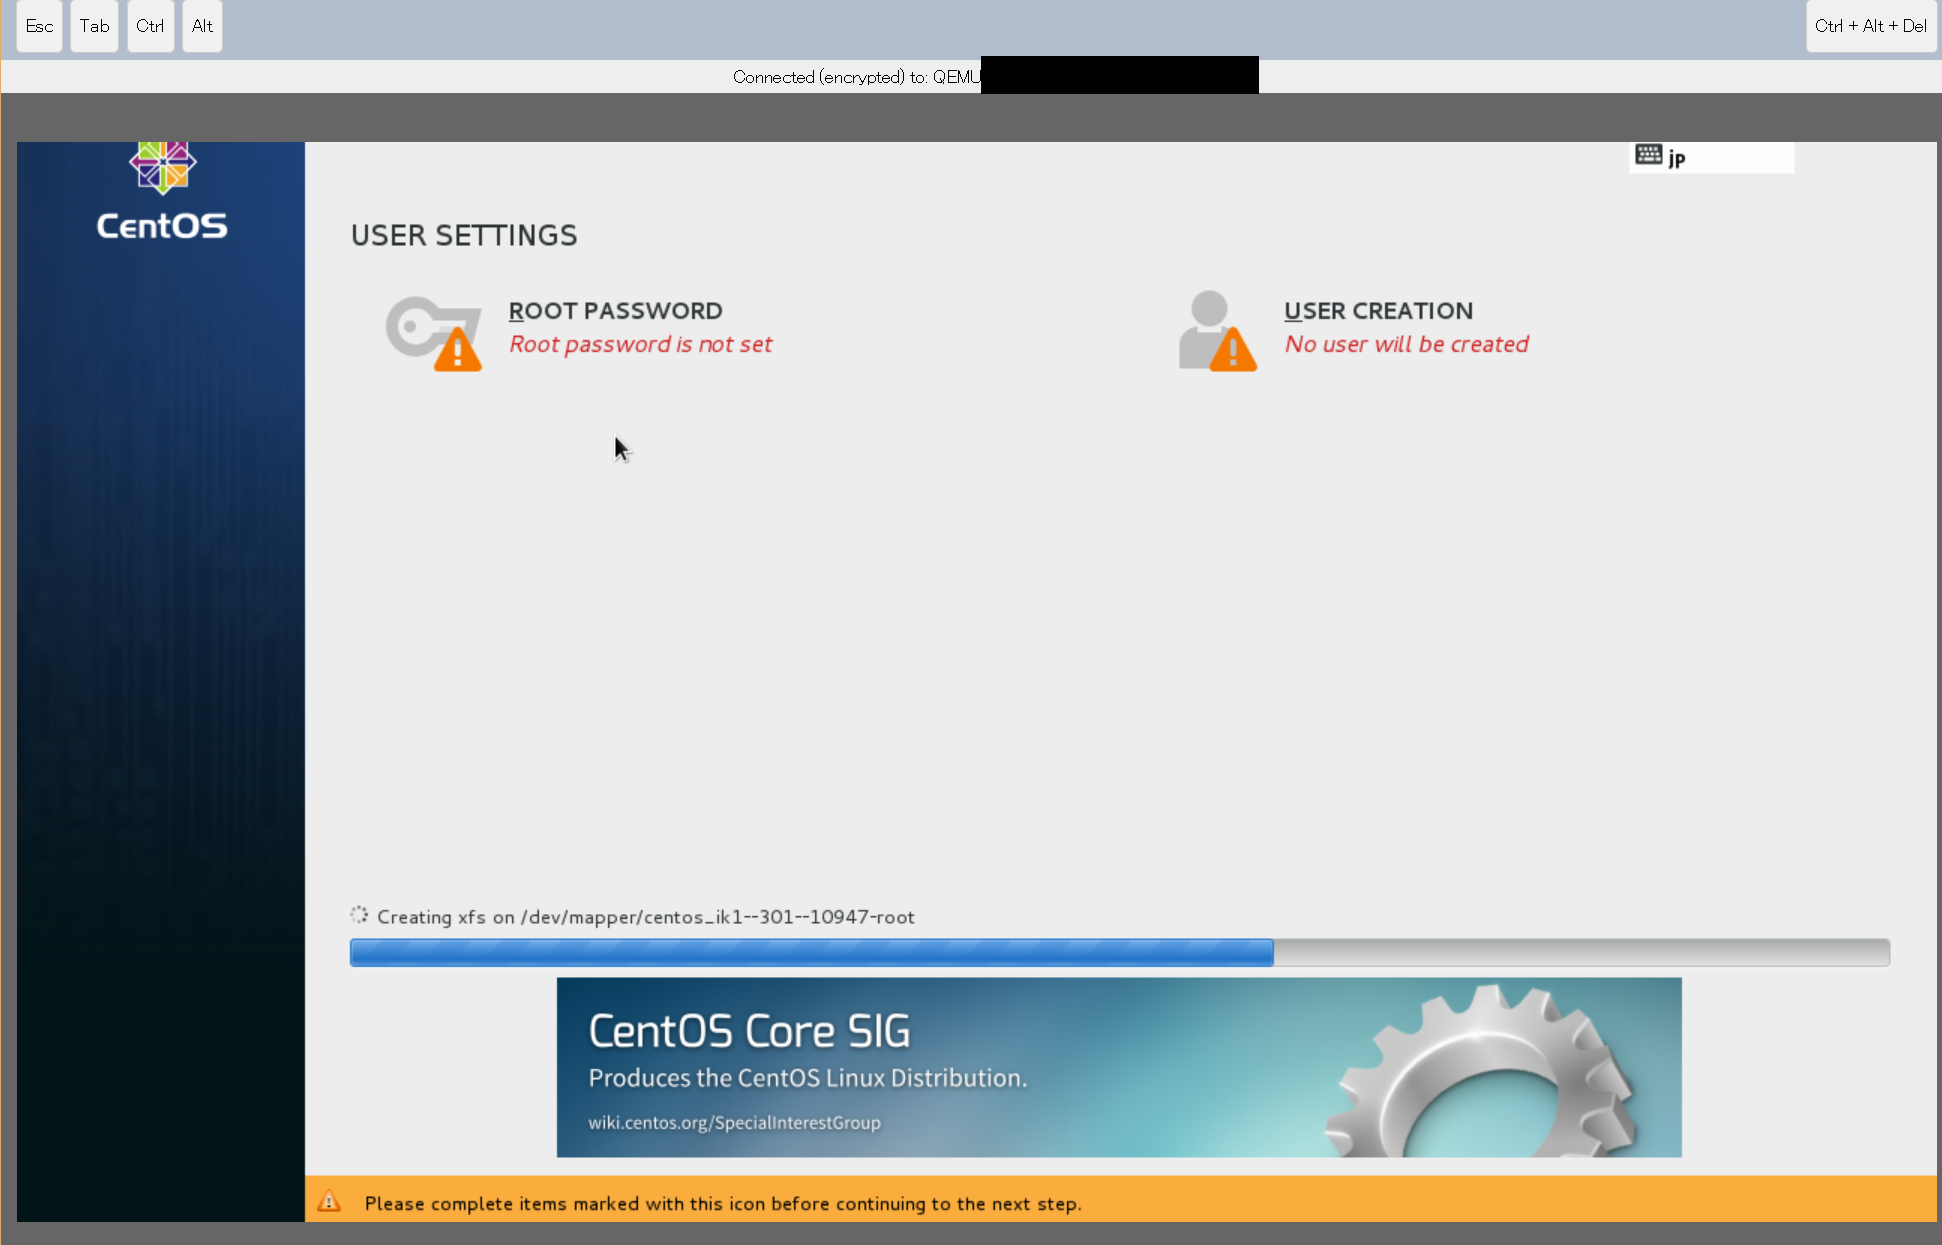
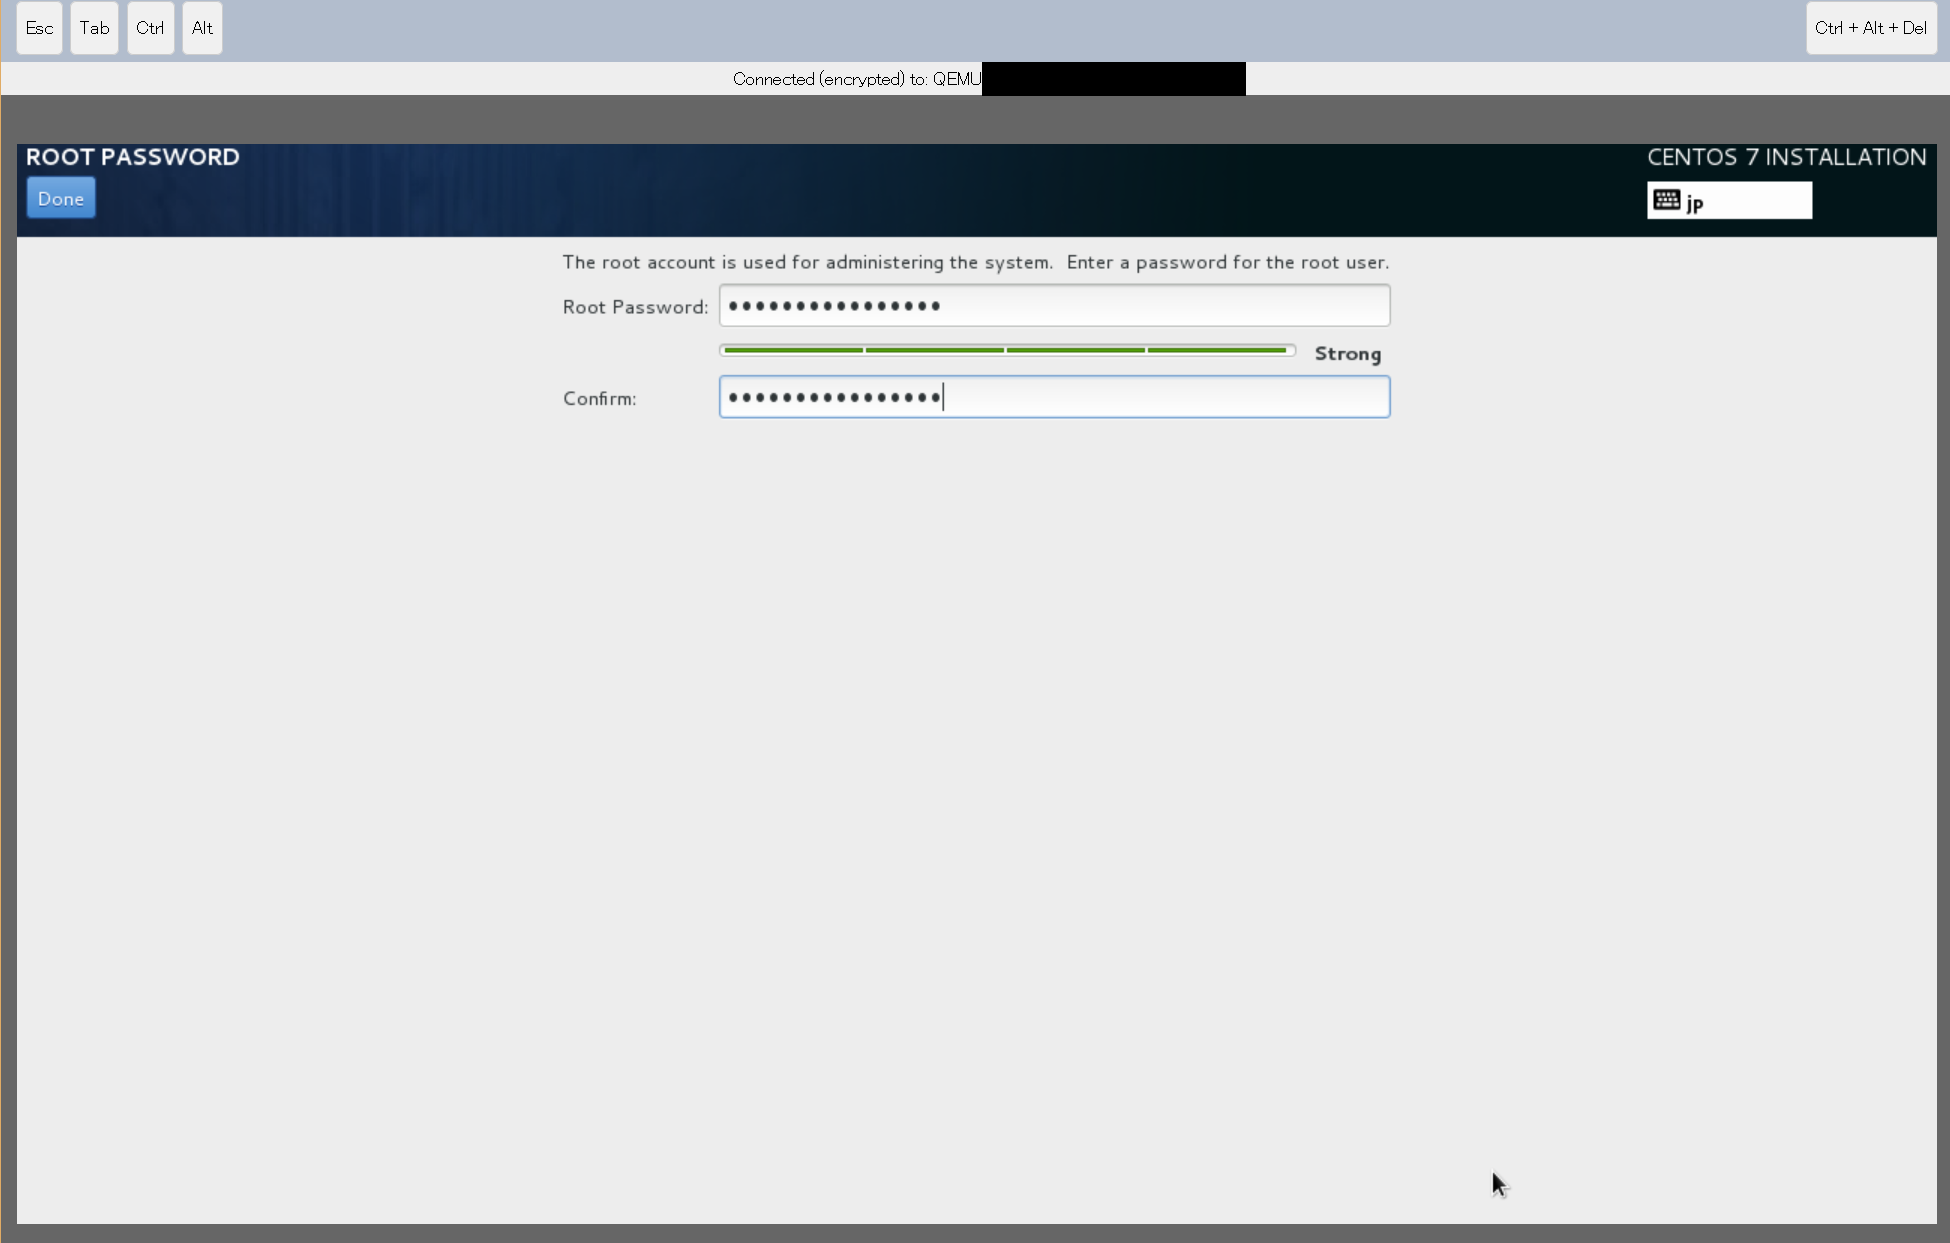
インストールが始まります。待っている間に、「ROOT PASSWORD」を設定しておきましょう。
インストールが終わると、自動的にシャットダウンしますので、サーバの一覧に戻り、
サーバの左側にあるチェックボックスにチェックを入れて「起動」しましょう。
状態が「稼働中」に変化します。

SSHログイン
ここから先はSSH経由で作業します。
WindowsならTeraTermなど、Macならターミナルなどでログインしてください。
ログイン先のサーバはメールに記載されているIPアドレス、ユーザはroot、パスワードはインストール中に設定したパスワードです。
rootパスワードの設定
ここから先はすべてrootで作業します。
先ほど設定したrootのパスワードが気に入らない場合は修正しておきましょう。
$ passwd root
Changing password for user root.
New password:パスワード入力
Retype new password:パスワード再入力
passwd: all authentication tokens updated successfully.
SELinuxの無効化
"SELINUX=disabled"となっている場合は変更の必要がありません。先に進みましょう。
$ vi /etc/selinux/config
#SELINUX=enforcing
SELINUX=disabled
SSHログイン用ユーザの追加
SSHでログインする際、最初からrootでログインするのはセキュアではないため、
別のユーザを作り、パスワードを設定します。
今後は、別ユーザでログインしてからrootになる、という流れを作るわけです。
$ useradd sshuser
$ passwd sshuser
Changing password for user sshuser.
New password:パスワード入力
Retype new password:パスワード再入力
passwd: all authentication tokens updated successfully.
rootでのSSHログインの無効化
SSHでログインする際、rootでのログインを許可しないように設定します。
$ vi /etc/ssh/sshd_config
#PermitRootLogin yes
PermitRootLogin no
変更を反映します。
$ systemctl restart sshd.service
次回以降のログインの流れについて触れておきます。
先ほど作ったsshuserでログインした後、rootになるには以下のように入力します。
$ su -
Password:パスワード入力
sshuserでログインする流れを確認したところで、
SELinuxの設定変更の反映もしておきたいので、サーバを再起動します。
$ reboot
再度SSHでアクセスできるようになったら、sshuserでログインし、rootになります。
IPフォワーディングの有効化
$ vi /etc/sysctl.d/10-ipv4.conf
#追記
net.ipv4.ip_forward = 1
変更を反映します。
$ sysctl -p /etc/sysctl.d/10-ipv4.conf
net.ipv4.ip_forward = 1
openssl設定の編集
$ vi /etc/pki/tls/openssl.cnf
#default_days   = 365                   # how long to certify for
default_days    = 3650                  # how long to certify for
#default_crl_days = 30                  # how long before next CRL
default_crl_days = 3650                 # how long before next CRL
openvpnのインストール
$ yum -y install epel-release
$ yum -y install openvpn
$ yum -y install wget
この後、設定をしていくわけですが、先にパスワードを1つ決めておいてください。
各種証明書の作成時などに使います。
**パスワード(A)**とします。
CA証明書・秘密鍵の作成
$ cd /usr/local/src/
$ wget https://github.com/OpenVPN/easy-rsa/archive/master.zip
$ unzip master.zip
$ cp -r easy-rsa-master/easyrsa3/ /etc/openvpn/
$ rm -fr easy-rsa-master/
$ cd /etc/openvpn/easyrsa3/
$ ./easyrsa init-pki

init-pki complete; you may now create a CA or requests.
Your newly created PKI dir is: /etc/openvpn/easyrsa3/pki

$ ./easyrsa build-ca
Generating a 2048 bit RSA private key
............................................................................................+++
.................................................+++
writing new private key to '/etc/openvpn/easyrsa3/pki/private/ca.key.XXXXXXXXXX'
Enter PEM pass phrase:パスワード(A)入力
Verifying - Enter PEM pass phrase:パスワード(A)再入力
-----
You are about to be asked to enter information that will be incorporated
into your certificate request.
What you are about to enter is what is called a Distinguished Name or a DN.
There are quite a few fields but you can leave some blank
For some fields there will be a default value,
If you enter '.', the field will be left blank.
-----
Common Name (eg: your user, host, or server name) [Easy-RSA CA]:サーバ名入力(例: vpnserver)

CA creation complete and you may now import and sign cert requests.
Your new CA certificate file for publishing is at:
/etc/openvpn/easyrsa3/pki/ca.crt

$ cp pki/ca.crt /etc/openvpn/
サーバ証明書・秘密鍵の作成
$ ./easyrsa build-server-full server nopass
Generating a 2048 bit RSA private key
...................................................+++
...............................................................................+++
writing new private key to '/etc/openvpn/easyrsa3/pki/private/server.key.e7omRJmwXu'
-----
Using configuration from /etc/openvpn/easyrsa3/openssl-1.0.cnf
Enter pass phrase for /etc/openvpn/easyrsa3/pki/private/ca.key:パスワード(A)入力
Check that the request matches the signature
Signature ok
The Subject's Distinguished Name is as follows
commonName            :PRINTABLE:'server'
Certificate is to be certified until Feb  3 04:11:41 2026 GMT (3650 days)

Write out database with 1 new entries
Data Base Updated

$ cp pki/issued/server.crt /etc/openvpn/
$ cp pki/private/server.key /etc/openvpn/
DHパラメータの作成
$ ./easyrsa gen-dh
Generating DH parameters, 2048 bit long safe prime, generator 2
This is going to take a long time
(省略)

DH parameters of size 2048 created at /etc/openvpn/easyrsa3/pki/dh.pem

$ cp pki/dh.pem /etc/openvpn/
クライアント証明書(ダミー)の作成
$ ./easyrsa build-client-full dmy nopass
Generating a 2048 bit RSA private key
..................+++
..................+++
writing new private key to '/etc/openvpn/easyrsa3/pki/private/dmy.key.XXXXXXXXXX'
-----
Using configuration from /etc/openvpn/easyrsa3/openssl-1.0.cnf
Enter pass phrase for /etc/openvpn/easyrsa3/pki/private/ca.key:パスワード(A)入力
Check that the request matches the signature
Signature ok
The Subject's Distinguished Name is as follows
commonName            :PRINTABLE:'dmy'
Certificate is to be certified until Feb  3 04:14:46 2026 GMT (3650 days)

Write out database with 1 new entries
Data Base Updated

$ ./easyrsa revoke dmy


Please confirm you wish to revoke the certificate with the following subject:

subject=
    commonName                = dmy


Type the word 'yes' to continue, or any other input to abort.
  Continue with revocation: yes
Using configuration from /etc/openvpn/easyrsa3/openssl-1.0.cnf
Enter pass phrase for /etc/openvpn/easyrsa3/pki/private/ca.key:パスワード(A)入力
Revoking Certificate 02.
Data Base Updated

IMPORTANT!!!

Revocation was successful. You must run gen-crl and upload a CRL to your
infrastructure in order to prevent the revoked cert from being accepted.
CRLの作成
$ cp vars.example vars
$ vi vars
#set_var EASYRSA_CRL_DAYS       180
set_var EASYRSA_CRL_DAYS       3650
$ ./easyrsa gen-crl
Using configuration from /etc/openvpn/easyrsa3/openssl-1.0.cnf
Enter pass phrase for /etc/openvpn/easyrsa3/pki/private/ca.key:パスワード(A)入力

An updated CRL has been created.
CRL file: /etc/openvpn/easyrsa3/pki/crl.pem

$ cp pki/crl.pem /etc/openvpn/
$ chmod o+r /etc/openvpn/crl.pem
OpenVPNの設定
$ vi /etc/openvpn/server.conf
port 1194
proto udp
dev tun

ca ca.crt
cert server.crt
key server.key  # This file should be kept secret
dh dh.pem

server 192.168.100.0 255.255.255.0

ifconfig-pool-persist ipp.txt

push "redirect-gateway def1"
push "dhcp-option DNS 133.242.0.3" # sakura DNS1
push "dhcp-option DNS 133.242.0.4" # sakura DNS2

# iOSで使う場合、fragmentは非対応のためコメントアウトしてください
fragment 1280

mssfix 1280
link-mtu 1400

client-to-client

keepalive 10 120

comp-lzo

user nobody
group nobody

persist-key
persist-tun

status openvpn-status.log

log-append  /var/log/openvpn.log

verb 3

crl-verify crl.pem
サービスの登録・起動
$ systemctl enable openvpn@server.service
Created symlink from /etc/systemd/system/multi-user.target.wants/openvpn@server.service to /usr/lib/systemd/system/openvpn@.service.

$ systemctl start openvpn@server.service
Firewallの設定
$ firewall-cmd --permanent --zone=public --add-masquerade
$ firewall-cmd --permanent --zone=public --add-port=1194/udp
$ firewall-cmd --reload
$ firewall-cmd --list-all
public (default, active)
  interfaces: eth0
  sources:
  services: dhcpv6-client ssh
  ports: 1194/udp
  masquerade: yes
  forward-ports:
  icmp-blocks:
  rich rules:
クライアント証明書・秘密鍵の作成
複数ユーザ分を作る場合は繰り返してください。
$ cd /etc/openvpn/easyrsa3/
$ ./easyrsa build-client-full ユーザ名
Generating a 2048 bit RSA private key
...............................................................+++
...................................+++
writing new private key to '/etc/openvpn/easyrsa3/pki/private/ユーザ名.key.XXXXXXXXXX'
Enter PEM pass phrase:ユーザ個別のパスワード入力
Verifying - Enter PEM pass phrase:ユーザ個別のパスワード再入力
-----
Using configuration from /etc/openvpn/easyrsa3/openssl-1.0.cnf
Enter pass phrase for /etc/openvpn/easyrsa3/pki/private/ca.key:パスワード(A)入力
Check that the request matches the signature
Signature ok
The Subject's Distinguished Name is as follows
commonName            :T61STRING:'ユーザ名'
Certificate is to be certified until Feb  3 04:25:02 2026 GMT (3650 days)

Write out database with 1 new entries
Data Base Updated

$ cp /etc/openvpn/ca.crt /home/sshuser/
$ cp /etc/openvpn/easyrsa3/pki/issued/ユーザ名.crt /home/sshuser/
$ cp /etc/openvpn/easyrsa3/pki/private/ユーザ名.key /home/sshuser/
$ chown sshuser:sshuser /home/sshuser/ca.crt
$ chown sshuser:sshuser /home/sshuser/ユーザ名.crt
$ chown sshuser:sshuser /home/sshuser/ユーザ名.key
各証明書・秘密鍵のユーザへの配布
一つ前の手順で/home/sshuser以下に設置しましたので、
SFTPなどでログインしてダウンロードするとよいでしょう。
ca.crt
ユーザ名.crt
ユーザ名.key
また、下記の情報も伝えます。
ユーザ名
ユーザ個別のパスワード
クライアントの接続設定
ユーザの端末上でOpenVPNへの接続設定をします。
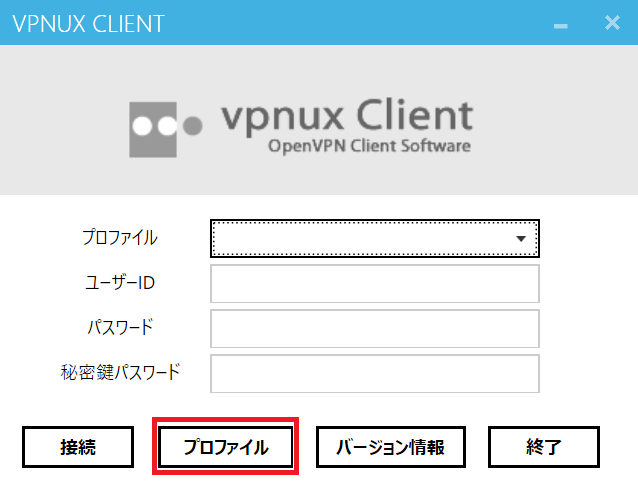
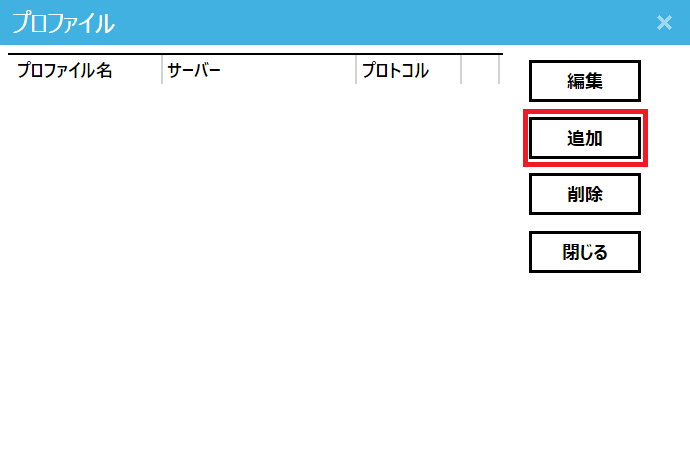
ここではWindows向けOpenVPNクライアントであるvpnux Clientを使った例を記載します。
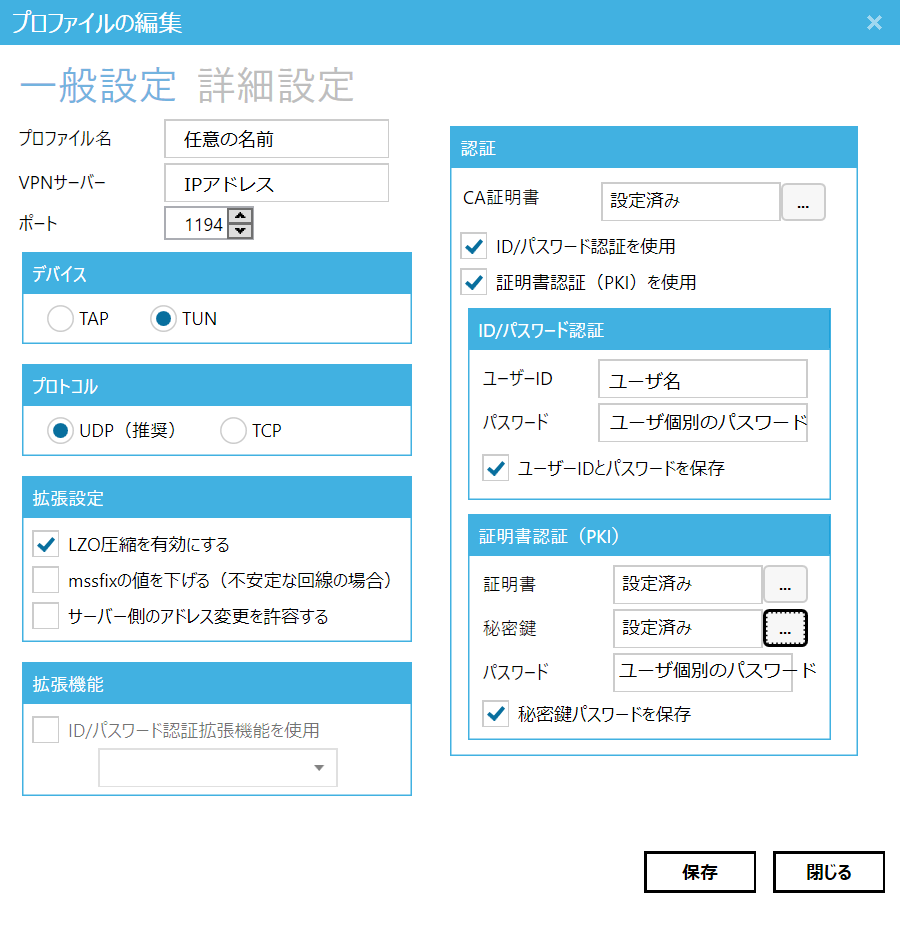
「CA証明書」の「...」を選択し、「ファイルから読み込み」を選択し、ca.crtを選択して「保存」します。

「証明書」の「...」を選択し、「ファイルから読み込み」を選択し、ユーザ名.crtを選択して「保存」します。

「秘密鍵」の「...」を選択し、「ファイルから読み込み」を選択し、ユーザ名.keyを選択して「保存」します。

接続の確認
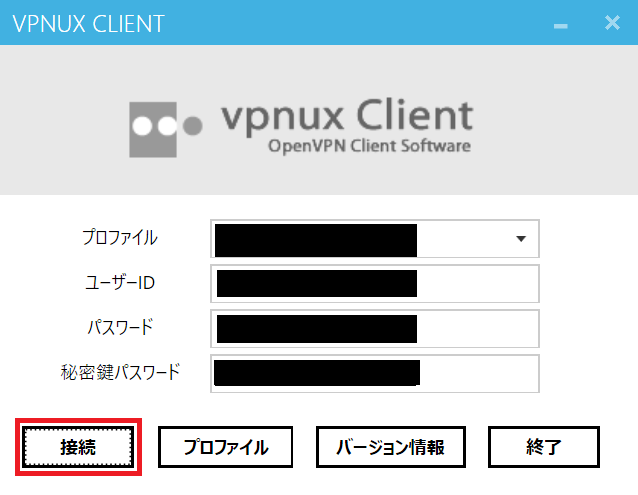
接続が完了したら、自分のIPアドレス確認用のサイトに行って確認してみましょう。
さくらのVPSで与えられたサーバのIPアドレスになっていたら成功です。
IPアドレス確認|Web便利ツール@ツールタロウ

なお、お試し期間中のサーバで回線速度制限がかかった状態でしたが、
Webサイトを閲覧する分には支障はありませんでした。
今もVPN接続している状態で編集作業をしています。
さいごに
必要最小限の作業にとどめたつもりでいるのですが、課題は色々あると思います。
例えば、
- SSHはどこからでも接続できてしまう(→Firewallで閉じ、普段はさくらのコンソールから作業する等の対応は可能)
- このサーバの状態を監視する手段がない
などです。
適宜、環境に合わせて追加・変更していただき、快適な運用をしていただければ幸いです。
ここまでお付き合いいただきましてありがとうございました。
##環境
-
開発
- Windows 10 Pro
- JDK 1.8.0_112
- NetBeans IDE 8.2
-
動作検証
- CentOS Linux release 7.2
- JDK 1.8.0_112
Webツールも公開しています。
Web便利ツール@ツールタロウ

