概要
Facebook Messenger APIを利用して、
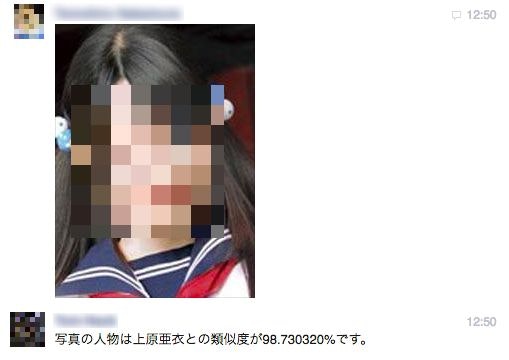
画像をアップロードすると、似ているAV女優を教えてくれるbotを実装しました。
システム構成
Bot応答を行うサーバは諸般の都合によりGo、画像判別はPython(顔検出はOpenCV、分類用の畳込みニューラルネットワークはTensorFlow)で作成しています。
尚、言語間のI/FはgRPCでGoからPythonにRPCを行っています。
実装
Go側
Facebook MessengerからのWebhookを受信して、bot応答を行うWorkerプロセスです。
Messenger Bot Server
WebサーバにはGinを利用しています。
難しい事は特にないですが、トラフィックが増えた際、複数のユーザからのメッセージをまとめてWebhookにPOSTする事があるようなので、
エンタープライズで利用するならそのあたりを注意する必要があると思います。
エラーハンドリングが甘々なのはご容赦下さい。
const (
    PORT = ":3000"
    VERIFICATION_TOKEN = "{{YOUR_VERIFICATION_TOKEN}}"
    ENDPOINT_URL = "https://graph.facebook.com/v2.6/me/messages"
)

func main() {
	router := gin.Default()
	router.GET("/messenger", varifyToken)
	router.POST("/messenger", processMessages)
	router.Run(PORT)
}

func varifyToken(c *gin.Context) {
    token := c.Query("hub.verify_token")
    challenge := c.Query("hub.challenge")

    if token == VERIFICATION_TOKEN {
        c.String(http.StatusOK, challenge + "\n")
    } else {
        log.WithFields(log.Fields{
            "received": token,
            "expected": VERIFICATION_TOKEN,
        }).Warn("Invalid token.")
    }
}

func processMessages(c *gin.Context) {
    var json model.Webhook
    if c.BindJSON(&json) == nil {
        for _, e := range json.Entry {
            for _, m := range e.Messaging {
                respondToOneMessage(&m)
            }
        }
        c.JSON(http.StatusOK, gin.H{"status": "you are logged in"})
    }
}

func respondToOneMessage(m *model.Messaging) {
    sender := m.Sender.Id

    switch {
    // Receive Text
    case m.Message.Text != "":

    // Receive Image
    case m.Message.Attachments[0].Type == "image":
        url := m.Message.Attachments[0].Payload.Url
        path := util.SaveImg(url)
        rs, err := classifyImg(path)
	if err != nil {
	    log.Fatal(err)
	}

	txt := fmt.Sprintf("写真の人物は%sとの類似度が%f%%です。", rs.Result[0].Label, rs.Result[0].Accuracy * 100)
        err2 := sendTextMessage(sender, txt)
	if err2 != nil {
	    log.Fatal(err2)
	}

    default:
        log.Error("Unexpected Message")
    }
}

func sendTextMessage(recipient int64, text string) error {
    endpoint := fmt.Sprintf("%s?%s=%s", ENDPOINT_URL, "access_token", VERIFICATION_TOKEN)
    json := `{"recipient":{"id":%d},"message":{"text":"%s"}}`
    body := fmt.Sprintf(json, recipient, text)

    req, err := http.NewRequest(
        "POST",
        endpoint,
        strings.NewReader(body),
    )
    if err != nil {
        return err
    }

    req.Header.Set("Content-Type", "application/json")

    client := &http.Client{ Timeout: time.Duration(3 * time.Second) }
    resp, err := client.Do(req)
    log.Printf("requested")
    defer resp.Body.Close()

    return err
}
Python側
画像のパスを与えると、顔を検出して学習済の畳込みニューラルネットで顔の類似度を判定します。
※学習用の画像は、Custom Search APIで取得しました。
OpenCVで顔検出
さて取得してきた画像ですが、いくらディープラーニングとはいえこのままCNNで分類しても大した精度にならないので、まずは顔の部分だけトリミングします。
今回は、検出にOpenCVを利用しました。
NumPy形式のArrayを引数に取って、顔面部分のみトリミングした結果を返します。
尚、なぜか右耳が顔として検出されたホラーな画像もありました。
心霊写真など検出してしまいそうでちょっと怖いです。
def face_detect(img):
    face_cascade = cv2.CascadeClassifier('./haarcascade_frontalface_default.xml')
    gray = cv2.cvtColor(img, cv2.COLOR_BGR2GRAY)
    faces = face_cascade.detectMultiScale(
        gray,
        scaleFactor=1.1,
        minNeighbors=5,
        minSize=(30, 30),
        flags = cv2.CASCADE_SCALE_IMAGE
    )
    if len(faces) > 0:
        fc = faces[0]
        x = fc[0]
        y = fc[1]
        w = fc[2]
        h = fc[3]
        return img[y:y+h, x:x+w]
    else:
        return None
結構大変かなと思っていたのですが、これだけです。
あまりにも便利すぎて驚きました。アルゴリズムは今度きちんと勉強しようと思います。
TensorFlowでCNN
収集・前処理した画像を使って、ネットワークの重みを学習させます。
畳込みニューラルネットの構成は、Deep MNIST for Expertsと同じ、
- 畳込み層1
- プーリング層1
- 畳込み層2
- プーリング層2
- 全結合層1
- 全結合層2(ソフトマックス)
の6層です。
チュートリアルだけだとイマイチTensorFlow作法がわからないので、TensorFlow Mechanics 101を熟読するのがオススメです。
モデリングの部分を抜粋します。
# !/usr/bin/env python
# -*- coding: utf-8 -*-
import sys
import cv2
import numpy as np
import tensorflow as tf

NUM_CLASSES = 5
IMAGE_SIZE = 28

class CNNetwork:

    def inference(self, x_images, keep_prob):

        def weight_variable(shape):
          initial = tf.truncated_normal(shape, stddev=0.1)
          return tf.Variable(initial)

        def bias_variable(shape):
          initial = tf.constant(0.1, shape=shape)
          return tf.Variable(initial)

        def conv2d(x, W):
          return tf.nn.conv2d(x, W, strides=[1, 1, 1, 1], padding='SAME')

        def max_pool_2x2(x):
          return tf.nn.max_pool(x, ksize=[1, 2, 2, 1],
                                strides=[1, 2, 2, 1], padding='SAME')

        with tf.name_scope('conv1') as scope:
            W_conv1 = weight_variable([5, 5, 3, 32])
            b_conv1 = bias_variable([32])
            h_conv1 = tf.nn.relu(tf.nn.bias_add(conv2d(x_images, W_conv1), b_conv1))

        with tf.name_scope('pool1') as scope:
            h_pool1 = max_pool_2x2(h_conv1)

        with tf.name_scope('conv2') as scope:
            W_conv2 = weight_variable([5, 5, 32, 64])
            b_conv2 = bias_variable([64])
            h_conv2 = tf.nn.relu(tf.nn.bias_add(conv2d(h_pool1, W_conv2), b_conv2))

        with tf.name_scope('pool2') as scope:
            h_pool2 = max_pool_2x2(h_conv2)

        with tf.name_scope('fc1') as scope:
            W_fc1 = weight_variable([7*7*64, 1024])
            b_fc1 = bias_variable([1024])
            h_pool2_flat = tf.reshape(h_pool2, [-1, 7*7*64])
            h_fc1 = tf.nn.relu(tf.nn.bias_add(tf.matmul(h_pool2_flat, W_fc1), b_fc1))
            h_fc1_drop = tf.nn.dropout(h_fc1, keep_prob)

        with tf.name_scope('fc2') as scope:
            W_fc2 = weight_variable([1024, NUM_CLASSES])
            b_fc2 = bias_variable([NUM_CLASSES])

        with tf.name_scope('softmax') as scope:
            y_conv=tf.nn.softmax(tf.nn.bias_add(tf.matmul(h_fc1_drop, W_fc2), b_fc2))

        return y_conv
訓練の際、下記のようにして訓練結果の重みをバイナリファイルに保存しておく事によって、
RPCによる分類関数の呼び出し時に利用する事ができます。
saver = tf.train.Saver()
save_path = saver.save(sess, "model.ckpt")
ネットワークの最深層のソフトマックス関数の実行結果を返す、分類用の関数です。
def classify(self, image_path):
    try:
        img = cv2.imread(image_path)
        img = face_detect(img)
        img = cv2.resize(img, (IMAGE_SIZE, IMAGE_SIZE))
        img = img.astype(np.float32)/255.0

        images_placeholder = tf.placeholder("float", shape=(None, IMAGE_SIZE, IMAGE_SIZE, 3))
        labels_placeholder = tf.placeholder("float", shape=(None, NUM_CLASSES))
        keep_prob = tf.placeholder("float")

        logits = self.inference(images_placeholder, keep_prob)
        sess = tf.InteractiveSession()

        saver = tf.train.Saver()
        sess.run(tf.initialize_all_variables())
        saver.restore(sess, "./model.ckpt")

        pred = logits.eval(feed_dict={images_placeholder: [img],keep_prob: 1.0 })[0]
        return pred

    except Exception as e:
        print 'message:' + e.message
gRPC
最後に、Go言語で実装したbotサーバから、TensorFlowをRPCします。
gRPCはデータフォーマットにProtocol Buffersを利用しています。
ざっくり説明するとプログラム間で通信するための汎用データ定義で、
定義ファイルである.protoファイルを作成すると、各言語用のシリアライズ/デシリアライズを行うライブラリがコマンドで生成できます。
データ構造の定義
まず下記のような、データ構造を定義するprotoファイルを作成します。
cnn.proto
syntax = "proto3";

package cnn;

service Classifier {
    rpc classify (CnnRequest) returns (CnnResponse){}
}

message CnnRequest {
    string filepath = 1;
}

message CnnResponse {
    repeated Result result = 1;
}

message Result {
    string label = 1;
    double accuracy = 2;
}
定義が完了したら、Go, Pythonそれぞれの言語用のライブラリファイルを作成します。
# go
protoc --go_out=plugins=grpc:./ cnn.proto

# Python
protoc --python_out=. --grpc_out=. --plugin=protoc-gen-grpc=`which grpc_python_plugin` cnn.proto
たったこれだけで、cnn.pb.go、cnn_pb2.pyというそれぞれの言語用のライブラリが生成されます。
gRPCサーバ構築
生成したライブラリを利用して、gRPCのサーバを実装します。
# !/usr/bin/env python
# -*- coding: utf-8 -*-
import time
import cnn_pb2 as pb
import cnn

_ONE_DAY_IN_SECONDS = 60 * 60 * 24

class Classier(pb.BetaClassifierServicer):

  def classify(self, request, context):
    path = request.filepath
    print path
    n = cnn.CNNetwork()
    accuracies = n.classify(path)
    print accuracies
    labels = ['澁谷果歩', 'AIKA', '佐々木あき', '上原亜衣', '篠田あゆみ']
    nameWithAccuracy = []
    for i in range (0, len(labels)):
        nameWithAccuracy.append((accuracies[i], labels[i]))
    nameWithAccuracy.sort(reverse=True)

    response = pb.CnnResponse()
    try:
        # とりあえず上位3人を返す
        for i in range(0, 3):
            r = pb.Result()
            label = nameWithAccuracy[i][1]
            accuracy = float(nameWithAccuracy[i][0])
            response.result.add(label=label, accuracy=accuracy)

    except Exception as e:
        print e.message

    return response


def serve():
  server = pb.beta_create_Classifier_server(Classier())
  server.add_insecure_port('[::]:50051')
  server.start()
  try:
    while True:
      time.sleep(_ONE_DAY_IN_SECONDS)
  except KeyboardInterrupt:
    server.stop(0)

if __name__ == '__main__':
  serve()
gRPCクライアント
次はGo言語でgRPCクライアントを実装します。
// 抜粋
func classifyImg(filepath string) (*cnn.CnnResponse, error) {
    address := "localhost:50051"

    conn, err := grpc.Dial(address, grpc.WithInsecure())
    if err != nil {
        log.Fatalf("did not connect: %v", err)
    }
    defer conn.Close()
    c := cnn.NewClassifierClient(conn)

    result, err := c.Classify(context.Background(), &cnn.CnnRequest{Filepath: filepath})
    if err != nil {
        log.Fatalf("couldn't classify: %v", err)
        return nil, err
    }
    return result, nil
}
おわりに
所感
技術的には、プログラミングよりAmazon Linux上でのOpenCVのビルドが一番手間取りました。
尚、テストデータを用いた、畳込みニューラルネットの判別精度は79%でした。
冒頭のキャプチャの様に正面から写っている写真であれば比較的判定精度が高いのですが、
号泣した照英のような表情の写真が上手く判別できていませんでした。
参考文献
プログラミングのための線形代数
そもそも線形代数の基本がわかっていなかったので、1から勉強しました。
深層学習 (機械学習プロフェッショナルシリーズ)
式の展開が結構詳細に書かれているため、ギリギリ読めました。
TensorFlowでアニメゆるゆりの制作会社を識別する
畳込みニューラルネットの実装は、丁寧に解説されているこちらを参考にさせて頂きました。