はじめに
swiftはほとんど未経験ですが、SmartNews風ニュースアプリを作ってみて、その過程をさらしています。
前回は、こんな記事を書きました。
swift初心者がSmartNews風ニュースアプリを作ってみる過程を晒す(7) - MVVMで関心事を分離する手法を学ぶ - Qiita
今回は、RxSwiftを用いて実際にMVVMアーキテクチャを使用した実装を行います。
RxSwiftを使用したMVVM
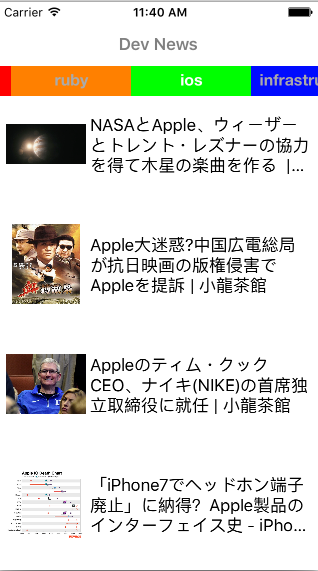
取得した記事を表示するシンプルなニュースアプリを作成します。
ニュース記事のデータは、ここから取得します。
Model
Entryモデルは一つ一つの記事を表現します。
JSONオブジェクトをparseし、各プロパティにセットすることで初期化されます。
import Foundation
import RealmSwift

class Entry: Object {

    dynamic var title: String = ""
    dynamic var link: String = ""
    dynamic var contentSnippet: String = ""
}
ViewModel
ViewModelには以下の責務をもたせます。
- ビジネスロジック(ネットワークリクエストを発生させるetc)
- 表示に必要なデータをViewControllerに届ける
- Modelの更新を監視する
import RxSwift
import RxCocoa

final class EntriesViewModel {

    //MARK: - Dependecies

    //MARK: - Model

    var entries: Driver<[Entry]> = Driver.never()

    //MARK: - Set up

    init() {
        //Initialise dependencies

    }

    func reloadData(title: String) {
        entries = EntryAPIService().fetchEntries(q: title)
    }
}
DriverはUIレイヤーを直感的にリアクティブプログラミングするための部品です。
Driverって何なんだ、ということに関しては、こちらに詳しく記載されています。
Units are totally optional. You can use raw observable sequences everywhere in your program and all RxCocoa APIs work with observable sequences.
公式ドキュメントにも記載があるように、使用しないと実装できないものでもないですが、便利なので使いましょう、という位置付けのようです。
Driverの特徴
Driverの特徴は以下の通りです。
- エラーでストリームが終了しない
- JSONのparseエラーやAPIとの通信失敗が起きた場合に、UIコンポーネントが更新できなくなるようなことを防ぎます
- main schedulerでsubscribe, observeする
- API通信の結果を使用して、バックグラウンドスレッドでUIコンポーネントを更新するようなことをするとCrashの原因になります
- 副作用をシェアする
- API通信の結果を複数のUIコンポーネントにバインドした時に、2回HTTPリクエストが発生するような事を回避します
公式ドキュメントでは、典型的なサンプルコードを交えて非常に詳しく解説されているので、一読をお勧めします ![]()
ViewController
   @IBOutlet weak var tableView: UITableView!

    private let bag = DisposeBag()
    private var entryList: [Entry]  = []

    // create ViewModel
    let viewModel = EntriesViewModel()

    override func viewDidLoad() {

        super.viewDidLoad()
        self.tableView.registerNib(UINib(nibName: "EntryTableViewCell", bundle: nil), forCellReuseIdentifier: "EntryTableViewCell")

        viewModel.reloadData(self.title!) //1

        // see http://yannickloriot.com/2016/01/make-uitableview-reactive-with-rxswift/
        // bind articles to UITableView

        // If there is a `drive` method available instead of `bindTo`,
        // that means that the compiler has proven that all properties
        // are satisfied.
        viewModel.entries.drive(self.tableView.rx_itemsWithCellIdentifier("EntryTableViewCell")) { //2
            (index, entry: Entry, cell:EntryTableViewCell) in
            cell.updateCell(entry)
        }.addDisposableTo(bag) //3

        viewModel.entries.driveNext { [unowned self] in //4
            self.entryList = $0
        }.addDisposableTo(bag)

    }
-
- APIにアクセスして記事の取得を行っています。
-
- entriesの更新をトリガーにして、tableviewの更新を行っています。
-
- unsubscribeを自動的に行って、リソースを解放するための記述です。
Using dispose bags or takeUntil operator is a robust way of making sure resources are cleaned up. We recommend using them in production even if the sequences will terminate in finite time.
感想
- 各クラスの責務が明確になり、仕様変追加時の変更箇所が明確になりました。
- テストが書きやすくなりそうです。
おわりに
ソースコードはこちらです。
次回は、少し趣を変えて、実装したアプリケーションのテストコードを書いていきます。
参考
- Introduction to Rx
- ReactiveX - Intro
- RxSwiftCommunity/RxDataSources: Table and Collection View Data Sources for RxSwift
- RxSwift + MVVM - SSSSLIDE
- 【翻訳】あなたが求めていたリアクティブプログラミング入門 - ninjinkun's diary
- [初心者]RxSwiftの道標[入門] - Qiita
- tailec - Pawel Krawiec iOS blog
- A practical MVVM example in Swift – Part 2 (featuring RxSwift) – Candy Code
- RxSwiftで実行するSchedulerの作り方とお行儀良く扱うためのメモ · Tomorrow Never Comes.