はじめに
AWS CodeBuildでDockerイメージを作成する際、AWSが用意したDockerビルド環境がありますが、他に自前で用意したビルド環境を使うことができます。
AWSが用意しているDockerビルド環境は、執筆時点(2017/7/10)でバージョンが1.12.1と少し低く、--cache-fromなどのオプションが使えません。(実はそのオプションを使いたいがためにこの調査をおこないました。)
公式サンプル
手順ですが、公式のドキュメントにサンプルがあります。(執筆時、英語版のみ)
実際この通りですが、いくつかはまった点があるので上記とは違うサンプルを使って説明します。
Dockerビルド環境を用意
ちなみに公式のビルド環境はここにあります。
https://github.com/aws/aws-codebuild-docker-images/tree/master/ubuntu/docker
ポイントはこの通りです。
- Ubuntu 14.04 ベース
- git, awscli, dind(Docker in Docker)をインストール
- entrypointはdockerd-entrypoint.shでdockerデーモンを起動
今回は以下のようなビルド環境を用意します
- docker:dind (Alpine Linux)ベース
- git, awscli をインストール
- entrypointはそのまま
FROM docker:17.06.0-ce-dind

RUN apk add --no-cache \
        git \
        less \
        openssh-client \
        py-pip \
        python \
        && \
    pip install awscli && \
    apk del --purge py-pip
ビルド環境をビルドしてECRにアップします。
ECRリポジトリを作成します。
ついでに、サンプルプロジェクトをアップするリポジトリも作成します。
ビルドしてアップします。
事前にAWS CLIのインストールと設定が必要ですが説明は割愛します。
# ECRにログイン
$(aws ecr get-login --no-include-email)
# build リポジトリURLは {account ID}.dkr.ecr.{region}.amazonaws.com/{repository}"
docker build -t {リポジトリURL}:latest .
# push
docker push {リポジトリURL}:latest
サンプルプログラム
ビルド用のサンプルプログラムは簡単なDockerfileとbuildspec.ymlだけにします。
まずはbuildspec.ymlです。
version: 0.2

phases:
  install:
    commands:
      - nohup /usr/local/bin/dockerd --host=unix:///var/run/docker.sock --host=tcp://0.0.0.0:2375 --storage-driver=overlay&
      - timeout -t 15 sh -c "until docker info; do echo .; sleep 1; done"
  pre_build:
    commands:
      - $(aws ecr get-login --no-include-email)
  build:
    commands:
      - docker build -t ${REPOSITORY_URI}:latest .
  post_build:
    commands:
      - docker push ${REPOSITORY_URI}:latest
順に説明します。
version: 0.2
0.1と0.2では大きな違いがあります。
英語版のドキュメントでは0.2の記載がありますが、日本語版はまだ0.1になっています。
0.1ではコマンドごとに別インスタンスで実行されるため、環境変数を設定したりする場合には注意が必要でした。0.2では解消されています。
次の部分です
phases:
  install:
    commands:
      - nohup /usr/local/bin/dockerd --host=unix:///var/run/docker.sock --host=tcp://0.0.0.0:2375 --storage-driver=overlay&
      - timeout -t 15 sh -c "until docker info; do echo .; sleep 1; done"
Dockerデーモンを立ち上げ、起動するまで待機しています。
公式のビルド環境を指定する場合は不要です。
ここが不可解な部分ですが、公式イメージのGitHubからcloneしてビルドしたものを使う場合でも上記の記述が必要でした。
残りはECRにログインしてbuild, pushしています。
--no-include-emailは公式ビルド環境の1.12.1の場合、対応していないバージョンのため、つけてはいけません。
環境変数REPOSITORY_URIはCodeBuild作成時に設定します。
  pre_build:
    commands:
      - $(aws ecr get-login --no-include-email)
  build:
    commands:
      - docker build -t ${REPOSITORY_URI}:latest .
  post_build:
    commands:
      - docker push ${REPOSITORY_URI}:latest
サンプルプログラムのDockerfileです。
echoして終わりです。
FROM alpine
RUN echo "Hello"
サンプルプロジェクトはCodeCommitにコミットしておきます。
CodeBuild用ロール作成
CodeBuild用のロールを作成します。
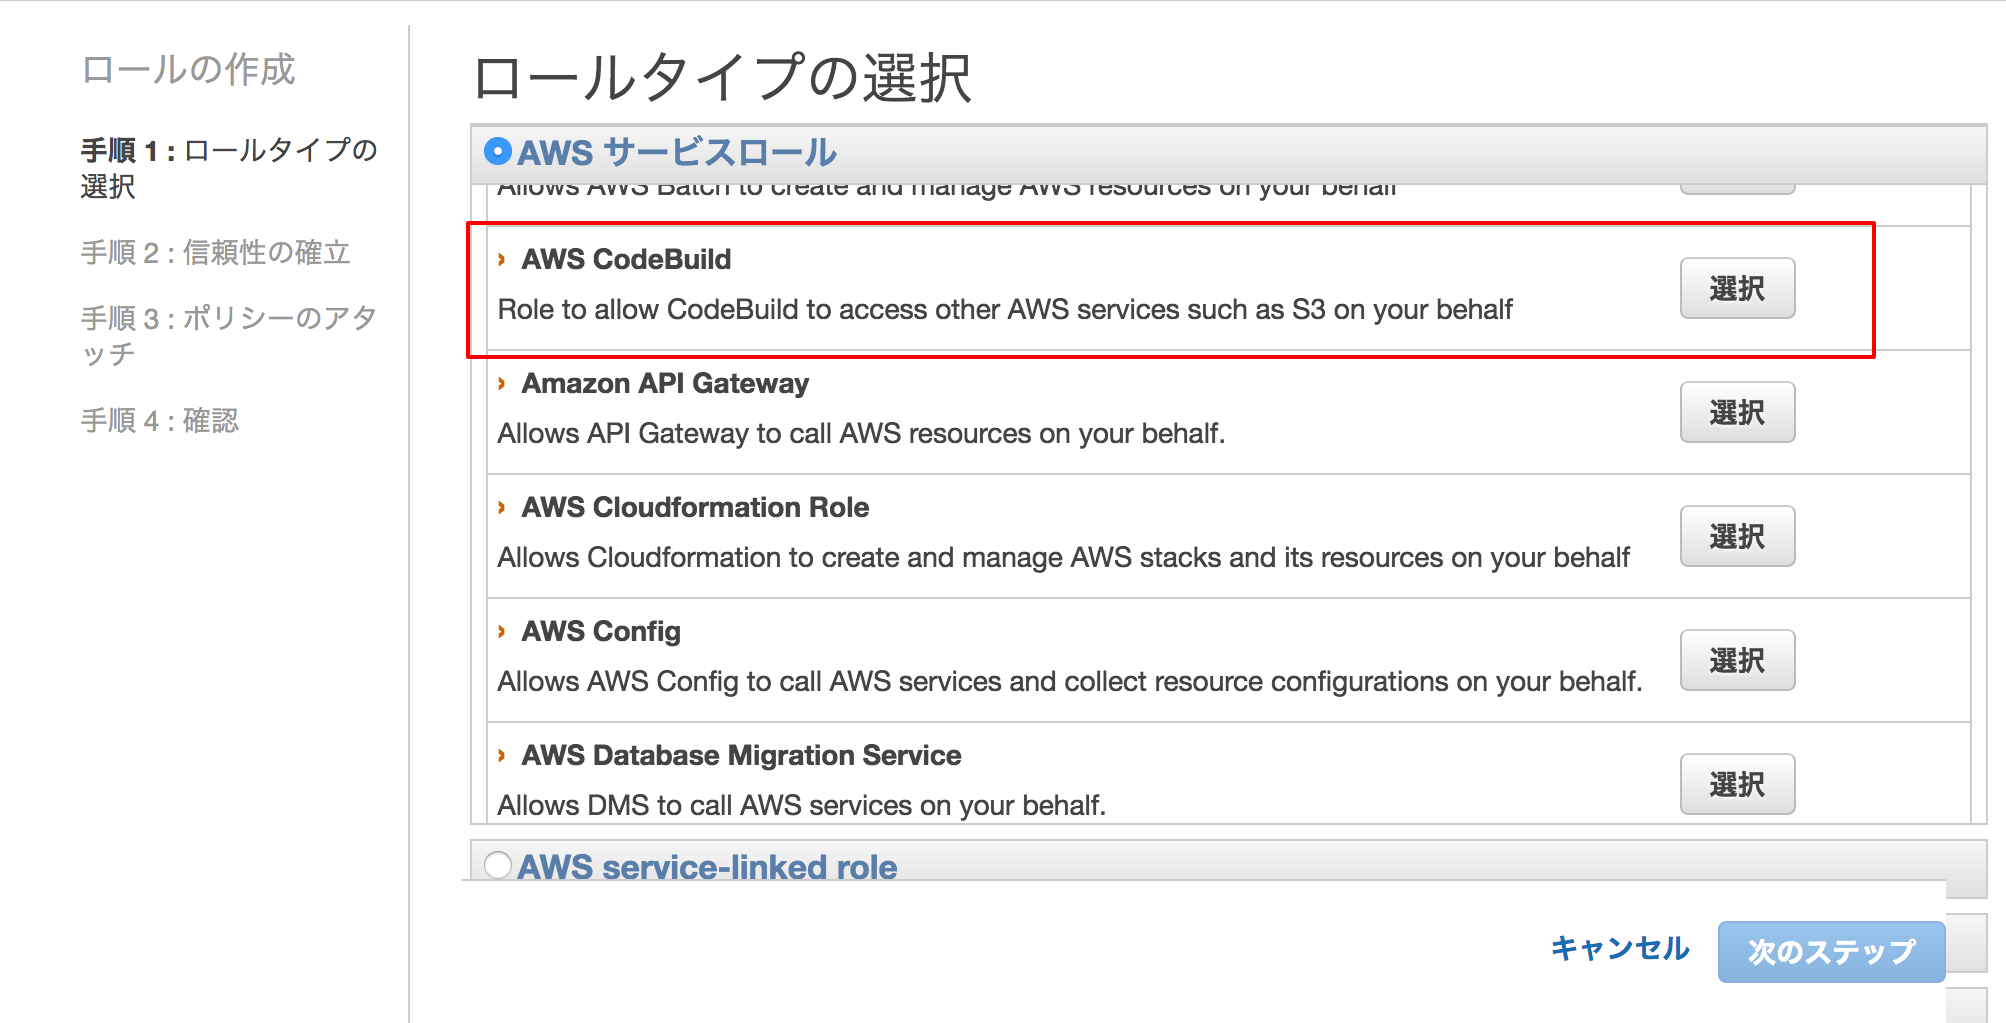
IAMのロールの作成から、ロールタイプはAWSサービスロールのAWSCodeBuildを選択します
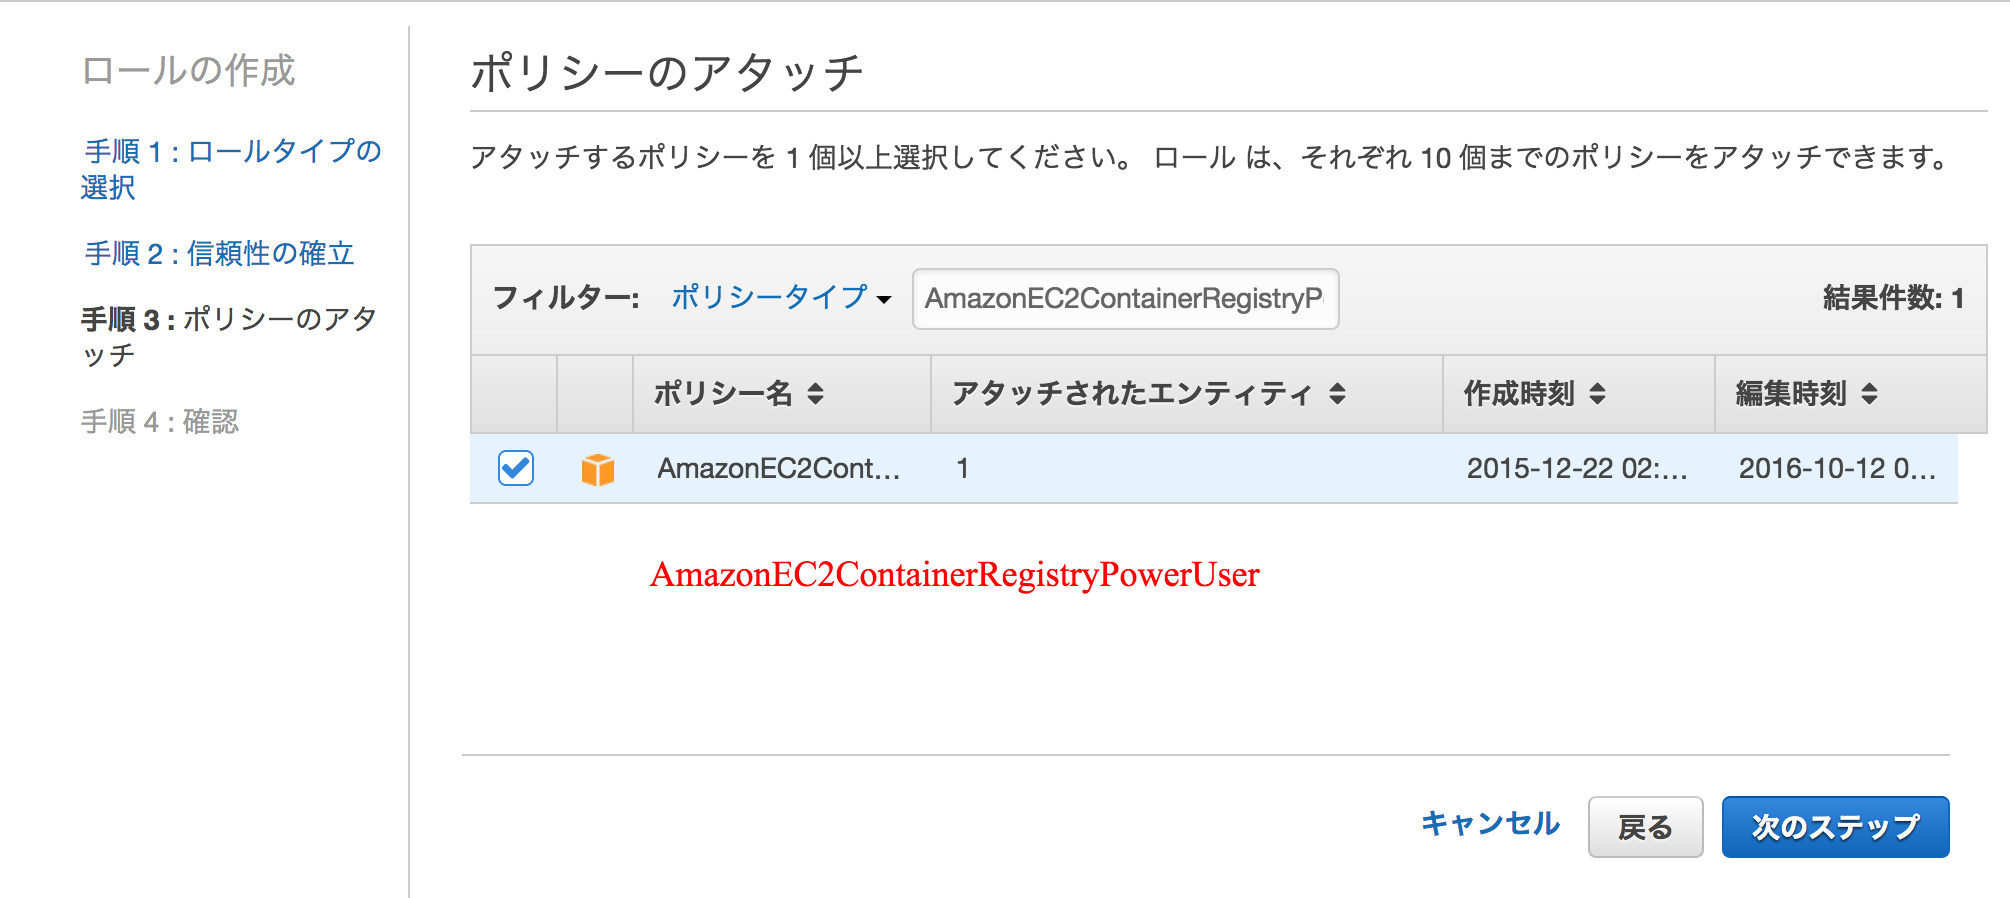
ポリシーのアタッチでAmazonEC2ContainerRegistryPowerUserをアタッチします。
次のステップで適当なロール名をつけて完了です。
CodeBuild ビルドプロジェクト作成
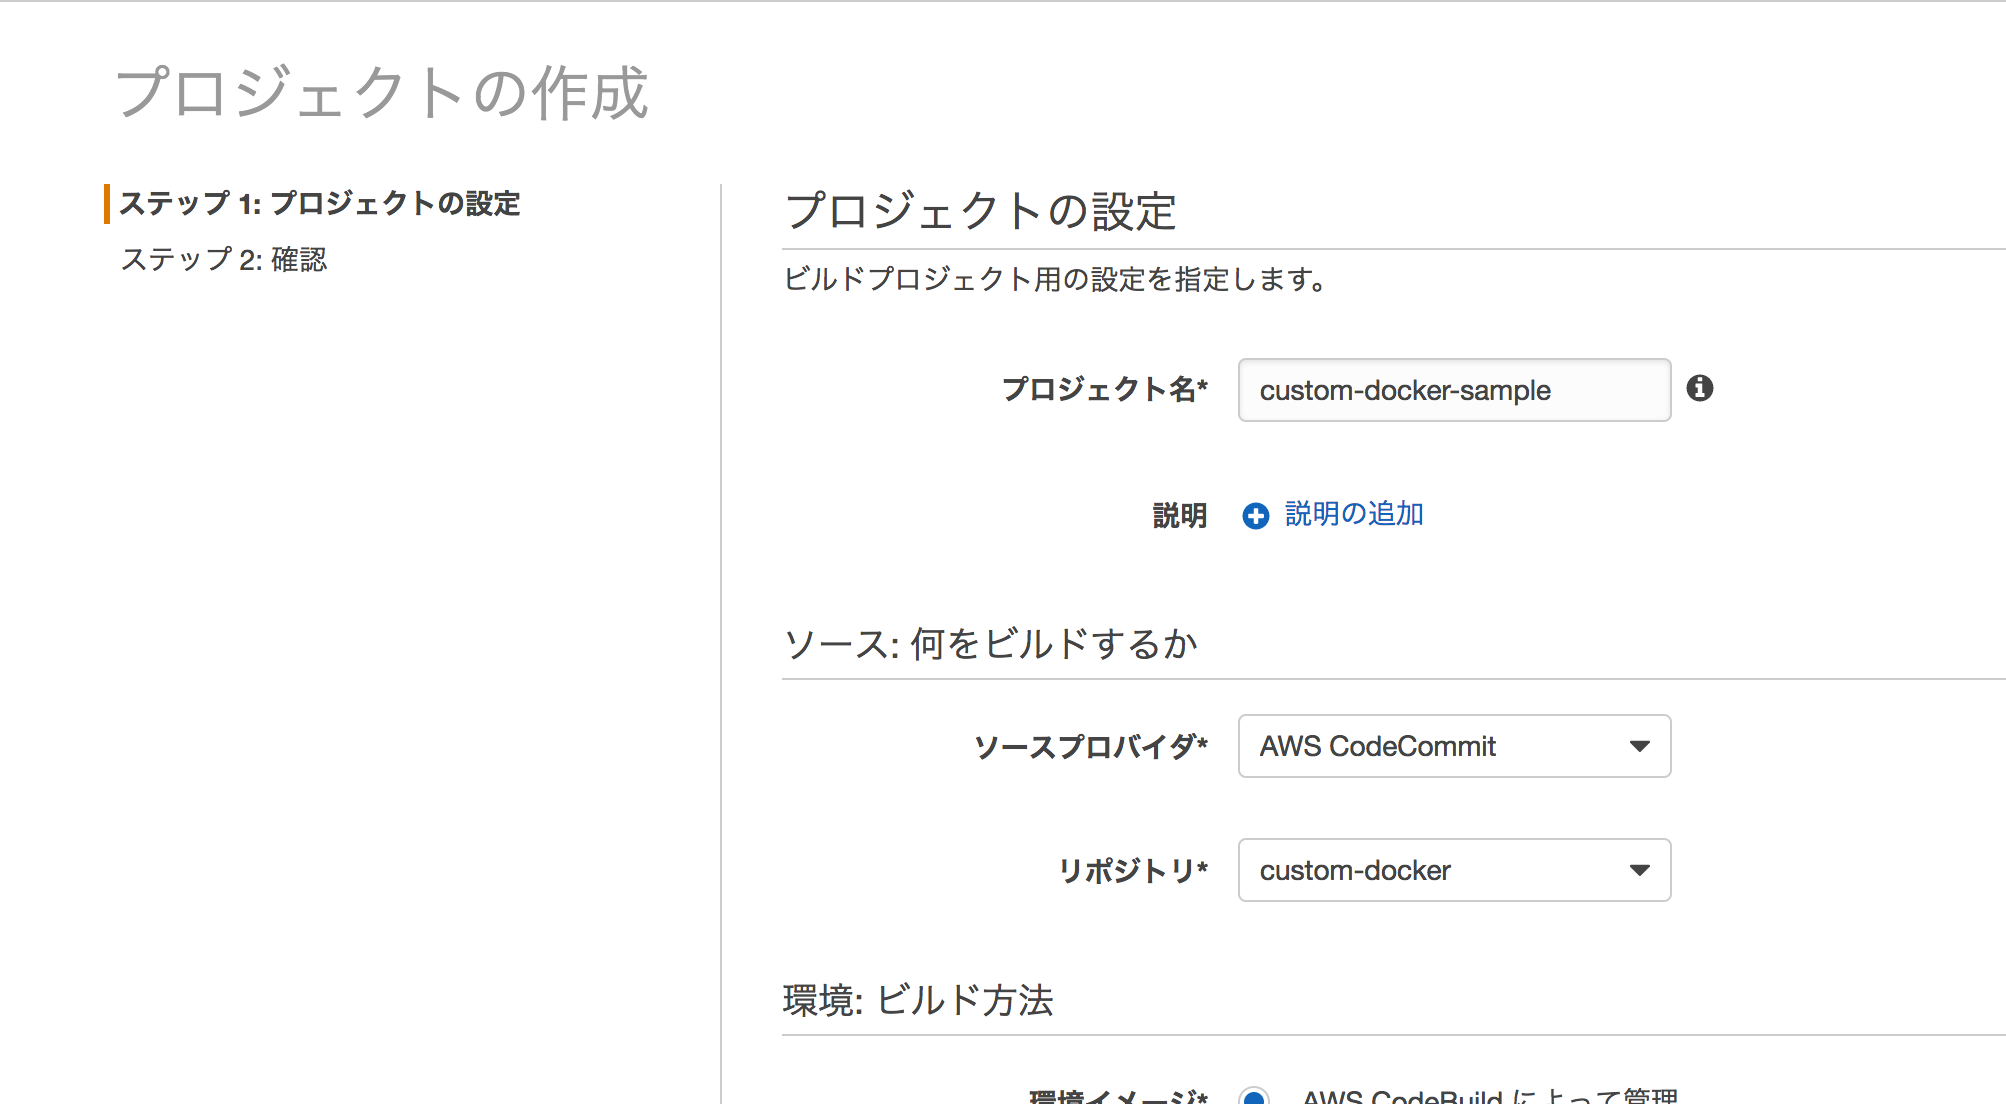
プロジェクト名を入力し、ソースプロバイダは先ほどサンプルプロジェクトをコミットしたCodeCommitのリポジトリを指定します。
環境イメージに"Dockerイメージの指定"、
環境タイプに"Linux"、
カスタムイメージタイプに"Amazon ECR"、
Amazon ECRレポジトリ、イメージにpushしたECRのリポジトリとタグを指定します。
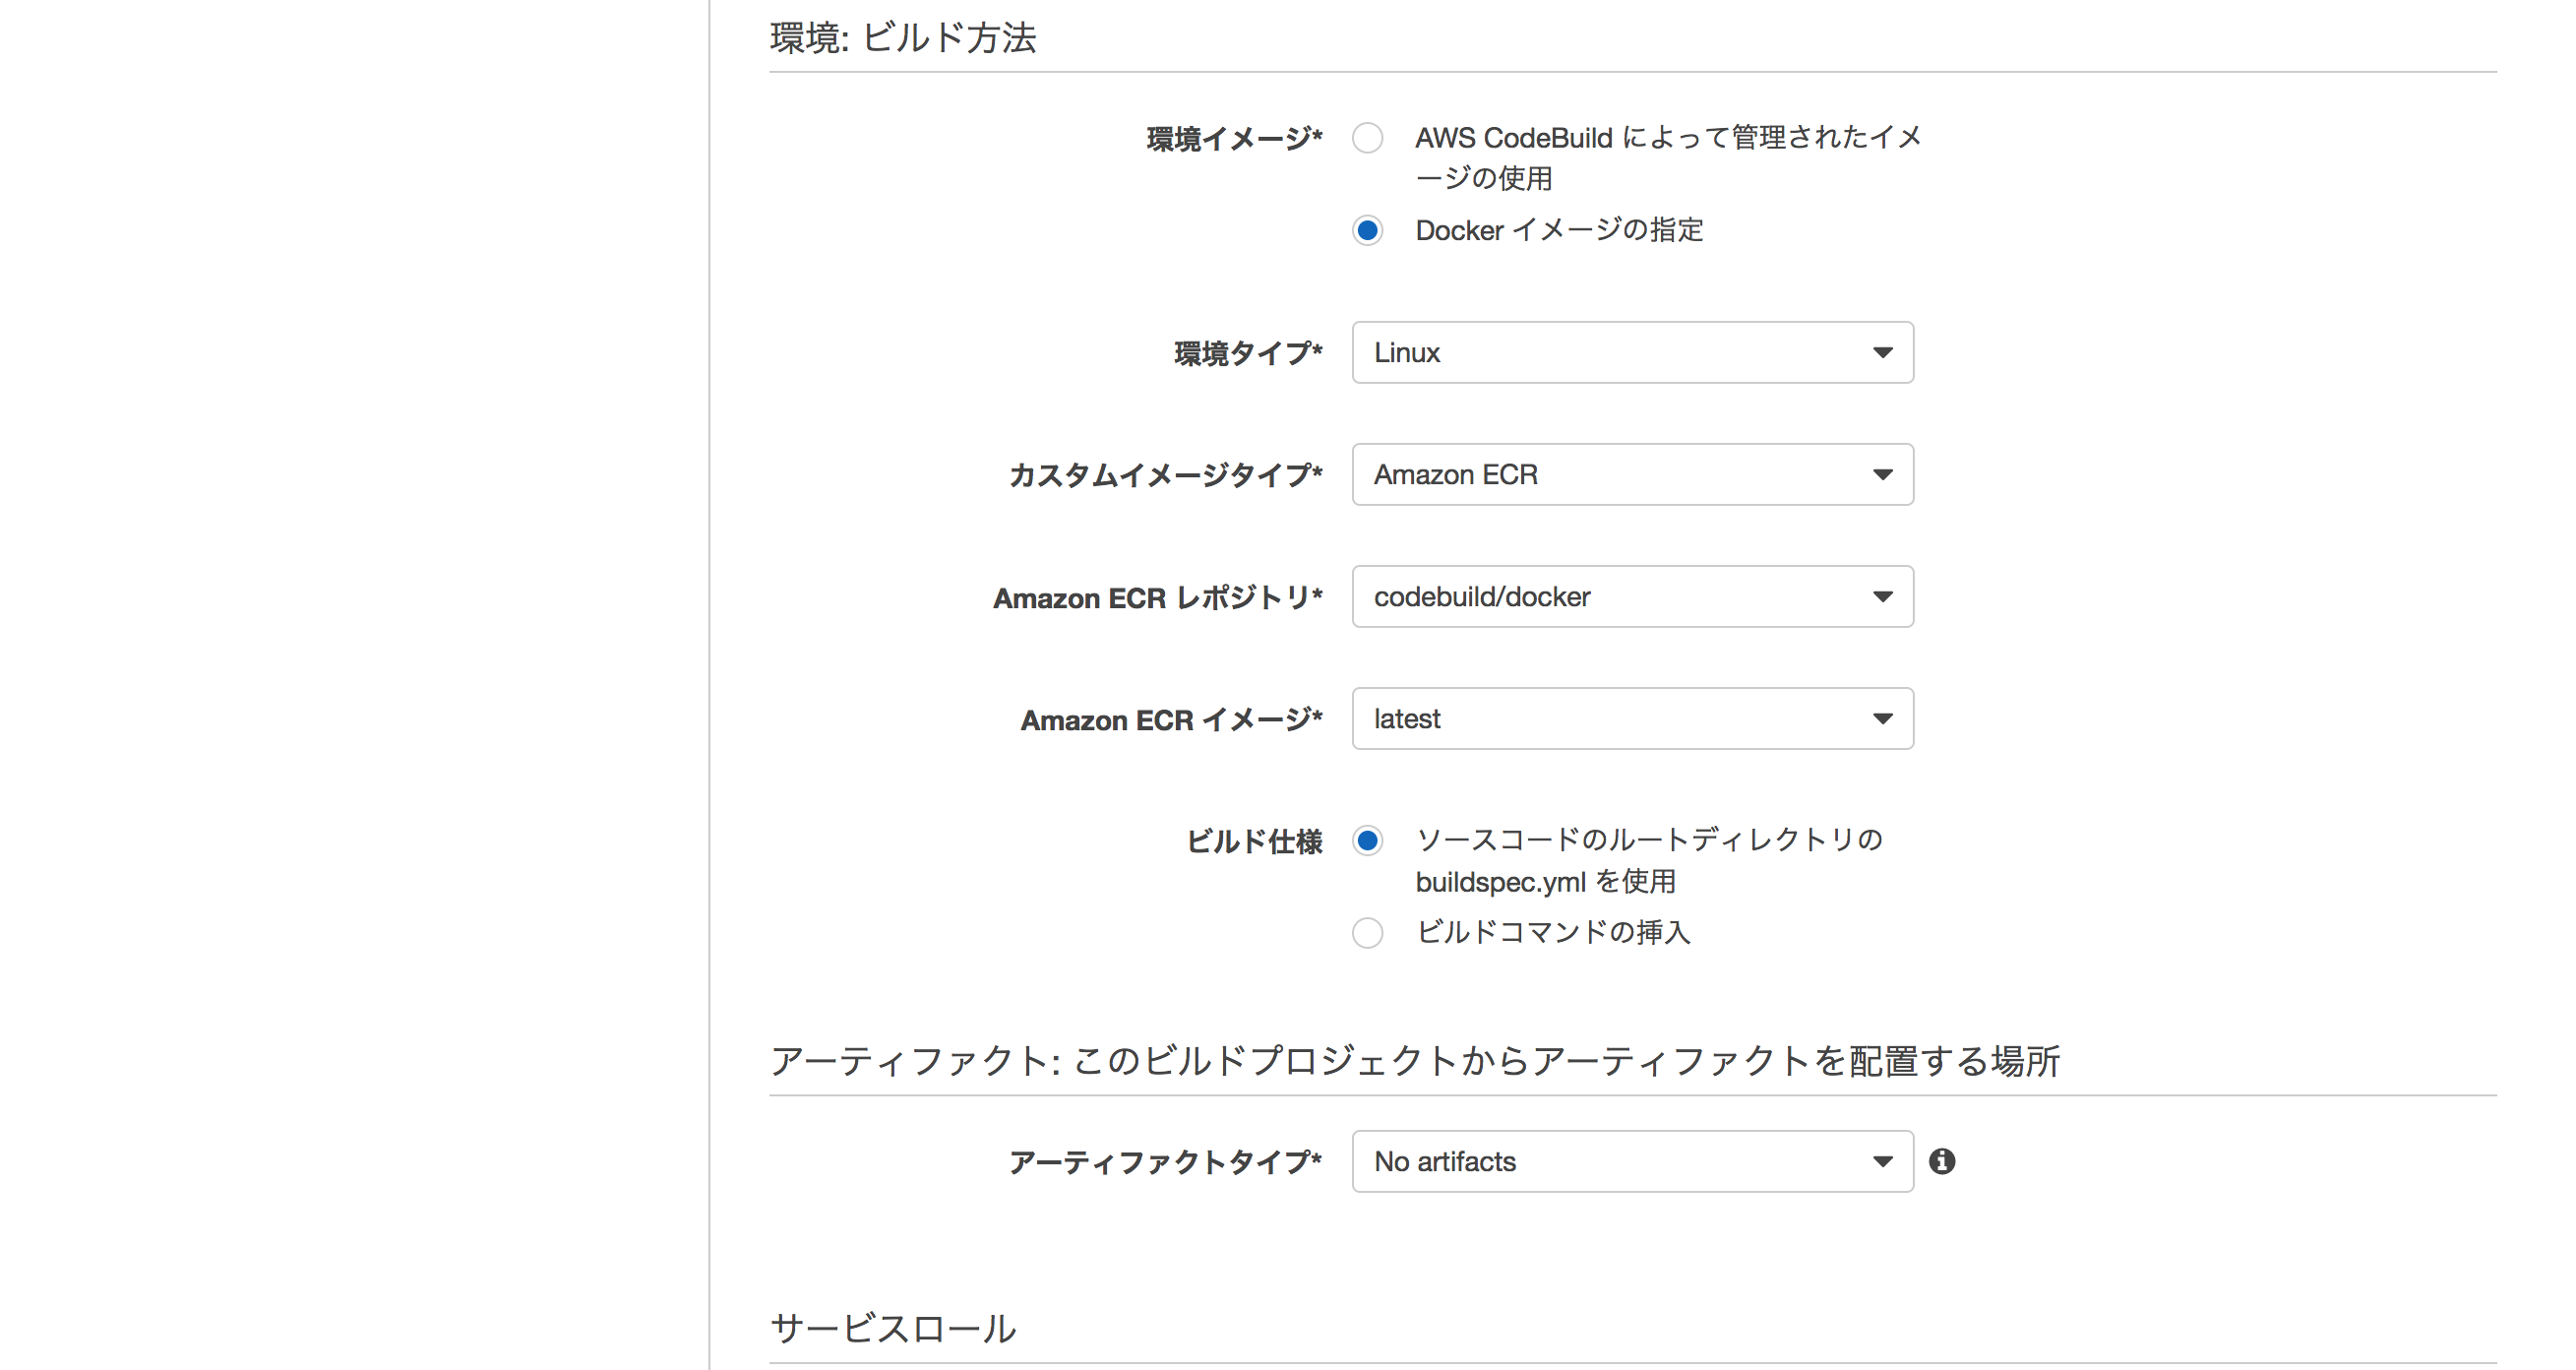
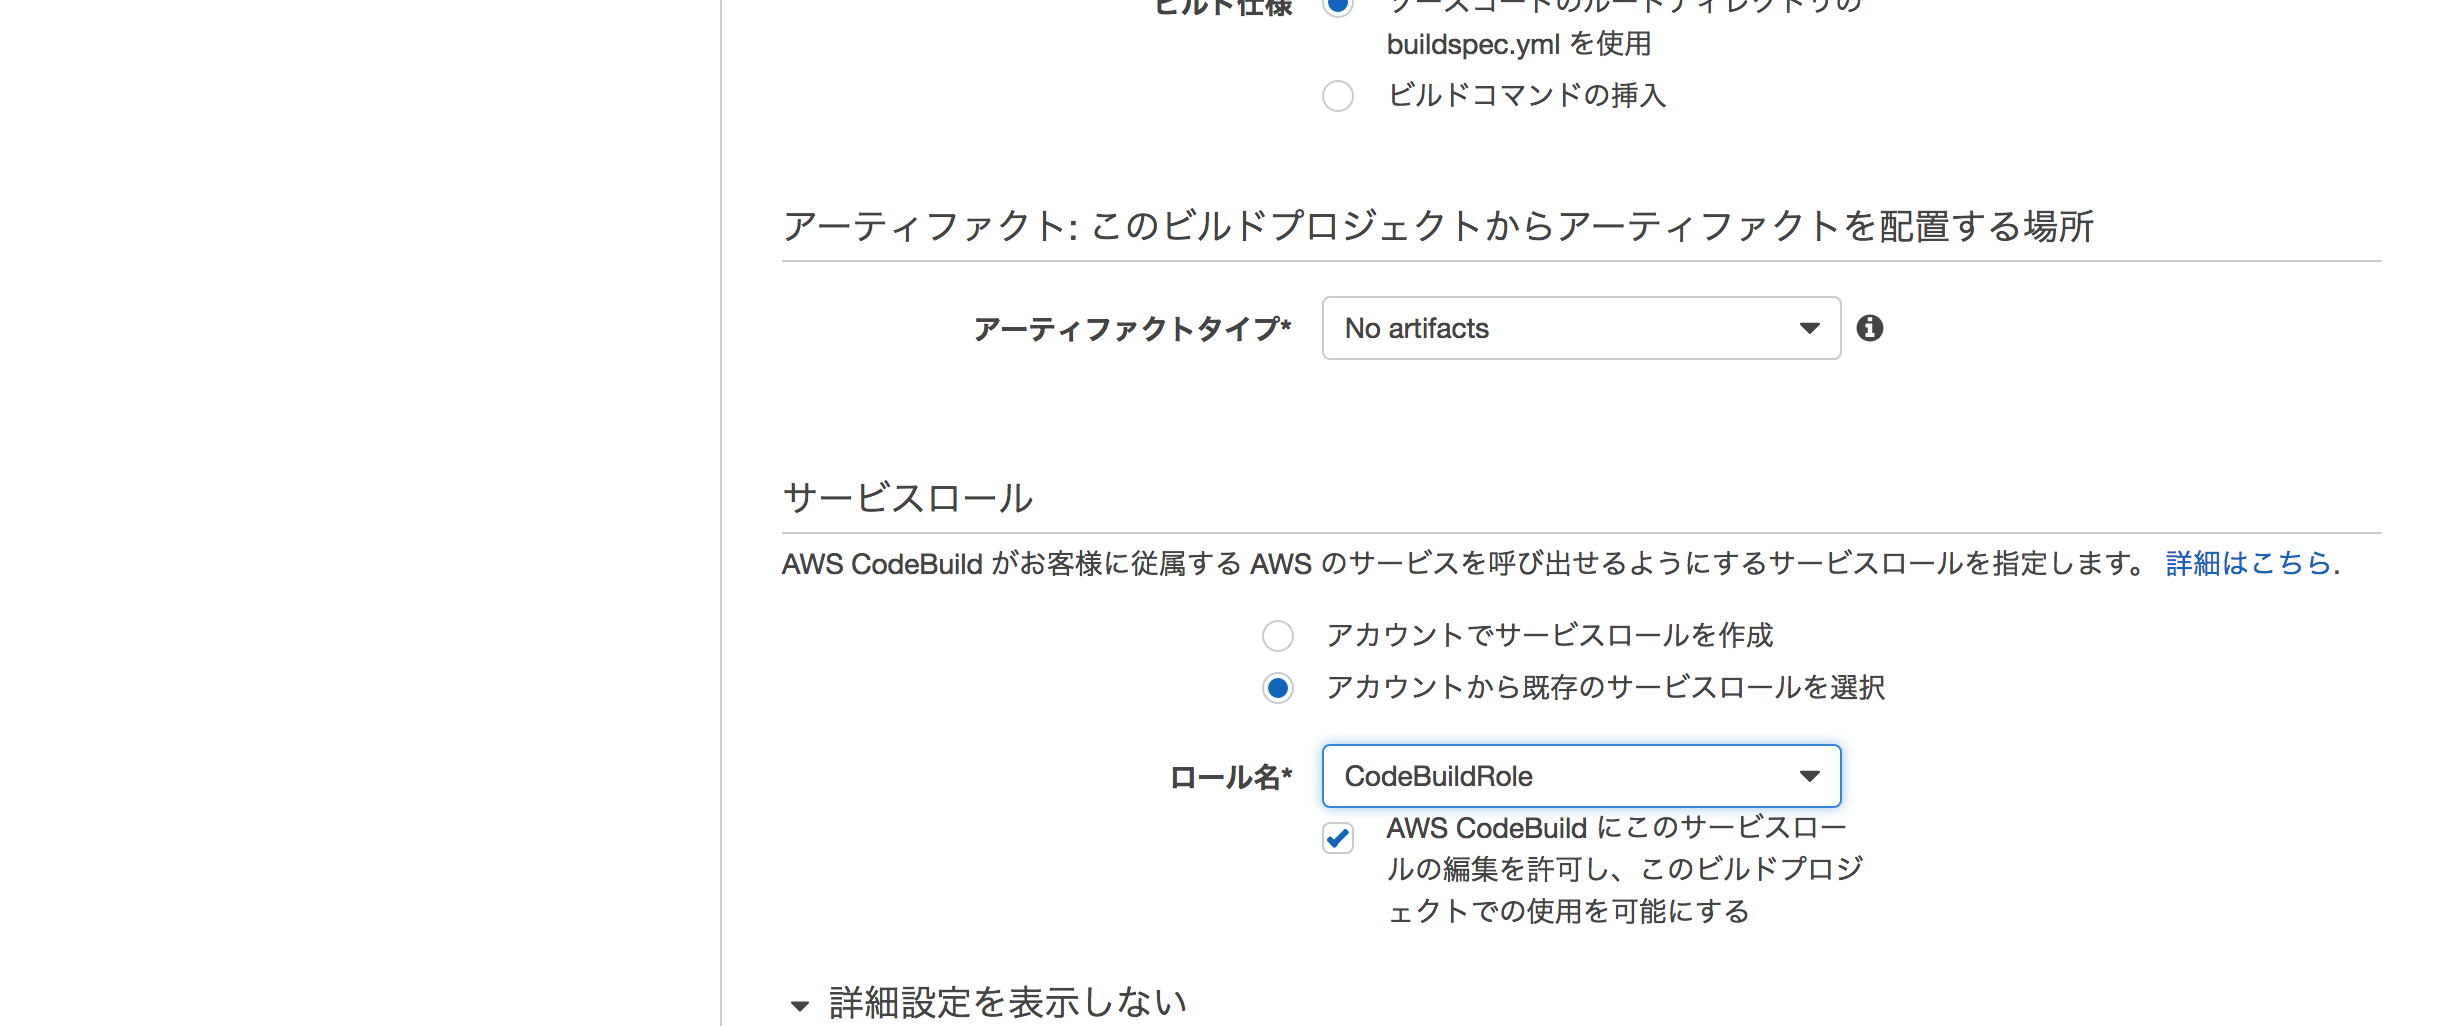
アーティファクトタイプはECRにpushするので"No artifacts"、
ロール名は先ほど作成したロールを指定します。
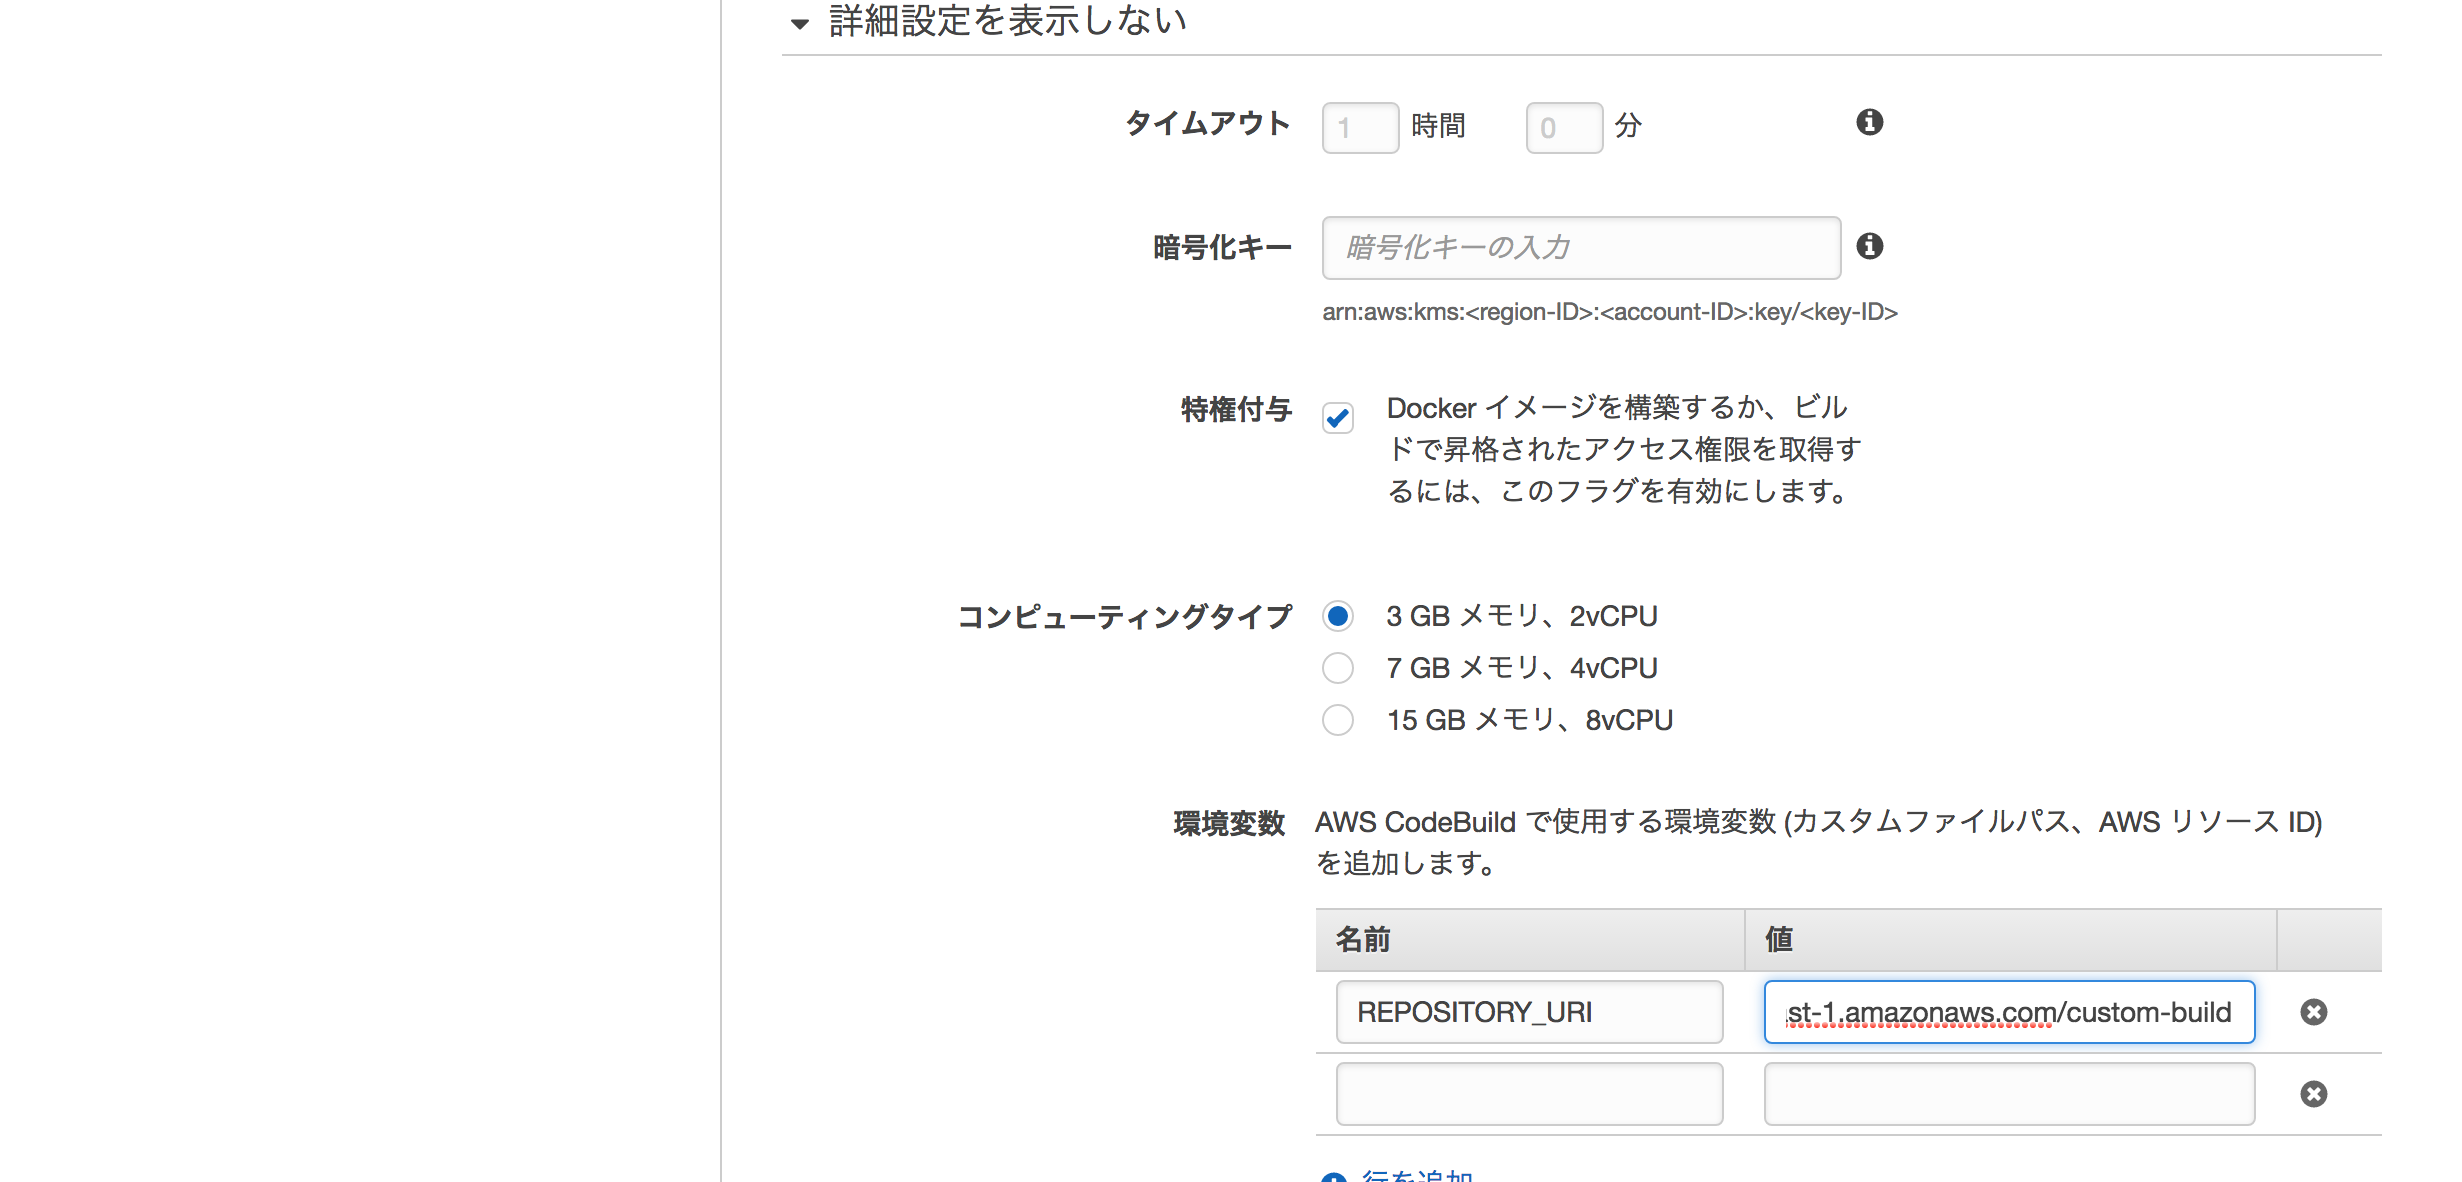
詳細設定の、"特権付与"にチェックし、環境変数にbuildspec.ymlで使用する
名前:REPOSITORY_URI
値:サンプルプログラムをpushするECRのリポジトリ名を指定します
CodeBuild ビルド実行
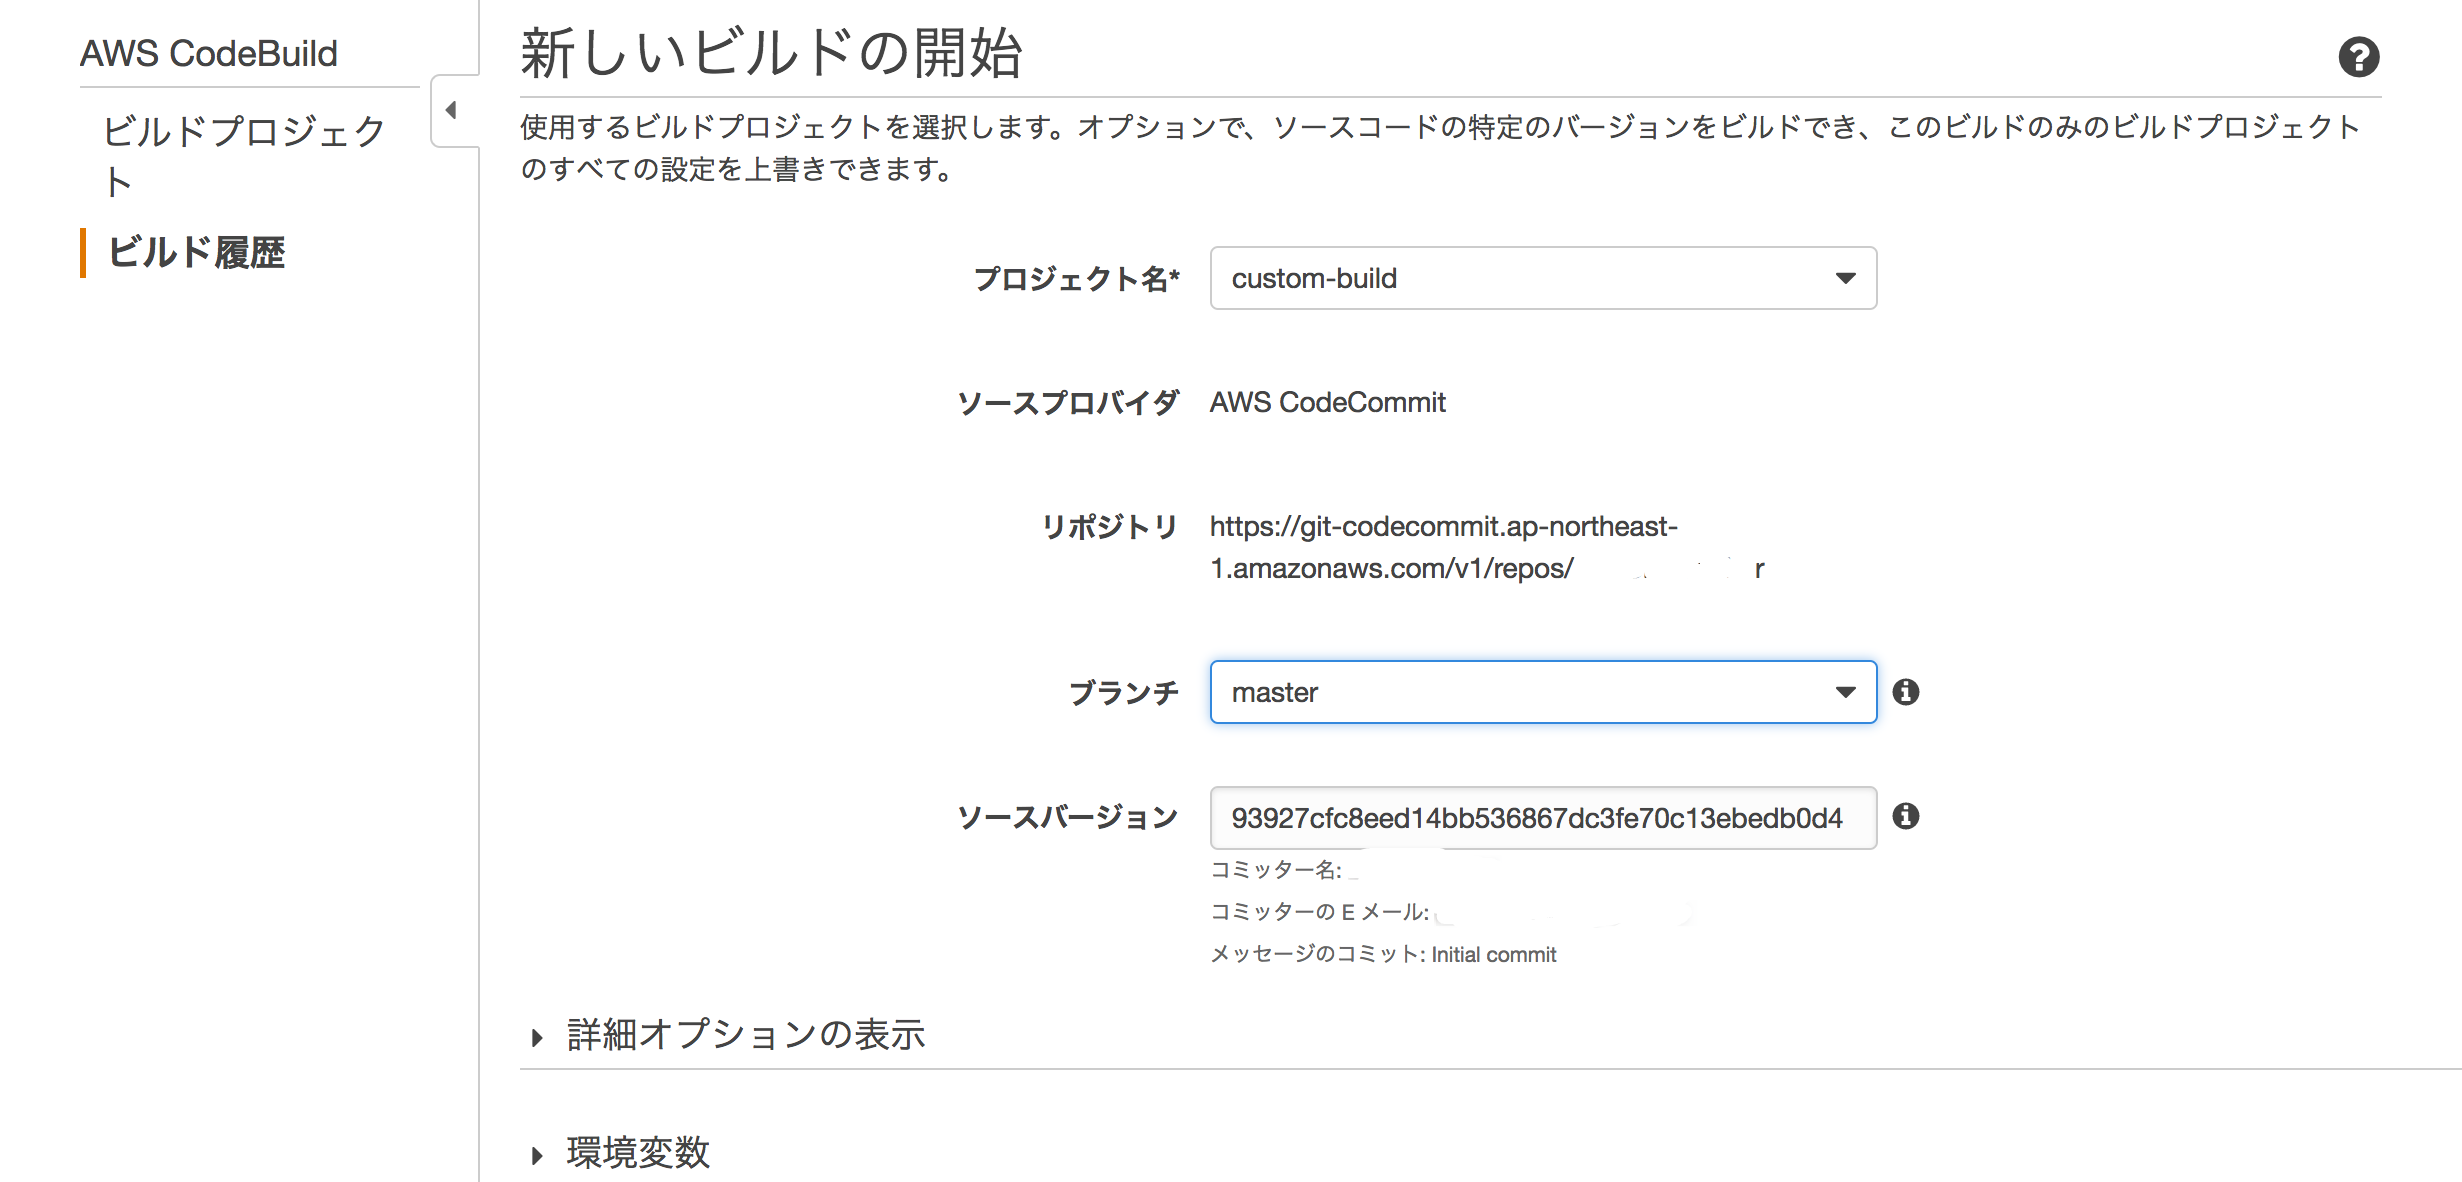
ビルドを実行します
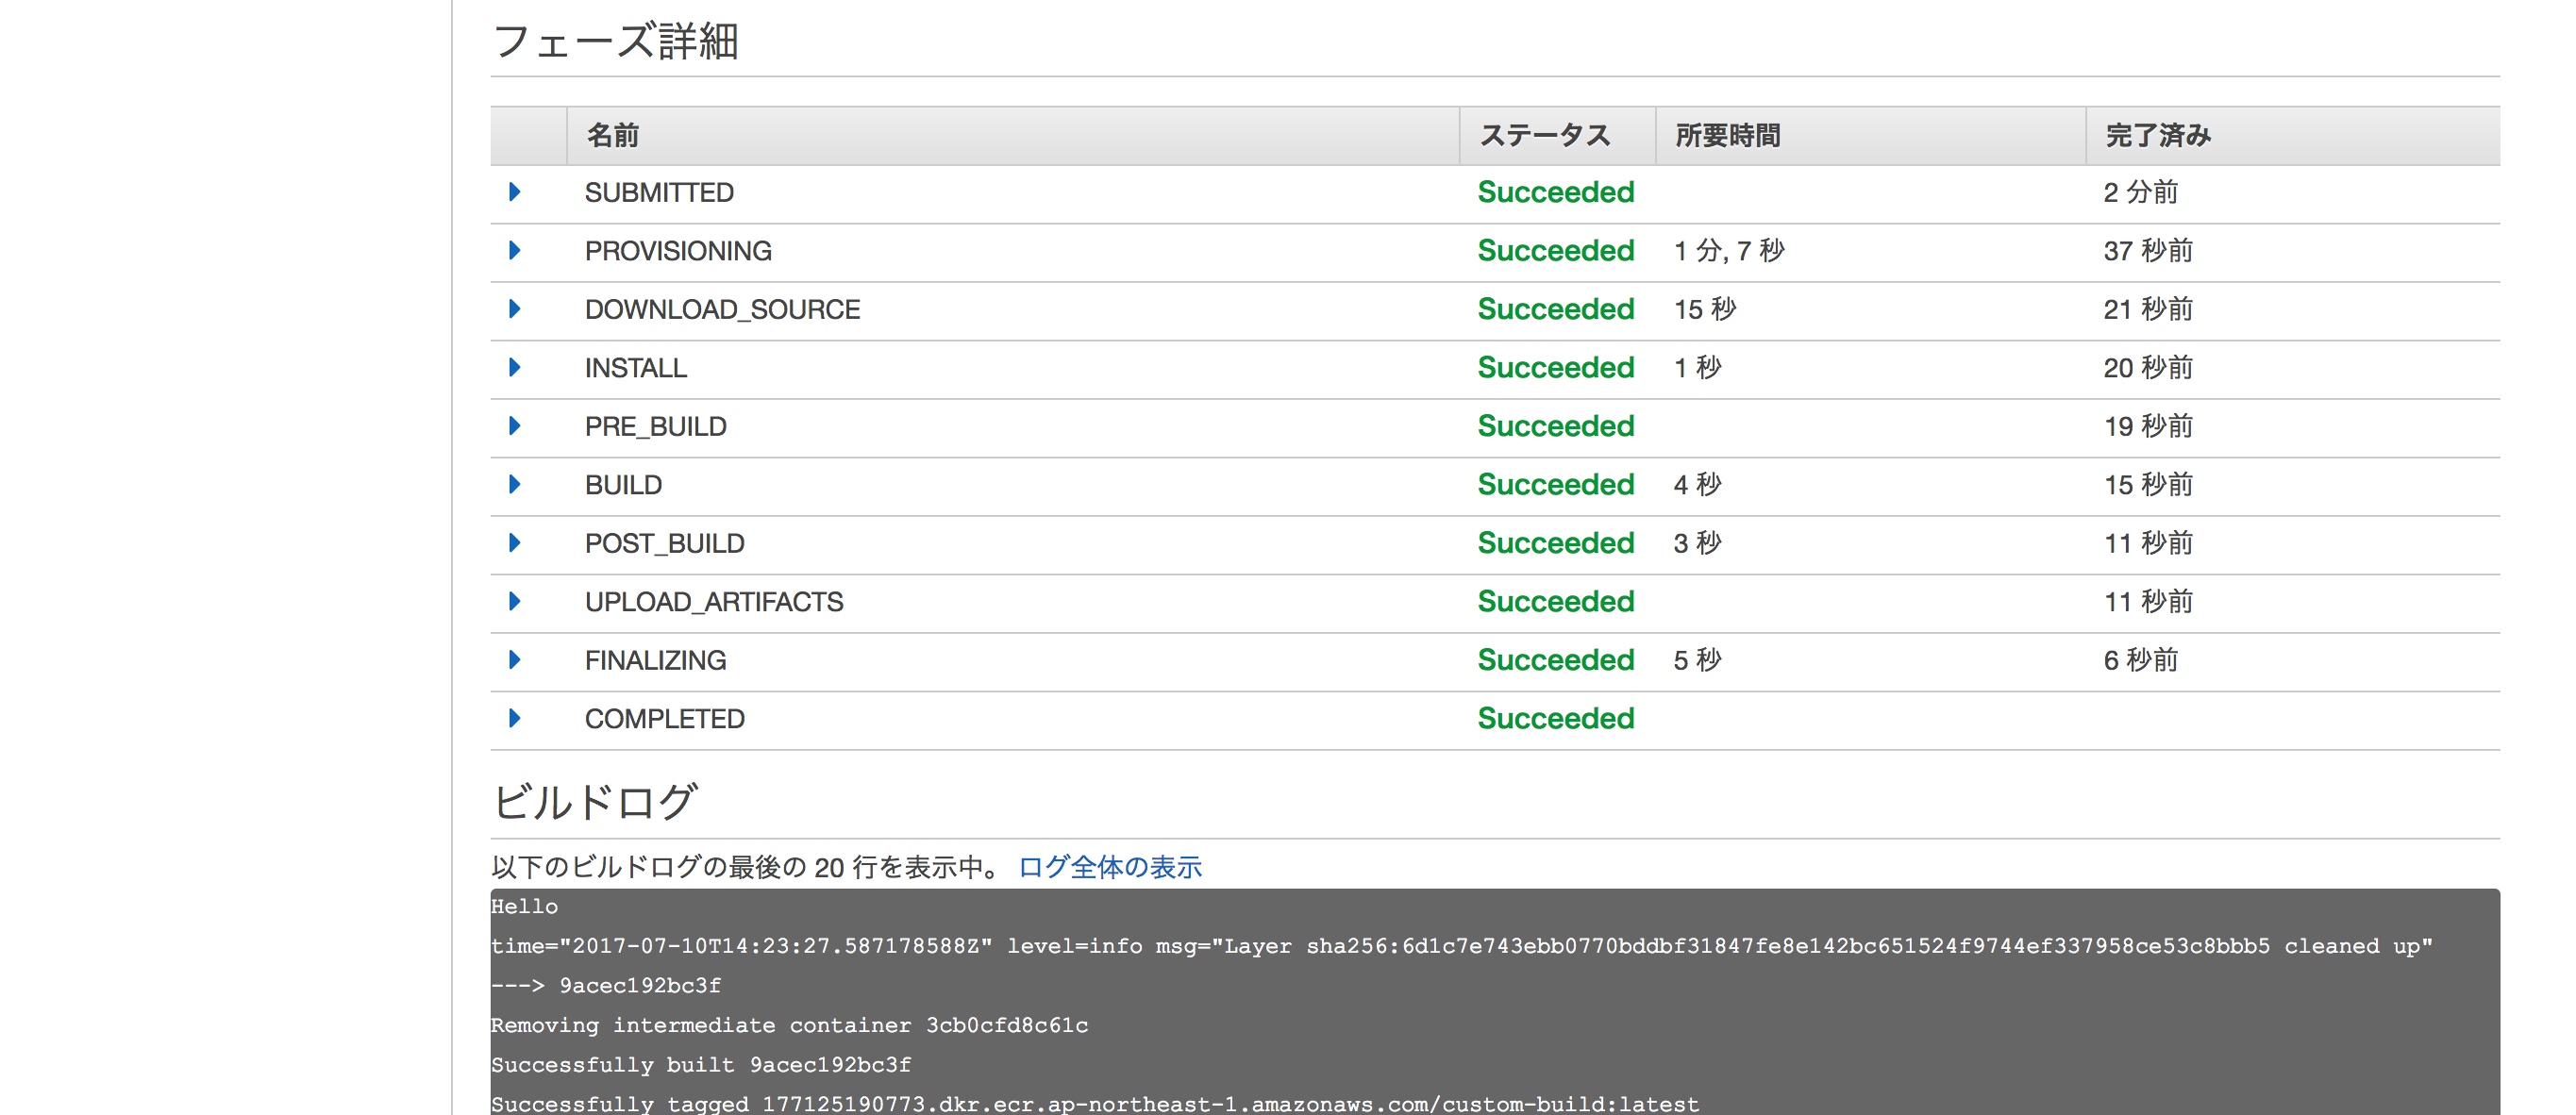
結果です
