Firebase Notifications
Firebase NotificationsのiOS10での設定方法からメッセージを送る方法です。
FirebaseとAPNの基礎的なことははしょります。
Podfileに下記を追加します。
pod 'Firebase/Core'
pod 'Firebase/Messaging'
お約束の証明書(CSR)、秘密キー(.p12)とプロビジョニングファイルを作成します。
詳しくはこちら-> https://firebase.google.com/docs/cloud-messaging/ios/certs
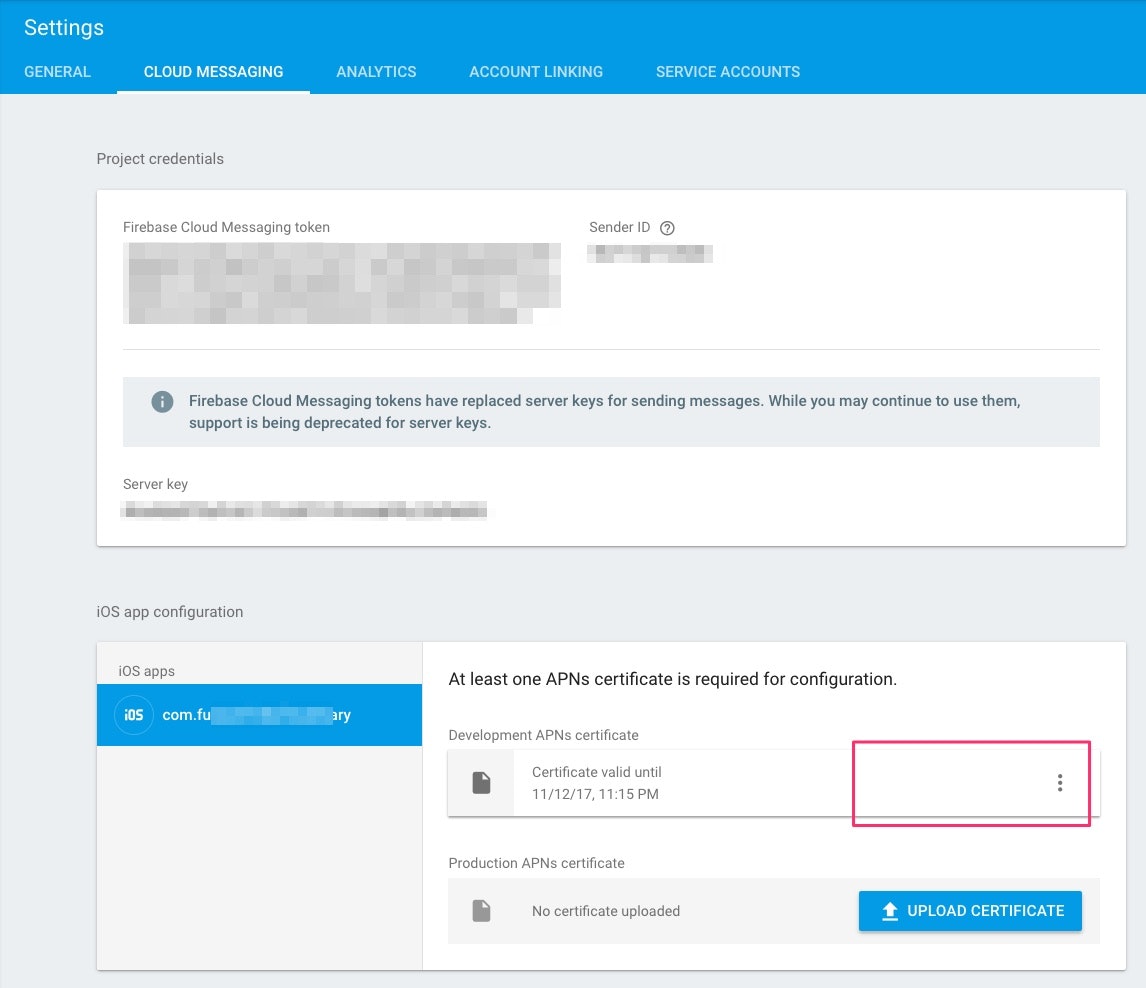
.p12の登録
Firebaseコンソールのギアアイコン > Project settings > CLOUD MESSAGINGを選択します。
Development APNs certificateから、作成した.p12ファイルをアップロードします。
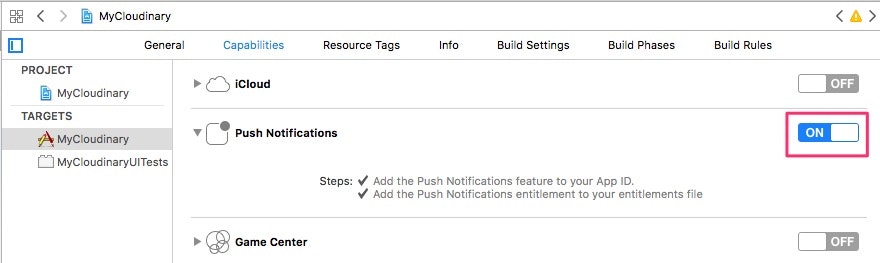
Xcode Push通知を有効化
Xcodeを起動します。Capabilitiesを開き、Push NotificationsをYESにします。
実機をXcodeに接続します。(シミュレータでは通知を受け取れません。)
Swift実装 (iOS10のみ対応)
リモート通知を登録し、通知を受け取るコードをAppDelegateに実装します。
詳しくはこちら-> https://firebase.google.com/docs/notifications/ios/console-audience
AppDelegate.swift
import UIKit
import Firebase
import UserNotifications

@UIApplicationMain
class AppDelegate: UIResponder, UIApplicationDelegate {

    var window: UIWindow?

    func application(_ application: UIApplication, didFinishLaunchingWithOptions launchOptions: [UIApplicationLaunchOptionsKey: Any]?) -> Bool {

        FIRApp.configure() // Firebase初期設定

        // リモート通知 (iOS10のみ対応)
        let authOptions: UNAuthorizationOptions = [.alert, .badge, .sound]
        UNUserNotificationCenter.current().requestAuthorization(
            options: authOptions,
            completionHandler: {_, _ in })

        // For iOS 10 display notification (sent via APNS)
        UNUserNotificationCenter.current().delegate = self
        // For iOS 10 data message (sent via FCM)
        FIRMessaging.messaging().remoteMessageDelegate = self

        application.registerForRemoteNotifications()
    }

    // アプリがバックグラウンドで通知を受け、ユーザが通知をタップしてアプリをフォアグランドにした時に呼ばれる
    func userNotificationCenter(_ center: UNUserNotificationCenter,
                                didReceive response: UNNotificationResponse,
                                withCompletionHandler completionHandler: @escaping () -> Void) {

        debugPrint("You tapped the message.")

        let userInfo = response.notification.request.content.userInfo
        // Print message ID.
        print("Message ID: \(userInfo["gcm.message_id"]!)")
        // Print full message.
        print("%@", userInfo)

        completionHandler()
    }
フォアグランドの時に通知を受け取る場合、エクステンションでデリゲートを実装します。(iOS10)
AppDelegate+notification.swift
import Foundation
import UserNotifications
import Firebase

@available(iOS 10, *)
extension AppDelegate : UNUserNotificationCenterDelegate {

    // アプリがフォアグランドの時に通知を受け取ると呼ばれる
    func userNotificationCenter(_ center: UNUserNotificationCenter,
                                willPresent notification: UNNotification,
                                withCompletionHandler completionHandler: @escaping (UNNotificationPresentationOptions) -> Void) {
        let userInfo = notification.request.content.userInfo
        // Print message ID.
        print("Now Fourground. Message ID: \(userInfo["gcm.message_id"]!)")

        // Print full message.
        print("%@", userInfo)
    }
}

extension AppDelegate : FIRMessagingDelegate {
    // Receive data message on iOS 10 devices.
    func applicationReceivedRemoteMessage(_ remoteMessage: FIRMessagingRemoteMessage) {
        print("%@", remoteMessage.appData)
    }
}
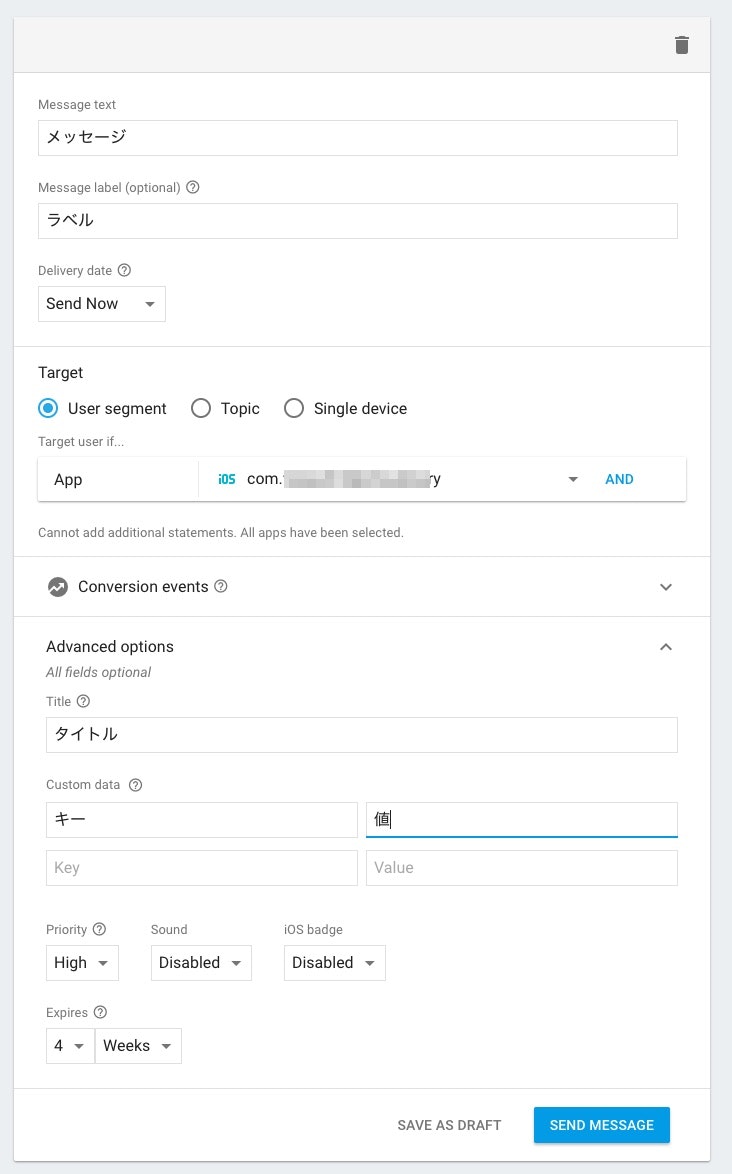
Firebaseコンソールから通知を送る
Firebaseのコンソールから、Notificationsを選択し、新規メッセージを作成します。
Advanced optionsをクリックすると、Custom dataキーバリューを設定することができます。
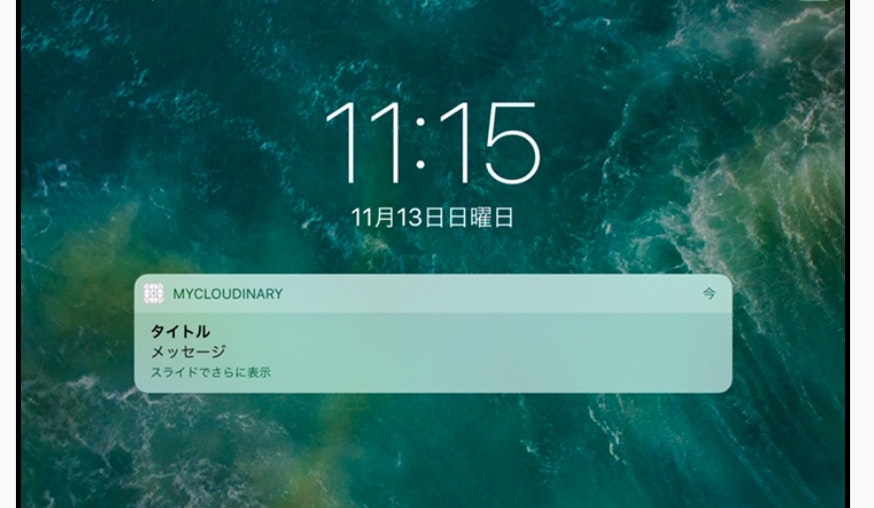
通知をタップすると、Xcodeのコンソールにデバッグ情報が出力されます。
