1年近く前に社内でHipChatクローンのKandanとHubotを動かす - Qiitaって記事を書いた。
最近プロジェクト向けの開発基盤的な環境を整えていて、その一環でチャットアプリを調べてたらLet's Chatを見つけた。(ホントはSlackとかサービスを使いたいんだけど、なかなかそうも行かない…)
当時Kandanを使って環境整えたけど、結構面倒だったり遅かったり不満も結構あった。ので、Let's Chatで環境を整えてみた。
結果を先に書いておくと、環境構築は割と簡単だし、UIもモダンでレスポンスも良かったのでオススメ。
環境構築
Docker, Heroku, Vagrant と手順が載っているけど、社内で利用するのでLocal installation を参考に構築。
今回はCentOS6.5上に構築した。
Node.jsのインストール
nodebrewで。
$ wget git.io/nodebrew
$ perl nodebrew setup
export PATH=$HOME/.nodebrew/current/bin:$PATH をpathに追加しろと言われるので追加する。
現時点で最新の v0.12.4 をインストールする。
$ nodebrew ls-remote
$ nodebrew install-binary v0.12.4
$ nodebrew use v0.12.4
MongoDBのインストール
MongoDBリポジトリ追加
[mongodb]
name=MongoDB Repository
baseurl=http://downloads-distro.mongodb.org/repo/redhat/os/x86_64/
gpgcheck=0
enabled=1
インストール
$ yum -y install mongodb-org
起動
$ service mongod start
Python2.7インストール
標準でPython2.6が入っていたけど、Python2.7以上が必要なので入れておく。
$ yum -y groupinstall "Development tools"
$ yum -y install zlib-devel bzip2-devel openssl-devel ncurses-devel sqlite-devel readline-devel tk-devel libicu-devel.x86_64
$ curl -O https://www.python.org/ftp/python/2.7.6/Python-2.7.6.tgz
$ tar zxvf Python-2.7.6.tgz
$ cd Python-2.7.6
$ ./configure --prefix=/opt/local
$ make && make altinstall
# 元から入っていたPythonをリネームしておく
$ mv /usr/bin/python /usr/bin/python2.6.6
$ ln -snf /opt/local/bin/python2.7 /usr/bin/python
$ python -V
Python 2.7.6
元から入っているPythonのバージョンを上げるとyumが動かなくなるので、リネームしたPythonを見るよう、以下のように修正する。
- #!/usr/bin/python
+ #!/usr/bin/python2.6.6
import sys
try:
    import yum
except ImportError:
    print >> sys.stderr, """\
There was a problem importing one of the Python modules
required to run yum. The error leading to this problem was:
.
.
Let's Chatのインストール
$ git clone https://github.com/sdelements/lets-chat.git
$ cd lets-chat
$ npm install
起動
$ npm start

> lets-chat@0.4.0 prestart /opt/lets-chat
> migroose


> lets-chat@0.4.0 start /opt/lets-chat
> node app.js


██╗     ███████╗████████╗███████╗     ██████╗██╗  ██╗ █████╗ ████████╗
██║     ██╔════╝╚══██╔══╝██╔════╝    ██╔════╝██║  ██║██╔══██╗╚══██╔══╝
██║     █████╗     ██║   ███████╗    ██║     ███████║███████║   ██║
██║     ██╔══╝     ██║   ╚════██║    ██║     ██╔══██║██╔══██║   ██║
███████╗███████╗   ██║   ███████║    ╚██████╗██║  ██║██║  ██║   ██║
╚══════╝╚══════╝   ╚═╝   ╚══════╝     ╚═════╝╚═╝  ╚═╝╚═╝  ╚═╝   ╚═╝

Release 0.4.0
http://localhost:5000 にアクセスするとログイン画面が表示される。
port番号やサインアップの許可などは settings.yml で行なう。KerberosやLDAPなどの認証にも対応している模様。
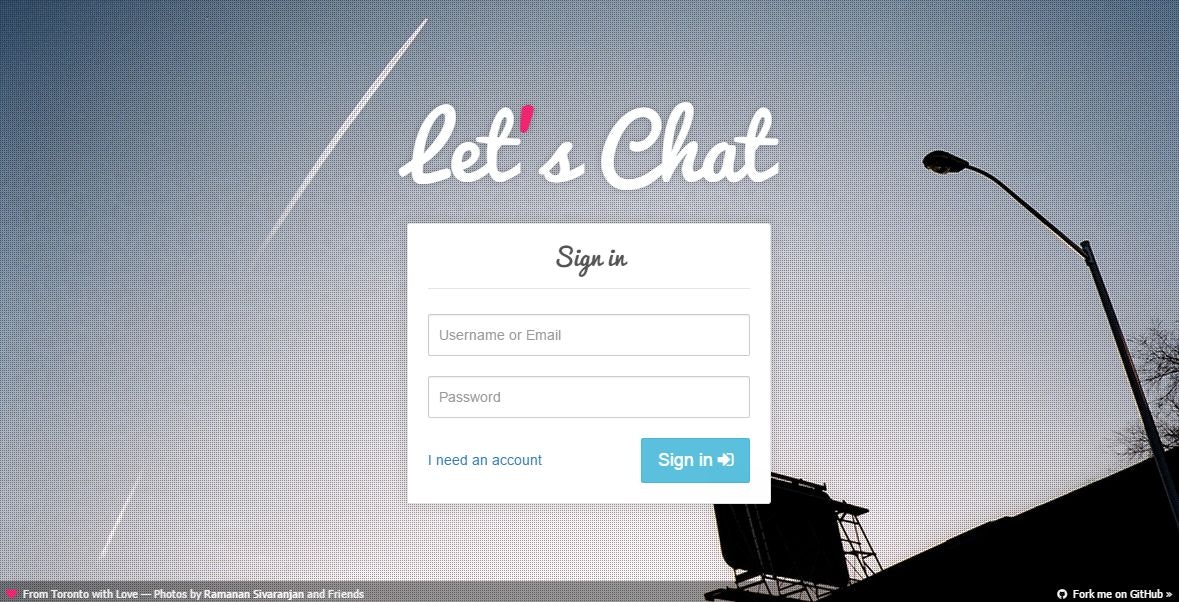
オシャレなログイン画面だ。
Init scriptを作成してサービス起動できるようにする
npm startで起動するのはイヤなので、サービス起動できるようにする。
Let's Chatのdaemon化はforeverを使って行なうのでインストールしておく。
$ npm install -g forever
以下の用にInit scriptを作成する。パスは各環境に合わせること。
# !/bin/sh
#
# Note runlevel 2345, 86 is the Start order and 85 is the Stop order
#
# chkconfig: 2345 86 85
# description: Description of the Service
#
# Below is the source function library, leave it be
. /etc/init.d/functions

# result of whereis forever or whereis node
export PATH=/home/tenten0213/.nodebrew/current/bin
# result of whereis node_modules
export NODE_PATH=$NODE_PATH:/home/tenten0213/.nodebrew/current/lib/node_modules

SERVICE_NAME="Let's Chat"
cd /opt/lets-chat


start(){
        forever start app.js
}

stop(){
        forever stop app.js
}

restart(){
        forever restart app.js
}

case "$1" in
        start)
                echo "Start service ${SERVICE_NAME}"
                start
                ;;
        stop)
                echo "Stop service ${SERVICE_NAME}"
                stop
                ;;
        restart)
                echo "Restart service ${SERVICE_NAME}"
                restart
                ;;
        *)
                echo "Usage: $0 {start|stop|restart}"
                exit 1
                ;;
esac
init.d/lets-chatとapp.jsに実行権限を与える
$ chmod a+x /etc/init.d/lets-chat
$ chmod a+x app.js
これで以下のようにサービス起動できるようになる。
$ service lets-chat start
Hubotとの連携
Hubotのインストールや構築についてはドキュメントを参照。
自身のHubotを作成したディレクトリでLet's Chatのアダプターをインストールする。
$ npm install hubot-lets-chat --save
Hubot用のアカウントを予め作成し、認証トークンを取得しておく。
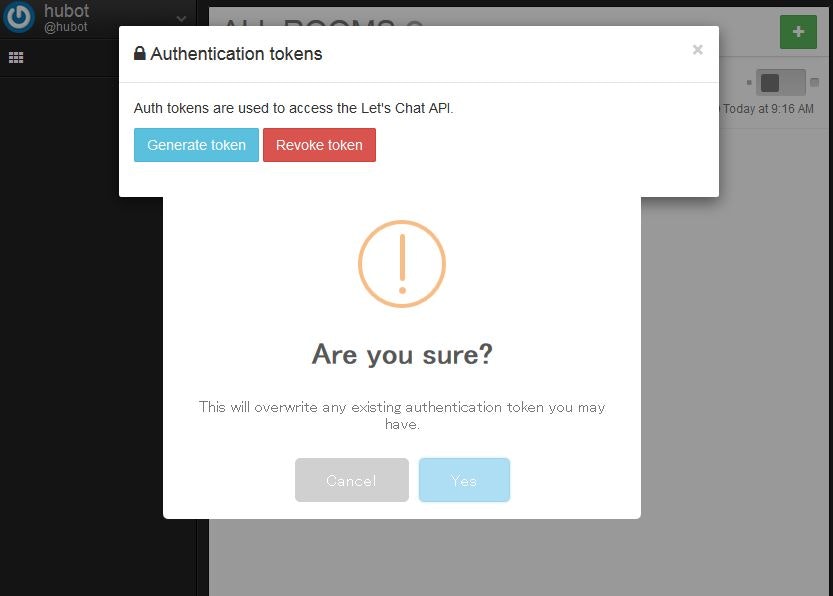
取得したトークンと、参加させたいルームのid(http://localhost:5000/#!/room/55825920a58fe99f7c28f232 なら 55825920a58fe99f7c28f232)を HUBOT_LCB_TOKENとHUBOT_LCB_ROOMSにそれぞれ設定する。
export HUBOT_LCB_TOKEN=NTRiNjg5NmYyMDZiMzEwMDAwYTAxNmZiOjE0ZTg2ODMwYz...
export HUBOT_LCB_ROOMS=5279facb1015642226000011,5394ffbabdea44e815000003
Let's Chatのプロトコルや、ホスト名、ポート名なども指定できる。
export HUBOT_LCB_PROTOCOL=http
export HUBOT_LCB_HOSTNAME=localhost
export HUBOT_LCB_PORT=5000
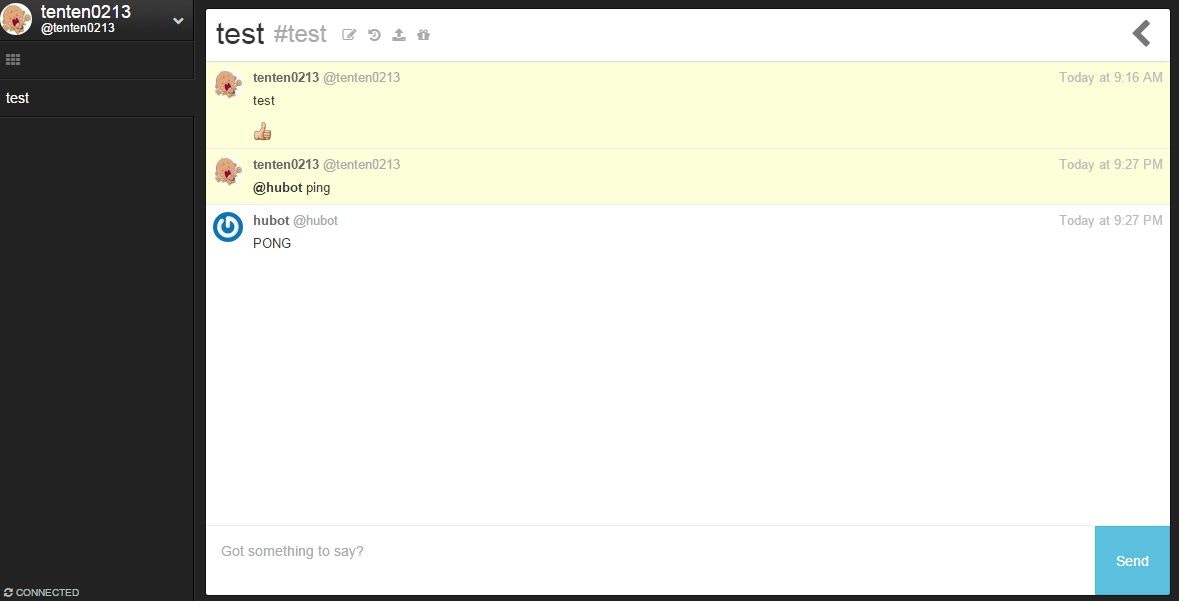
アダプターとしてlets-chatを指定して起動すると、HubotがLet's Chatに参加するようになる。
$ ./bin/hubot -a lets-chat
一応HubotもInit script書いといた。
追記
↓だとちゃんと動かないかも…ダメだったら
起動だけ run.shを用意して、止めるのは forever stop する感じで。
# !/bin/sh
#
# Note runlevel 2345, 86 is the Start order and 85 is the Stop order
#
# chkconfig: 2345 86 85
# description: Description of the Service
#
# Below is the source function library, leave it be
. /etc/init.d/functions

# result of whereis forever or whereis node
export PATH=/home/tenten0213/.nodebrew/current/bin
# result of whereis node_modules
export NODE_PATH=$NODE_PATH:/home/tenten0213/.nodebrew/current/lib/node_modules
export PATH=$HOME/.nodebrew/current/bin:$PATH
export HUBOT_LCB_HOSTNAME=localhost
export HUBOT_LCB_PORT=5000
export HUBOT_LCB_TOKEN="NTRiNjg5NmYyMDZiMzEwMDAwYTAxNmZiOjE0ZTg2ODMwYz..."
export HUBOT_LCB_ROOMS=5279facb1015642226000011,5394ffbabdea44e815000003

SERVICE_NAME="Hubot"
cd /home/tenten0213/hubot

start(){
        forever start -c coffee node_modules/.bin/hubot -a lets-chat
}

stop(){
        forever stop -c coffee node_modules/.bin/hubot -a lets-chat
}

restart(){
        forever restart -c coffee node_modules/.bin/hubot -a lets-chat
}

case "$1" in
        start)
                echo "Start service ${SERVICE_NAME}"
                start
                ;;
        stop)
                echo "Stop service ${SERVICE_NAME}"
                stop
                ;;
        restart)
                echo "Restart service ${SERVICE_NAME}"
                restart
                ;;
        *)
                echo "Usage: $0 {start|stop|restart}"
                exit 1
                ;;
esac