開発用Parse Serverをローカルに立ててみましたが、デバッグに制約があり使い勝手があまりよくないので、Quick botchでGCEのインスタンス上にサーバーを立ててみました。
全てGoogle Cloud PlatformのWebコンソールから操作していますが、もちろんgcloudコマンドラインツールからも操作可能です。インスタンス起動後はローカルサーバーを立てる手順と同じになります。BootイメージにはUbuntu14.04を使用しました。
GCEインスタンス作成
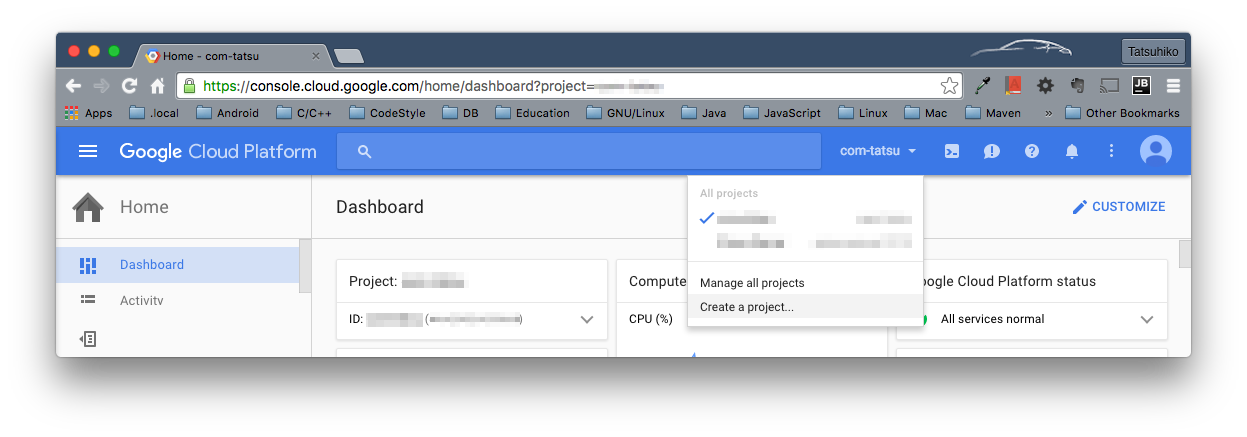
1. プロジェクト作成
任意のプロジェクト名(ここではParse Server)でプロジェクトを作成します。
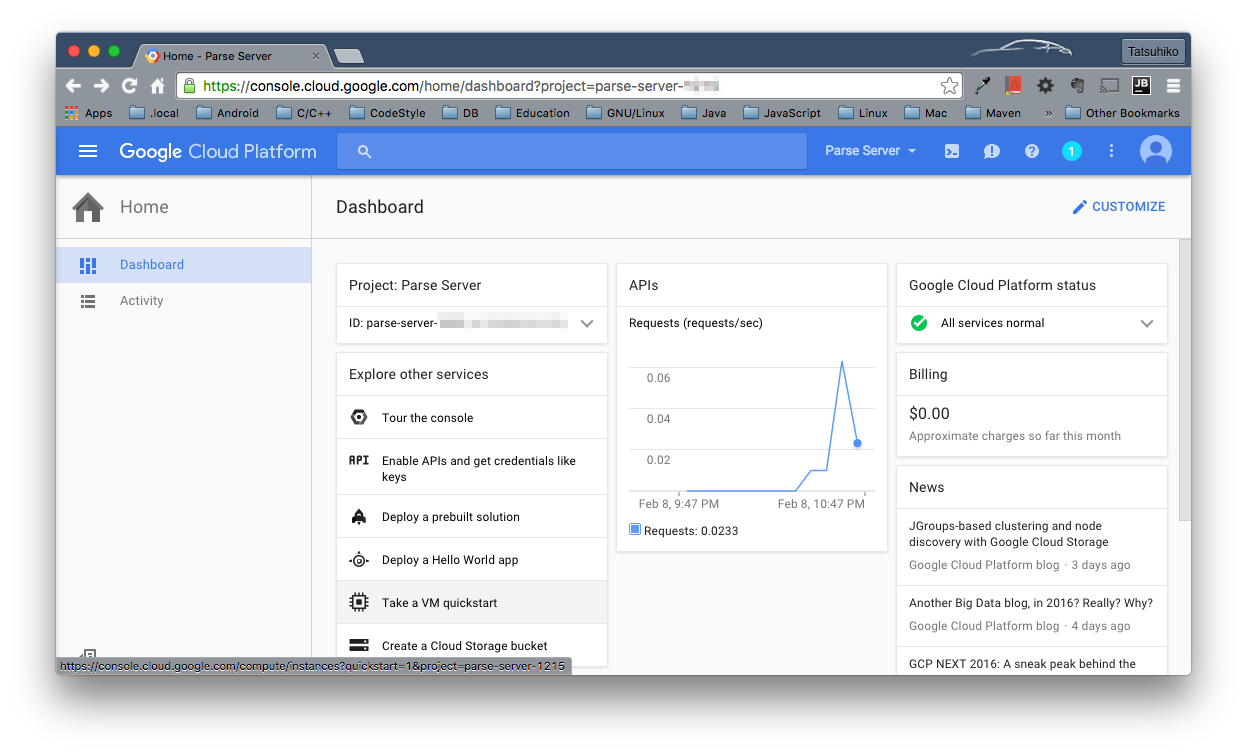
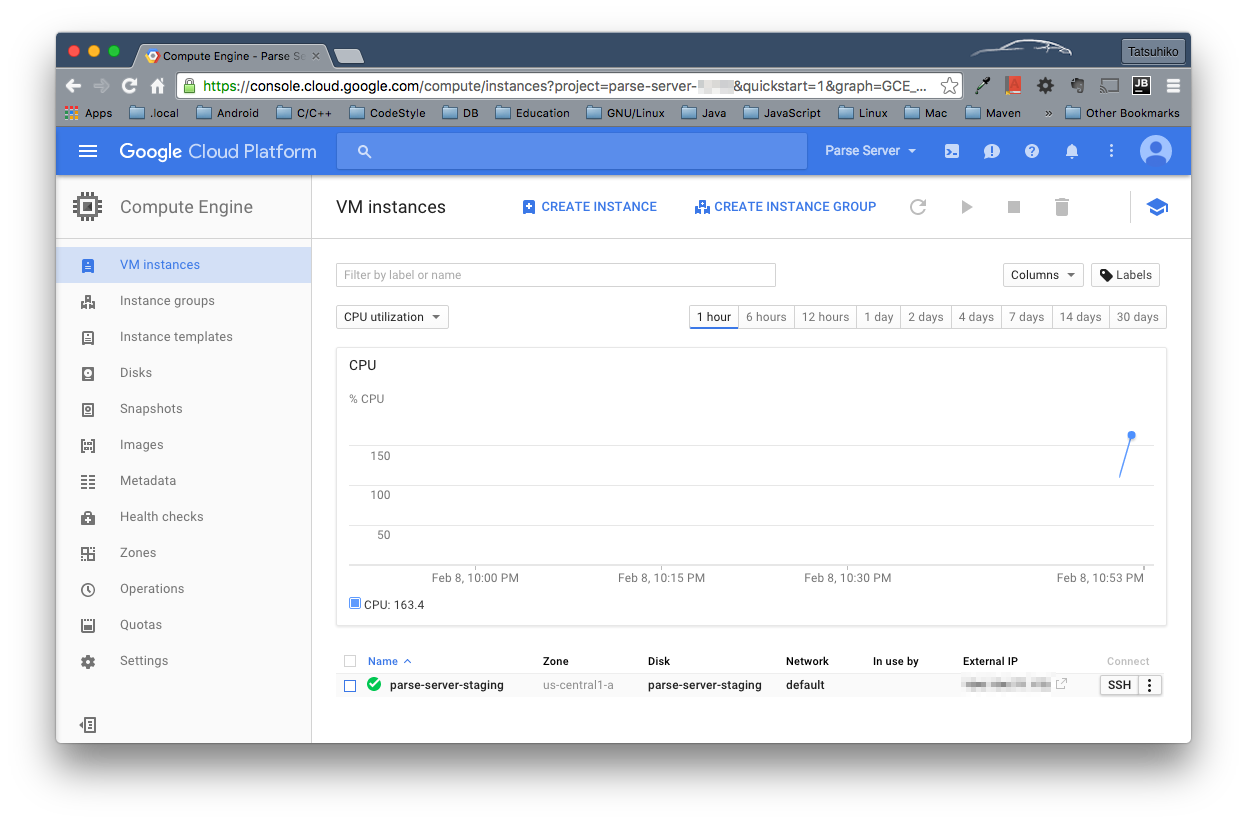
2. VMインスタンス作成
メニュー>Compute Engine、もしくはダッシュボードのTake a VM quickstartを選択します。
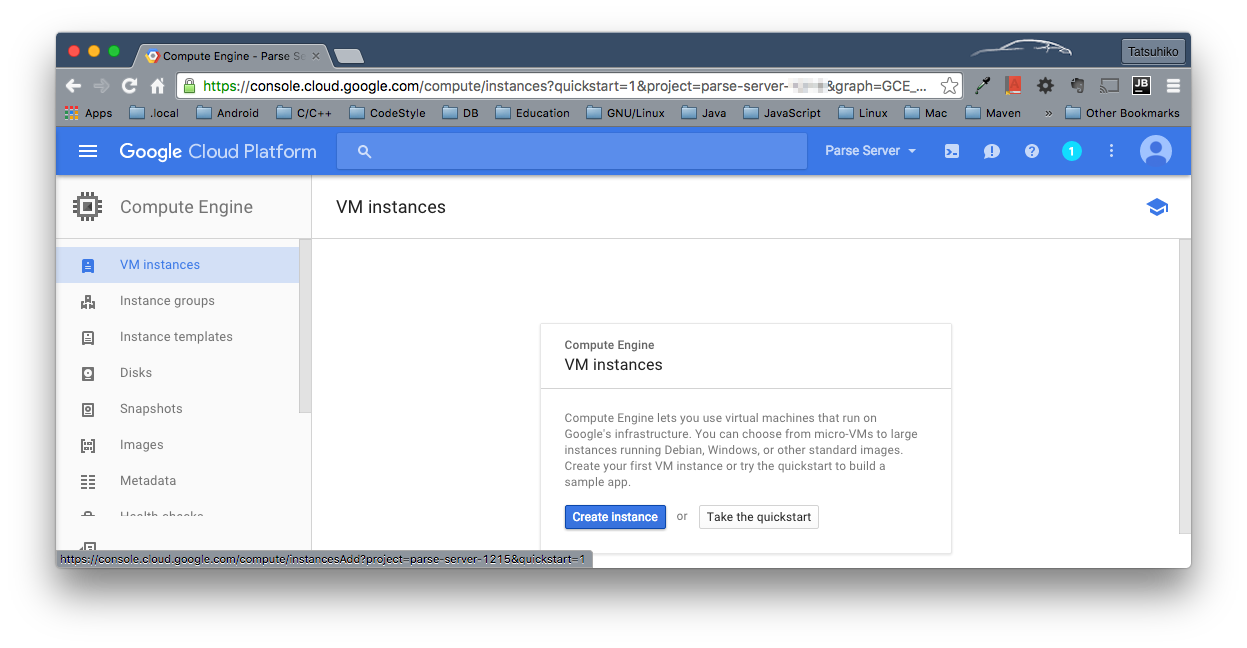
Create instanceボタンを押します。
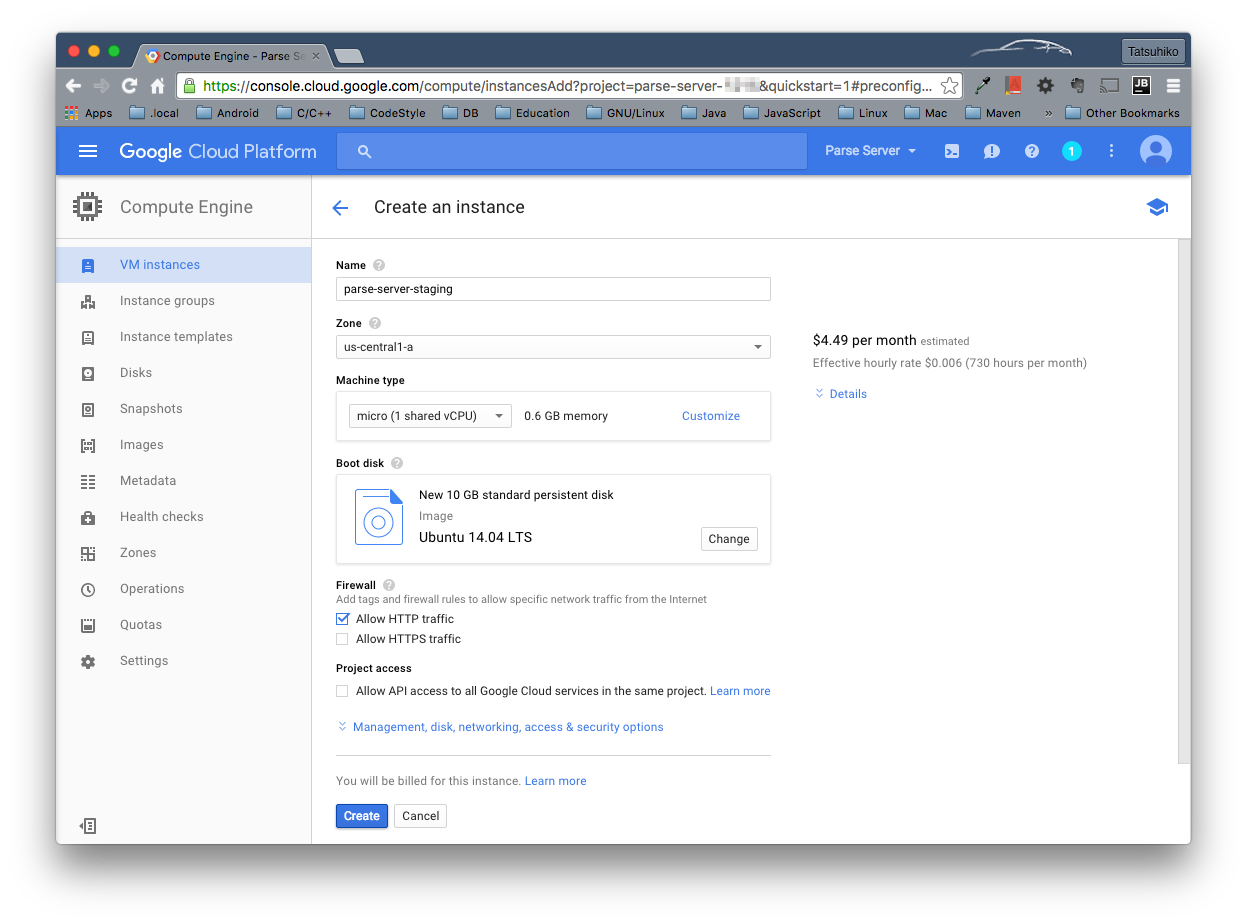
インスタンス名、ゾーン、マシンタイプ、Bootディスクはお好みで。f1-microをusゾーンに立てた場合、10GBのディスクと合わせても月にUS$7.00程度です。使用しない間は停止しておくこともできます。FirewallのAllow HTTP trafficはチェックしておきます。
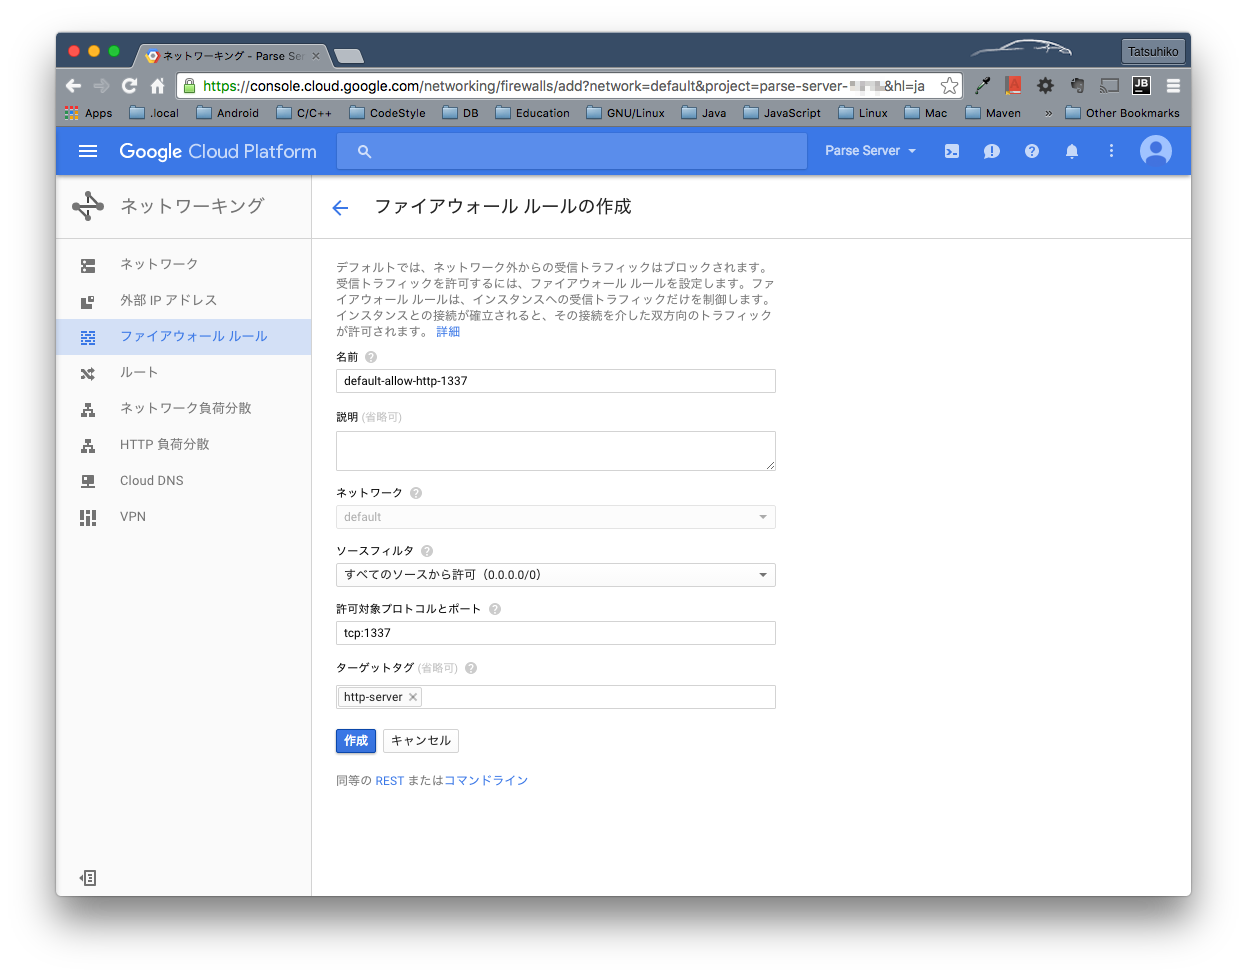
3. 使用ポートのファイアウォールルール作成
今回、defaultポート番号の1337をそのまま使用しました。ソースフィルタで接続元を限定可能、許可対象プロトコルとポートは"tcp:1337"、名前、説明、ターゲットタグは任意です。
SSH接続でWeb端末を開いたら、あとはローカルホストと同様に必要なものをインストールしていきます。
IPアドレスはデフォルトでEphemeralになっており、典型的には再起動の都度、動的に変わってしまいます。productionサーバーでなくとも、メニュー>Networking>External IP addressesページからStaticに変更しておいたほうが無難です。
Parse Serverインストール
0. 前提条件
$ sudo apt-get update
$ sudo apt-get install git
$ python -V
Python 2.7.6
Installing Node.js via package manager
$ curl -sL https://deb.nodesource.com/setup_4.x | sudo -E bash -
$ sudo apt-get install -y nodejs
$ node --version
v4.2.6
$ sudo apt-get install -y build-essential
$ sudo apt-key adv --keyserver hkp://keyserver.ubuntu.com:80 --recv EA312927
$ echo "deb http://repo.mongodb.org/apt/ubuntu trusty/mongodb-org/3.2 multiverse" | sudo tee /etc/apt/sources.list.d/mongodb-org-3.2.list
$ sudo apt-get update
$ sudo apt-get install -y mongodb-org
1. サンプルParse Serverインストール
$ git clone https://github.com/ParsePlatform/parse-server-example.git
$ cd parse-server-example/
$ sudo apt-get install libkrb5-dev
$ npm install
libkrb5-devをインストールしておかないと、以下のエラーが起きると思います。
> kerberos@0.0.18 install /home/tatsu/parse-server-example/node_modules/kerberos
> (node-gyp rebuild) || (exit 0)
make: Entering directory `/home/tatsu/parse-server-example/node_modules/kerberos/build'
  CXX(target) Release/obj.target/kerberos/lib/kerberos.o
In file included from ../lib/kerberos.cc:1:0:
../lib/kerberos.h:5:27: fatal error: gssapi/gssapi.h: No such file or directory
 #include <gssapi/gssapi.h>
                           ^
compilation terminated.
make: *** [Release/obj.target/kerberos/lib/kerberos.o] Error 1
make: Leaving directory `/home/tatsu/parse-server-example/node_modules/kerberos/build'
gyp ERR! build error
gyp ERR! stack Error: `make` failed with exit code: 2
gyp ERR! stack     at ChildProcess.onExit (/usr/lib/node_modules/npm/node_modules/node-gyp/lib/build.js:270:23)
gyp ERR! stack     at emitTwo (events.js:87:13)
gyp ERR! stack     at ChildProcess.emit (events.js:172:7)
gyp ERR! stack     at Process.ChildProcess._handle.onexit (internal/child_process.js:200:12)
gyp ERR! System Linux 3.19.0-43-generic
gyp ERR! command "/usr/bin/nodejs" "/usr/lib/node_modules/npm/node_modules/node-gyp/bin/node-gyp.js" "rebuild"
gyp ERR! cwd /home/tatsu/parse-server-example/node_modules/kerberos
gyp ERR! node -v v4.2.6
gyp ERR! node-gyp -v v3.0.3
gyp ERR! not ok
環境変数を設定します。index.jsに直接書いても構いません。
$ export APP_ID=YourParseApplicationId
$ export MASTER_KEY=YourMasterKey
$ export DATABASE_URI=mongodb://localhost:27017/your_db_name
$ export FACEBOOK_APP_ID=YourFacebookAppId
サーバーを起動します。
$ npm start
> parse-server-example@1.0.0 start /home/tatsu/parse-server-example
> node index.js
parse-server-example running on port 1337.
ローカルから以下の要求を投げてresultが返ってくれば正常です。
curl -X POST \
  -H "X-Parse-Application-Id: YourParseApplicationId" \
  -H "Content-Type: application/json" \
  -d '{}' \
  http://XXX.XXX.XXX.XXX:1337/parse/functions/hello
補足1
今回は開発用としていますが、もちろんprojuction/staging用としてGCEを使用してもよいわけです。ググったらnodeサーバーのデーモン起動するチュートリアルが出てきましたので参考までに載せておきます。
How To Set Up a Node.js Application for Production on Ubuntu 14.04
こちらにはGoogle App Engineにディプロイする手順が書かれています。合わせて載せておきます。
Deploying Parse server to Google App Engine
補足2
iOSアプリについてですが、iOS9ではApp Transport Securityが有効になっているので、馴れっこかとは思いますがサーバーのIPアドレスを許可してあげないと以下のようなエラーが起きますよね。
[Error]: The resource could not be loaded because the App Transport Security policy requires the use of a secure connection. (Code: 100, Version: 1.12.0)
NSExceptionDomainsではIPアドレスを指定できないので、いまのところNSAllowsArbitraryLoadsでATSを無効にせざるを得ませんね。
<key>NSAppTransportSecurity</key>
     <dict>
         <key>NSAllowsArbitraryLoads</key>
         <true/>
     </dict>