まず始めに
本記事は、karnoさんのドラッグしてドロップ on WPFのブログ記事に、写経兼備忘録とゴースト表示の追加した内容となっています。
WPFのドラッグ&ドロップについて詳しく知りたい方は、karnoさんのブログご参照ください。
ドラッグ&ドロップの実装
実装に手間が掛かる割に標準的な実装が用意されていない
もしかすると私が無知なだけかも知れませんが、WPFでドロップ&ドロップ実装を行うスタンダードなライブラリというのは見たことがありません。
WPFでドロップ&ドロップを実装するには、マウス関連のイベント処理とドロップ&ドロップAPIを組み合わせる必要があるのですが、オブジェクトをドラッグする処理とオブジェクトをドロップ処理に分けれており、毎回イチから作るには少々手間が掛かり過ぎる気がします。
ただ、実装難易度が高いかというと、そうでも無く、ネット検索して豊富にあるサンプルコードを組み合わせれば、動くコードを書くことは、それほど難しくありません。
検索した中でもビヘイビアを使用したkarnoのコードが流用し易そうだったので試してみました。
実装方針
MVVMと親和性の高い方法として、主なコードはビヘイビアで実装します。
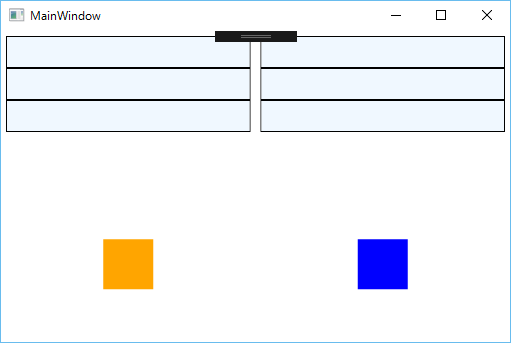
WPFでドラッグする対象とドロップする対象は、ItemsControl(リストコンテナ、ドロップ対象)、ListItem(ドラッグ対象、ドロップ対象)、FrameworkElement(ドラッグ対象、ドロップ対象)の3種類があれば事足ります。
DragStartBehavior(ドラッグ対象オブジェクト用ビヘイビア)
ドラッグするオブジェクトに対して指定します。
DataContextに設定されている値が、ドロップ先へ通知される仕組みになりますので必ず設定します。
また、ドロップされる側のオブジェクトが、ドロップを受諾して良い種類のオブジェクトなのかの判断を行うのにも使用されます。
オリジナルのコードに対して、IsDragEnableプロパティを追加しています。
このプロパティは、ドラッグ対象オブジェクトを一時的にドラッグ禁止にしたいときに利用します。
<Rectangle Width="50" Height="50" AllowDrop="True">
    <Rectangle.DataContext><vm:ViewModel1 /></Rectangle.DataContext>
    <i:Interaction.Behaviors>
        <behaviors:DragStartBehavior AllowedEffects="Copy" DragDropData="{Binding}" />
    </i:Interaction.Behaviors>
</Rectangle>
コンテナのアイテムをドラッグするには、アイテムのテンプレートにビヘイビアを指定します。
<ItemsControl>
    <ItemsControl.ItemTemplate>
        <DataTemplate>
            <Grid>
                <i:Interaction.Behaviors>
                    <behaviors:DragStartBehavior AllowedEffects="Copy" DragDropData="{Binding}" />
                </i:Interaction.Behaviors>
                <Border Height="32" Background="AliceBlue" BorderBrush="Black" BorderThickness="1" />
            </Grid>
        </DataTemplate>
    </ItemsControl.ItemTemplate>
</ItemsControl>
DragAcceptBehavior(ドロップ対象オブジェクト・コンテナ用ビヘイビア)
ドロップ対象オブジェクトに指定します。
ドラッグ&ドロップされる場合には、DragStartBehaviorとDragAcceptBehaviorの2つを指定します。
バインディングしているDescriptionが、ViewModelの制御クラスになります。
<Rectangle Width="50" Height="50" AllowDrop="True">
    <Rectangle.DataContext><vm:ViewModel1 /></Rectangle.DataContext>
    <i:Interaction.Behaviors>
        <behaviors:DragAcceptBehavior Description="{Binding Description}" />
    </i:Interaction.Behaviors>
</Rectangle>
ドロップ対象のコンテナに指定する場合には、コンテナ自体に設定します。
リストアイテムへドロップする場合には、アイテムのテンプレートにビヘイビアを指定します。
<ItemsControl>
    <i:Interaction.Behaviors>
        <behaviors:DragAcceptBehavior Description="{Binding Description}" />
    </i:Interaction.Behaviors>
    <ItemsControl.ItemTemplate>
        <DataTemplate>
            <Grid>
                <i:Interaction.Behaviors>
                    <behaviors:DragAcceptBehavior Description="{Binding Description}" />
                </i:Interaction.Behaviors>
                <Border Height="32" Background="AliceBlue" BorderBrush="Black" BorderThickness="1" />
            </Grid>
        </DataTemplate>
    </ItemsControl.ItemTemplate>
</ItemsControl>
ViewModelの実装
ViewModel側に実装が必要なのは、ドロップ側だけです。
ドラッグ側は、ビヘイビアを指定してDataContextにデータを指定すれば動きます。
DragAcceptBehavior(ビヘイビア)に、バインディングするDropAcceptDescriptionクラスによって
ドロップの受諾判定とドロップ処理を実装します。
DragOverイベントが、受諾判定処理で、Effectsに、DragDropEffects.Noneを設定すればカーソルがドロップ禁止マークになります。
DragDropイベントが、ドロップ処理です。
ドラッグソースデータとドロップターゲットデータを使って、処理を行います。
using SampleApplication.Behaviors;
using System;
using System.Collections.Generic;
using System.Linq;
using System.Text;
using System.Threading.Tasks;
using System.Windows;

public class ViewModel1 : Livet.ViewModel
{
    public ViewModel1()
    {
        this.Description = new DropAcceptDescription();
        this.Description.DragOver += Description_DragOver;
        this.Description.DragDrop += Description_DragDrop;
    }
    private DropAcceptDescription _description;
    public DropAcceptDescription Description
    {
        get { return this._description; }
        set
        {
            if (this._description == value)
            {
                return;
            }
            this._description = value;
            this.RaisePropertyChanged(() => this.Description);
        }
    }
    private void Description_DragDrop(System.Windows.DragEventArgs args)
    {
        if (!args.Data.GetDataPresent(typeof(ViewModel2))) return;
        var data = args.Data.GetData(typeof(ViewModel2)) as ViewModel2;
        if (data == null) return;
        var fe = args.OriginalSource as FrameworkElement;
        if (fe == null) return;
        var target = fe.DataContext as ViewModel1;
        if (target == null) return;
    }
    private void Description_DragOver(System.Windows.DragEventArgs args)
    {
        if (args.AllowedEffects.HasFlag(DragDropEffects.Copy))
        {
            if (args.Data.GetDataPresent(typeof(ViewModel2)))
            {
                return;
            }
        }
        args.Effects = DragDropEffects.None;
    }
}
ゴースト表示
オリジナルコードは、ゴースト表示を行っていませんでしたので、機能追加を行っています。
ゴーストの表示には、WPFではお馴染みのAdornerを使用しました。
ちなみに、本コードは複数オブジェクトのドラッグには対応していませんので、必要な方は修正してみてください。
コードは、GitHubへ置いてありますので、気になる方は参照ください。