概要
Plaidアプリについて以下で紹介しており、また起動のときに何を行っているか説明を行いました。
マテリアルデザインのアニメーション実装(Google製 Plaid) Part 1: 起動編
http://qiita.com/takahirom/items/0d0aacfea94b25dcaceb
ここではViewに触れたときのフィードバックについて見ていきます。
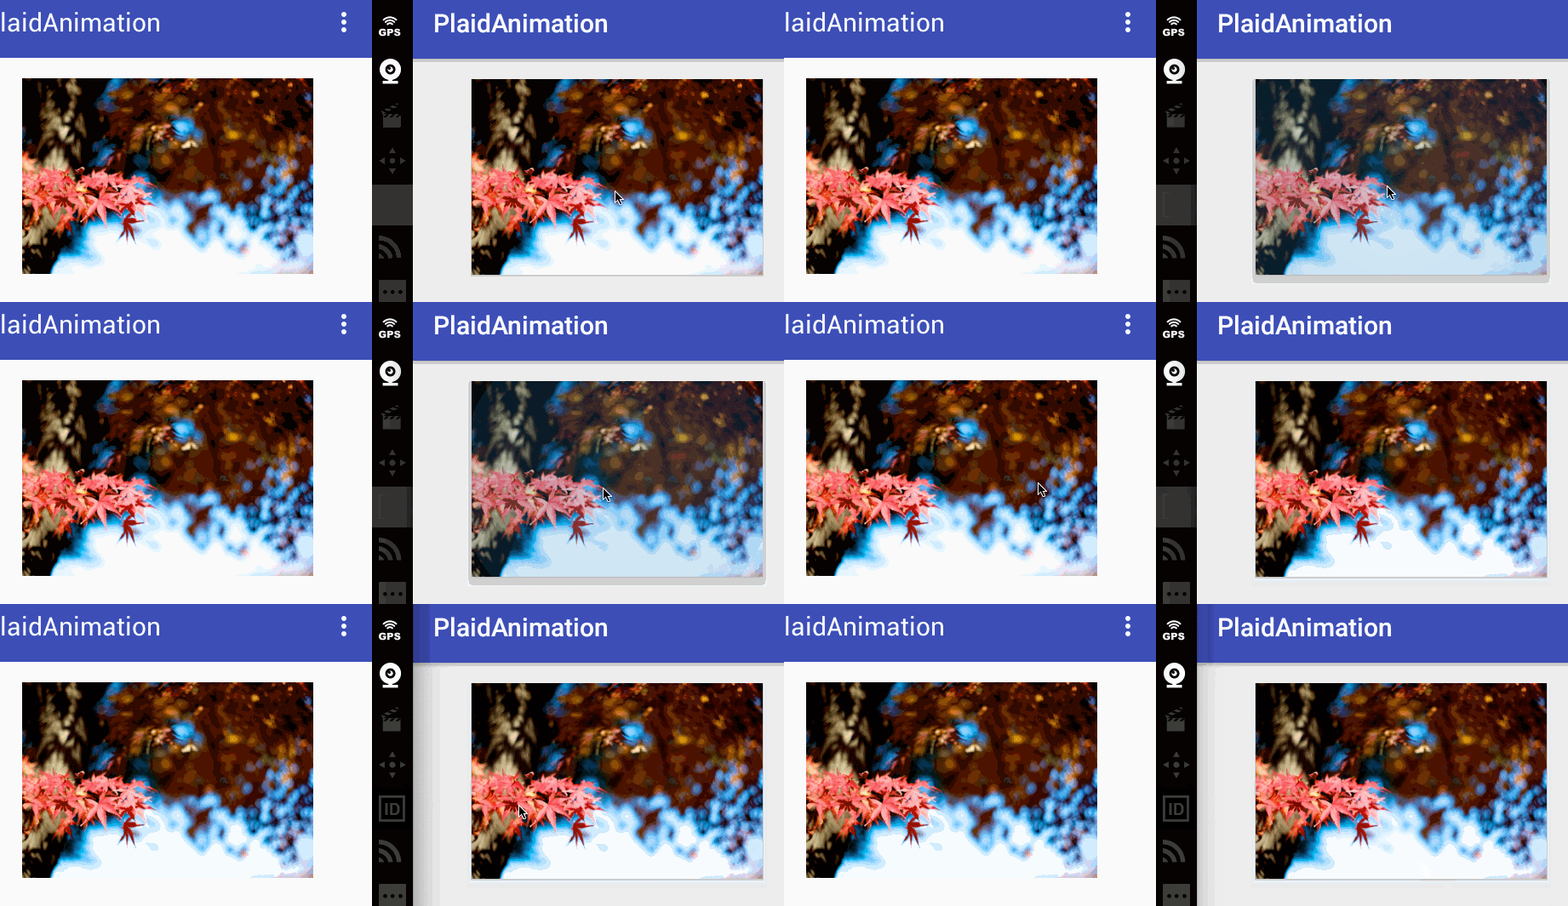
このgifアニメーションには2つのアニメーションがあります。
- タップしているときに下に影が表示され、浮き上がって見えるElevation(高度)のシャドウのアニメーション
- 波紋が広がって見えるRippleのアニメーション
こららをそれぞれ見ていきましょう。
マテリアルデザインおさらい
レスポンシブ高度と動的高度オフセット(Responsive elevation and dynamic elevation offsets)
日本語: https://material.google.com/jp/
マテリアルデザインのpdf
高度とシャドウ > 高度(Android) > 静止高度 > レスポンシブ高度と動的高度オフセット
英語: https://material.google.com/material-design/elevation-shadows.html#elevation-shadows-elevation-android
レスポンシブ高度と動的高度オフセット
一部のコンポーネント タイプでは、ユーザーの入力(通常時、フォーカス時、押下時など)や
システム イベントに応じて高度が変化するレスポンシブ高度が使用されています。こうした高
度の変化は、動的高度オフセットを使用して一貫して実装されます。
動的高度オフセットとは、そのコンポーネントの静止状態からコンポーネントの移動先までの
間の相対的な目標高度です。動的高度オフセットによって、複数の操作やコンポーネント タイ
プにわたり高度の変化の一貫性が保たれます。たとえば、押下時に隆起するすべてのコンポー
ネントでは、静止高度に対する相対的な高度の変化が同じです。
入力イベントが完了またはキャンセルされると、コンポーネントは静止高度に戻ります
押下時に高度が変化するレスポンシブ高度が利用されているようです。
同じように一貫して動く実装が必要になるようです。
また今回の場合、Cardのようなので、以下のように高度(Elevation)が定義されています。
カード
静止状態: 2 dp
選択された状態: 8 dp
放射状の反応(Radial reaction)
日本語: https://material.google.com/jp/
モーション > 放射状の反応
英語: https://material.google.com/motion/choreography.html#choreography-radial-reaction
おなじみのRippleエフェクトです。
入力と反応のつながりを明確にして、タップ入力を受け付けたことを確認することができます。
放射状の動きを使って、ユーザー入力とサーフェスの反応とのつながりを明確にします。

タッチリップルを使って、ユー
ザー入力と画面の反応を関連付
けます。それによって、タップ
した場所を示すとともに、タッ
プ入力を受け付けたことを確認
します。タップとマウスのどち
らの場合でも、タッチリップル
は接触した地点で発生します。
画面の反応は、タップした場所
に近いほうが、遠い場所よりも
早く発生する必要があります。
どう実装しているのか?
では実際にPlaidの実装を見てどのように実装しているか見ていきましょう。
レスポンシブ高度と動的高度オフセット(Responsive elevation and dynamic elevation offsets)
Android アプリにマテリアル デザインを導入する
https://googledevjp.blogspot.jp/2014/11/android.html
でも紹介されているのですが、Viewにandroid:stateListAnimatorを指定しています。
<io.plaidapp.ui.widget.BadgedFourThreeImageView
    xmlns:android="http://schemas.android.com/apk/res/android"
    xmlns:app="http://schemas.android.com/apk/res-auto"
    android:id="@+id/shot"
    android:layout_width="match_parent"
    android:layout_height="0dp"
    android:elevation="@dimen/z_card"
    android:stateListAnimator="@animator/raise"  **ここに注目**
    android:foreground="@drawable/mid_grey_ripple"
    app:badgeGravity="end|bottom"
    app:badgePadding="@dimen/padding_normal" />
animator/raiseは以下のようになっていました。
一時的に高さを変えるときはtranslationZを利用するようです。
<selector xmlns:android="http://schemas.android.com/apk/res/android">
    <item
        android:state_enabled="true"
        android:state_pressed="true">
        <objectAnimator
            android:duration="@android:integer/config_shortAnimTime"
            android:propertyName="translationZ"
            android:valueTo="@dimen/touch_raise" />
    </item>
    <item>
        <objectAnimator
            android:duration="@android:integer/config_shortAnimTime"
            android:propertyName="translationZ"
            android:valueTo="0dp" />
    </item>
</selector>
ちなみにtouch_raiseの大きさは6dp、タブレット(sw600)では9dpとなっていました。(おそらく6dpになっているのはすでにViewのelevationが2dpなので2+6dpで8dpになるからではないかと思います。)
これをいろいろなところで利用することで、タップ時に浮き上がるような動きを実現しているようです。
低いAPIレベルではどうなるか?
クラッシュするようなことはありませんが、android:stateListAnimatorがAPIレベル21未満(Android 5.0未満)では無視されてしまうため、何の効果もえられません。
放射状の反応(Radial reaction)
インクが広がるような通称Ripple Effectですが、一般的にBackgroundに?android:selectableItemBackgroundで利用することができます。
しかし今回のPlaidでは画像の上にRippleが表示されており、また、画像によってRippleの色が異なっています。
(赤いRipple Effect)

(青いRipple Effect)

どのように実装しているのか見ていきましょう。
大きく色の作り方、RippleDrawableの作り方、setForegroundのバックポートを説明します。
色の作り方
Paletteクラスを使うと、画像からマテリアルデザインで利用できる色を取り出すことができます。
Glideを利用して画像をセットしているのですが、セットする前に、以下のようにBitmapを取り出して、Paletteにより色を生成します。
            Palette.from(((GlideBitmapDrawable) resource).getBitmap())
                    .clearFilters()
                    .generate(this);
生成が終わるとRippleDrawableを作成して、setForegroundしています。
    @Override
    public void onGenerated(Palette palette) {
        ((BadgedFourThreeImageView) getView()).setForeground(
                ViewUtils.createRipple(palette, 0.25f, 0.5f,
                        ContextCompat.getColor(getView().getContext(), R.color.mid_grey), true));
    }
ViewUtils.createRipple()はRippleDrawableを作成するメソッドで自分で実装しているメソッドなので次にそれを見ていきます。また利用することでDrawableをViewのコンテンツの前面に描画することができるView.setForeground()はAPI Level 23なのでバックポートする実装が入っていますので、次にそれを紹介していきます。
RippleDrawableの作り方
ViewUtils.createRipple()はPaletteのクラスから色を取り出して、それを半透明にして、あの波紋のように広がるRippleDrawableを生成して返しているようです。
また、何も色が見つからなかったときは<color name="mid_grey">#40808080</color>の色を利用するようです。
またRippleDrawableのコンストラクタの引数として渡しているnew ColorDrawable(Color.WHITE)はmaskとして渡しており、全体をRippleさせるために渡すようです。
    public static RippleDrawable createRipple(@NonNull Palette palette,
                                              @FloatRange(from = 0f, to = 1f) float darkAlpha,
                                              @FloatRange(from = 0f, to = 1f) float lightAlpha,
                                              @ColorInt int fallbackColor,
                                              boolean bounded) {
        int rippleColor = fallbackColor;
        if (palette != null) {
            // try the named swatches in preference order
            if (palette.getVibrantSwatch() != null) {
                rippleColor =
                        ColorUtils.modifyAlpha(palette.getVibrantSwatch().getRgb(), darkAlpha);

            } else if (palette.getLightVibrantSwatch() != null) {
                rippleColor = ColorUtils.modifyAlpha(palette.getLightVibrantSwatch().getRgb(),
                        lightAlpha);
            } else if (palette.getDarkVibrantSwatch() != null) {
                rippleColor = ColorUtils.modifyAlpha(palette.getDarkVibrantSwatch().getRgb(),
                        darkAlpha);
            } else if (palette.getMutedSwatch() != null) {
                rippleColor = ColorUtils.modifyAlpha(palette.getMutedSwatch().getRgb(), darkAlpha);
            } else if (palette.getLightMutedSwatch() != null) {
                rippleColor = ColorUtils.modifyAlpha(palette.getLightMutedSwatch().getRgb(),
                        lightAlpha);
            } else if (palette.getDarkMutedSwatch() != null) {
                rippleColor =
                        ColorUtils.modifyAlpha(palette.getDarkMutedSwatch().getRgb(), darkAlpha);
            }
        }
        return new RippleDrawable(ColorStateList.valueOf(rippleColor), null,
                bounded ? new ColorDrawable(Color.WHITE) : null);
    }
透明度について
暗い色には25%の可視性にして、明るい色には50%の可視性をつけているようです。
ColorUtils.modifyAlpha()は独自で作っているメソッドなのですがSupport Libraryに似たメソッドがあるので、それを使うことができます。
https://github.com/takahirom/PlaidAnimation/blob/18fe2357e9836010c4171b6d0d51831a6af28c2b/app/src/main/java/com/github/takahirom/plaidanimation/MyColorUtils.java#L16-L16
setForegroundのバックポート
これを利用することでDrawableをViewのコンテンツの前面に描画することができます。
RippleDrawableはAPI Level 21(Android 5.0)以上が必要なので、それ以下には正式な方法ではバックポートできませんが、View.setForegroundがAPI Level 23(Android 6.0)以上必要なのはバックポート可能です。これによりAPI Level 21(Android 5.0以降)でViewのコンテンツの上にRippleDrawableを描画することが可能になります。
ちなみにPlaidにはこれをバックポートするためにForegroundImageViewとForegroundLinearLayoutとForegroundRelativeLayoutが存在します。コメントの一覧でコメントをタップしたときのRipple Effectもこれを利用して作られています。
Foregroundの検索結果
https://github.com/nickbutcher/plaid/search?utf8=%E2%9C%93&q=Foreground
処理についてはコメントを書きます。
public class ForegroundImageView extends ImageView {

    private Drawable foreground;
...

    public ForegroundImageView(Context context, AttributeSet attrs) {
        super(context, attrs);
...
        // 影がViewの中に表示されると、そこもRippleしてしまうので、
        // Viewの大きさと影の四角を一緒にする
        setOutlineProvider(ViewOutlineProvider.BOUNDS);
    }
...
    /**
     * Supply a Drawable that is to be rendered on top of the contents of this ImageView
     *
     * @param drawable The Drawable to be drawn on top of the ImageView
     */
    public void setForeground(Drawable drawable) {
        if (foreground != drawable) {
            ...
            foreground = drawable;

            if (foreground != null) {
                // 大きさを合わせる
                foreground.setBounds(0, 0, getWidth(), getHeight());
                // このViewをDrawさせる
                setWillNotDraw(false);
                // **ここでおそらくDrawableの変更をViewに知らせて、再度描画させる**
                foreground.setCallback(this);
                if (foreground.isStateful()) {
                    foreground.setState(getDrawableState());
                }
            } else {
                // foregroundがなければ描画しない
                setWillNotDraw(true);
            }
            // 再描画
            invalidate();
        }
    }

    @Override
    public void draw(Canvas canvas) {
        super.draw(canvas); // 普通の描画を行う
        if (foreground != null) {
            // **その上にforegroundのDrawableを上に描画する**
            foreground.draw(canvas);
        }
    }

    // DrawableにHotspotの位置を教える(Rippleの中心地を教える)
    @Override
    public void drawableHotspotChanged(float x, float y) {
        super.drawableHotspotChanged(x, y);
        if (foreground != null) {
            foreground.setHotspot(x, y);
        }
    }
}
下位互換性について
今回出てきた互換性をまとめると以下のようになります。
| View#setForeground | RippleDrawable | 押下時のElevation(StateListAnimator) | |
|---|---|---|---|
| 4.0-4.4 | △(対応可) | ☓(ビルドは可能、サードパーティ製のライブラリを使えば可能) | ☓(ビルドは可能、サードパーティ製のライブラリを使えば可能) |
| 5.0-5.1 | △(対応可) | ○ | ○ |
| 6.0- | ○ | ○ | ○ |
影もRippleもAPI Level21未満(Android 5.0未満)の下位互換性はありません。下位バージョンのAndroidでも選択状態が分かるようにしたい場合は以下のようにStateListDrawableを利用してあげるようにすると良いかもしれません。
    @TargetApi(Build.VERSION_CODES.LOLLIPOP)
    static Drawable createForeground(Palette palette,
                                     @FloatRange(from = 0f, to = 1f) float darkAlpha,
                                     @FloatRange(from = 0f, to = 1f) float lightAlpha,
                                     @ColorInt int fallbackColor,
                                     boolean bounded) {
        int rippleColor = fallbackColor;
        if (palette != null) {
            // try the named swatches in preference order
            if (palette.getVibrantSwatch() != null) {
                rippleColor =
                        MyColorUtils.setAlphaComponent(palette.getVibrantSwatch().getRgb(), darkAlpha);

            } else if (palette.getLightVibrantSwatch() != null) {
              ...
            }
        }
        if (Build.VERSION.SDK_INT < Build.VERSION_CODES.LOLLIPOP) {
            // **注目**
            final StateListDrawable stateListDrawable = new StateListDrawable();
            stateListDrawable.addState(new int[]{android.R.attr.state_pressed}, new ColorDrawable(rippleColor));
            return stateListDrawable;
        }
        return new RippleDrawable(ColorStateList.valueOf(rippleColor), null,
                bounded ? new ColorDrawable(Color.WHITE) : null);
    }
4.0では影とRippleは動かないですが、ビルドでき起動できるようにして、
5.0以降で動作するサンプルを以下においています。
https://github.com/takahirom/PlaidAnimation
左はAndroid 4.1、 右はAndroid5.1での動作です。
まとめ
これによってマテリアルデザインの代表的な動きの一つのRipple + Elevationのアニメーションの実装についてなんとなく理解することができました。
個人的にAPI Levelについては古いAPI Levelでもビルドすることはでき、今後は5.0以降のユーザーが増えていくので、4.4以前では動く状態で提供して、5.0以降ではいろいろなエフェクトが良い動きをするのを目指すのが良いではないかと思っています。
// 次の記事を出したら更新するので、ストックしておくと受け取れて良いかもです。

