追記(2016/07/13)
この記事を投稿した2日後にドキュメントが新しいバージョンになっていたため、新しく書き直しました。
書き直した記事は以下です。
【Swift】サーバーサイドSwift 〜Vapor 始めの第一歩〜【Vapor v0.13】
サーバーサイドSwiftのフレームワークの一つである Vapor をはじめてみようと思うので、手順を書き残そうと思います。
順調にできるはずの流れを一通り書き、はまった点を最後にまとめていきます。
使ってみた印象としては、やはりタイミングがタイミングなので、Swiftのバージョンなどちょっとした違いで簡単にエラーが出てつまづいてしまいますが、
そのあたりがなければ非常に簡単に試すことができるなと思いました。
環境
- OS X: 10.11.5(15F34)
- Xcode: Version 7.3.1 (7D1014)
- Toolchain: Swift Development Snapshot 2016-06-06 (a)
ドキュメント
https://vapor.readme.io/v0.12
今回はこちらの公式ドキュメントの手順に従って進めていきます。
Swift3のインストール
ドキュメントには、Swfit3のインストール方法が、3種類書かれています。
- macOSへのインストール
- Ubuntuへのインストール
- Swiftenvを使用したインストール
macOSの方は1か3、
Ubuntuの方は2か3
の方法でインストールします。
ここでは、macOSでSwiftenvを使ったインストール方法を記載します。
Swiftenvからインストール
Swiftのバージョン切り替えツールをインストールします。(RubyのrbenvとかPythonのpyenvみたいなやつ)
Swiftenvをインストール
# Homebrewからインストール
brew install kylef/formulae/swiftenv

# パスを通す
echo 'if which swiftenv > /dev/null; then eval "$(swiftenv init -)"; fi' >> ~/.bash_profile
source ~/.bash_profile
Swift3のインストール
# インストール
swiftenv install DEVELOPMENT-SNAPSHOT-2016-06-06-a
# インストールしたバージョンをグローバルに設定
swiftenv global DEVELOPMENT-SNAPSHOT-2016-06-06-a
確認
swift --version

> Apple Swift version 3.0-dev (LLVM cb08d1dbbd, Clang 383859a9c4, Swift 9e8266aaeb)
3.0-dev になっていればOK
インストールされている全てのSwiftのバージョンを確認
swiftenv versions
詳しい使い方はこちらをご覧ください。
CLIのインストール
Vaporのコマンドラインツールをインストールします。
インストール
curl -L cli.qutheory.io -o vapor
chmod +x vapor
sudo mv vapor /usr/local/bin
確認
vapor help
ここで、vaporコマンドが使用できて、以下のようなヘルプ内容が出ればOKです。
Usage: /usr/local/bin/vapor [version|help|clean|build|run|new|self|xcode|heroku|docker]

Available Commands:

  version:
      display Vapor CLI version


  help:

  clean:

  build:
      build <module-name>
      Builds source files and links Vapor libs.
      Defaults to App/ folder structure.


  run:
      runs executable built by vapor build.
      use --release for release configuration.


  new:
      new <project-name>
      Clones the Vapor Example to a given
      folder name and initializes an empty
      Git repository inside it.


  self:
      install:
          Installs the CLI to the /usr/local/bin

      update:
          Downloads the latest version of
          the Vapor command line interface
          and compiles it into a binary.

      compile:
          Compiles and caches the CLI
          to improve performance.

  xcode:
      Generates and opens an Xcode Project.


  heroku:
      init:
          Configures a new heroku project

  docker:
      Setup and run vapor app via docker
      sub commands: init|build|run|enter

      init:
          Creates a Dockerfile

      build:
          Build the docker image, using the swift
          version specified in .swift-version.

      run:
          Run the app in a docker container with the
          image created by running 'docker build'

      enter:
          Enter the docker container (useful for
          debugging purposes)


Community:
    Join our Slack if you have questions,
    need help, or want to contribute.
    http://slack.qutheory.io
CLIの高速化
一度CLI自身をコンパイルすることで、キャッシュが作られ高速に動作するようになるようです(おそらく)
vapor self compile
CLIのアップデート
CLI自身をアップデートするときは次のようにします。
vapor self update
プロジェクトを作成
vapor new hello-world
このコマンドで色々とプロジェクトファイルをセットアップしてくれます。
セットアップが完了すると、オシャレなVaporのマークが出てきました。

(↑私はvapor new hello-world-vaporとしたので、Project "hello-world-vapor"となっています。)
また、セットアップ完了と同時にXcodeでプロジェクトが自動的に立ち上がりました。

ディレクトリ構成
とりあえず、2階層くらいまでのディレクトリ構成を表示してみます。
.
├── App
│   ├── Controllers
│   ├── Middleware
│   ├── Models
│   └── main.swift
├── Config
│   ├── app.json
│   ├── development
│   ├── secrets
│   └── servers.json
├── Localization
│   ├── default.json
│   ├── en.json
│   └── es.json
├── Package.swift
├── Packages
│   ├── C7-0.9.1
│   ├── CryptoEssentials-0.8.0
│   ├── Fluent-0.7.0
│   ├── HMAC-0.8.0
│   ├── Jay-0.12.0
│   ├── Mustache-0.10.0
│   ├── PathIndexable-0.2.0
│   ├── Polymorphic-0.2.0
│   ├── S4-0.10.1
│   ├── SHA1-0.8.0
│   ├── SHA2-0.8.0
│   ├── Socks-0.8.1
│   ├── Strand-1.5.1
│   ├── Vapor-0.13.0
│   ├── VaporMustache-0.9.0
│   └── libc-0.1.0
├── Procfile
├── Public
│   ├── images
│   └── styles
├── README.md
├── Resources
│   └── Views
├── VaporApp.xcodeproj
│   ├── C7_Info.plist
│   ├── Configs
│   ├── CryptoEssentials_Info.plist
│   ├── Fluent_Info.plist
│   ├── HMAC_Info.plist
│   ├── Jay_Info.plist
│   ├── Mustache_Info.plist
│   ├── PathIndexable_Info.plist
│   ├── Polymorphic_Info.plist
│   ├── S4_Info.plist
│   ├── SHA1_Info.plist
│   ├── SHA2_Info.plist
│   ├── SocksCore_Info.plist
│   ├── Socks_Info.plist
│   ├── Strand_Info.plist
│   ├── VaporMustache_Info.plist
│   ├── Vapor_Info.plist
│   ├── libc_Info.plist
│   ├── project.pbxproj
│   ├── project.xcworkspace
│   ├── xcshareddata
│   └── xcuserdata
└── app.json
APPの中にControllersやModels、Resourcesの中にViewsがありますね。
そして、何やら中核になりそうなmain.swiftというファイルがAPPの中にあります。
このmain.swiftに色々書いていきます。
main.swiftの編集
デフォルトで色々書いていますが、以下のように書き換えます。
import Vapor
import VaporMustache

let app = Application()

app.get("hello") { request in
    return "Hello, world"
}

app.start()
また、同じくデフォルトでできている以下のファイルを削除します。
- App/Controllers/UserController.swift
- App/Models/User.swift
- App/Middleware/SampleMiddleware.swift
コンパイル
vapor build
vapor buildコマンドは、中でswift buildを実行しているようです。
サーバー起動
ビルドが完了したらサーバーを起動させます。
vapor run
このコマンドでウェブサーバーが立ち上がります。
$ vapor run
Running...
No command supplied, defaulting to 'serve'.
Server starting at 0.0.0.0:8080
また、ポートを指定することもできます。
vapor run --port=8080
これで、ブラウザからhttp://localhost:8080へアクセスすると、今立ち上げたサーバーにアクセスすることができます。
ただ、ルートパスへは何も出力していないので、真っ白のページになっているかと思います。
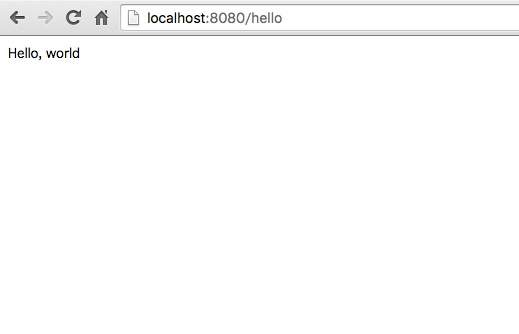
先ほど、main.swiftで処理を記入したのはhelloというパスだったので、http://localhost:8080/helloにアクセスします。
すると、「Hello, world」と画面上に表示されるかと思います。
このようにできれば完了です。
以上、始めの第一歩として触ってみました。
はまったところ
スムーズに行けばものすごく簡単なはずなのですが、いくつかハマりまくったところがありました。
SwiftenvでのSwift3.0-Devのインストール
私の場合ですが、Swiftenvの正しい使い方がわかっていなかったこともあり、macOSへのSwift3のインストールを行って、その後Swiftenvをインストールしてその後の設定をきちんとしていなかったりと、、
そのあたりの手順がバラバラになっていたためか、目的のDEVELOPMENT-SNAPSHOT-2016-06-06-aがきちんとインストールされていませんでした。
エラーが出た場合は、Swiftのバージョンが正しいかを確認した方がいいかもしれません。
Package.swiftで設定するVaporのバージョン
vapor newコマンドで作成されるデフォルトのPackage.swiftでは、以下のように、vapor.gitのマイナーバージョンの指定が13、vapor-mustache.gitのマイナーバージョンが9となっています。
import PackageDescription

let package = Package(
    name: "VaporApp",
    dependencies: [
        .Package(url: "https://github.com/qutheory/vapor.git", majorVersion: 0, minor: 13),
        .Package(url: "https://github.com/qutheory/vapor-mustache.git", majorVersion: 0, minor: 9)
    ],
    exclude: [
        "Config",
        "Database",
        "Localization",
        "Public",
        "Resources",
        "Tests",
    ]
)
こちらだとなぜかエラーが出てしまいました。
$ vapor build
Cloning https://github.com/qutheory/vapor.git
HEAD is now at fc05b8b update environment description
Resolved version: 0.13.0
Cloning https://github.com/open-swift/S4.git
HEAD is now at 84e6ac0 add responder representable (#72)
Resolved version: 0.10.1
Cloning https://github.com/open-swift/C7.git
HEAD is now at 6660400 add StructuredDataFallibleRepresentable (#48)
Resolved version: 0.9.1
Cloning https://github.com/czechboy0/Jay.git
HEAD is now at 6ee6278 Updating to swift 3 preview 1 (#28)
Resolved version: 0.12.0
Cloning https://github.com/CryptoKitten/HMAC.git
HEAD is now at 63eac3a Merge pull request #5 from CryptoKitten/LoganWright-patch-1
Resolved version: 0.8.0
Cloning https://github.com/CryptoKitten/CryptoEssentials.git
HEAD is now at 058196b Merge pull request #8 from CryptoKitten/update
Resolved version: 0.8.0
Cloning https://github.com/CryptoKitten/SHA2.git
HEAD is now at e090a0c Merge pull request #3 from CryptoKitten/LoganWright-patch-1
Resolved version: 0.8.0
Cloning https://github.com/CryptoKitten/SHA1.git
HEAD is now at 869025c Merge pull request #3 from CryptoKitten/update-06-20
Resolved version: 0.8.0
Cloning https://github.com/qutheory/fluent.git
HEAD is now at 0a15ab2 Merge pull request #48 from qutheory/schema
Resolved version: 0.7.0
Cloning https://github.com/qutheory/polymorphic.git
HEAD is now at 734b45d Merge pull request #1 from qutheory/open-swift-9
Resolved version: 0.2.0
Cloning https://github.com/qutheory/path-indexable.git
HEAD is now at a58a785 Merge pull request #2 from qutheory/variable-rename
Resolved version: 0.2.0
Cloning https://github.com/ketzusaka/Strand.git
HEAD is now at 043d34d Fix linux compiling
Resolved version: 1.5.1
Cloning https://github.com/czechboy0/Socks.git
HEAD is now at ab383f6 Improved connect with timeout (#58)
Resolved version: 0.8.1
Cloning https://github.com/qutheory/libc.git
HEAD is now at ffd692c add readme
Resolved version: 0.1.0
Cloning https://github.com/qutheory/vapor-mustache.git
HEAD is now at c9f07b7 vapor 13
Resolved version: 0.9.0
Cloning https://github.com/Zewo/Mustache.git
HEAD is now at abe2dc8 Travis Supports Xcode8
Resolved version: 0.10.0
2016-07-10 18:36:37.058 xcodebuild[22979:616679] [MT] PluginLoading: Required plug-in compatibility UUID ACA8656B-FEA8-4B6D-8E4A-93F4C95C362C for plug-in at path '~/Library/Application Support/Developer/Shared/Xcode/Plug-ins/RealmBrowser.xcplugin' not present in DVTPlugInCompatibilityUUIDs
Compile Swift Module 'C7' (23 sources)
Compile Swift Module 'CryptoEssentials' (15 sources)
Compile Swift Module 'PathIndexable' (2 sources)
Compile Swift Module 'Strand' (1 sources)
Compile Swift Module 'SocksCore' (14 sources)
Compile Swift Module 'libc' (1 sources)
Compile Swift Module 'Mustache' (29 sources)
/Users/tajika/hello-world-vapor/Packages/Strand-1.5.1/Sources/Strand.swift:52:48: error: cannot convert value of type '(arg: UnsafeMutablePointer<Void>) -> UnsafeMutablePointer<Void>?' to expected argument type '(@convention(c) (UnsafeMutablePointer<Void>?) -> UnsafeMutablePointer<Void>?)!'
                guard pthread_create(&pt, nil, runner, pointer) == 0 && pt != nil else {
                                               ^~~~~~
/Users/tajika/hello-world-vapor/Packages/CryptoEssentials-0.8.0/Sources/ArrayProtocol.swift:131:73: error: extraneous argument label 'options:' in call
                    return NSData(bytes: bytesArray).base64EncodedString(options: [])
                                                                        ^~~~~~~~~~

/Users/tajika/hello-world-vapor/Packages/CryptoEssentials-0.8.0/Sources/NSData+Extensions.swift:35:48: error: extraneous argument label 'options:' in call
                return self.base64EncodedString(options: .lineLength64Characters)
                                               ^~~~~~~~~~

<unknown>:0: error: build had 2 command failures
error: exit(1): /Library/Developer/Toolchains/swift-DEVELOPMENT-SNAPSHOT-2016-06-06-a.xctoolchain/usr/bin/swift-build-tool -f /Users/tajika/hello-world-vapor/.build/debug.yaml

Need help getting your project to build?
Join our Slack where hundreds of contributors
are waiting to help: http://slack.qutheory.io

Error: Could not build project.
Note: Make sure you are using Swift 3.0 Snapshot 06-06
tajika@asakalab-no-MacBook-Air:~/hello-world-vapor$ vim .
tajika@asakalab-no-MacBook-Air:~/hello-world-vapor$ vapor build
error: The dependency graph could not be satisfied because an update to `https://github.com/qutheory/vapor.git' is required

Error: Could not fetch dependencies.
Note: Make sure you are using Swift 3.0 Snapshot 06-06
ということで、
下のようにvapor.gitのマイナーバージョンを11、vapor-mustache.gitのマイナーバージョンを7とすることでbuildができました。
import PackageDescription

let package = Package(
    name: "VaporApp",
    dependencies: [
        .Package(url: "https://github.com/qutheory/vapor.git", majorVersion: 0, minor: 11),
        .Package(url: "https://github.com/qutheory/vapor-mustache.git", majorVersion: 0, minor: 7)
    ],
    exclude: [
        "Config",
        "Database",
        "Localization",
        "Public",
        "Resources",
        "Tests",
    ]
)
これが解決されるまでにXcode8-betaをインストールしてみたり、Xcodeを再インストールしてみたり、Swiftの違うバージョンを試してみたりと色々と試行錯誤してかなりの時間を費やしてしまいました。